If you are looking for a low resource, speedy server statistics monitoring script, look no further than linux-dash. Linux Dash’s claim to popular is its slick and responsive web dashboard that works better on large and small screens.

linux dash is a memory efficient, low resource, easy to install, server statistics monitoring script written in PHP. The web statistics page allows you to drag and drop the various widgets and rearrange the display as you desire. The script displays live statistics of your server, including RAM, CPU, Disk Space, Network Information, Installed Software’s, Running Processes and much more.
Linux Dash’s interface provides information in a organized fashion, which makes us easy to switch between specific sections using buttons in the main toolbar. Linux Dash is not an advanced monitoring tool like Collectl or Glances, but still it’s a good monitoring application for users who are looking for lightweight and easy to deploy.
linux-dash Demo
Please have a quick look at the demo page set up by the developer of linux-dash.
- Watch Demo at: linux-dash: Server Monitoring
Linux Dash Features
- A responsive web based interface for monitoring server resources.
- A real-time monitoring of CPU, RAM, Disk Usage, Load, Uptime, Users and many more system statistics.
- Easy install for servers with Apache/Nginx + PHP.
- Click and drag to re-organize widgets.
- Support for wide range of Linux server flavours.
Pre-requisites for Installation
- A Linux server with Apache/Nginx installed.
- A PHP and php-json extension installed.
- A unzip utility installed on server.
- Optionally, you need htpasswd installed, to password protect the statistics page on your server.
After all, you do not want to be displaying your statistics to the whole world, as it is a security risk.
Note: htpasswd is just one of the ways to protect your server. There are others such as denying access to certain IPs for instance. Use whichever way you are comfortable.
However, in this article, I’ve used Apache web server to show you how to setup linux-dash on Linux servers. I’ve also tested this nifty tool on other browsers such as Firefox, Midori and Chrome and it works fine.
Installing “linux-dash” in RedHat and Debian Based Systems
As I said above, that linux-dash is created in PHP for Linux with Apache. So, you must have these two packages installed on the server along with php-json module. Let’s install them using package manager tool called yum or apt-get according to your server distribution.
Step 1: Install Apache, PHP and PHP Modules
Install on Red Hat based systems using yum command.
# yum install httpd httpd-tools
# yum install php php-xml php-common php-json
# service httpd start
Install on Debian based systems using apt-get command.
# apt-get install apache2 apache2-utils
# apt-get install php5 curl php5-curl php5-json
# service apache2 start
Step 2: Download and Install linux-Dash
Proceed to ‘GitHub‘ repository, download linux-dash and extract contents into a sub-directory called ‘linux-dash‘ in your Apache public folder (i.e. /var/www or /var/www/html).
# git clone https://github.com/afaqurk/linux-dash.git
Step 3: Monitor Server using linux-dash
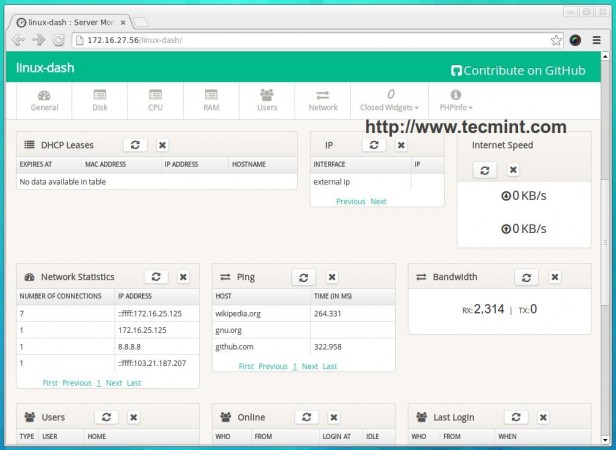
Open your browser and navigate to the folder where you have ‘linux-dash‘ installed. On mine it is http://localhost/linux-dash.
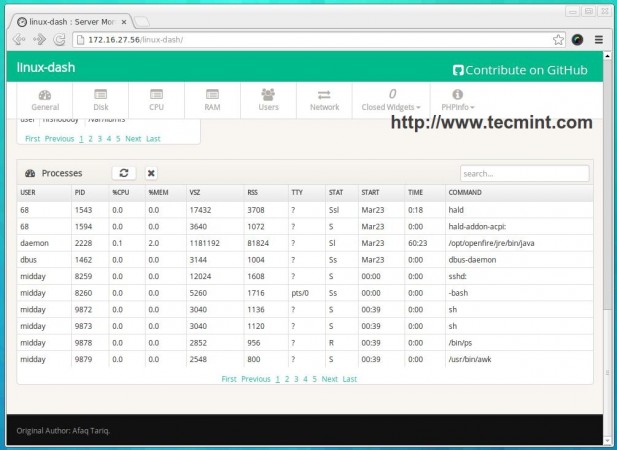
The following are some screenshots of linux-dash dashboard taken from my CentOS 6.5 server.
General Info
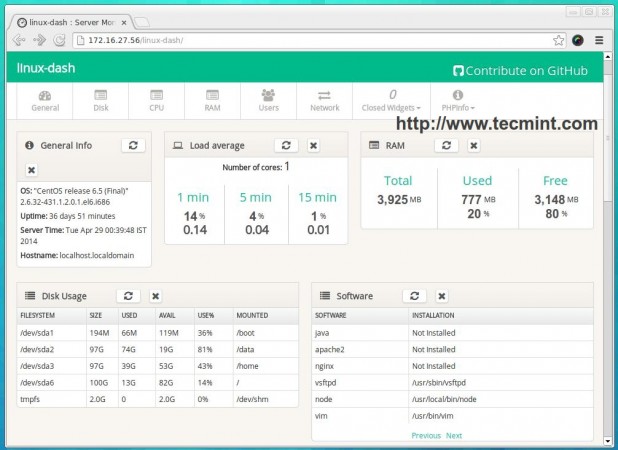
Disk Usage

CPU Usage
RAM Usage
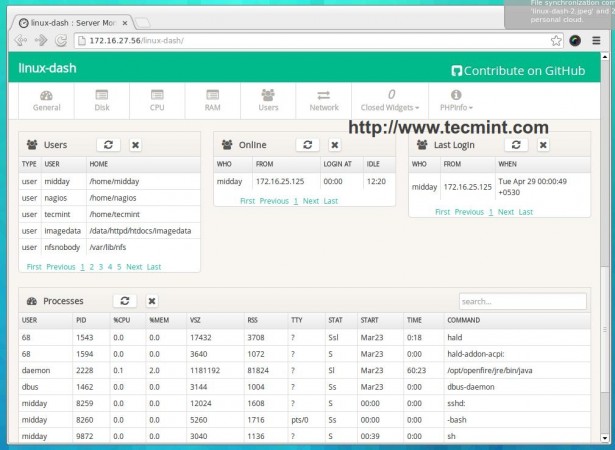
Users
Network Statistics
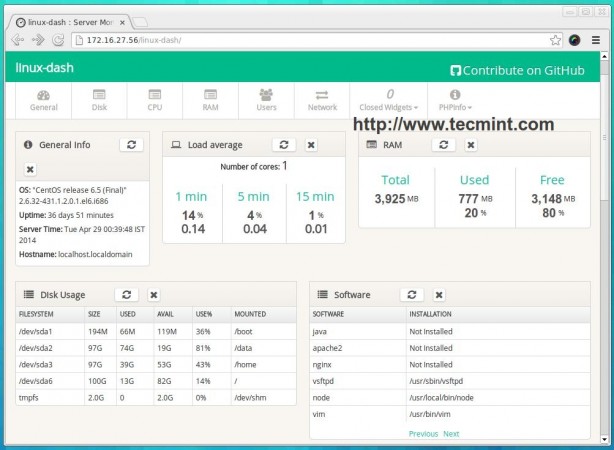
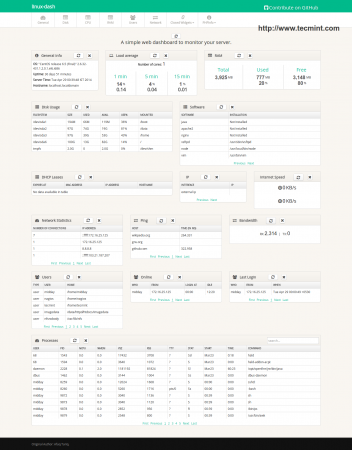
Full linux-dash Preview
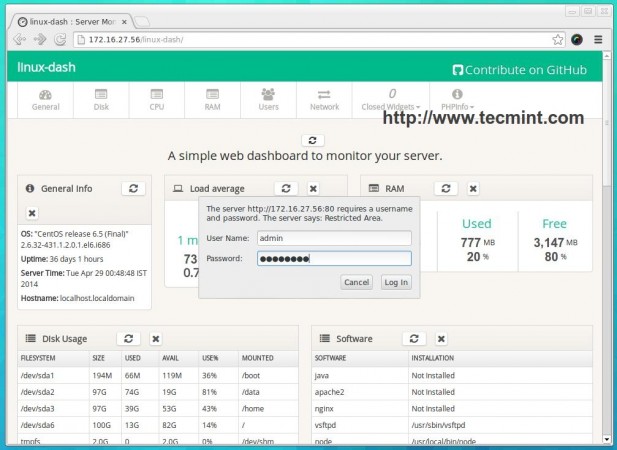
Step 4: Password Protect linux-dash
To password protect your statistics page, you need to generate an ‘.htaccess’ and ‘.htpasswd‘ file. The following command will create a user ‘admin‘, sets password ‘admin123‘ and creates new ‘htpasswd‘ file under ‘/var‘ folder.
# htpasswd -c /var/.htpasswd admin admin123
Note: The ‘htpasswd‘ file stores the user ‘admin‘ password in encrypted format and this file should be placed in a non public folder to protect from viewing in the browser.
Now create a ‘.htaccess‘ file under ‘linux-dash‘ directory and add the following content to it. Save and close the file.
AuthName "Restricted Area"
AuthType Basic
AuthUserFile /var/.htpasswd
AuthGroupFile /dev/null
require valid-user
Clear your browser’s cache. The next time you navigate to the statistics page, you will be greeted with a login prompt. Login with the username and password you used in the htpasswd command.
Reference Links
https://github.com/afaqurk/linux-dash
Enjoy your low resource, server statistics monitoring application.


Can we use it like nagios, i mean does it show previous data like nagios or zabbix
@Amit,
It’s just a simple monitoring tool for only one server, not like zabbir or Nagios which does multiple Linux monitoring..
This shows the status of Single VM/Server only. Is there anyway to get multiple servers details on a single Dashboard?
@Ishtiyaque,
linux-dash meant for single server only, it not build for monitoring mulitple Linux servers on single dashboard, If you are looking for such feature I suggest you to go for Nagios monitoring tools at:
https://www.tecmint.com/install-nagios-in-linux/
sorry Mr. do could windows server monitoring with this,
most of the servers I use is windows, thankyou
On Centos/Fedora/et al. you should probably look at the cockpit project http://cockpit-project.org/ as it is much lighter and doesn’t require apache or php
@Tim,
Thanks for the informing about cockpit project, and I think I should give a try and document it here..
Nice … but for use on multiple servers (only one of which that has php/nginx) which monitoring program would be a good alternative?
Hi,
It will monitor same server or can be watch other servers also ?
Unfortunately, it will only monitors the same server, where linux-dash installed.
Thank you. The demo link is broken.
That software looks pretty good. I have a doubt: Could I install “linux-dash” in a server and then manage/configure it in order to access to a third server.
My point is: monitoring a server from another server. But not from the same server.
Thanks in advance,
Linux-dash is specially designed for single server monitoring, not for remote servers..
DataTables warning (table id = ‘ping_dashboard’):Requested unknown parameter ’0′ I checked the ping.php and also created a csv file but stil i get the error.
DataTables warning (table id = ‘ping_dashboard’): Requested unknown parameter ‘1’ from the data source for row 0
How to fix?
I was also getting this error, but the pre-reqs were not installed. It went away after I ran
# yum install httpd httpd-tools
# yum install php php-xml php-common php-json
Oh now its working. I wish it could give live details. And one thing I/Ostat is missing they need to add it
Im installing this app on Redhat 6.4
Linux mainserver 2.6.32-358.el6.x86_64 #1 SMP Tue Jan 29 11:47:41 EST 2013 x86_64 x86_64 x86_64 GNU/Linux
And when I run this command
git clone https://github.com/afaqurk/linux-dash.git
It says
-bash: git: command not found
Sorry im not much familiar with GIT. Never uses it. Can you please tell me how to fix it. BTW excellent tutorial
That means ‘git’ package is missing, you have to install it using yum command as shown below.
Hello Ravi
Linux-dash is very cool and easy to setup. Thanks for sharing this with us.
I tried to password protect the Linux-dash using your procedure on a RHEL 6.5 server. When I issued the command
htpasswd -c /var/.htpasswd admin admin123
the following error is displayed:
[root@localhost ~]# htpasswd -c /var/.htpasswd admin admin123
Usage:
htpasswd [-cmdpsD] passwordfile username
htpasswd -b[cmdpsD] passwordfile username password
htpasswd -n[mdps] username
htpasswd -nb[mdps] username password
-c Create a new file.
-n Don’t update file; display results on stdout.
-m Force MD5 encryption of the password.
-d Force CRYPT encryption of the password (default).
-p Do not encrypt the password (plaintext).
-s Force SHA encryption of the password.
-b Use the password from the command line rather than prompting for it.
-D Delete the specified user.
On Windows, NetWare and TPF systems the ‘-m’ flag is used by default.
On all other systems, the ‘-p’ flag will probably not work.
Then I tried the another option by giving the following command:
htpasswd -c /var/.htpasswd -n admin admin123
This also displays the same error as given below:
Usage:
htpasswd [-cmdpsD] passwordfile username
htpasswd -b[cmdpsD] passwordfile username password
htpasswd -n[mdps] username
htpasswd -nb[mdps] username password
-c Create a new file.
-n Don’t update file; display results on stdout.
-m Force MD5 encryption of the password.
-d Force CRYPT encryption of the password (default).
-p Do not encrypt the password (plaintext).
-s Force SHA encryption of the password.
-b Use the password from the command line rather than prompting for it.
-D Delete the specified user.
On Windows, NetWare and TPF systems the ‘-m’ flag is used by default.
On all other systems, the ‘-p’ flag will probably not work.
Any idea what is happening here?
Regards
Jo
I think some version problem, better don’t use ‘-c’ switch, For example, run this way.
And enter password twice, the htpasswd file will be created in current working directory.
HI ,
i CAN install in cpanel server and resors monitoring ? do not have any problome for scurity ?
Yes, you can install it on Cpanel without any trouble.
Hi,
I tried on cPanel with no luck. It just shows the page with no values in it.
@Brandon,
CPanle has it’s own customized OS, so you need to understand it before installing Linux-Dash..