Setting up a firewall in Linux can be very daunting for a newbie, or someone not very familiar with iptables. Luckily, there is a very easy-to-use solution in Shorewall.
In this multi-part tutorial, I am going to get you started with Shorewall and walk you through some more advanced topics with this awesome firewall system.
What is Shorewall?
Shorewall is essentially a front-end to iptables, but it is a command-line environment front-end that utilizes several text files for its configuration. While Shorewall is a robust firewall system that can be scaled over very large networks servicing numerous machines, we are going to start with a basic two-interface configuration and nail down the basics.
A two-interface configuration consists of a machine with two ethernet ports, one coming in, and one going out to the local network.
Install Shorewall Firewall in Linux
Shorewall can be installed using apt and yum package manager tools.
sudo apt install shorewall    [On Debian-based Sysems]
sudo yum install shorewall    [On RHEL-based Sysems]
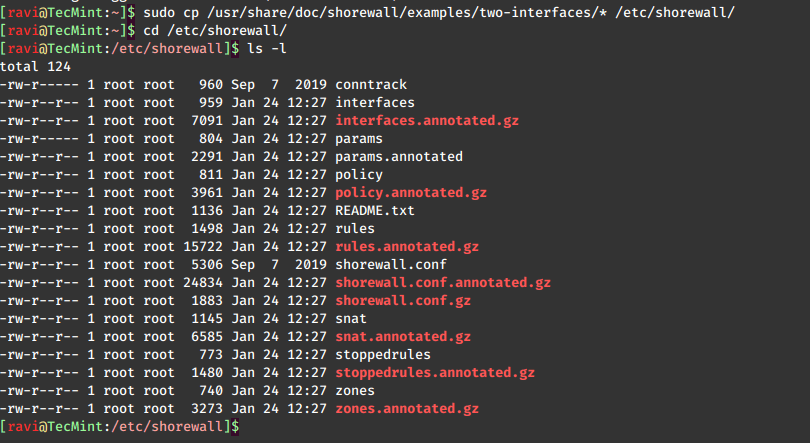
After installation, we need to copy a sample configuration from the “/usr/share/doc/shorewall” directory to Shorewall’s default directory “/etc/shorewall“.
sudo cp /usr/share/doc/shorewall/examples/two-interfaces/* /etc/shorewall
cd /etc/shorewall
If we take a look in this directory, we see a bunch of files and shorewall.conf file.
Shorewall views the network as a group of different zones, so the first file we want to take a look at is the “/etc/shorewall/zones” file.
sudo nano /etc/shorewall/zones
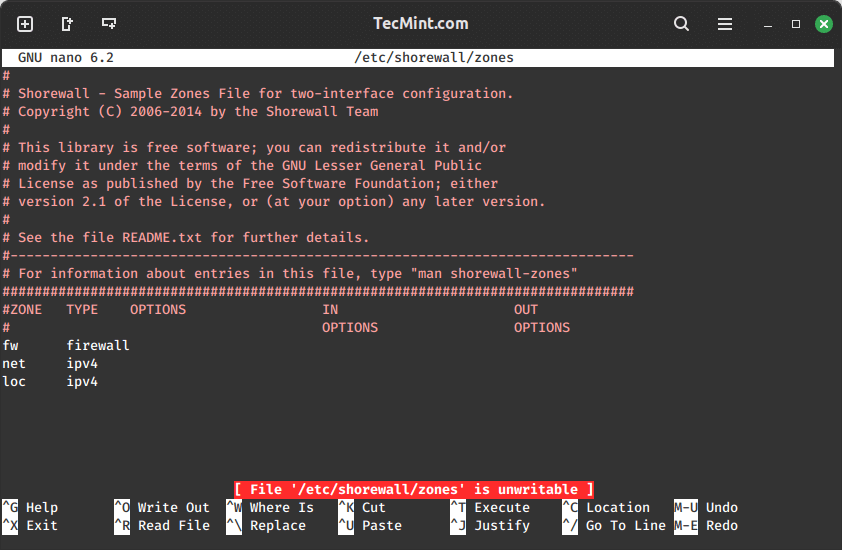
Here, we see that there are three zones defined by default: fw, net, and loc. It is important to note that Shorewall treats the firewall machine itself as its own zone and stores it in a variable called $fw.
The “/etc/shorewall/zones” file is pretty self-explanatory. You have the net zone (internet-facing interface), the loc zone (LAN-facing interface), and fw, which is everything.
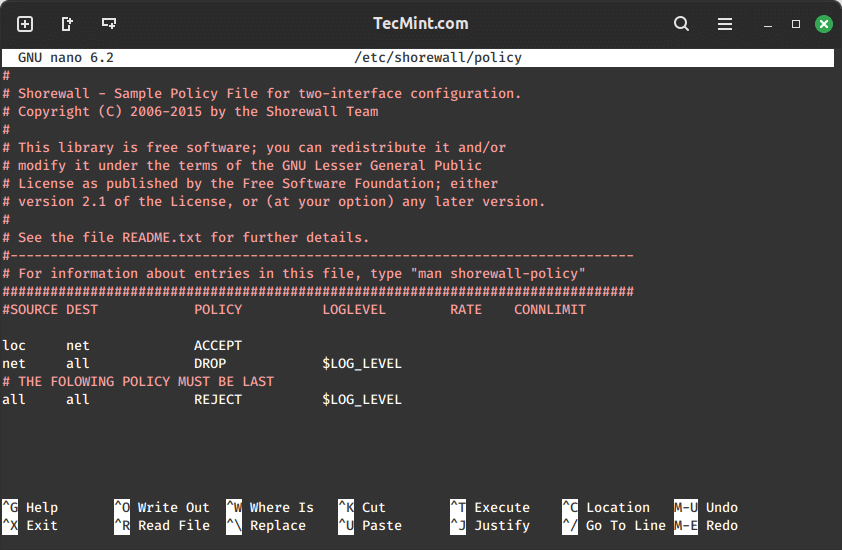
This setup up gives up the following:
- It allows all connection requests from the loc zone (LAN) to the net zone (Internet).
- Drops all connection requests (ignores) from the net zone to the firewall and the LAN.
- Rejects and logs all other requests.
The LOG LEVEL bit should be familiar to anyone who has done administrating with Apache, MySQL, or any other number of other FOSS programs. In this case, we are telling Shorewall to use the info level of logging.
Now that our zones and policy are set, we have to configure our interfaces. You do this by editing the “/etc/shorewall/interfaces” file.
sudo nano /etc/shorewall/interfaces
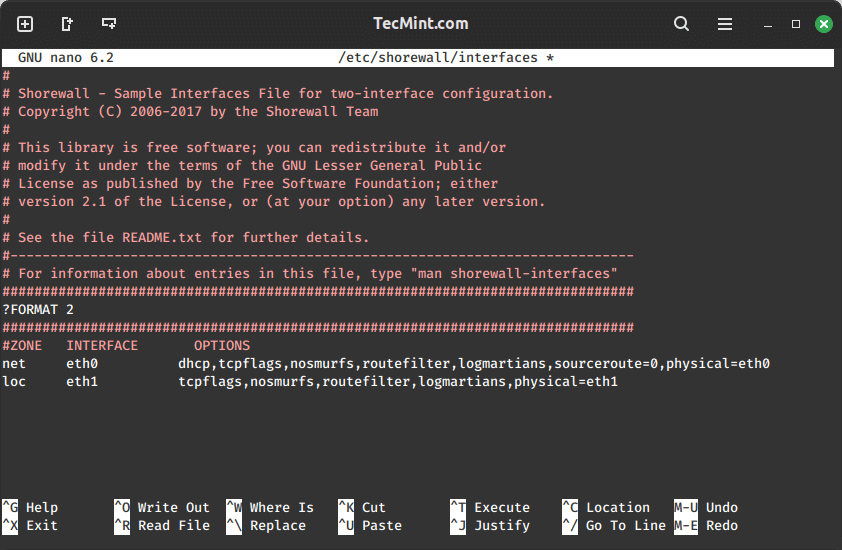
Here, we have set our internet-facing interface as eth0 to the net zone. On our LAN side, we have set the other interface, eth1, to the loc zone. Please adjust this file to fit your configuration properly.
The various options you can place for either of these interfaces are extensive and are best explained in detail on the man page.
man shorewall-interfaces
A quick rundown of some of them is as follows:
- nosmurfs – filter packets with a broadcast address as source.
- logmartians – log packets with the impossible source address.
- routefilter – kernel route filtering for anti-spoofing.
Of course, now that our system is firewalled, we are going to need certain connections to be allowed through in order to get what we need to do done. You define these in the rules file at “/etc/shorewall/rules“.
sudo nano /etc/shorewall/rules
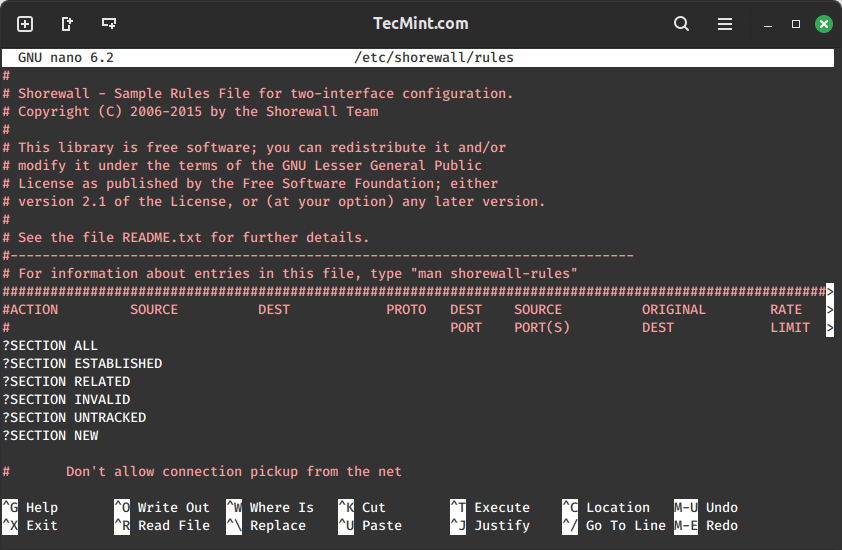
This file looks confusing at first, mainly because the columns overlap, but the headers are pretty self-explanatory. First, you have the ACTION column, that describes what you want to perform.
Next, you have a SOURCE header where you define the zone where the packet is originating. Then, you have your DEST, or destination, which is the zone or IP address of the destination. Let’s use an example.
Suppose you want to run an SSH server behind your firewall on the machine with the IP address 192.168.1.25. Not only are you going to have to open up a port in your firewall, but you are going to have to tell the firewall that any traffic coming on port 22 needs to get routed to the machine at 192.168.1.25.
This is known as Port Forwarding. It is a common feature on most firewalls/routers. In “/etc/shorewall/rules“, you would accomplish this by adding a line like this:
SSH(DNAT) net loc:192.168.1.25
Above, we have defined any SSH-destined packets coming from the net zone to the firewall have to be routed (DNAT) to port 22 on a machine with address 192.168.1.25.
This is called Network Address Translation or NAT. The “D” simply tells Shorewall that this is a NAT for a destination address.
For this to work, you have to have NAT support enabled in your kernel. If you need NAT and don’t have it, please see my tutorial on Recompiling a Debian Kernel.
In the next article, we will explore various Shorewall configurations and options. However, there should be ample information here to help you get started for now. As always, please refer to the man pages for a more in-depth understanding.


The correct path for example configurations is `
/usr/share/doc/shorewall/examples/` instead of `/usr/share/doc/shorewall/example/`.Update the blog to reflect this change.
@Nishant,
Thanks for pointing that out!
I’ve updated the blog with the correct path…
Great article,
How do I preserve the Shorewall rules upon reboot?
Very good article…
i have installed but is giving me as follow;
#yum install shorewall6
Loaded plugins: fastestmirror, security
Loading mirror speeds from cached hostfile
* Webmin: webmin.mirror.somersettechsolutions.co.uk
* base: mirror.informatik.hs-fulda.de
* extras: mirror.skylink-datacenter.de
* updates: mirror.23media.de
Setting up Install Process
No package shorewall6 available.
@Haroon,
Which OS distro version you using? or give a try like this: yum install shorewall
yum install shorewall
Loaded plugins: fastestmirror
Loading mirror speeds from cached hostfile
* base: mirrors.linode.com
* extras: mirrors.linode.com
* updates: mirrors.linode.com
No package shorewall available.
@Ranjeet,
May I know on which version of Linux distribution you are trying? if its CentOS, have you enabled EPEL repository before installing Shorewall?
I’m really hoping that you will answer this. can shorewall be used together csf firewall?
No I don’t think so, never tried that. Sorry no idea.
ufw is a decent firewall system for a standalone machine, but Shorewall is a more advanced firewall solution. In this article, I demonstrated how it would be configured over a two interface machine.
What about this one: sudo ufw enable
sudo ufw status verbose
ufw disable