ClearOS is a simple, open source and affordable Linux operating system based on CentOS and Red Hat Enterprise Linux. It designed for use in small and medium enterprises as a server or network gateway. It comes with an intuitive graphical web-based user interface and an application marketplace with over 100 applications to choose from, with more being added each day.
ClearOS is available in three major editions: Business, Home and Community Edition. In this article, we will explain how to install ClearOS Community Edition on your machine.
Download ClearOS 7 ISO Image
Download ClearOS 7 Community Edition 64-bit DVD ISO for your operating system using following link.
Installation Of ClearOS 7.4
1. Once you have downloaded the last version of ClearOS using above download link, burn it to a DVD or create a bootable USB stick using LiveUSB Creator called Unetbootin or Etcher (Modern USB Image Writer) tool.
2. After you have created the installer bootable media, place your DVD/USB into your system appropriate drive. Then power on the computer, select your bootable device and the ClearOS 7 prompt should appear as in the following screenshot.
Select Install CentOS 7 and press [Enter] key.

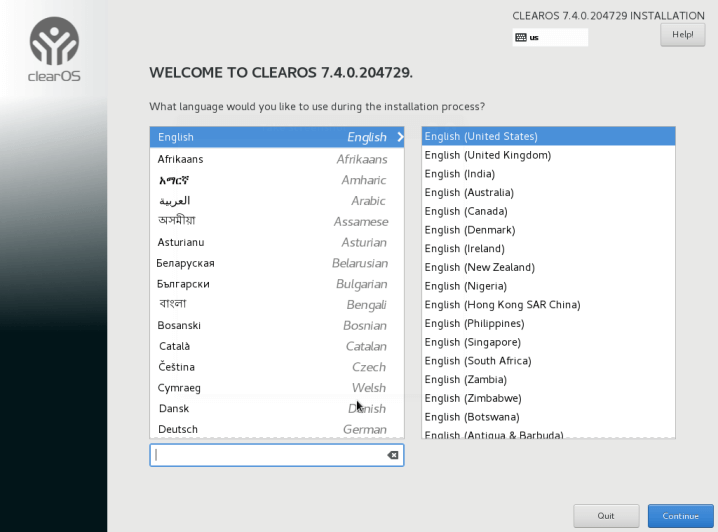
3. The system will begin loading the media installer and a welcome screen should appear as in the following screenshot. Choose the Installation Process Language, which will help you through the entire installation process procedure and click on Continue.
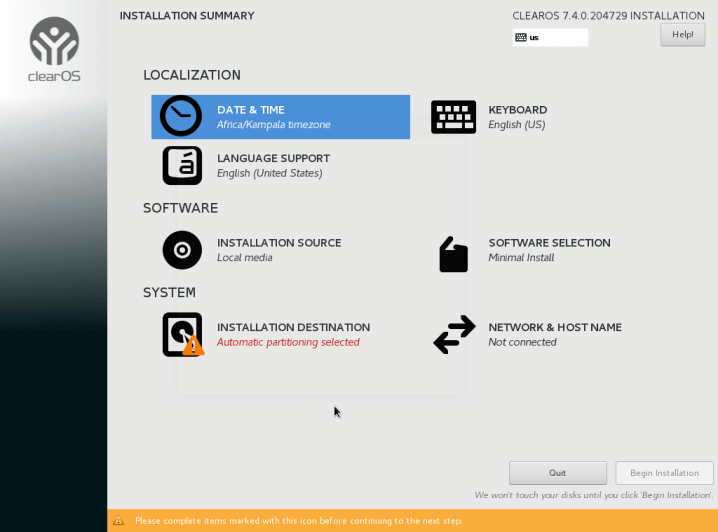
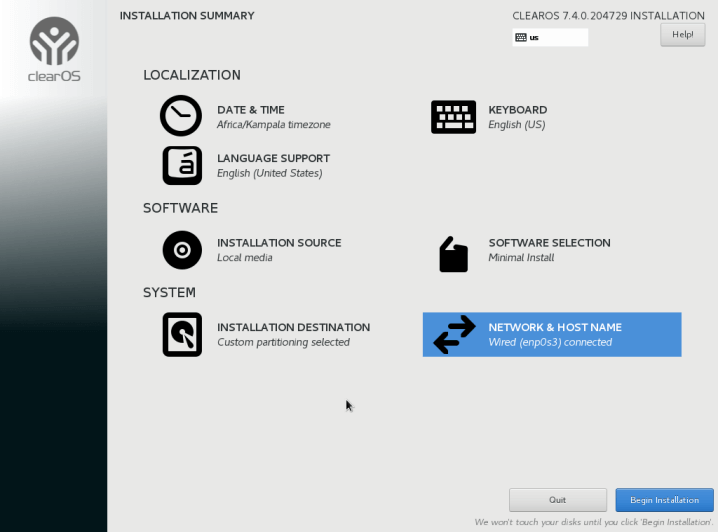
4. Next, you will see the Installation Summary screen. It has a lot of options to fully customize your system before the actual installation of system files on the disk.
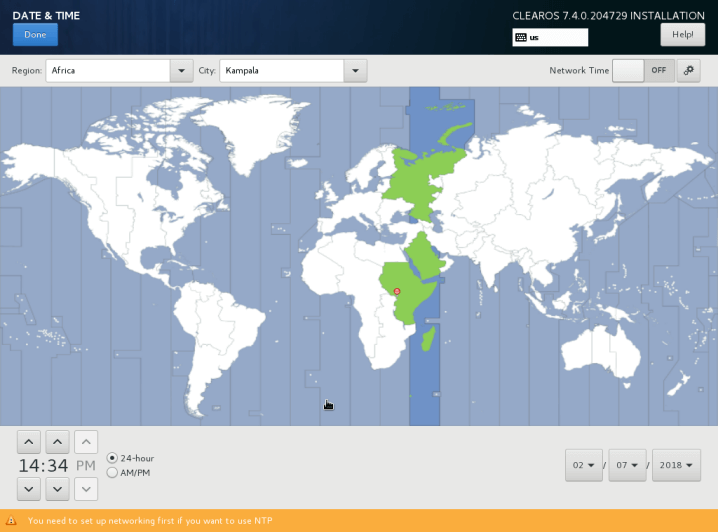
Start by configuring your system time settings. Click on Date & Time and select your server physical location from the provided map and click Done button on the upper left corner to apply the settings.
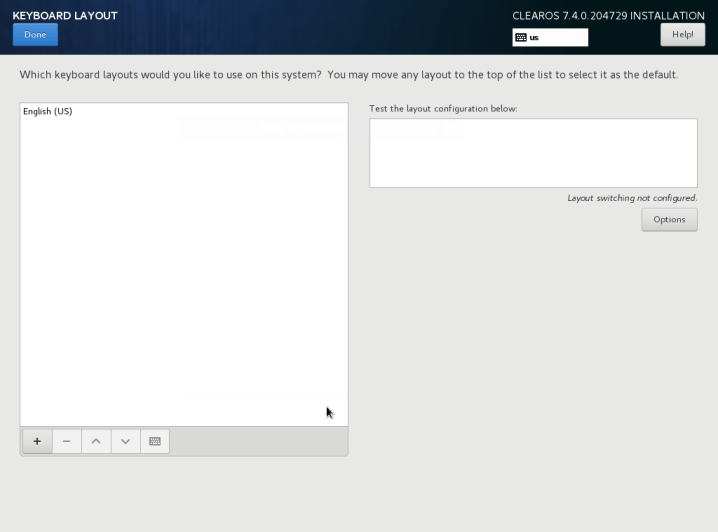
5. Next, click on Keyboard to set your Keyboard Layout and click on the + button and test your keyboard configuration using the right input filed.
Once you are finished setting up your keyboard, click on Done button on the upper left corner to apply changes and which should take you back to the Installation Summary screen.
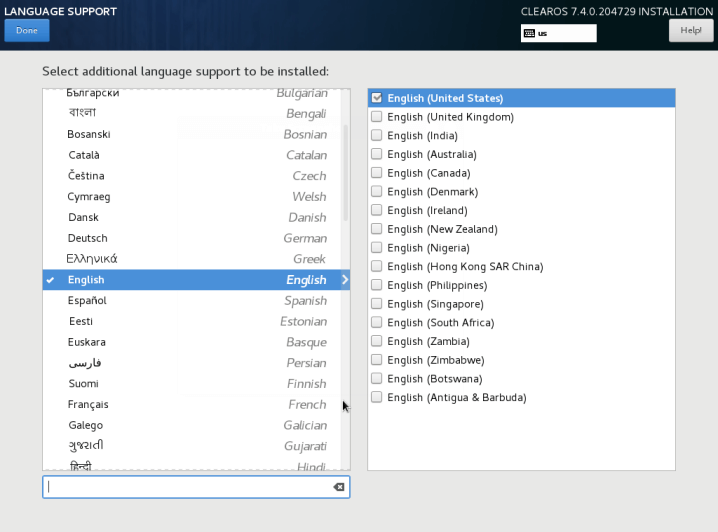
6. Now click on Language Support, then choose your additional language support to be installed and when you have finished, hit on Done button to continue..
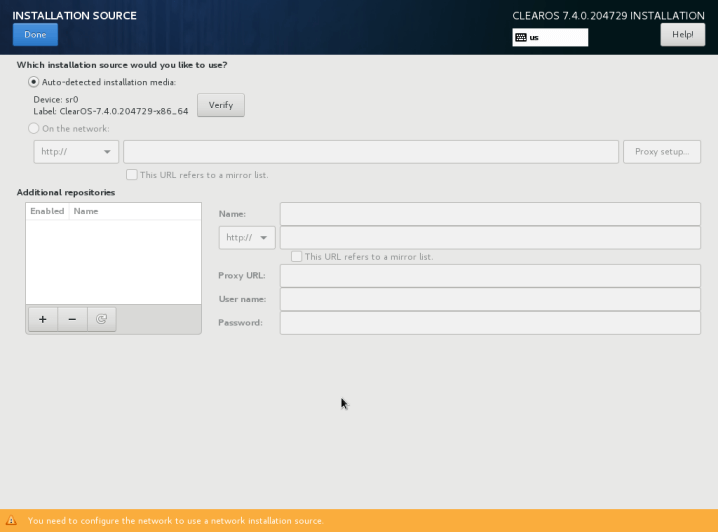
7. Once you are done customizing your system. Under Installation Sources, since you are only using a local DVD or USB media, leave the default Auto-detected installation media option and hit on Done to continue.
8. In this step, from the Installation Summary screen click on Software Selection. CelearOS offers a Minimal Install option only as you can see from the following screen shot. You can add more software later on once the system is fully installed and running. So click on Done to continue.

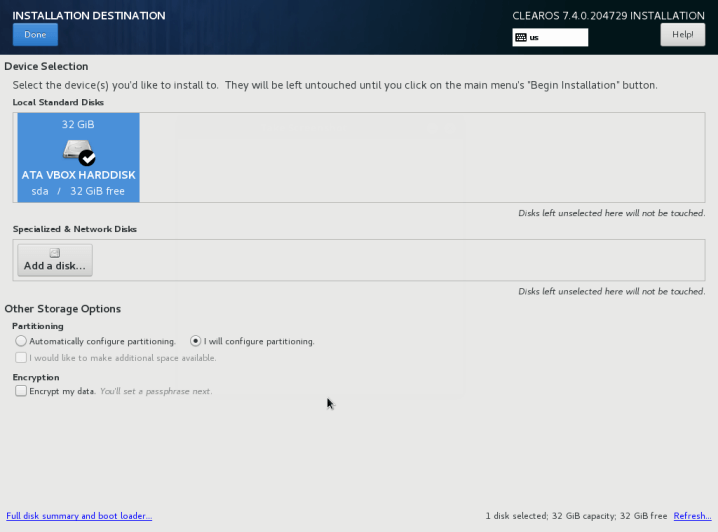
9. Next, you need to setup the installation destination, meaning you should partition your hard-drive. Click on Installation Destination option, select your disk and choose I will configure partitioning and click on Done to continue.
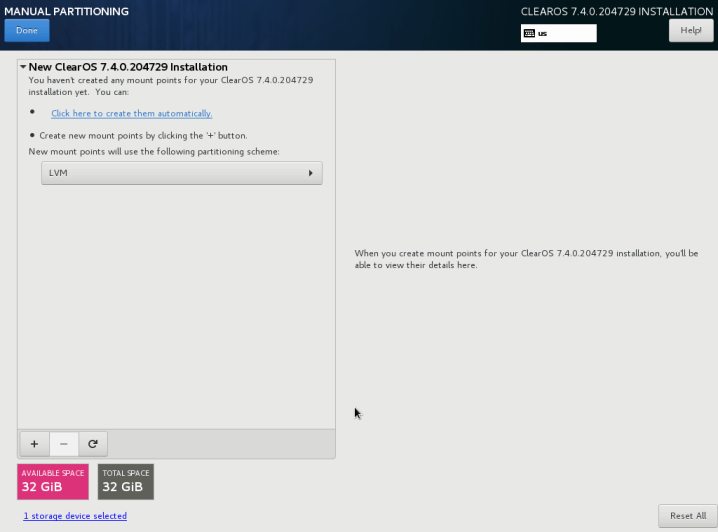
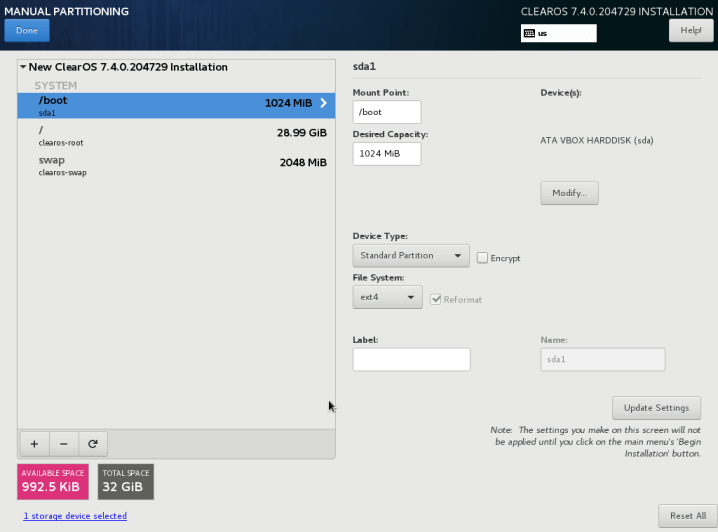
10. Now choose LVM (Logical Volume Manager) as partition layout and then hit on Click here to create them automatically option, which will create three system partition using XFS filesystem.
You can make changes to the automatically generated values, you can add, modify or resize your partition scheme, change the filesystem type label etc.
The following partitions will be created on the hard-disk and combined into one big Volume Group named clearos.
/boot - Standard partition
/(root) - LVM
Swap - LVM
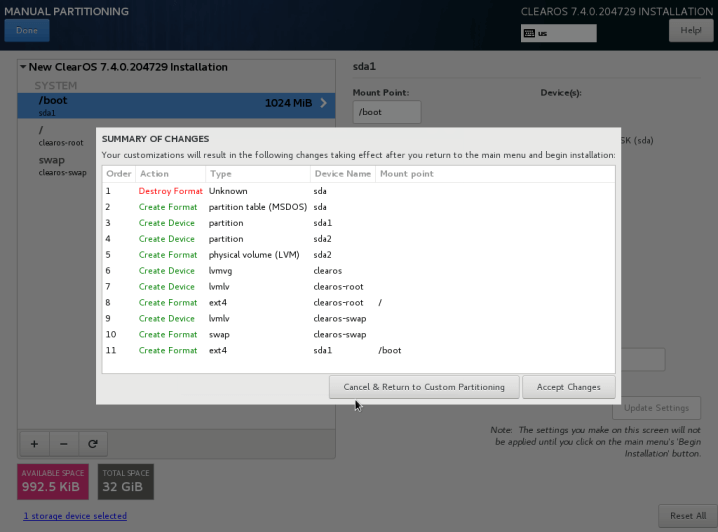
11. Once you have made any desirable changes, you can click on the Done button and Accept Changes on the Summary of Changes prompt.
Attention: If you have a hard-disk of more than 2TB capacity, the installer automatically will convert partition table to GPT. However, if you wish to use GPT table on smaller disks than 2TB, then you should use the argument inst.gpt to the installer boot command line in order to change the default behavior.
12. Now you need to enable networking and set your system hostname. Click on Network & Hostname option and you will be taken to the screen shown below.
Enter your system FQDN (Fully Qualified Domain Name) on Hostname filed, then enable your Network interface, switching the top Ethernet button to ON.
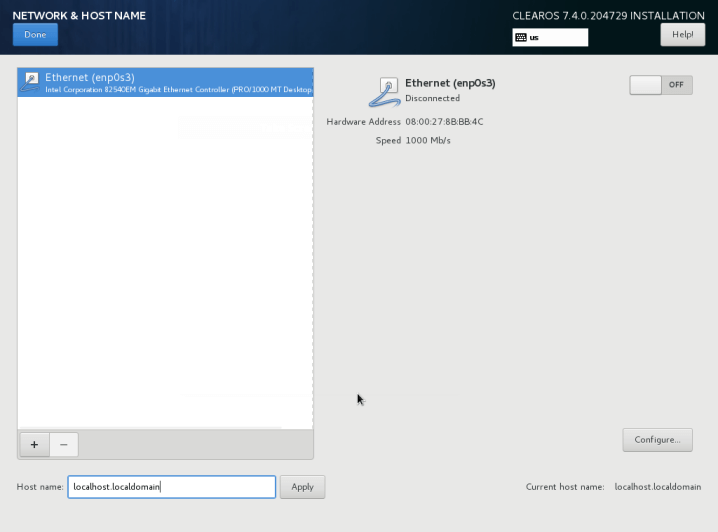
13. Once the Ethernet network interface button turned ON, if you have a functional DHCP server on you network then it will automatically configure all your network setting for enabled NIC, which should appear under your active interface.
However, if you are setting up a server then it’s recommended to configure a static network configuration on Ethernet NIC by clicking on Configure button.
Then add all your static interface settings as shown in the following screenshot. When you have finished, click on Save button, disable and enable Ethernet card by switching the button to OFF and ON, and, then click on Done to apply settings and go back to the Installation Summary window.

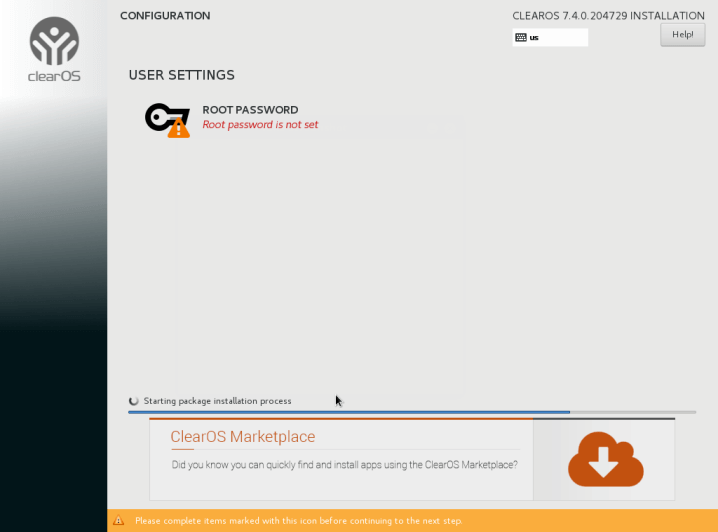
14. At this point, you can now to start installation process by pressing on Begin Installation button and set up a strong password for root account.
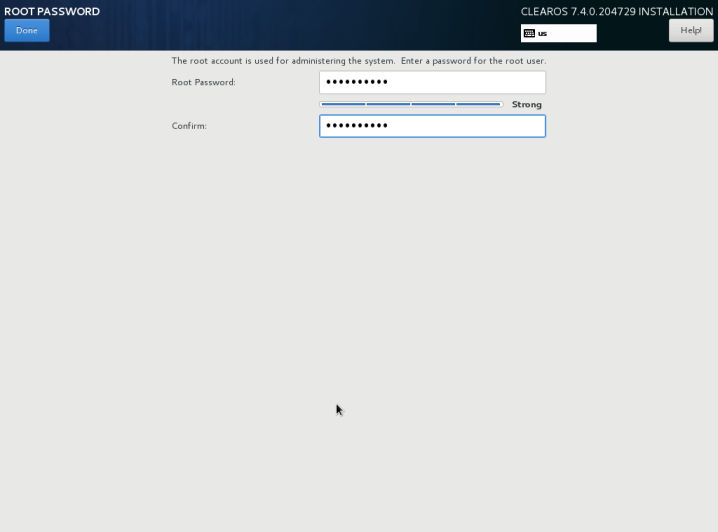
15. Click on Root Password and set a strong password for the root account as shown in the screenshot that follows.
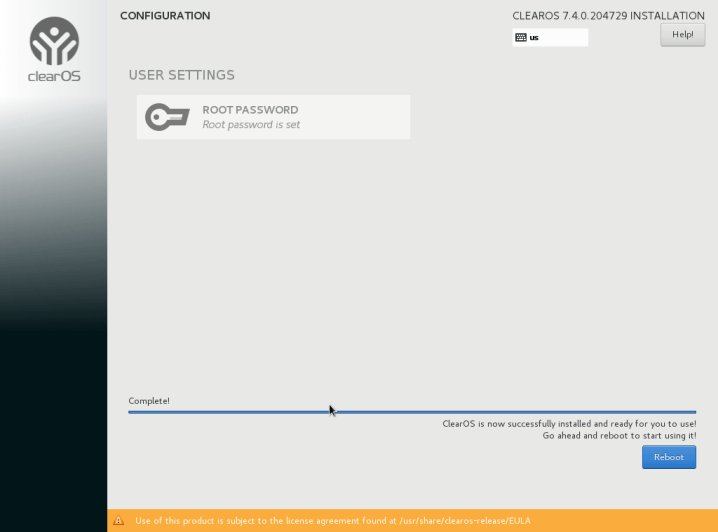
16. When the installation process is complete, the installer will show a successfully message on screen, asking for a reboot of the system in order to use it. Remove your installation media and reboot your computer so you can login to your new minimal ClearOS 7 environment.
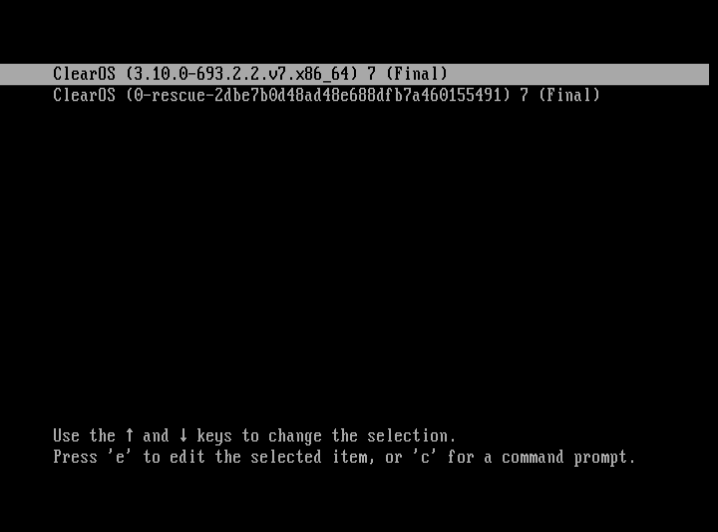
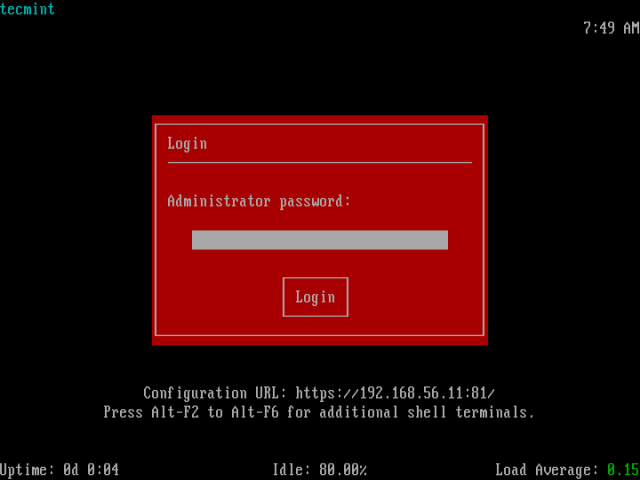
17. Next, the system will begin loading services as well as the ClearOS API, then an Administrator Login interface will appear as shown in the following screenshot.
You can choose to login or access the web-based interface on port 81 using the IP address you set for the Ethernet interface in step 13 above.
https://192.168.56.11:81
If you fail to login after some number of seconds, the Network Console shown below will appear. You can go back to the text based administrator login interface by clicking on Exit Console.

Important: ClearOS is configured via a web-based admin tool called Webconfig. Once you login into web-based administration tool from a remote web browser, you can get started with the First Boot Wizard.
That’s It! Hoping that everything went on well, now you have the latest ClearOS release installed on your computer. You can ask any questions via the feedback form below.
I don’t really understand. Do I need a monitor connected to the server? Or is the web UI up and running from the get-go?
This installation process is not perfect!
I have configured my PC in Gateway mode. when I access it from another PC and run the installation wizard, then up-till Software Updates, every thing works fine. However, when it comes to System Registration, then it gives this error, “Connection failed: SSL connect error”. Any help please?
@Sajid,
It’s your server behind any firewall? If yes, make sure to open SSL port..
@Ravi Saive ,
my server is not behind any firewall. it is directly connected to the internet line
Hi Ravi
is there a way to upgrade from community to professional without doing a clean install again
I think Gateway mode firewall have lot of issues in clearos 6.5,if you activate it that way,then after you pass any rule the previous rule forgotten by the clear os.Its really very appropriable if someone know ,how to configure it with gateway mode (allowing,ftp,http,https,smtp and other service).Specically LAn system won’t able to access these services from clear os to other webserver.
Hi Ravi,
I am able to set it up, but I am getting struck with Content Filter., I want to block category wise sites for my users., In community edition no option to update from GUI. Is there any option to update the content filter manually.?
Thanks,
Prakash
I am trying to run a virtual pc under clearos , Is this possible ???
Why system keep asking to insert desk 1, when all the downloaded ISO came only on one disk, I tried download again, but still prompt for disK one even the download came from the main ClearOS site, This only shows that this product can’t even serve step one of community software when we can’t even install what they give us.
hai,
How i can test that the clearos is work as proxy and how to see that real ip that access intenet. can you help me
Hi Ravi:
I’ve tried to set a clearOS 6.4 server in my organization, but I can’t get to configurate it properly.
After 3 fresh installations the only thing that I can do is to ping the server IP from outside, but I can’t resolve the name of the domain via ping the www or the ftp.
There’s any chance to receive some detailed help? I mean, maybe you would like to check my configurations to see what is happening.
Thank’s in advance.
Boris.
you need to have your domain pointed to your ip, normally you do this from the people who you bought your domain from you , the nameservers need to point to your ip – hopefully you have a fixed ip !
Type this in a bash
yum remove app-clearcenter-core
Hi,
is there any way of installing version 6.3.0 like version 5.2.0 with out going to the market place.
Thank you
Thanks for posting such a detailed walk-through. The one on the ClearFoundation site should be as detailed as this!
Hi ! thnx for the tutorial.
I have some issue with the web interface. It hangs in the “System Registration” step (it keeps waiting). I dunno how to overcome or ignore this step. I don’t have internet connection in that box.
I have some questions about DHCP and getting client computers connected to a ClearOS Professional Server. Could you assist me with this?