This guide will describe how you can integrate CentOS 7 Desktop to Samba4 Active Directory Domain Controller with Authconfig-gtk in order to authenticate users across your network infrastructure from a single centralized account database held by Samba.
Requirements
Step 1: Configure CentOS Network for Samba4 AD DC
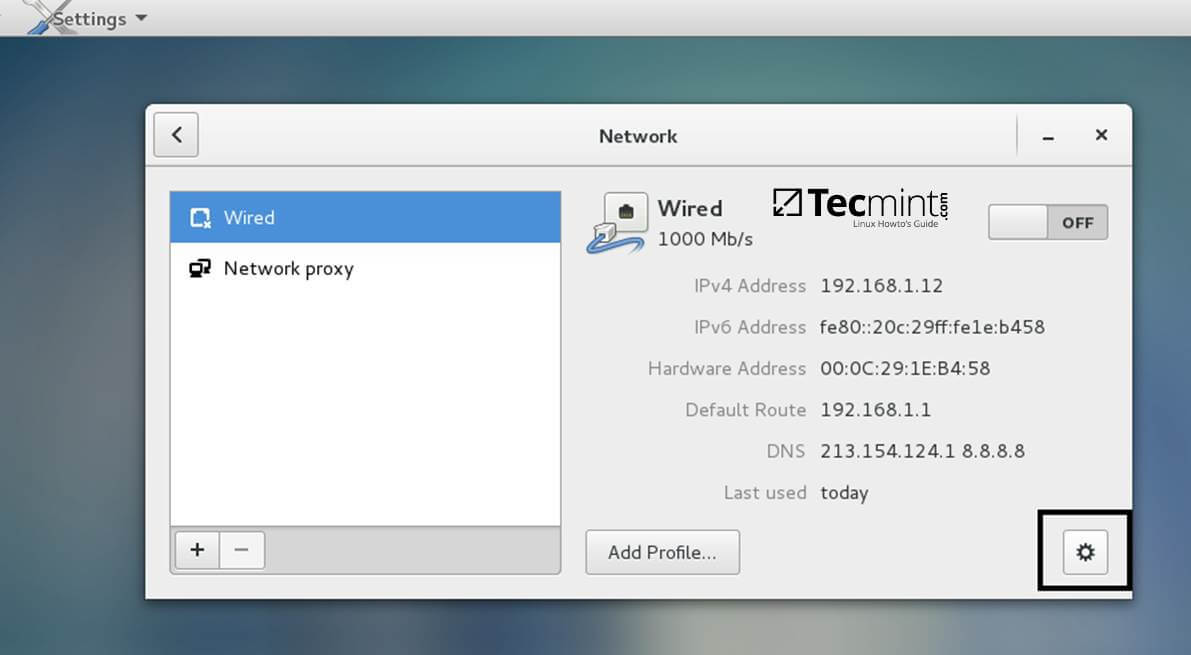
1. Before starting to join CentOS 7 Desktop to a Samba4 domain you need to assure that the network is properly setup to query domain via DNS service.
Open Network Settings and turn off the Wired network interface if enabled. Hit on the lower Settings button as illustrated in the below screenshots and manually edit your network settings, especially the DNS IPs that points to your Samba4 AD DC.
When you finish, Apply the configurations and turn on your Network Wired Card.

2. Next, open your network interface configuration file and add a line at the end of file with the name of your domain. This line assures that the domain counterpart is automatically appended by DNS resolution (FQDN) when you use only a short name for a domain DNS record.
$ sudo vi /etc/sysconfig/network-scripts/ifcfg-eno16777736
Add the following line:
SEARCH="your_domain_name"

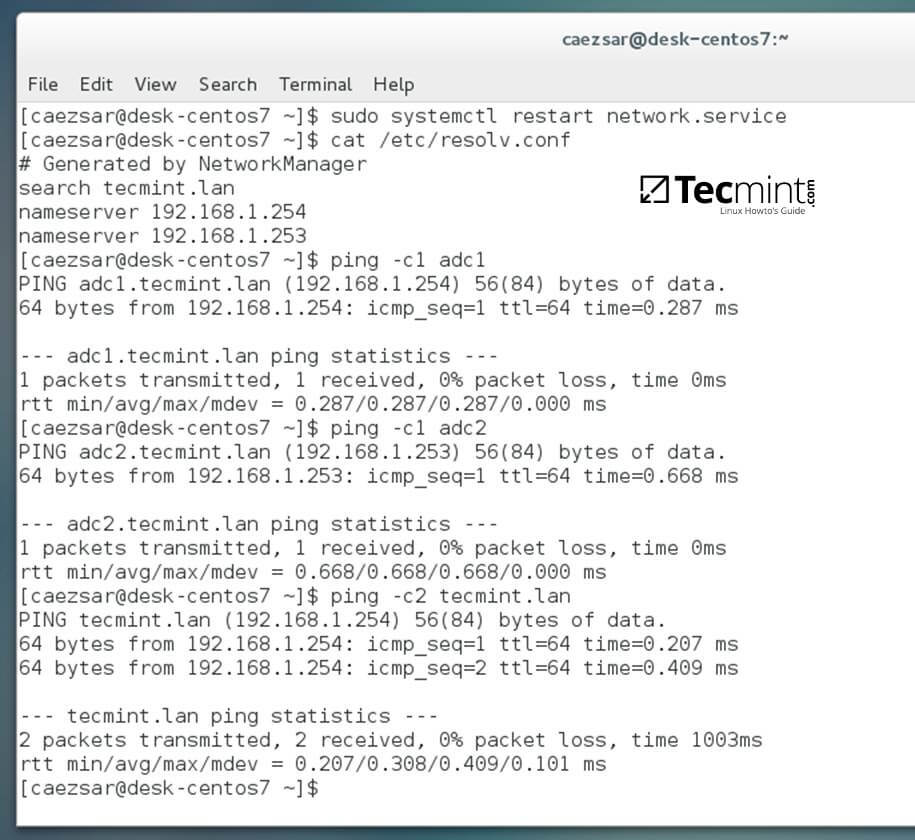
3. Finally, restart the network services to reflect changes, verify if the resolver configuration file is correctly configured and issue a series of ping commands against your DCs short names and against your domain name in order to verify if DNS resolution is working.
$ sudo systemctl restart network
$ cat /etc/resolv.conf
$ ping -c1 adc1
$ ping -c1 adc2
$ ping tecmint.lan
4. Also, configure your machine hostname and reboot the machine to properly apply the settings by issuing the following commands:
$ sudo hostnamectl set-hostname your_hostname
$ sudo init 6
Verify if hostname was correctly applied with the below commands:
$ cat /etc/hostname
$ hostname
5. The last setting will ensure that your system time is in sync with Samba4 AD DC by issuing the below commands:
$ sudo yum install ntpdate
$ sudo ntpdate -ud domain.tld
Step 2: Install Required Software to Join Samba4 AD DC
6. In order to integrate CentOS 7 to an Active Directory domain install the following packages from command line:
$ sudo yum install samba samba samba-winbind krb5-workstation
7. Finally, install the graphical interface software used for domain integration provided by CentOS repos: Authconfig-gtk.
$ sudo yum install authconfig-gtk
Step 3: Join CentOS 7 Desktop to Samba4 AD DC
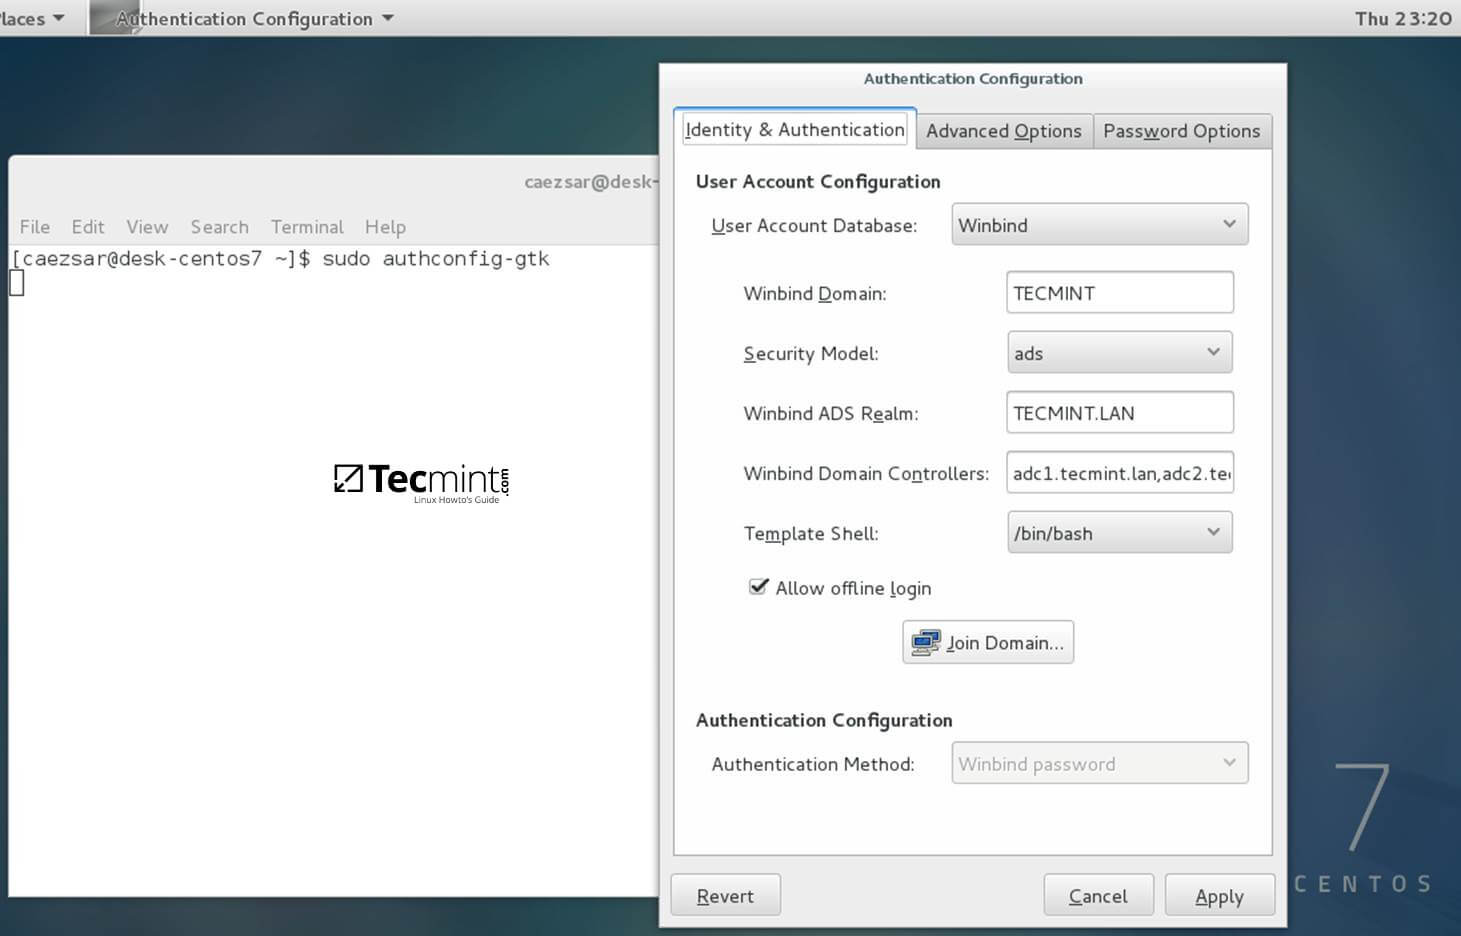
8. The process of joining CentOS to a domain controller is very straightforward. From command line open Authconfig-gtk program with root privileges and make the following changes as described below:
$ sudo authconfig-gtk
On Identity & Authentication tab.
- User Account Database = select Winbind
- Winbind Domain = YOUR_DOMAIN
- Security Model = ADS
- Winbind ADS Realm = YOUR_DOMAIN.TLD
- Domain Controllers = domain machines FQDN
- Template Shell = /bin/bash
- Allow offline login = checked
On Advanced Options tab.
- Local Authentication Options = check Enable fingerprint reader support
- Other Authentication Options = check Create home directories on the first login

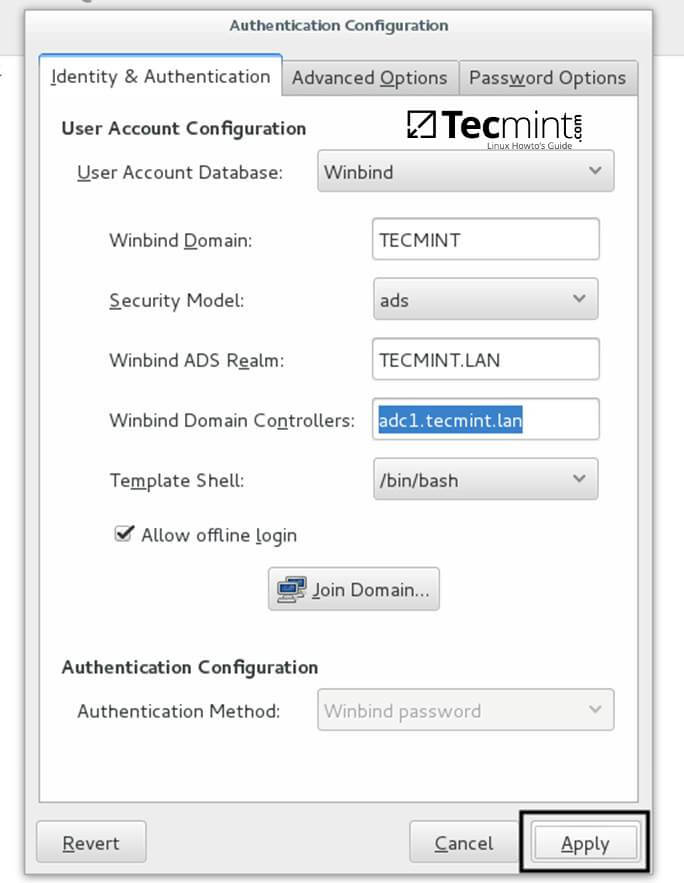
9. After you’ve added all required values, return to Identity & Authentication tab and hit on Join Domain button and the Save button from alert window to save settings.


10. After the configuration has been saved you will be asked to provide a domain administrator account in order to join the domain. Supply the credentials for a domain administrator user and hit OK button to finally join the domain.

11. After your machine has been integrated into the realm, hit on Apply button to reflect changes, close all windows and reboot the machine.
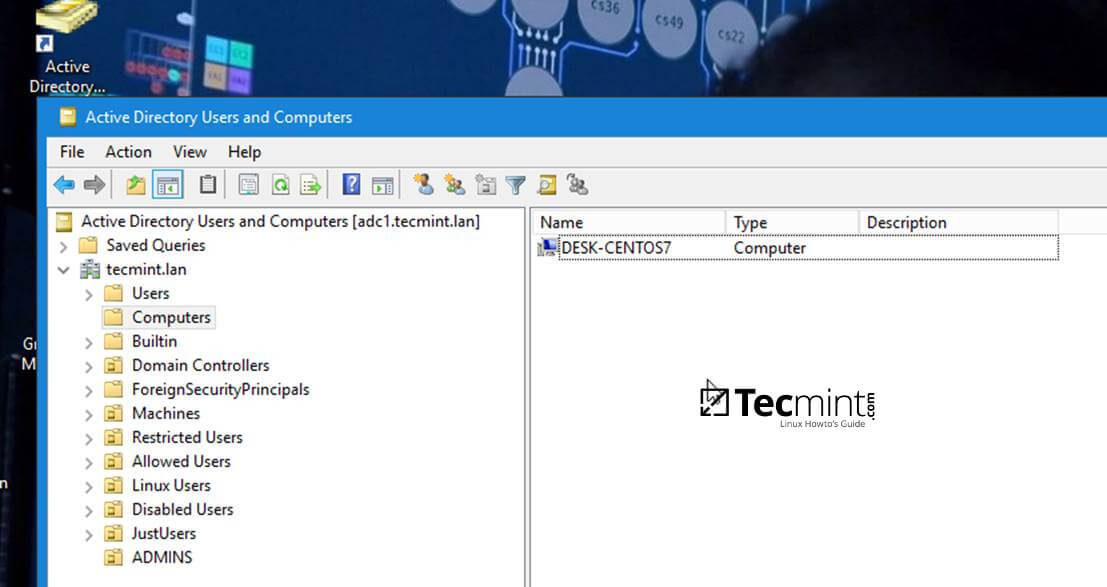
12. In order to verify if the system has been joined to Samba4 AD DC open AD Users and Computers from a Windows machine with RSAT tools installed and navigate to your domain Computers container.
The name of your CentOS machine should be listed on the right plane.
Step 4: Login to CentOS Desktop with a Samba4 AD DC Account
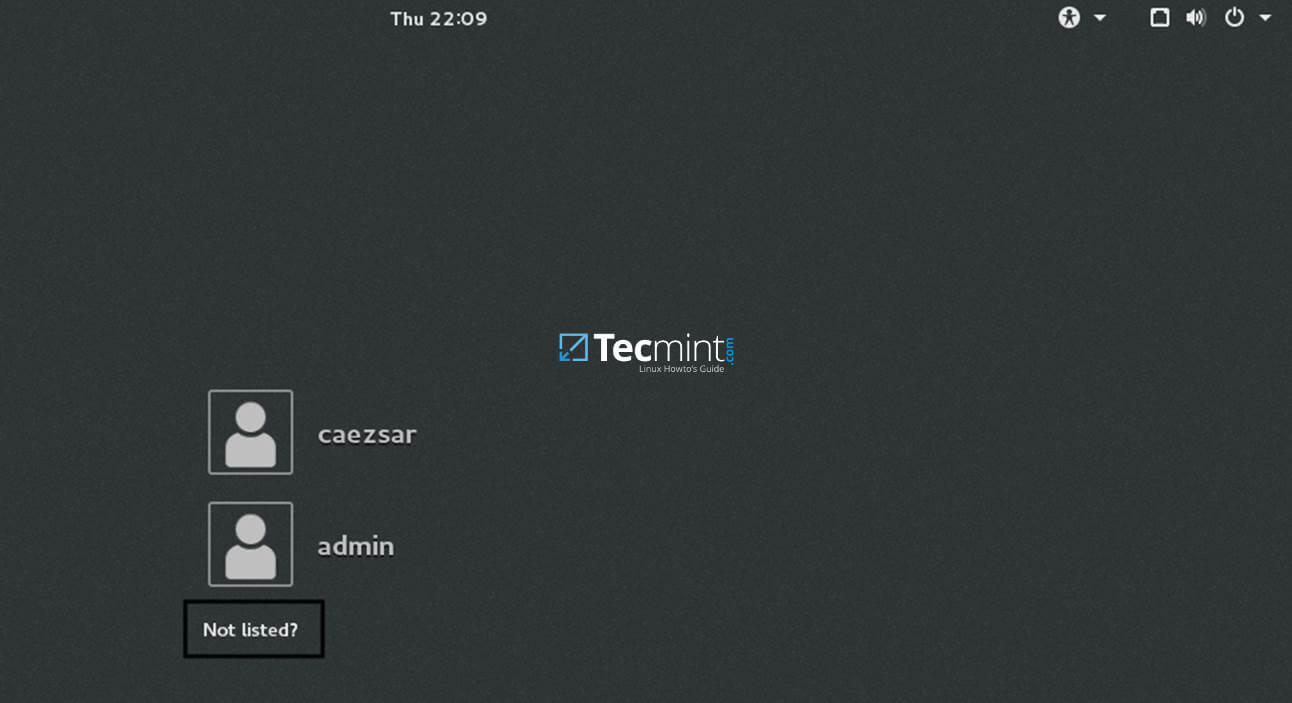
13. In order to login to CentOS Desktop hit on Not listed? link and add the username of a domain account preceded by the domain counterpart as illustrated below.
Domain\domain_account
or
[email protected]

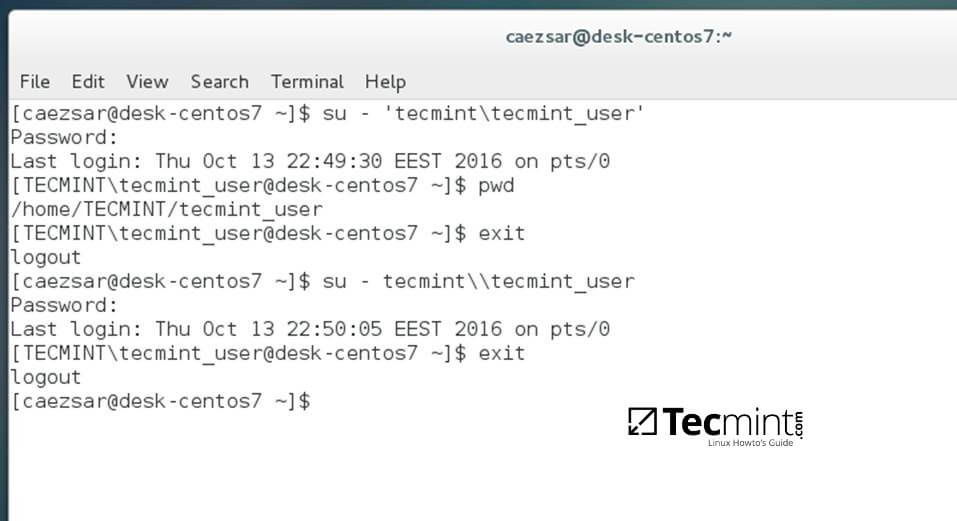
14. To authenticate with a domain account from command line in CentOS use one of the following syntaxes:
$ su - domain\domain_user
$ su - [email protected]

15. To add root privileges for a domain user or group, edit sudoers file using visudo command with root powers and add the following lines as illustrated on the below excerpt:
YOUR_DOMAIN\\domain_username       		 ALL=(ALL:ALL) ALL  	#For domain users
%YOUR_DOMAIN\\your_domain\  group      		 ALL=(ALL:ALL) ALL	#For domain groups

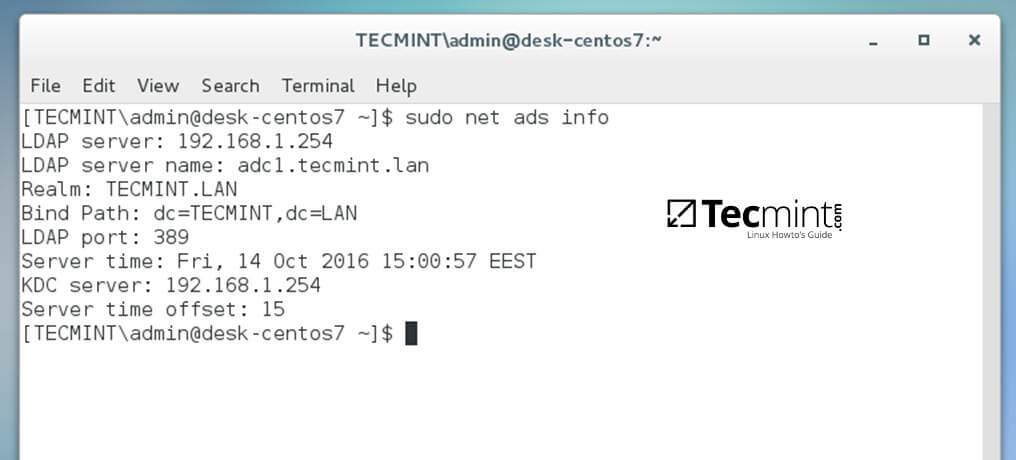
16. To display a summary about the domain controller use the following command:
$ sudo net ads info
17. In order to verify if the trust machine account created when CentOS was added to the Samba4 AD DC is functional and list domain accounts from command line install Winbind client by issuing the below command:
$ sudo yum install samba-winbind-clients
Then issue a series of checks against Samba4 AD DC by executing the following commands:
$ wbinfo -p #Ping domain
$ wbinfo -t #Check trust relationship
$ wbinfo -u #List domain users
$ wbinfo -g #List domain groups
$ wbinfo -n domain_account #Get the SID of a domain account

18. In case you want to leave the domain issue the following command against your domain name by using an domain account with administrator privileges:
$ sudo net ads leave your_domain -U domain_admin_username

That’s all! Although this procedure is focused on joining CentOS 7 to a Samba4 AD DC, the same steps described in this documentation are also valid for integrating a CentOS 7 Desktop machine to a Microsoft Windows Server 2008 or 2012 domain.


Yes,
I have centos 7 and i am using realm for domain join, after domain join they are showing different UID and GID, that UID and GID was not match with AD.
Use idmap_rid smb.conf configuration setting. winbind daemons will generate unique UIDs and GIDs across a Windows domain, mapps the Relative Identifier (RID) portion of a Windows SID to a UNIX/Linux UID or GID.
https://www.samba.org/samba/docs/man/Samba-HOWTO-Collection/winbind.html
uid=1829600500([email protected]) gid=1829600513
UID and GId was not match with Active Directory.
How to match UID and GID with AD
For NTP date you should use chrony. It is the default for Rhel 7 and centos. Net ads were cool for centos 6 but for Rhel and centos 7 try using the Realm client utility. You can do everything you showed in one line.