Apache Web Server is one of the most popular HTTP servers on the Internet today, due to its open-source nature, rich modules, and features, and can run on almost major platforms and operating systems.
While on Windows platforms there are some built-in development environments that provide a Graphical Interface to manage Apache configurations, such as WAMP or XAMPP, on Linux the entire management process must be performed entirely from the Command Line, in most cases.
While managing and configuring Apache Web Server from the command line can have a huge impact concerning system security, it can also be a scary job for newbies who are not very familiar with doing things from the command line.
This is the point where the Apache GUI tool can come in handy, which is a free and open source package designed for system administrators to manage the functionality of Apache Web Server from a browser, such as:
- Edit your web server configuration files right from your browser.
- Edit your web documents right from your browser.
- Download, search, and visualize Apache Logs in real-time.
- Install, edit, or remove Apache modules.
- View runtime statistics or detailed graphs of transactions of Apache HTTP Server.
- Manage global server settings.
- Manage and view all VirtualHosts in a tree view.
Requirements
- How to Install LAMP Stack in RHEL-based Distributions
- How to Install LAMP Stack on Debian 11/10/9
- How to Install LAMP Stack in Ubuntu 20.04
For the purpose of this article, I will be installing Apache GUI Web Tool on a Linode Rocky Linux 8 VPS with IP address 192.168.0.100 and provide you a short init script for starting or stopping the Apache GUI process.
Step 1: Download and Install Apache GUI
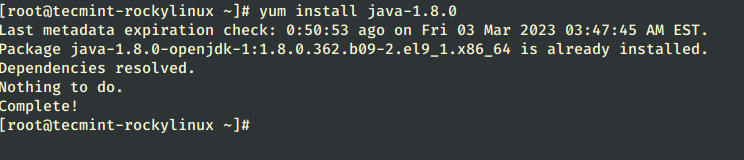
1. Before getting started with downloading and installing the Apache GUI tool, you need to assure that Java JDK provided by the Java-openjdk package is installed on your system, so you can run Apache GUI.
Use the following commands to install the Java-openjdk package on RHEL-based and Debian-based distributions.
$ sudo yum install java-1.8.0    [On RHEL/CentOS/Fedora and Rocky/AlmaLinux]
$ sudo apt install default-jre   [On Debian, Ubuntu and Mint]
2. Assuming, that you are logged in as root and your current working directory is /root, use the following link to download the latest version of Apache GUI source package (i.e. ApacheGUI-1.12.0.tar.gz) installation files from Sourceforge.net.
Alternatively, you can also grab the Linux-Solaris-Mac –> ApacheGUI tar archive source files using the following wget command as shown below.
# wget https://sourceforge.net/projects/apachegui/files/1.12-Linux-Solaris-Mac/ApacheGUI-1.12.0.tar.gz/download -O ApacheGUI-1.12.0.tar.gz
3. After the archive is downloaded, extract it and move the entire directory to /opt system path, which will be the installation location of your Apache GUI Server.
# tar xfz ApacheGUI-1.12.0.tar.gz
# mv ApacheGUI /opt
# cd /opt

4. Now, it’s time to start and verify Apache GUI Web Tool functionality. Change your directory to ApacheGUI/bin/ path and use run.sh script to start the tool and stop.sh script to stop the server.
# cd ApacheGUI/bin/
# ./run.sh
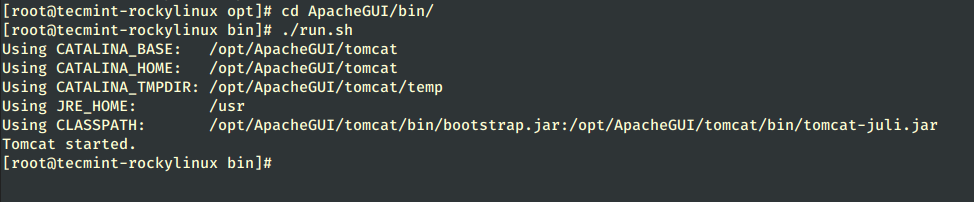
5. After the tool starts it will display some environmental information and you can access it only from your localhost using the following URL address on your browser.
http://localhost:9999/ApacheGUI/
To gain remote control over Apache GUI Web Tool from a browser, you need to add a rule on your system Firewall that opens Port 9999/TCP, which is the default port that Apache GUI Tools listens on.
Use the following commands to open port 9999 on the Firewalld utility.
# firewall-cmd --add-port=9999/tcp --permanent
# firewall-cmd --reload
If you are using a UFW firewall, then run:
$ sudo ufw allow 1191/tcp
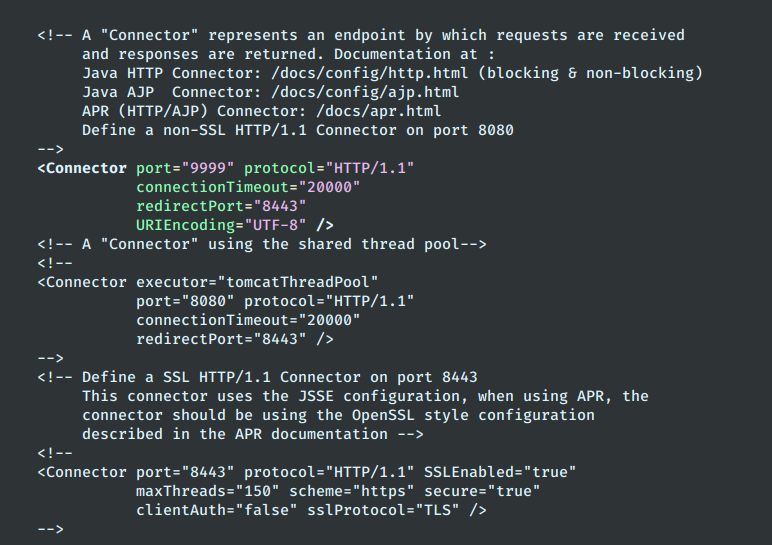
6. If port 9999 used by Apache GUI overlaps with another application on your system you can change it by editing the ApacheGUI server.xml configuration file, searching for Connector port=”9999” protocol=”HTTP/1.1” directive, and replacing the port statement with your favorite port number (don’t forget to apply port firewall rule the same time).
# vi /opt/ApacheGUI/tomcat/conf/server.xml
OR
# nano /opt/ApacheGUI/tomcat/conf/server.xml
Step 2: Configure Apache GUI
7. Now it’s time to configure Apache GUI Web Tool for Apache Web Server administration from a remote point. Assuming that you have configured your system Firewall and allowed external connections, open a remote browser and type use your server external IP address to access Apache GUI
http://192.168.0.183:9999/ApacheGUI/
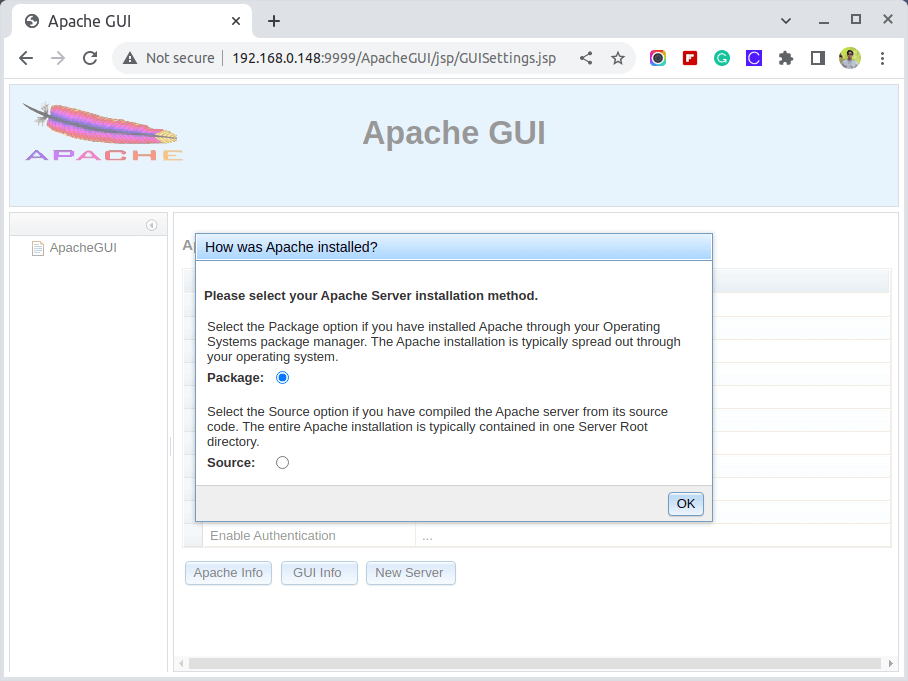
8. Next, the tool will prompt you on How Apache Web Server was installed? Choose the Package option, if you installed Apache on RHEL/CentOS using the yum package management tool and hit OK to move forward.
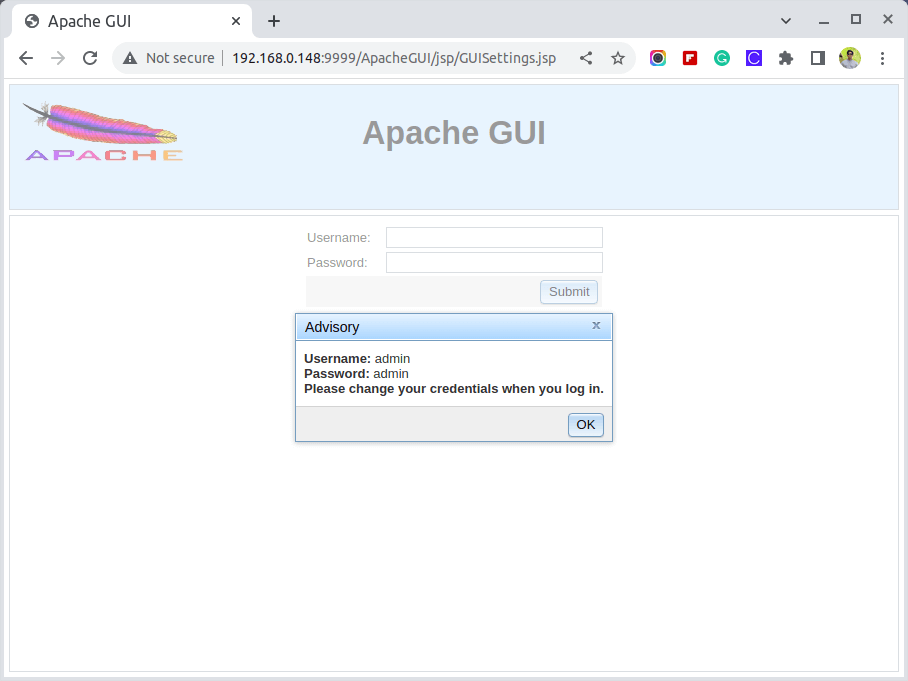
9. Provide your Apache Web Server Package Parameters with the following configurations and, also, choose a username and a strong password to log in to Apache GUI next time.
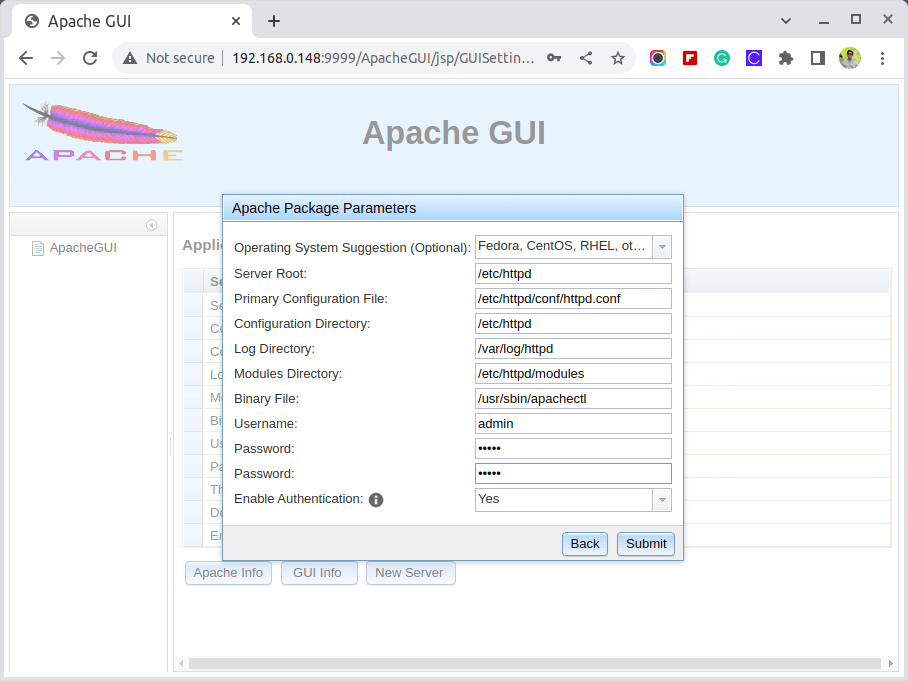
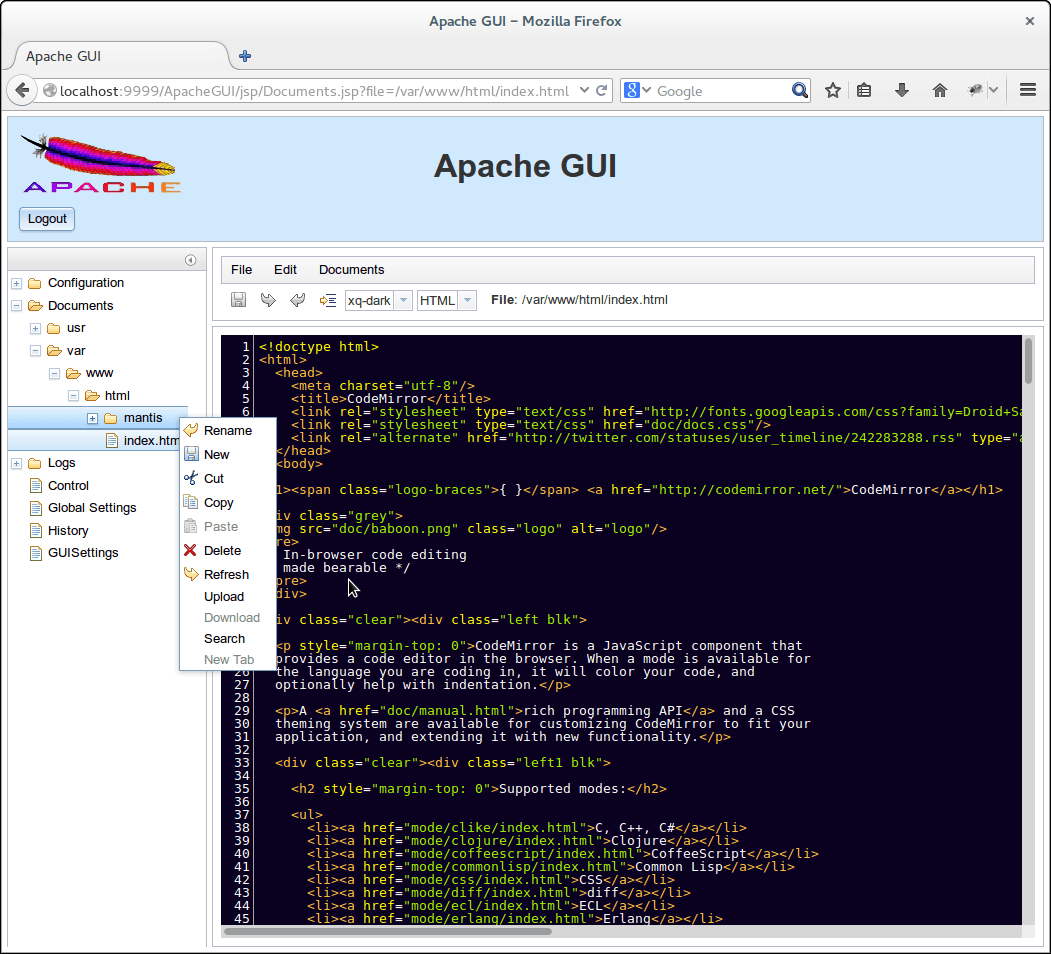
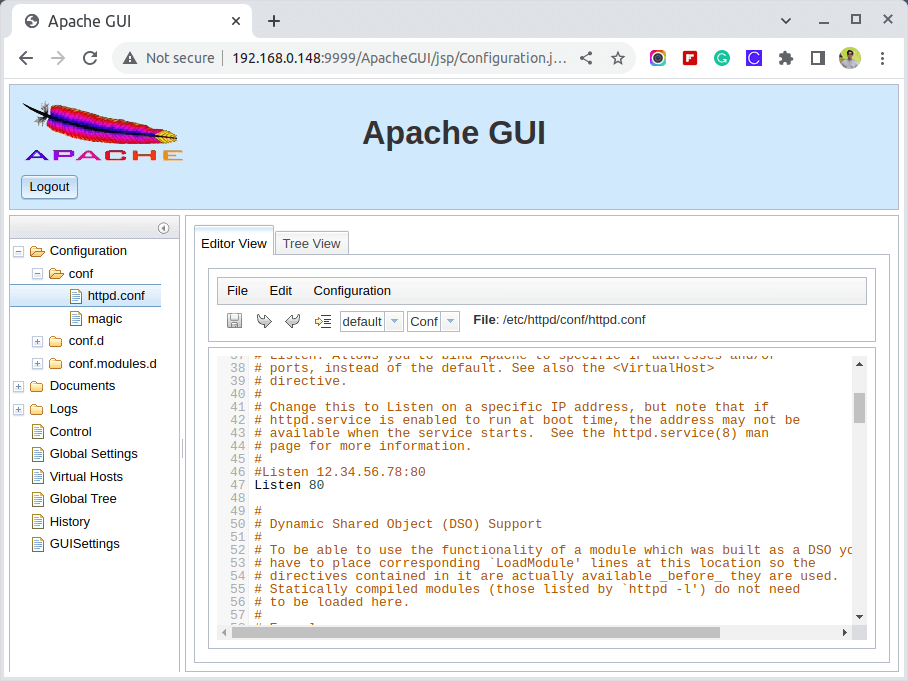
10. After you finish hit on Submit button to apply the configuration and you’re done. Now you can control Apache Web Server with all its configuration files and edit web documents directly from your browser as in the screenshots below.

Step 3: Create Systemd Unit File
11. If you need a method to manage Apache GUI Tool without always changing the directory to [APACHEGUI_HOME], which for this installation is /opt/ApacheGUI/, execute run.sh and stop.sh scripts, create a systemd configuration file /etc/systemd/system/apachegui.service as in the following excerpt.
# vi /etc/systemd/system/apachegui.service
OR
# nano /etc/systemd/system/apachegui.service
Copy the below text without any modification, save it, and apply for execution permissions.
[Unit]
Description=Apache GUI Service
After=multi-user.target

[Service]
ExecStart="/opt/ApacheGUI/bin/run.sh"
ExecStop="/opt/ApacheGUI/bin/stop.sh"
Type=simple

[Install]
WantedBy=multi-user.target
12. Use the following commands to manage the Apache GUI process.
# systemctl daemon-reload
# systemctl enable apachegui
# systemctl start apachegui
# systemctl stop apachegui
Even though Apache GUI Web Tool has some limitations and doesn’t provide the same degree of flexibility for Apache Web Server as you can achieve from the command line.
It can provide a modern free Java web interface to administer your web server and has a full inline editor for web documents such as HTML, CSS, JavaScript, XML, Json, PHP, Perl, Shell, and Python and can generate some detailed graphs of Apache Transactions.


Had to change the apachegui.service as given below on a proxmox container to make sure tomcat doesn’t stop after starting.
The download filename and the tar version filename are different:
ApacheGUI-1.12.0.tar.gz
tar xfz ApacheGUI-1.9.3.tar.gz
Most novice users are dazed as it is. Are you trying to bother them as well?
Thank you for the article, anyway excellent info as always from tecmint.
@Addon,
I’ve updated the Apache GUI article with the latest instructions…
Thanks, mate.
SSH is a pain in the…
Things get easier and easier as the tech continues to evolve.
BTW, is this Apache GUI tool is developed by the same team as this VPSrobots?
I see the quite similar features in VPSrobots too.
@Aron,
No idea about that, but quite similar features in both tools..
What’s going on here. This article has comments dating back to September 8,2014, but is was supposedly post today October 8, 2018! You can’t comment on an article that doesn’t exist yet.
@Cybernard,
We’ve udpated this article with latest version and instructions of Apache GUI Tool, so re-posted again…
Yet, I still experienced tons of errors.
apache2-2.4.35
Haha LogFormat is an invalid configuration command according to ApacheGUI in mod_log_conf Funny apache doesn’t register any errors.
Error message abound.
Tree view seems broken
I don’t see the benefit, all configurations shown is a web based notepad.
About the only thing it has is hover over links to the apache documentation, its not even in-line help like sublime, phpstorm or etc.
Logs are no better than standard GREP over ssh.
Control can’t retrieve extended info, and won’t tell me how to fix it.
Global Settings “Sorry, an error has occured” WOW very helpful
Mime Types “Sorry, an error has occured” WOW very helpful
Virtual hosts /etc/apache2/conf.d/apache2-manual? conf (No such file or directory)
Add virtual hosts gets stuck Loading Active Files
History ditto virtual hosts error.
OMG… I did it again… 1.8 is what I had. The latest release is 1.11.0
Sorry, I forgot to mention that the latest release is is 1.8.0
admin@centos75 /]$ sudo wget http://downloads.sourceforge.net/project/apachegui/1.9%20Linux-Solaris-Mac/ApacheGUI-1.9.3.tar.gz
–2018-09-05 08:42:30– http://downloads.sourceforge.net/project/apachegui/1.9%20Linux-Solaris-Mac/ApacheGUI-1.9.3.tar.gz
Resolving downloads.sourceforge.net (downloads.sourceforge.net)… 216.105.38.13
Connecting to downloads.sourceforge.net (downloads.sourceforge.net)|216.105.38.13|:80… connected.
HTTP request sent, awaiting response… 404 Not Found
2018-09-05 08:42:30 ERROR 404: Not Found.
Nice post. I am currently having issues with mine, i install SNAP server on ubuntu 14.04 server and it has apache installed but things are not working right for me. I can not access the portal to manage the server using username and password. when i typed localhost it just show that it worked that all
I am like a newbie network admin, for the time being I am following your this tutorial for a gui for my apache server. But, I wanted to ask about webmin or plesk or the puppet for apache gui configurations.
Can Anyone please point out which one is the best among the webmin, plesk, puppet or the ApacheGui explained in this tutorial..
Regards
@Junaid,
I worked with Webmin as well as on Plesk, but ApacheGUI seems much easier to configure Apache configuration like creating Vhosts, etc..
The most flexible way to manage your server is through command line. If you truly need a GUI to manage Apache web server then ApacheGui represents a tool especially crafted for Apache, unlike the other you’ve mentioned which are serve multiple purposes.
Nice post. To the point and crisp. Keep up the good work.
Thanks,
Sandeep
Make sure that /etc/init.d/apache-gui file has execution permission ( chmod +x /etc/init.d/apache-gui ) and start the service from root account or a system user with root privileges.
Also make sure that the file has the same content as presented on above excerpt ( file comments are important here)
friend error
env: /etc/init.d/apache-gui: Permiso denegado
Failed to start LSB: Start the apache-gui.