Digital forms are a great way to boost the productivity of any team or group of users as they make it possible to create model documents within seconds. When you work with fillable forms, all you need to do is open a ready-to-use template, make the required changes to the text if necessary, share the updated template with other people, and wait until they fill out the file and send it back to you.
The whole process doesn’t usually take much time and allows you to deal with contracts, legal agreements, questionnaires, admissions forms, and other similar documents with ease.
As a Linux user, you can use different software to create and edit fillable forms, including the PDF format. For example, the ONLYOFFICE open-source office suite lets you create such files using its desktop client or the self-hosted version called ONLYOFFICE Docs. Both versions of the package have the same interface and editing features, so the process of form creation is identical.
In this guide, you will learn how to create fillable forms with ONLYOFFICE Docs in a more comfortable way with the help of the newly added feature – user roles.
About ONLYOFFICE Forms
Starting from version 7.0, ONLYOFFICE Docs, an open-source collaborative office suite, allows users to create, edit and collaboratively work on fillable forms that are also known as OFORMs.
This abbreviation means ONLYOFFICE’s native format that is used for its own digital forms. They can’t be modified except for the fields where other people can enter the required information, whether it be text values, numbers, or images.
This feature allows you to create and edit electronic documents with fillable fields online or locally, and you can share them with other users. OFORMs allow you to save a lot of time while working with standard documents.
OFORMs are similar to the traditional content controls in Microsoft Office but they offer a greater degree of flexibility. Moreover, ONLYOFFICE forms have more advanced field properties and come with various field types:
- Tex field;
- Combo box;
- Drop-down list;
- Checkbox;
- Radio button;
- Image;
- Email address;
- Phone number;
- Date & Time;
- Zip code;
- Credit card;
- Complex field.
What Are User Roles in Fillable Forms?
The recently released version of ONLYOFFICE Docs version, v7.3, provides a new feature to make the process of form filling as easy as possible. What is meant here is user roles, also referred to as recipient roles.
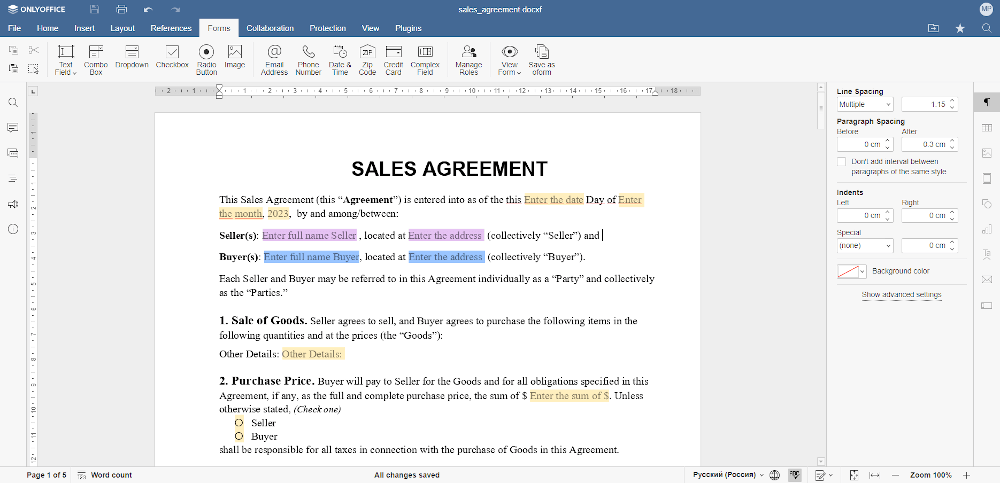
When creating a fillable form in ONLYOFFICE Docs, now you can create different roles for those users who will fill out the document later. For example, if you create a sales agreement, you can create a role for the Buyer, a role for the Seller, and a role for the Legal advisor, each indicated with its own color.
Then, you can assign each field in your document to one of the roles you created. In this case, the Buyer, the Seller, and the Legal advisor will be able to visually recognize all the fields they must fill out depending on their role.
Now let’s find out how to create and manage user roles in ONLYOFFICE forms.
How to Create and Manage User Roles in ONLYOFFICE
When you create a form template in ONLYOFFICE Docs, you work with the DOCXF format. This is another format created by the ONLYOFFICE developers.
It’s based on DOCX and is used for form templates only. DOCXF templates are editable and can be saved as non-editable OFORM or PDF files, the formats used for fillable forms.
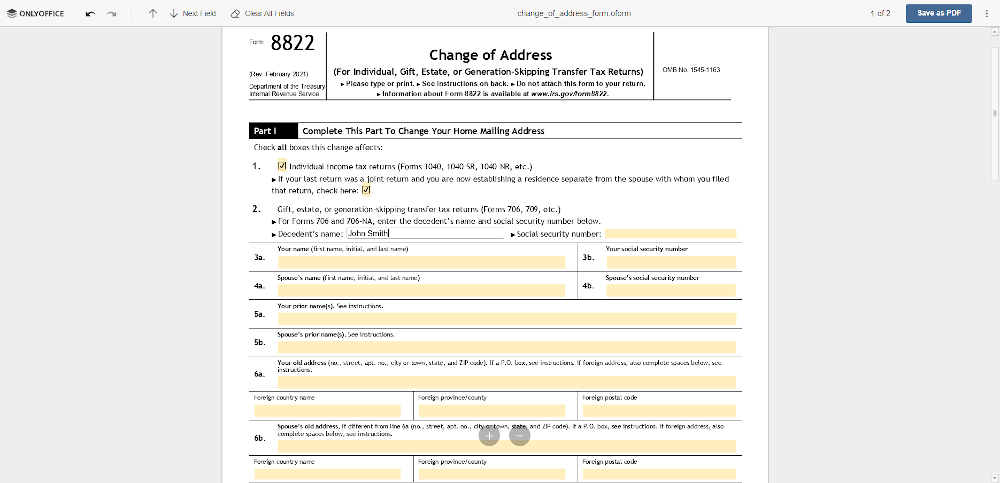
To get started, create a new DOCXF file or upload a DOCX file and turn it into a template. Then edit the text and add all the required fields by choosing the type you need on the Forms tab. After adding the fields and configuring their properties, you can create as many roles as you need.
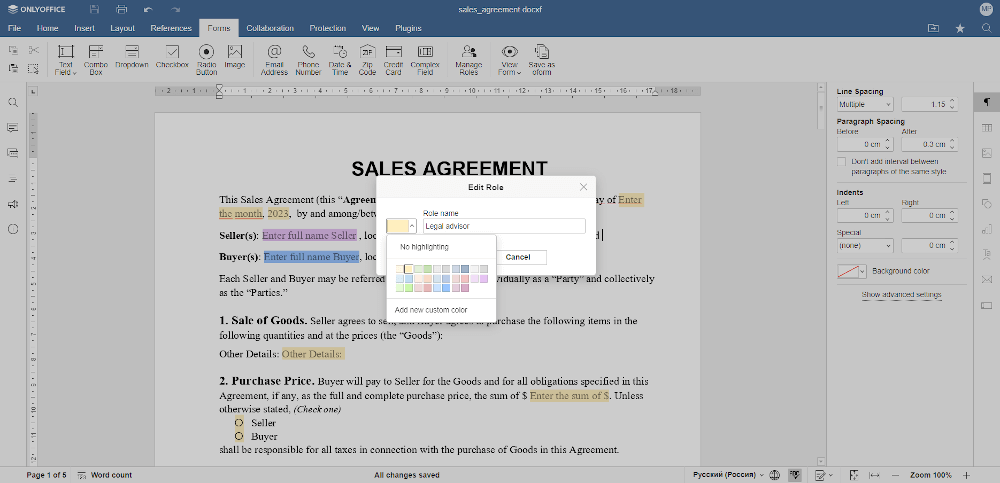
To create a role, go to the Forms tab and click the Manage roles button. You will see a new window where you will be able to create new roles, modify the existing ones and delete the ones you don’t need anymore using the corresponding buttons — New, Edit, and Delete.
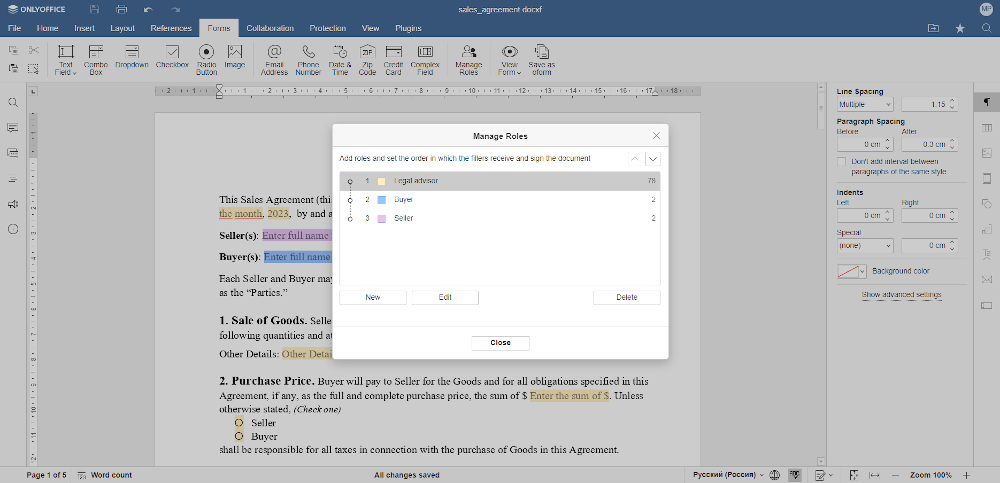
When creating a new role, you need to enter its name and choose the corresponding color that will distinguish it from other roles. You can also rename roles and change their colors at any moment using the same window.
How to Assign Roles to Different Fields
When you are done with creating all the necessary roles for your form, you can assign the roles to different fields. To do so, click a field and find the Who needs to fill this out? option in the upper right corner of the form settings menu. Open the drop-down list and choose the role you need.

This way, you can quickly assign all the roles in your document making it easier for other users to fill out what they have to fill out.
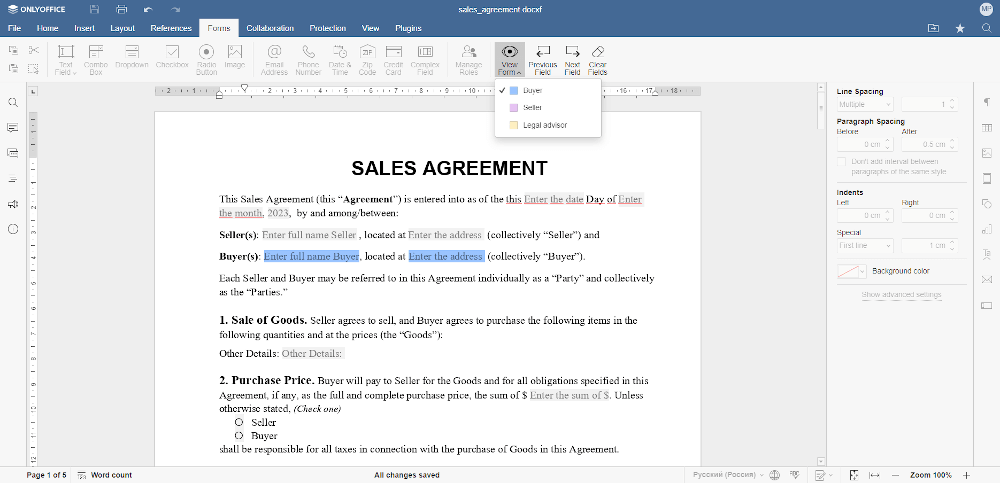
When your form is ready, you can click the View form option on the Forms tab and see what the form will look like in the eyes of each recipient.
For example, the Buyer will see only the blue fields because they have been assigned to their role. All the other fields will be marked with a grey color.
This is it. Now you can save your form as OFORM or turn it into a fillable PDF.
In future updates, the ONLYOFFICE developers promise to extend the role functionality by adding an option to set up restrictions for certain roles and add e-signatures. This improvement sounds intriguing, so we hope to see it implemented soon.