Short for Secure Shell, SSH is a secure network protocol that encrypts traffic between two endpoints. It allows users to securely connect and/or transfer files over a network.
SSH is mostly used by network and system administrators to securely access and manage remote assets such as servers and network devices over a network. It uses strong encryption methods such as AES and hashing algorithms like SHA-2 and ECDSA to encrypt traffic exchanged between a client and a remote system.
[ You might also like: How to Secure and Harden OpenSSH Server ]
SSH implements two authentication methods; password-based authentication and public-key authentication. The latter is more preferred since it offers better security using the public key authentication which protects the system against brute force attacks.
With that in mind, we will demonstrate how you can configure SSH key-based authentication on RHEL 9.
Testing Lab Setup
This is what our setup looks like
- A Linux/UNIX (Ubuntu-based or RHEL-based) system on which we will generate the key pair. For this guide, I am using the Ubuntu distribution.
- An instance of RHEL 9 ( This cloud be an on-premise or cloud VPS).
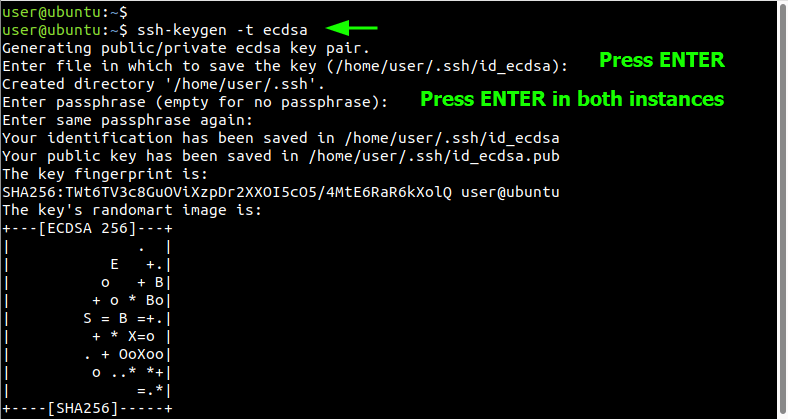
Step 1: Generate the ECDSA SSH Key Pair
Access your Linux system and generate the SSH key pair as follows. In this guide, we will generate the key pair using the ECDSA algorithm which provides better encryption and security.
Therefore, to generate the ECDSA key pair, run the command:
$ ssh-keygen -t ecdsa
The command will walk you through a series of prompts.
By default, the key pair is saved in the user’s home directory inside the ~/.ssh directory. You can accept this as the destination of the SSH key pair by pressing ENTER on the keyboard, otherwise, your can specify your preferred path. In this guide, we have decided to go with the default path.
Next, you will be prompted to provide a passphrase. This is basically a password that you will be required to provide upon establishing a connection with the remote RHEL 9 system. It provides an added layer of protection on top of the encryption offered by the SSH keys.
However, if your plan is to automate processes over the SSH protection or configure passwordless authentication, it is recommended to leave this blank. And therefore, we will leave this blank by, once again, hitting ENTER.
Below is the output of the command runtime.
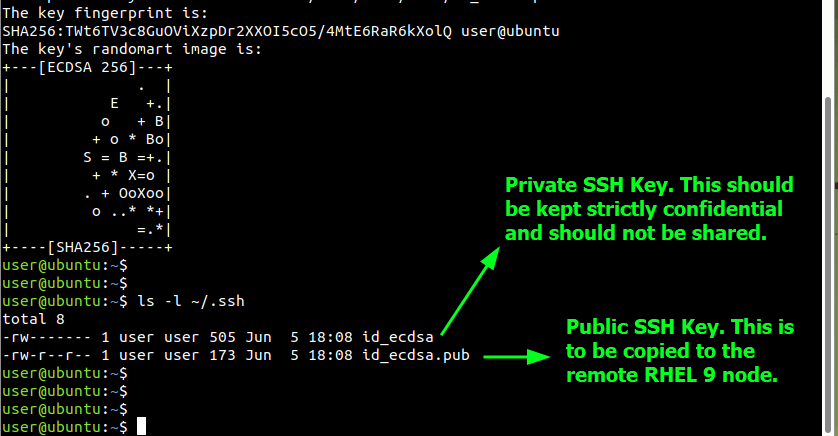
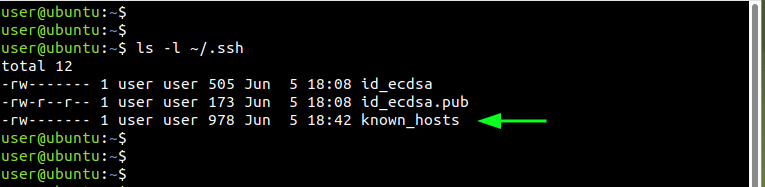
You can have a glance at the SSH key pair using the ls command as shown.
$ ls -l ~/.ssh
The id_ecdsa is the private key while id_ecdsa.pub is the public key. The private key should always remain a secret and should not be shared or divulged to anyone. On the other hand, you are at liberty to share the public with any remote system that you want to connect to.
Step 2: Copy Public SSH Key to Remote RHEL 9
The next step is to copy the public key to the remote RHEL 9 instance. You can do this the manual way or using the ssh-copy-id command-line tool. Since the latter is much easier and more convenient to use, invoke it using the following syntax.
$ ssh-copy-id user@rhel-9-server-IP
In our case, the command will be as follows where tecmint is the regular login user and 192.168.254.129 is the IP address of the remote user.
$ ssh-copy-id [email protected]
Type yes to continue connecting. Then provide the remote user’s password and press ENTER.
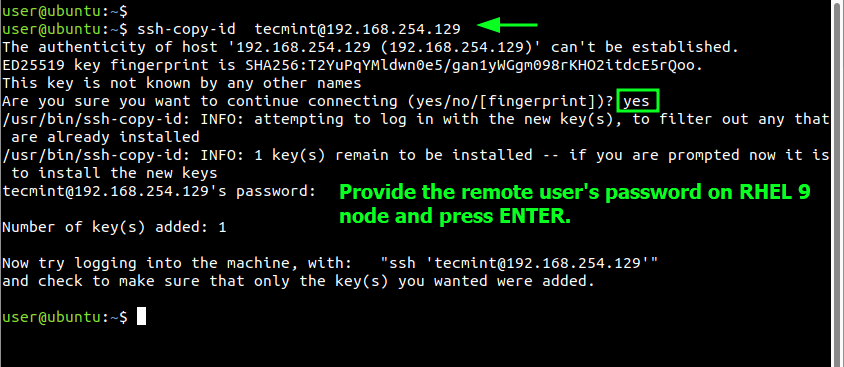
The public key will be copied to the authorized_keys file in the ~/.ssh directory of the remote user’s home directory. Once the key is copied, you can now login to the remote RHEL 9 instance using public-key authentication.
NOTE: In RHEL 9, root login over SSH is disabled or denied by default. This is for good reasons – it prevents an attacker from logging in using the root account which will grant him all the privileges on the system. Therefore copying the public key to the RHEL system as root will fail.
Enable Root Login in RHEL 9
If you need to log in as root, you need to edit the default SSH configuration as follows.
$ sudo vim /etc/ssh/sshd_config
Next, set the PermitRootLogin attribute to yes and save the changes and exit the file.
To apply the changes made, restart the SSH service.
$ sudo systemctl restart ssh
Step 3: Verify SSH Public Key Authentication
Now let us confirm public key authentication. To do this, log in as follows.
$ ssh [email protected]
This time around, you will not be prompted for a password and you will drop straight to the remote RHEL 9 shell as shown. You may also want to verify the presence of the authorized_keys file as mentioned earlier.
$ ls -l ~/.ssh

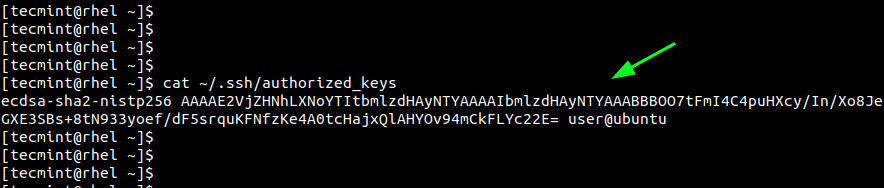
You can also view the cryptographic public key file using the cat command.
$ cat ~/.ssh/authorized_keys
At the Linux desktop on which we generated the SSH keys, a file called known_hosts is generated in the ~/.ssh directory. This contains the fingerprint of all the remote servers that the system has connected to.
In this guide, we have successfully configured SSH key-based authentication on RHEL 9. Your feedback is highly welcome.


A great article, thanks.
Can I use the same steps for Debian-based Linux or the ssh-commands will be different?
@Alexey,
You can use the same instructions on Debian Linux as well…