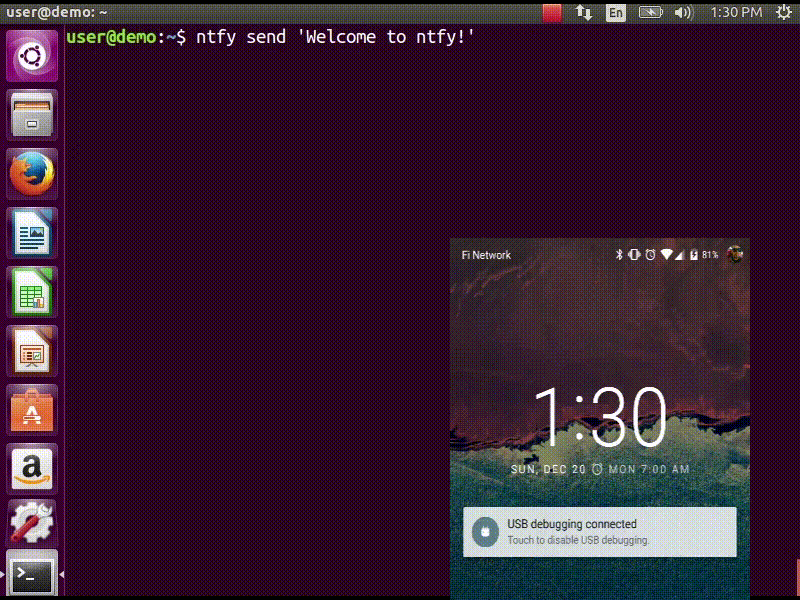
Ntfy is a simple yet serviceable cross-platform Python utility that enables you to automatically get desktop notifications on demand or when long running commands complete. It can as well send push notifications to your phone once a particular command completes.
It supports shell integration with popular Linux shells such as bash and zsh; by default, ntfy will only send notifications for commands lasting longer than 10 seconds and if the terminal is focused. It also offers features for process, emjoi, XMPP, Telegram, Instapush and Slack notification support.
Check out the following video that demonstrates some of ntfy functionality:
Step 1: How to Install Ntfy in Linux
Ntfy package can be installed using Python Pip as follows.
$ sudo pip install ntfy
Once ntfy installed, it can be configured using a YAML file located in ~/.ntfy.yml or in standard platform specific locations, ~/config/ntfy/ntfy.yml on Linux.
It operates via dbus, and works on most if not all popular Linux desktop environments such as Gnome, KDE, XFCE and with libnotify. Make sure you have required dependencies installed before using it as shown.
$ sudo apt-get install libdbus-glib-1-dev libdbus-1-dev [On Debian/Ubuntu]
$ sudo yum install dbus-1-glib-devel libdbus-1-devel    [On Fedora/CentOS]
$ pip install --user dbus-python
Step 2: Integrate Ntfy with Linux Shells
ntfy offers support for spontaneously sending notifications once long running commands complete in bash and zsh. In bash, it reproduces the function of zsh’s preexec and precmd functionality using rcaloras/bash-preexec.
You can enable it in your .bashrc or .zshrc file as below:
eval "$(ntfy shell-integration)"
After integrating it with the shell, nfty will send notifications on your desktop for any commands lasting longer than 10 seconds provided the terminal is focused, this is the default setting.
Note that terminal focus works on X11 and with Terminal.app. You can configure it via the --longer-than and --foreground-too flags.
Ignore Unnecessary Notifications
Imaginably, you can do away with unnecessary notifications when running interactive programs, this can be configured using the AUTO_NTFY_DONE_IGNORE env variable.
For instance, using the export command below, you will prevent the command “vim screen meld” from generating notifications:
$ export AUTO_NTFY_DONE_IGNORE="vim screen meld"
Step 3: How to Use Nfty in Linux
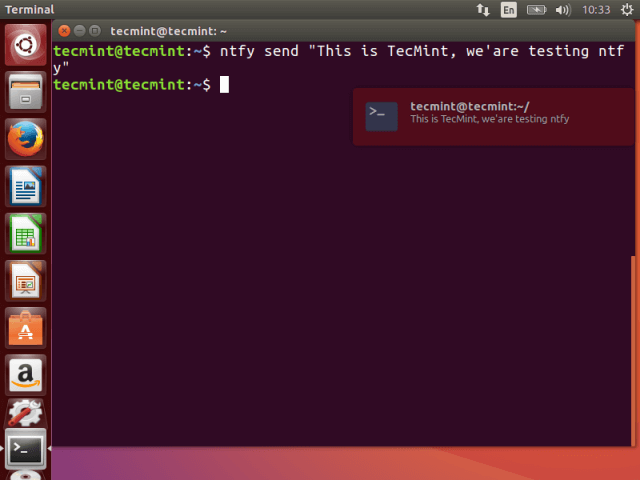
Once you have installed and configured ntfy, you can test it with a these examples:
$ ntfy send "This is TecMint, we’re testing ntfy"
The example below shows how to run a command and send a notification when it is done:
$ ntfy done sleep 5

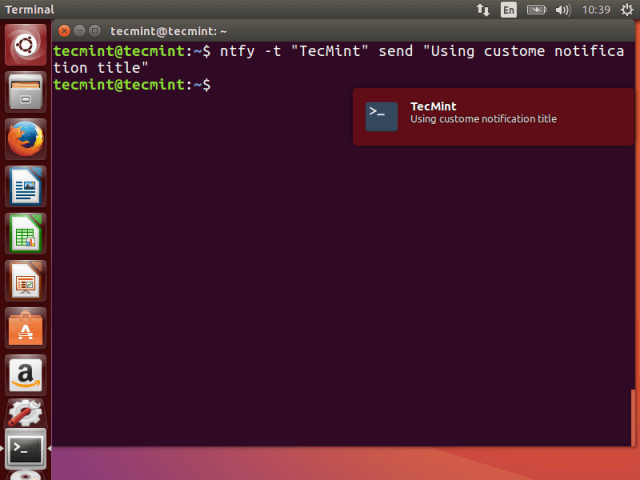
To use a custom notification title, set the -t flag as follows.
$ ntfy -t 'TecMint' send "Using custom notification title"
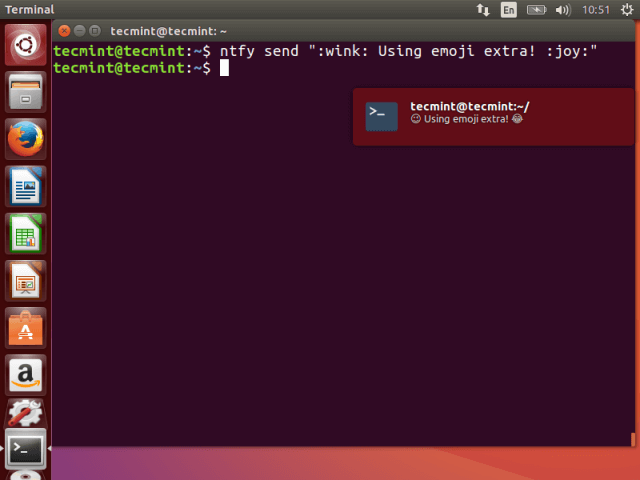
The example below will show an emoji for the particular code used.
$ ntfy send ":wink: Using emoji extra! :joy:"
To send a notification to the desktop once a process with the specified ID completes, use the example below:
$ ntfy done --pid 2099
You can view all notifications using notification indicator, run the commands below to install recent notifications indicator.
$ sudo add-apt-repository ppa:jconti/recent-notifications
$ sudo apt update && sudo apt install indicator-notifications
When the installation completes, launch the indicator from the Unity Dash, run a few ntfy commands and click on the icon from the panel to view all notifications.

To view a help message, run:
$ ntfy -h
Step 4: Install Additional Ntfy Features
You can install additional features but this calls for extra dependencies:
ntfy done -p $PID – requires installing as ntfy[pid].
$ pip install ntfy[pid]
emjoi support – requires installing as ntfy[emoji].
$ pip install ntfy[emoji]
XMPP support – requires installing as ntfy[xmpp].
$ pip install ntfy[xmpp]
Telegram support – requires installing as ntfy[telegram].
$ pip install ntfy[telegram]
Instapush support – requires installing as ntfy[instapush].
$ pip install ntfy[instapush]
Slack support – requires installing as ntfy[slack].
$ pip install ntfy[slack]
And to install multiple extra features using a single command, separate them with commas like so:
$ pip install ntfy[pid,emjoi,xmpp, telegram]
For an exhaustive usage guide, check out: http://ntfy.readthedocs.io/en/latest/
That’s all! In this article, we showed you how to setup and use ntfy in the mainstream Linux distributions. Use the feedback form below to share your thoughts concerning this article or else share with us info about any similar Linux utilities.


