In this article, we will show you how to create an ISO from a bootable USB drive in Linux. We will explain two ways to achieve this: via the command line interface (CLI) and a graphical user interface (GUI) program.
Create An ISO From A Bootable USB Drive Using dd Tool
dd is a commonly used command-line tool for Linux and other Unix-like operating systems, used to convert and copy files.
To create an ISO image from a Bootable USB Drive files, first you need to insert your USB drive and then find the device name of your USB using following df command.
$ df -hT
Sample Output
Filesystem     Type      Size  Used Avail Use% Mounted on
udev           devtmpfs  3.9G     0  3.9G   0% /dev
tmpfs          tmpfs     787M  1.5M  786M   1% /run
/dev/sda3      ext4      147G   28G  112G  20% /
tmpfs          tmpfs     3.9G  148M  3.7G   4% /dev/shm
tmpfs          tmpfs     5.0M  4.0K  5.0M   1% /run/lock
tmpfs          tmpfs     3.9G     0  3.9G   0% /sys/fs/cgroup
/dev/sda1      vfat      299M   11M  288M   4% /boot/efi
tmpfs          tmpfs     787M   56K  787M   1% /run/user/1000
/dev/sda5      ext4      379G  117G  242G  33% /media/tecmint/Data_Storage
/dev/sdb1 iso9660 1.8G 1.8G 0 100% /media/tecmint/Linux Mint 19 Xfce 64-bit
From the output above, you can clearly see that our attached USB device name is /dev/sdb1.
Now you can run the following command to create an ISO from a bootable USB drive as shown. Make sure to replace /dev/sdb1 with your USB drive and /home/tecmint/Documents/Linux_Mint_19_XFCE.iso with the full name of the new ISO image.
$ sudo dd if=/dev/sdb1 of=/home/tecmint/Documents/Linux_Mint_19_XFCE.iso
In the above command, the option:
- if – means read from specified FILE instead of stdin.
- of – means write to specified FILE instead of stdout.
Once done, you can verify the ISO image using following ls command as shown.
$ ls -l /home/tecmint/Documents/Linux_Mint_19_XFCE.iso

Create An ISO From A Bootable USB Drive Using Gnome Disks
Gnome Disks is a graphical tool used to manage disk drives and media in Linux. It is used to format and partition drives, mount and unmount partitions, and query S.M.A.R.T. (Self-Monitoring Analysis and Reporting Technology) attributes.
If you don’t have gnome-disk utility on your system, you can install it by running the following command.
$ sudo apt install gnome-disk-utility        #Ubuntu/Debian
$ sudo yum install gnome-disk-utility        #CentOS/RHEL
$ sudo dnf install gnome-disk-utility        #Fedora 22+
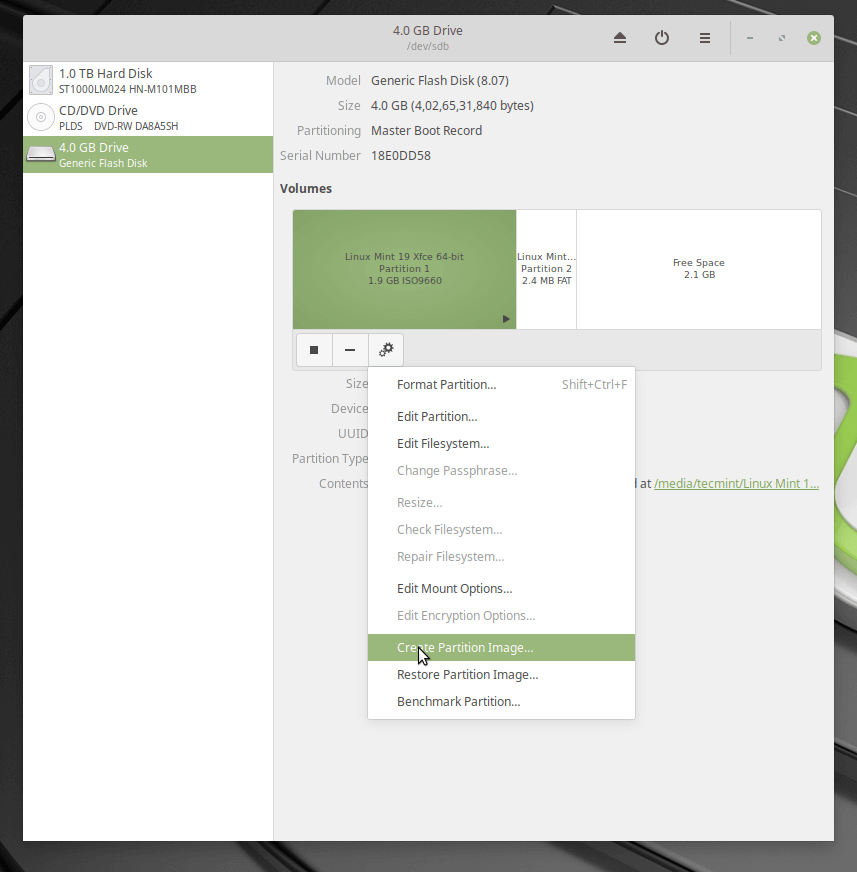
After successfully installing Gnome disk, search and open it from the system menu or dash. Then from the default interface, select the bootable device from the list of mounted devices on the left-hand pane, by clicking on it and click on disk options. Then click on Create Disk Image option as shown in the following image.
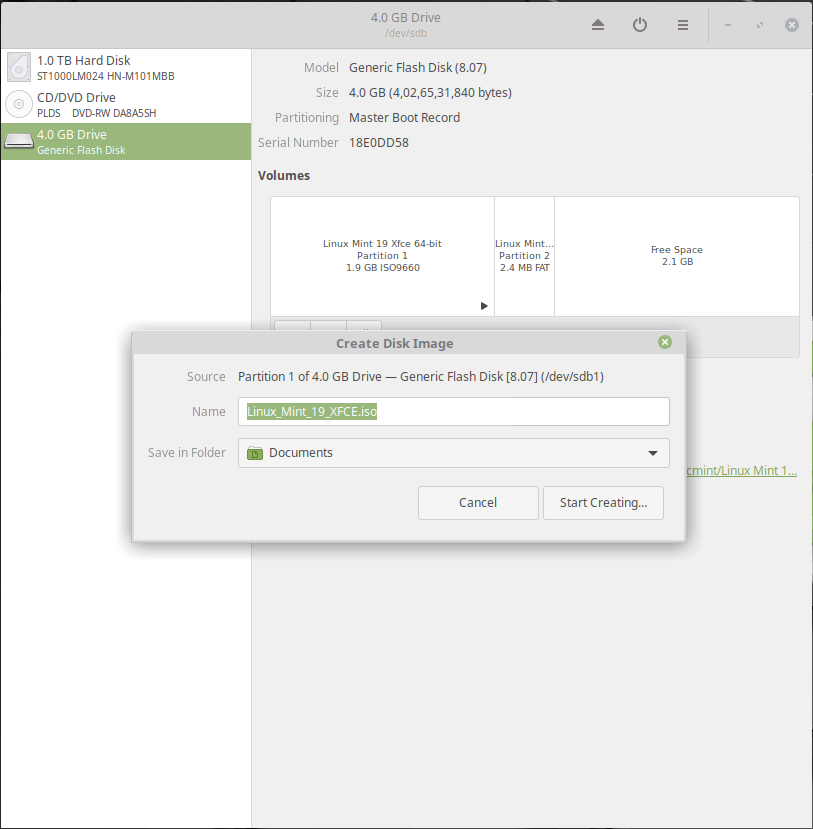
From the dialog window, set the name of the ISO file, its location and click Start creating. Then enter your password to open the bootable device and the process should start if the authentication is successful.
That’s it for now! In this article, we’ve explained two ways to create an ISO from a bootable USB drive in Linux. Use the comment form below to share your thoughts with us or ask questions.