How to Add or Remove Linux User From Group

Linux is by default a multi-user system (meaning many users can connect to it simultaneously and work), thus Linux user management is one of the fundamental tasks of a system administrator, which includes everything from creating, updating, and deleting user accounts or user groups on a Linux system.

In this short quick article, you will learn how to add or remove a user from a group in a Linux system.

TecMint Weekly Newsletter
Get the Learn Linux 7 Days Crash Course free when you join 34,000+ Linux professionals reading every Thursday.
Check your email for a magic link to get started.
Something went wrong. Please try again.

Check a User Group in Linux

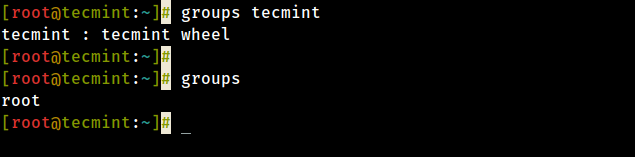
To find out what group a user is in, just run the following groups command and provide the username (tecmint in this example) as an argument.

# groups tecmint

tecmint : tecmint wheel

To find out the group of root user in Linux, just run the groups command without any argument.

# group

root
Check a User Group in Linux

Add a User to a Group in Linux

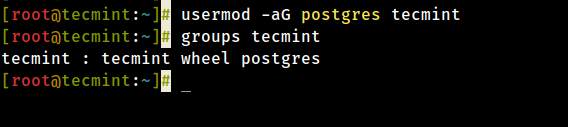
Before trying to add a user to a group, ensure that the user exists on the system. To add a user to a certain group, use the usermod command with the -a flag which tells the usermod to add a user to the supplementary group(s), and the -G option specifies the actual groups in the following format.

In this example, tecmint is the username and postgres is the group name:

# usermod -aG postgres tecmint
# groups tecmint
Add User to Group in Linux

Remove a User from a Group in Linux

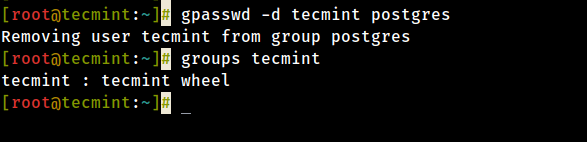
To remove a user from a group, use the gpasswd command with the -d option as follows.

# gpasswd -d tecmint postgres
# groups tecmint
Remove User from Group in Linux

Additionally, on Ubuntu and its derivatives, you can remove a user from a specific group using the deluser command as follows (where tecmint is the username and postgres is the group name).

$ sudo deluser tecmint postgres

For more information, see the man pages for each of the different commands we have used in this article.

$ man groups
$ man usermod
$ man gpasswd
$ man deluser

You will also find the following user management guides very useful:

If this article helped, with someone on your team.

TecMint Weekly Newsletter
Get the Learn Linux 7 Days Crash Course free when you join 34,000+ Linux professionals reading every Thursday.
Check your email for a magic link to get started.
Something went wrong. Please try again.
TecMint has been free for 14 years. Help keep it that way.
Google AI Overviews and tools like ChatGPT have cut into search traffic for independent tech sites like TecMint. Running this site costs over $2,000 every month for hosting, infrastructure, and paying authors to keep the content accurate and tested.

If this article helped you solve a problem, consider buying a coffee. It helps keep TecMint free, supports the authors, and keeps the project going.
☕ Buy Me a Coffee
Aaron Kili
Aaron Kili is a Linux and F.O.S.S enthusiast, an upcoming Linux SysAdmin, web developer, and currently a content creator for TecMint who loves working with computers and strongly believes in sharing knowledge.

Each tutorial at TecMint is created by a team of experienced Linux system administrators so that it meets our high-quality standards.

Got Something to Say? Join the Discussion...

Thank you for taking the time to share your thoughts with us. We appreciate your decision to leave a comment and value your contribution to the discussion. It's important to note that we moderate all comments in accordance with our comment policy to ensure a respectful and constructive conversation.

Rest assured that your email address will remain private and will not be published or shared with anyone. We prioritize the privacy and security of our users.

Free Course
Get a free Linux course before you go.
Subscribe to TecMint Weekly and get the Learn Linux 7 Days Crash Course free. Read by 34,000+ Linux professionals every Thursday.
Something went wrong. Please try again.
Check your email for a magic link to get started.