Gulp is a small toolkit that automates repetitive tasks. Those repetitive tasks are usually compiling CSS, JavaScript files or basically when you use a framework that deals with nonstandard JavaScript/CSS files you will want to use an automation tool that grabs those files, package them together and compile everything so your browser can easily understand it.
Gulp is useful for automating following tasks:
- Compiling JS and CSS files
- Refreshing browser page when you save a file
- Run a unit test
- Code analysis
- Copying modified files to a target directory
To keep track of all the files that you need to create a gulp file, develop your automation tool or automate tasks, you need to generate a package.json file. The file basically contains explanation of what is inside your project, what dependencies you need in order to make your project work.
In this this tutorial, you are going to learn how to install Gulp and how to automate some basic tasks for your projects. We are going to use npm – which stands for node package manager. It is installed with Node.js, and you can check if you have already installed Nodejs and npm with:
# node --version
# npm --version

If you don’t have it already installed on your system, I recommend you to check the tutorial: Install Latest Nodejs and NPM Version in Linux Systems.
How to Install Gulp in Linux
Installation of gulp-cli can be completed with npm using the following command.
# npm install --global gulp-cli
If you want to install the gulp module locally (for the current project only), you can use instructions below:
Create a project directory and navigate in it:
# mkdir myproject
# cd myproject
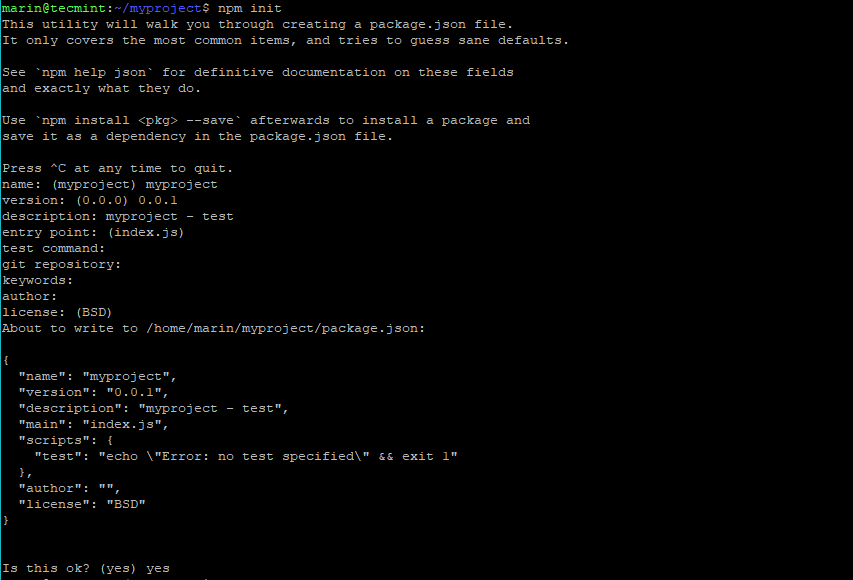
Next, use the following command to initialize your project:
# npm init
After running the above command, you will be asked a series of questions to give your project a name, version description and others. Finally confirm all the information you have given:
Now we can install the gulp package in our project with:
# npm install --save-dev gulp
The --save-dev option tells npm to update the package.json file with the new devDependencies.
Note that devDependencies need to be resolved during development, while Dependencies during run time. Since gulp is a tool that helps us in development, it needs to be resolved at development time.
Create Gulp File
Now let’s create a gulpfile. Tasks that we want to run will be found in that file. It is automatically loaded when using the gulp command. Using a text editor, create a file named gulpfile.js. For the purpose of this tutorial, we are going to create a simple test.
You can insert the following code into your gulpfile.js:
var gulp = require('gulp');

gulp.task('hello', function(done) {
        console.log('Hello world!');
        done();
});
Save the file and now try to run it with:
# gulp hello
You should see the following result:

Here is what the above code does:
- var gulp = require(‘gulp’); – imports the gulp module.
- gulp.task(‘hello’, function(done) { – defines a task that will be available from the command line.
- console.log(‘Hello world!’); – simply prints “Hellow world!” to the screen.
- done(); – we use this callback function to instruct gulp that our tasks has finished.
Of course the above was just a sample to show how the gulpfile.js can be organized. If you want to see the available tasks from your gulpfile.js, you can use the following command:
# gulp --tasks

Gulp Plugins
Gulp has thousands of plugins available, all providing different functionality. You can check them at Gulp’s plugin page.
Below we will use the minify-html plugin in a more practical example. With the function below, you can minify HTML files and place them in new directory. But first, we will install the gulp-minify-html plugin:
# npm install --save-dev gulp-minify-html
You can make your gulpfile.js look like this:
# cat gulpfile.js
Sample Output
// including plugins
var gulp = require('gulp')
, minifyHtml = require("gulp-minify-html");

// task
gulp.task('minify-html', function (done) {
    gulp.src('./src/*.html') // path to your files
    .pipe(minifyHtml())
    .pipe(gulp.dest('./dest'));
    done()
});
Then you can minify HTML files using following commands.
# gulp minify-html
# du -sh /src dest/

Conclusion
Gulp is a useful toolkit that can help you improve your productivity. If you are interested in this tool I highly recommend you checking its documentation page, which available here.


I think you should update the gulp tasks syntax since those are outdated and not recommended anymore (stable gulp 4 has been released a couple months ago)
Please encourage the use of gulp v4.x patterns for new development.