Update: For newer version of pfSense, check out Installation and Configuration of pfSense 2.4.4 Firewall Router.
pfSense is an open source network firewall/router software distribution which is based on the FreeBSD operating system. pfSense software is used to make dedicated firewall/router for a network and it is considered for its reliability and offers many features which mostly found in commercial firewalls. Pfsense can be included with many third party free software packages for additional functionality.
As we are using many popular firewall’s in industry level such as Cisco ASA, Juniper, Check Point, Cisco PIX, Sonicwall, Netgear, Watchguard etc.. We can use the pfsense in free of cost with rich web interface to configure all our network components. pfsense supports traffic shapper, virtual ip, Load balancer and much more. It has several Diagnostics tool by default.
This article will guide you through the basic instructions on how to install and configure pfSense version 2.1.5 in a home/office network and offers few basic recommendations which is based on my experience.
Hardware Requirements
- Pentium II Processor, 256MB RAM, 1GB of HDD Space, CD-ROM.
- 2 Ethernet Card’s, Pfsense ISO file.
My Environment Setup
Hostname	:	pfSense.tecmintlocal.com
WAN IP Address	:	192.168.0.14/24 gw 192.168.0.1
LAN IP Address	:	192.168.0.15/Default will be 192.168.1.1
HDD Size	:	2 GB
pSense Version	:	2.1.5
pfSense Installation and Configuration
1. First visit the pfSense download page and select your computer architecture and platform. Here I’ve chosen “i368 (32-bit)” as my computer architecture and platform as “LiveCD with installer“, but in your case it would be different, make sure to select and download correct architecture for your system.
2. After selecting the architecture and platform, you will get a list of mirrors to download, make sure to select nearest mirror link to download the image from there.
3. After download completes, the downloaded image must be burn to an CD/DVD media as an ISO image before we start using it. You can use any CD/DVD burning software to burn the image to CD/DVD media.
If incase, you don’t have an CD/DVD drive, you can use Unetbootin tool to create a Live bootable USB media or if you don’t want to follow all these procedures, just go the pfSense download page, there you will get pre-created bootable pfSense images for you USB media, just go there and grab the “Live CD with installer (on USB Memstick)“. Don’t forget to select USB console type before downloading…
4. Now switch on or reboot the target machine, place pfSense CD/DVD or USB stick and set the BIOS options to your booting method (CD/DVD or USB) according to your choice and choose the boot options by pressing a keyboard function keys, usually F10 or F12, pfSense will start booting….
5. As the pfSense starts booting, a prompt is displayed with some options and a countdown timer. At this prompt, press 1 to get install pfsense by default. If we don’t choose any option it will start to boot option 1 by default.
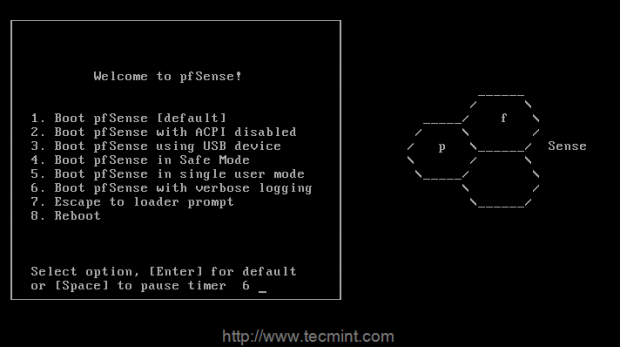
6. Next, press ‘I‘ to install fresh copy of pfsense, If we need to start a recovery use R, to Continue using Live CD choose C within 20 seconds count.

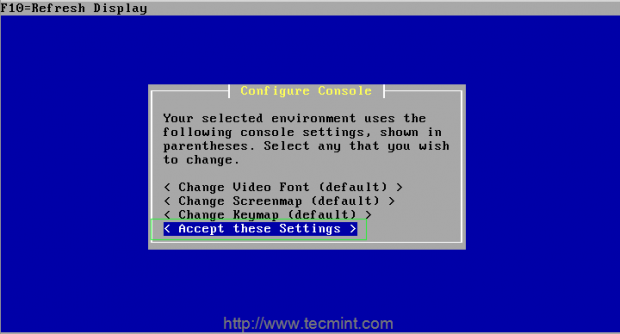
7. On the next screen, it will ask you to ‘Configure Console‘, just press ‘Accept these settings‘ to move forward for installation process.
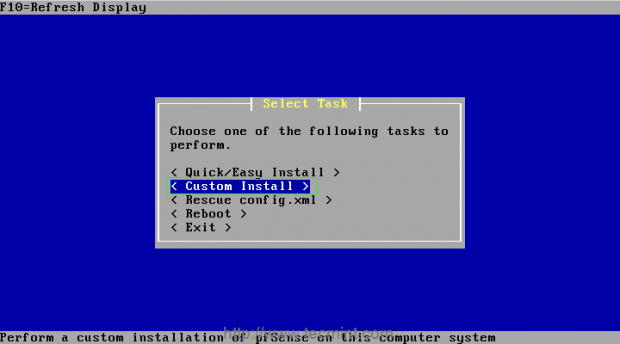
8. If you’re new to pfsense, choose ‘Quick/Easy Install‘ option to take make things easier or choose ‘Custom Install‘ to get advance options during installation process (recommended for advance users).
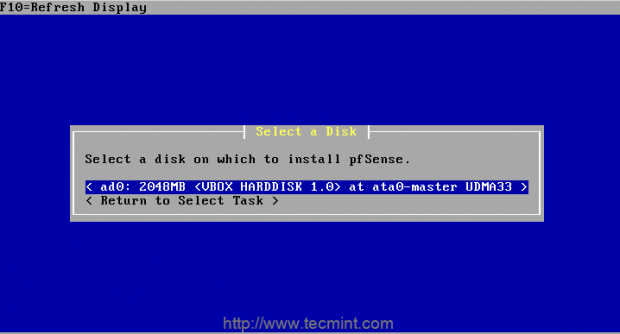
9. Next, select the disk on which you want to install pfsense.
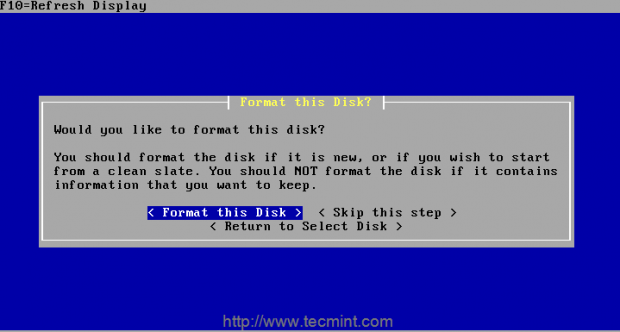
10. Next, it will ask you to format the selected disk, if it’s new disk you should format or if it contains any important data you should take backup before formatting the disk.
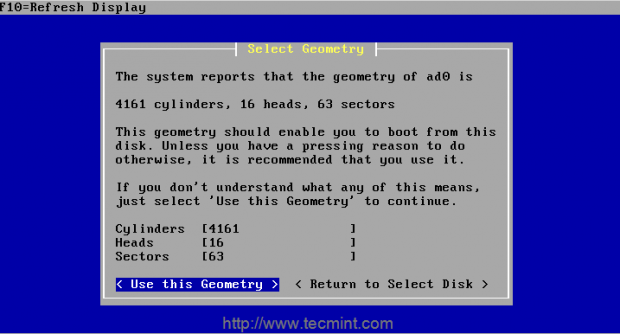
11. Choose the cylinder size and heads, here I’m using the default settings option ‘Use this Geometry‘ to move forward for the installation.
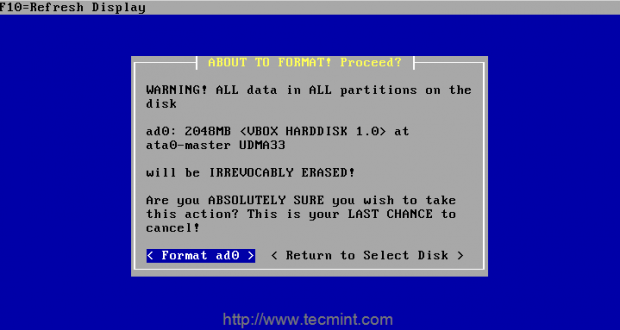
12. On the next step, it will prompt you a warning about disk format, if you sure about that the disk has no data, just move forward with the selection.
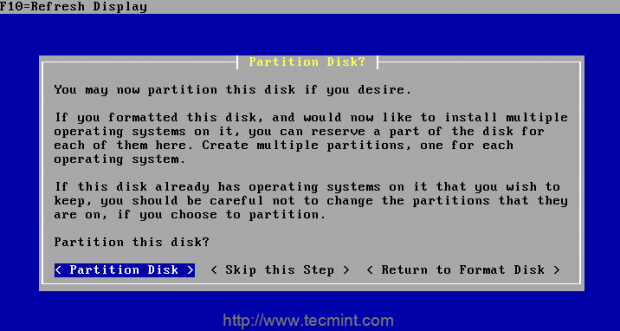
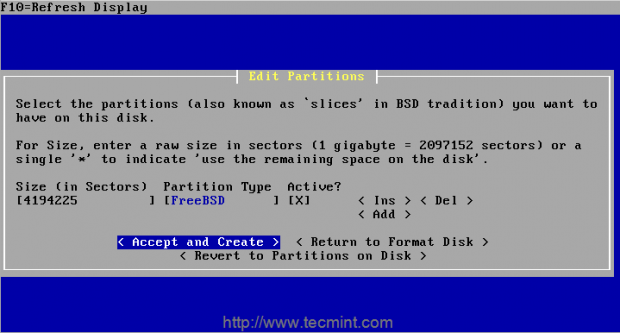
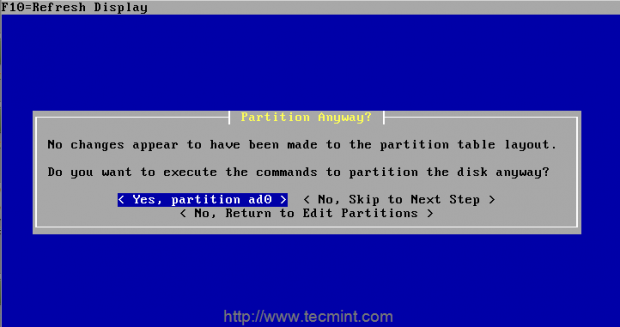
13. Now it’s time to partition the disk.
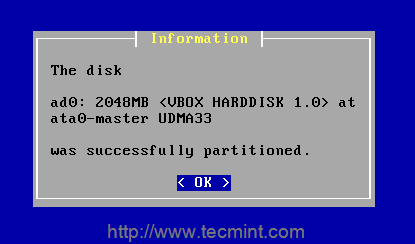
14. Next, select the partitions you want to have on the disk and enter a raw size in sectors, then accept and create the partition using the specified size or you may move forward with default options.
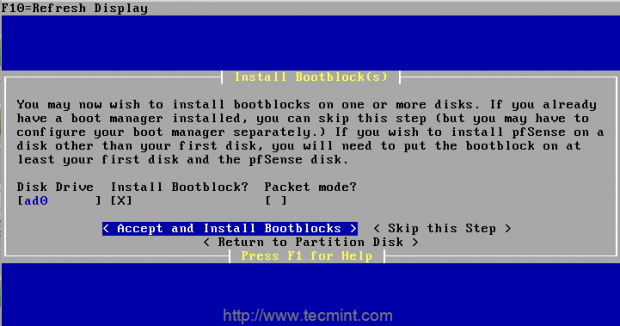
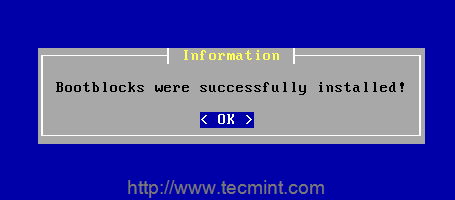
15. Once partition created successfully, it’s time to install bootblocks to get install the boot loader for pfsense.
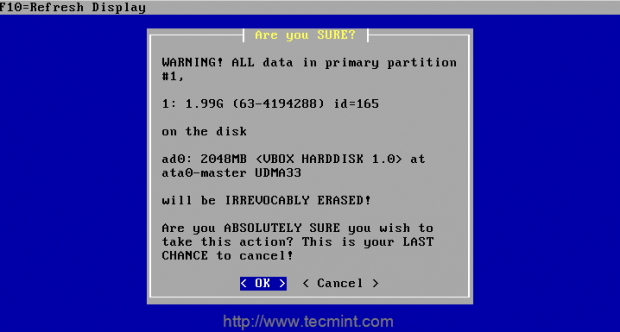
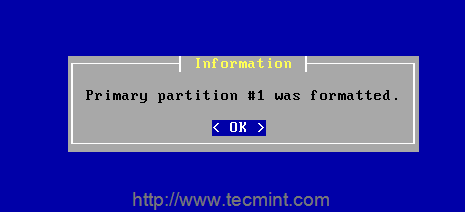
16. Select a partition to install the pfsense, which also called as slice in BSD.
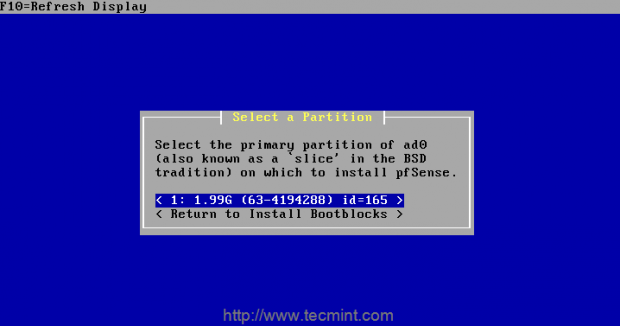
Note: A warning alert will be displayed, telling that during installing pfsense partition will be overwritten. Click on ‘Ok’ button to continue..
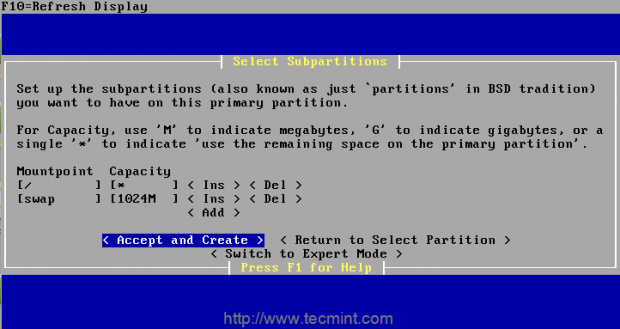
17. Next, setup the subpartitions (also well known as ‘partitions’ in BSD tradition) to create the subpartition.


Thanks for the tutorial. Now I have the following problem – when I select the disk with Windows 10 on which I would like to install pfSense, there is the following message: “This partition does not have a valid mountpoint (for the partition from which you intend to boot the operating system, the mountpoint should be “/”.
This message is shown even if I have formatted the partition with free space for pfSense as EXT4. So I don’t know how to prepare a disk with Windows for the right pfSense installation, ao that I could during boot choose Windows or pfSense. Please could You help me via my e-mail? thank You very much in advance. Regards Fanda Waldorf
Hello i’m a bit of a noob in this do you need to use the ip of the place you are at or use the ones in the tutorial?
Dear Sir,
My company need pfsense firewall install on my server..
@Shaikh,
You can check our Linux services here: https://www.fosswork.com
you can consult any third party solution provider to manage your firewall, i have worked with HEX64 InfoSolutions my experience was good with the HEX64.
After this what shall we do to make bridge mode.
Yes it is very helpful but a little bit of confusion when assigning IP address wan and LAN in pfsense.
How can you put Lan and Wan on same subnet? Lan and wan ip are the network Why is that?
I agree. I am a little confused by this as well. Shouldn’t you change you lan ip scheme to 192.128.1.x? I ask because I really think this is a good article and I am about to set this up in my lab, only it is being install on a Check Point UTM, and through console port. Thanks again!
I have a typo:
pfsense1(LAN: 192.168.1.3 WAN:221.132.18.251) and pfsense2 (LAN: 192.168.1.2 WAN: 221.132.18.253). I’m config sync with LAN ok but with wan can’t sync, please help me. Thank.
Thank you…..very much!
If I am making pfSense as a network controller/firewall, should i run this on a dedicated machine or I can run it on a virtual machine installed on a main server? Thanks in advance
@Lawrence,
Virtual machine is more enough if your environment is small.
After installing pfsense.. do i shutdown and reboot my machine with windows? Will the pfsense still be runing at the background or do i need a totally seperate system for this? If i dont need, How do i configure my windows os to communicate with the pfsense installed in the hard disk
@Thompson,
Are you trying this in your desktop machine? Pfsense is a router if you configure network through pfsense it should UP continuously for uninterrupted internet connection.
This might have been helpful if this site had not put ‘https://www.tecmint.com’ at the bottom of each graphic. As it is now, I can’t read the last line in some of the pics.
@William,
Sorry for trouble, could you please tell us where you’ve facing problem? and what text is not visible?
This tutorial is very good! I wish if you could do another configuring dual wan loadbalancing and failover
@Keddian Gilbert
Please have a note on below Link for Dual LAN and failover
https://www.tecmint.com/how-to-setup-failover-and-load-balancing-in-pfsense/
This is good Article and I have setup Pfsense by using this article…
Thanks for your feedback, Happy to see that it works good for you..
I just heard about pfSense a couple of days ago, and that its great for all kinds of uses, including home networks. What kind of device should I install it on if I want it to cover my whole network? Can I install it on a router or what?
1. How is your network size ?
2. You can’t install in a Router instead you can use a old Celeron or P II machines.
@DJ,
Apologies for the delay reply, Can you provide me the details how many hosts are available in your network?
Dear Admin,
This is very help full for those want to install pfSense. I want to know that can we use pfSense
free of cost and without any license in corporate network.
For Corporate network they are providing dedicated hardware, But open source can be used but there will be some performance issue while large number of handling.
Great topic, Will install pfsense shortly on an older dl360 g4 see how it works
Hi Sir,
Just want to ask what if I have a static WAN Ip and gateway from my ISP, what should be my LAN settings?
Thanks in advance
Great to see an article about pfsense. I think pfsense is often overlooked by Linux users. I have alternated using pfsense and ipfire for my home network. I use HP thin clients with expansion chassis for dual intel gb nic. (In the past I used older thin client with bulit in pci slot.) I have found both firewalls work very well in flash install. I currently use ipfire only because it allowed me to turn the built-in wifi into an access point. (I could not figure out how to do this with pfsense). Maybe you could future articles about flash install and configuration of pfsense for other readers? Thanks!
@Rick,
This is just the part one of the series, ther are more advance articles on pfSense to come under this series..stay tuned..