Android (x86) is a project which aims to port the Android system to Intel x86 processors to let users install it easily on any computer, the way they do this is by taking an android source code, patching it to work on Intel x86 processors and some laptops and tablets.
In this article, you will learn how to install the latest version of Android OS on your VirtualBox platform on Linux. If you want, you can also install Android directly on your Linux, Windows or Mac system.
Step 1: Install VirtualBox in Linux
1. VirtualBox is available to install easily via official repositories in most Linux distributions, to install it on Debian-based Linux distributions run the following commands.
First, add the following line to your /etc/apt/sources.list file and according to your distribution release, make sure to replace '<mydist>' with your distribution release.
deb [arch=amd64] https://download.virtualbox.org/virtualbox/debian <mydist> contrib
Then import public key and install VirtualBox as shown.
$ wget -q https://www.virtualbox.org/download/oracle_vbox_2016.asc -O- | sudo apt-key add -
$ wget -q https://www.virtualbox.org/download/oracle_vbox.asc -O- | sudo apt-key add -
$ sudo apt-get update
$ sudo apt-get install virtualbox-6.1
For other Linux distributions like RHEL, CentOS, and Fedora, use the following article to install Virtualbox.
Step 2: Download and Install Android in Virtualbox
2. This is an easy step, go to the Android-x86 project and grab the latest Android version of Android-x86 64-bit ISO file for your architecture.
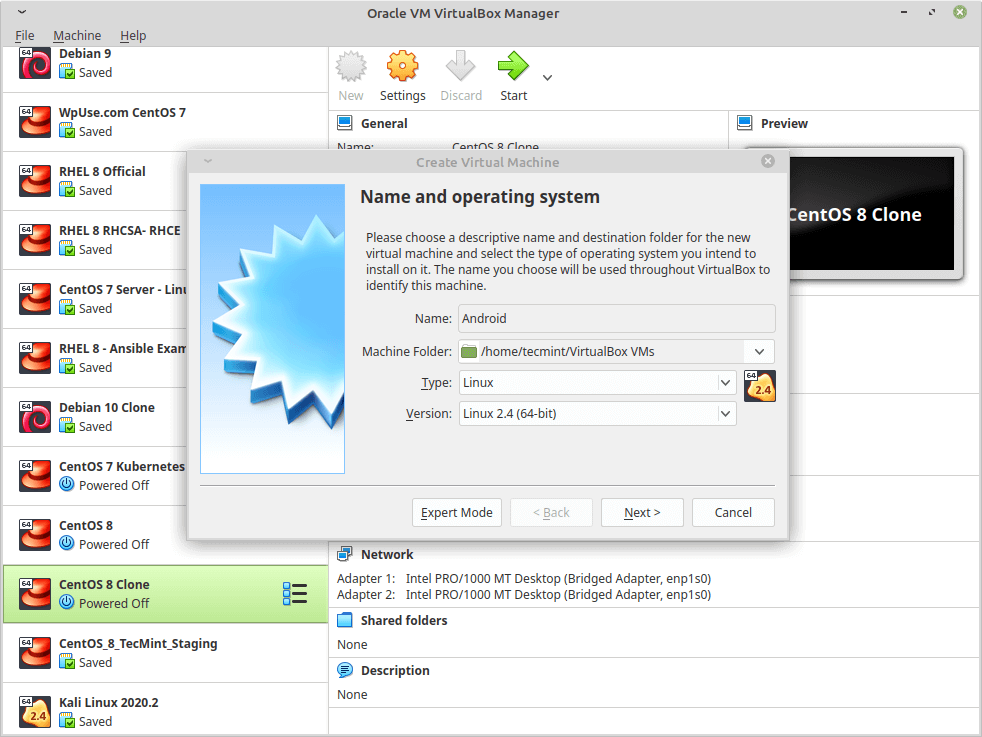
3. To install Android on VirtualBox, you need first to boot from the .iso image that you downloaded, to do so, open VirtualBox, Click on new to create a new virtual machine, and choose the settings as follows.
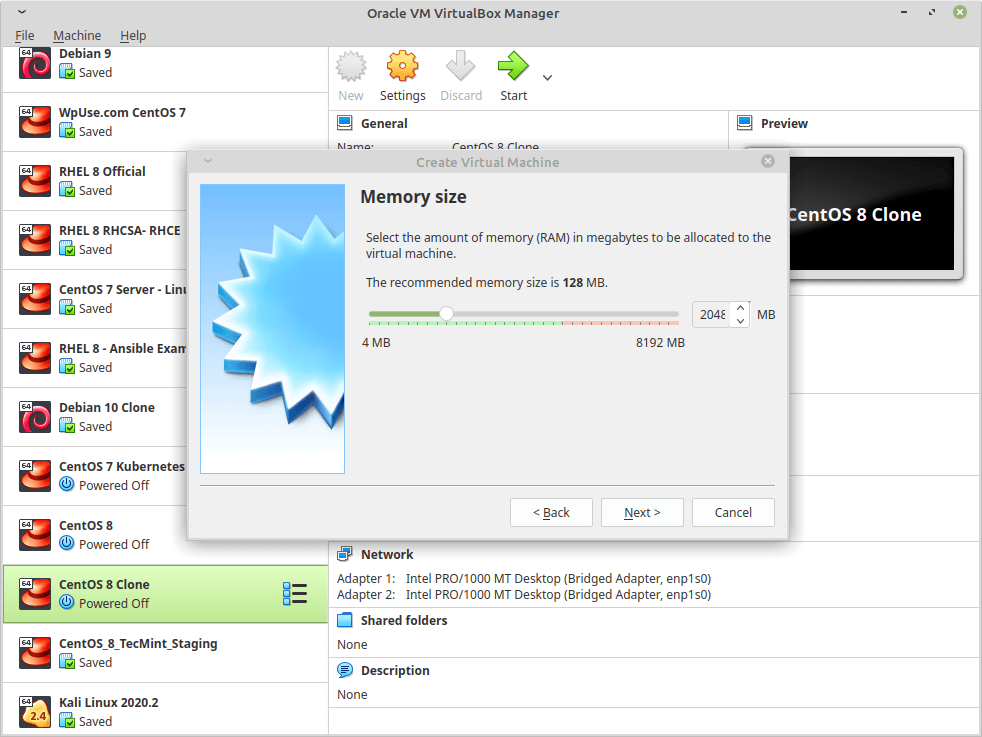
4. Then it will ask you to choose a Memory size for the machine, Android needs 1GB of RAM to work perfectly, but I will choose 2GB since I only have 4GB of RAM on my computer.
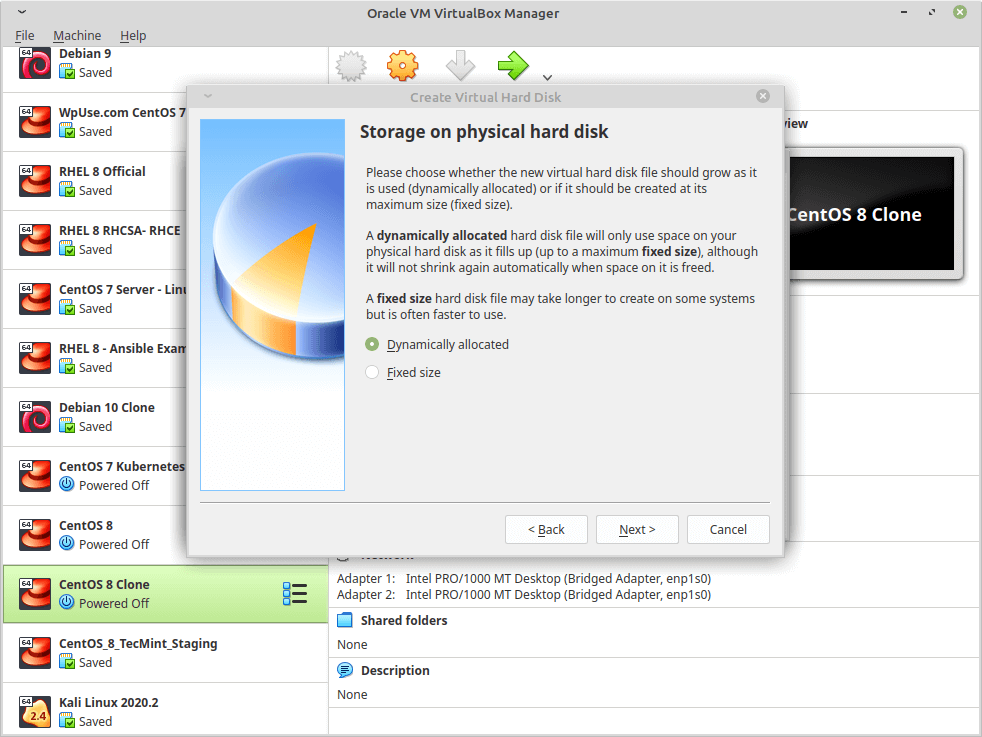
5. Now select “Create a virtual hard drive now” to create a new one.

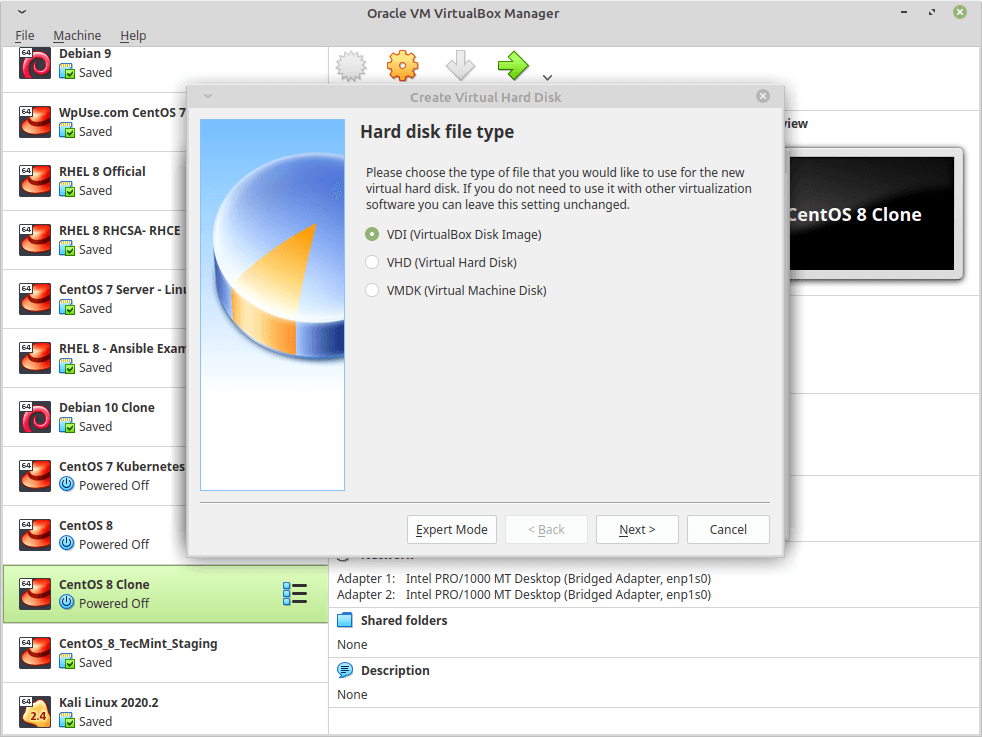
6. It will now ask you for the type of the new virtual hard drive, select VDI.
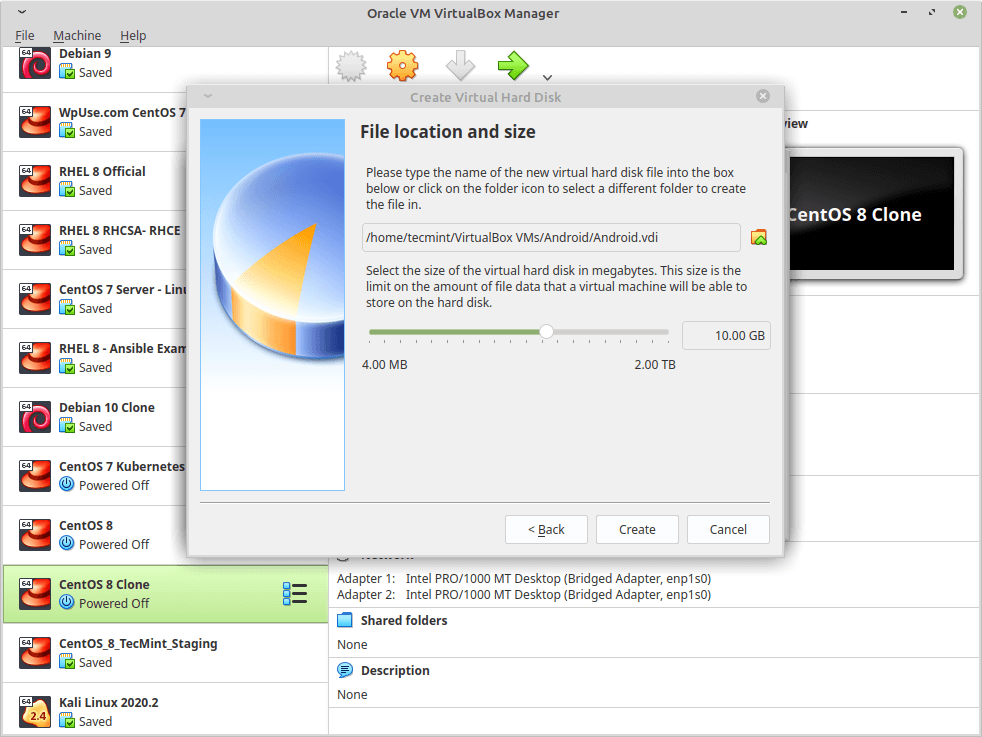
7. Now choose the size of the virtual hard drive, you may choose any size you want, no less than 10GB so the system can be installed correctly beside any future apps that you want to install.
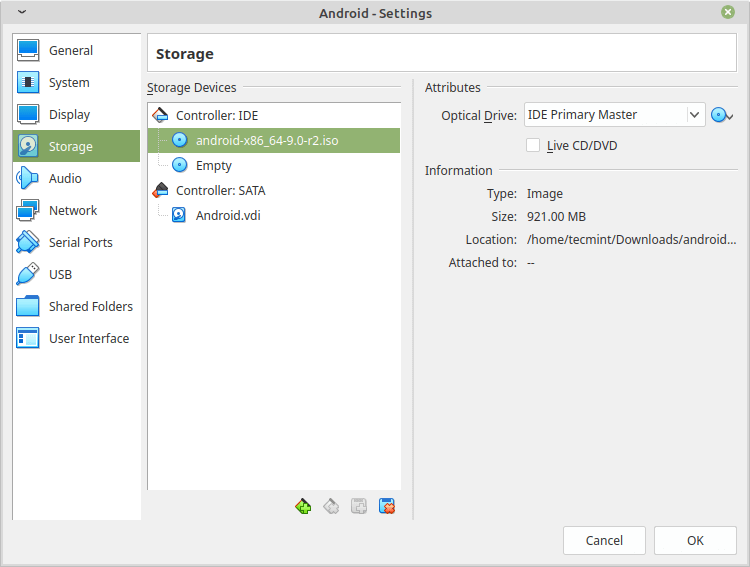
8. Now that’s your first virtual machine is created, now to boot from the .iso file that you downloaded, select the virtual machine from the list on the left, click on Settings, and go for “storage”, do as follow, and select the .iso image of Android.
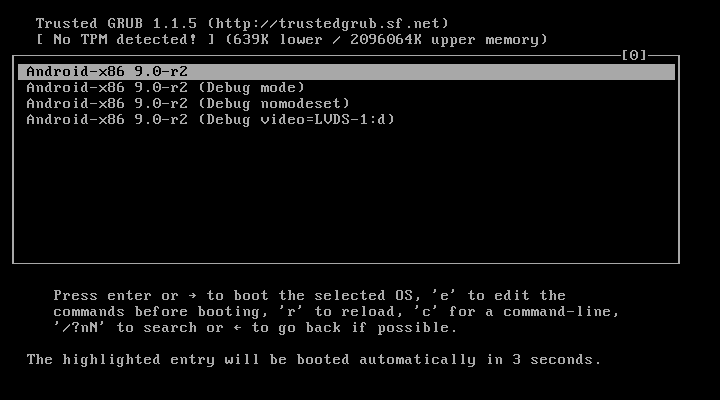
9. Click on OK, and start the machine to boot the .iso image, choose “Installation” to start installing the system on the virtual machine.

10. Please select a partition to install Android-x86.
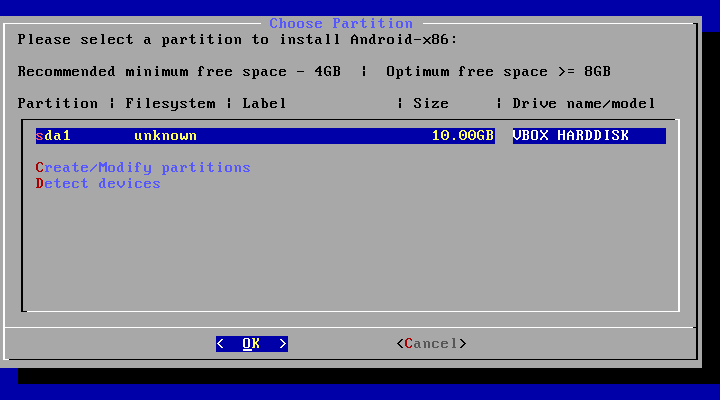
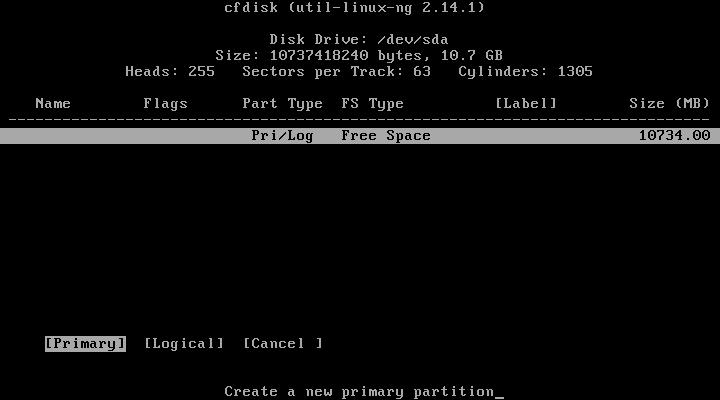
11. Now you will be prompted cfdisk which is a partitioning tool that we will use to create a new hard drive, so we can install android on it, click on “New”.
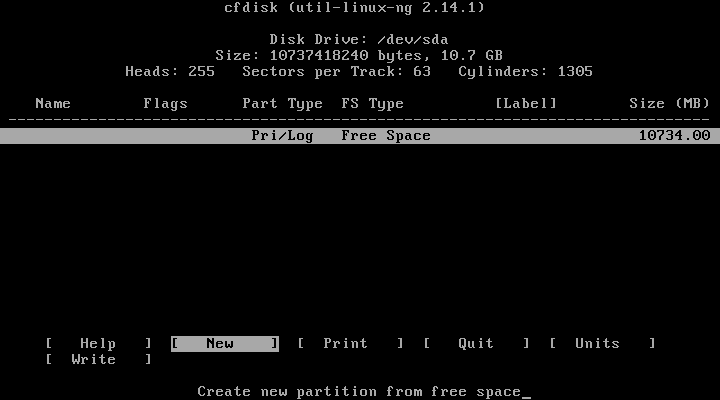
12. Choose “Primary” as partition type.
13. Next, select the size of the partition.

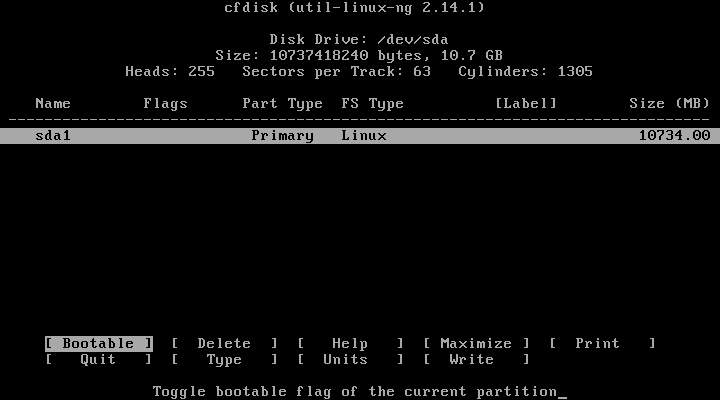
14. Now, we have to make the new hard drive bootable in order to be able to write changes to the disk, click on “Bootable” to give the bootable flag to the new partition, you won’t notice any changes in fact but the bootable flag will be given to that partition.
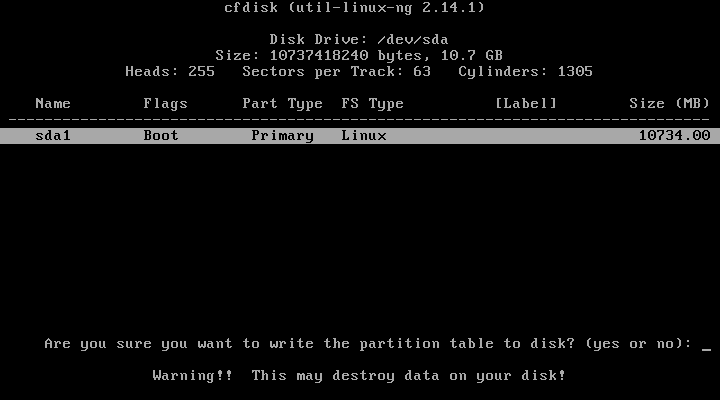
15. After that, click on “Write” to write the changes to the hard drive.

16. It will ask you if you are sure, write “yes”, and click on Enter.
17. Now that’s our new hard drive is created, now click on Quit and you will see something like this, select the partition that you created before in order to install android on it and hit Enter.

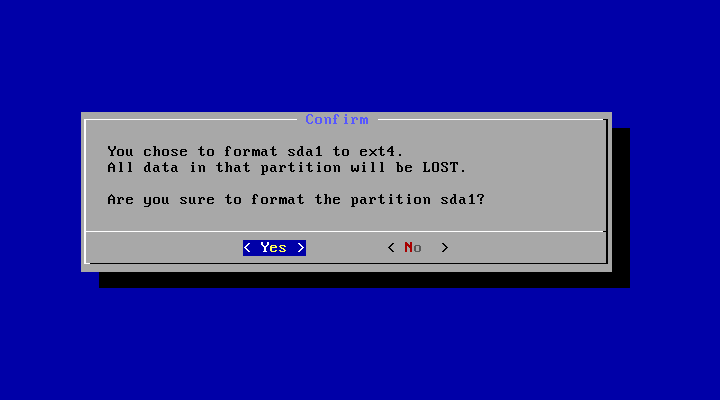
18. Choose “ext4” as a filesystem for the hard drive and format.

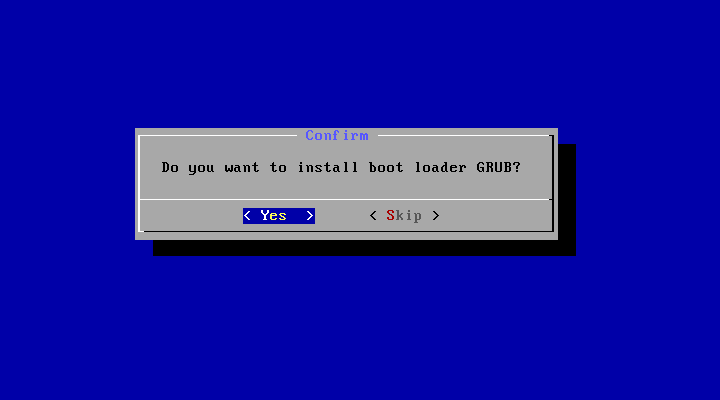
19. You will be asked now if you want to install GRUB bootloader, of course, you will select Yes because if you don’t, you won’t be able to boot the new system, so choose “Yes” and hit Enter.
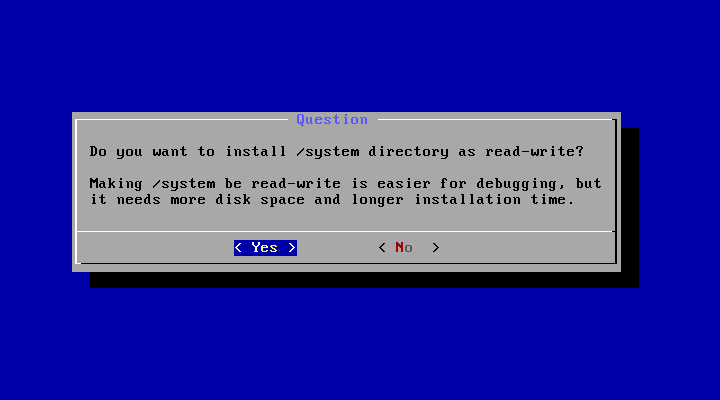
20. Finally, you will be asked if you want to make the /system partition writeable, choose Yes, it will help in a lot of things later after you install the system.
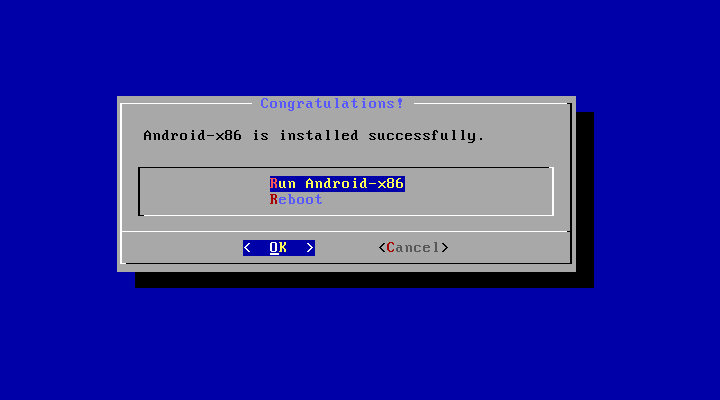
21. The installer will start the installation process after the installer finishes the job, choose Reboot.
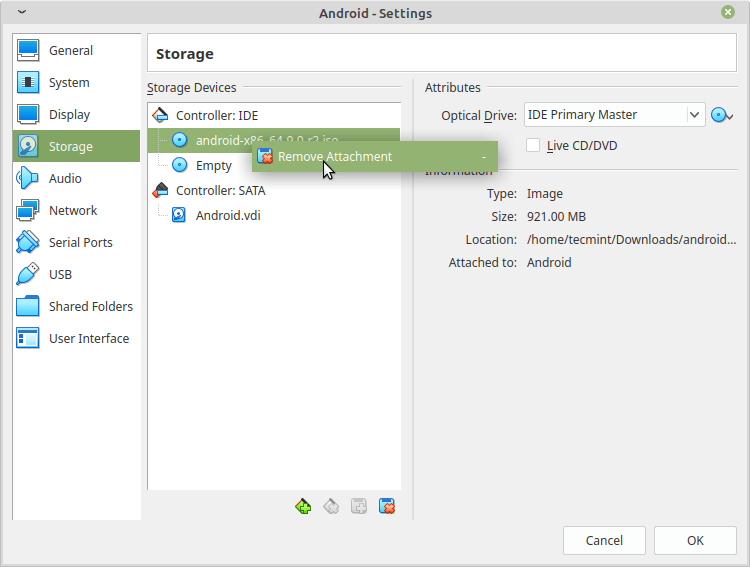
22. Now that’s we installed Android on our hard drive, the problem is now that VirtualBox will keep loading the .iso image file instead of booting from the virtual hard drive, so to fix this problem, go to Settings, under “storage” select the .iso file and remove it from the booting menu.
23. Now you can start the virtual machine with the installed android system.
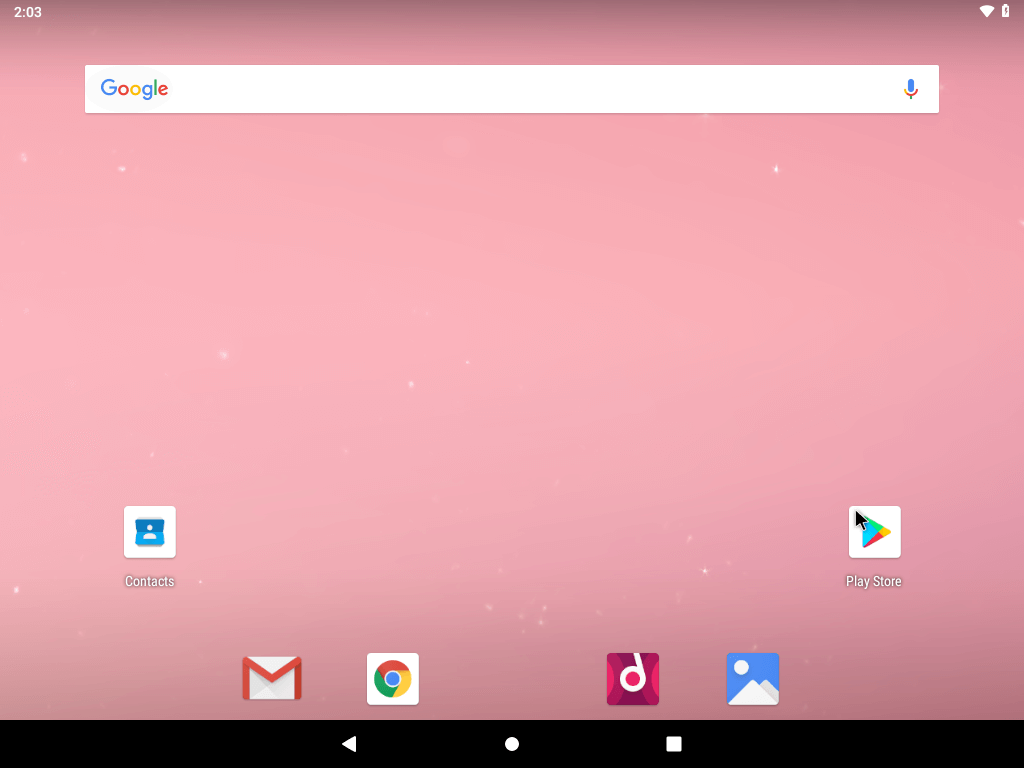
Installing Android x86 will be good for you if you don’t have a smartphone and you want to use the Play Store apps easily, have you ever tried to install android x86? What were the results? Do you think that android may become a “real operation system” targeting PCs in the feature?
Why use VDI (virtual disk image) instead of VHD (virtual hard disk)?
How do I create more than one partition for the Android machine?
Do all partitions need to be in EXT4 format?
Thank you.
There is a big missing part in your article about install apps and games from the Google store. In order to do that we need to install an arm bridge called ‘houdini‘ and I am surprised how little people talk about that.
Android x86 brings a bash script in /system/bin/enable_nativebridge that helps you to set up Houdini. In my case, I had to download the houdini.sfs manually from http://dl.android-x86.org/houdini.php?v=9_y, (9_y) changes depending on the Android version and architecture, and place it in where the script was failing to find Houdini, and later activate the setting to enable arm.
Thanks for Article, but some things are going wrong. I followed all steps, mentioned above, but at the time of booting from the Hard disk.
I am getting messages like this.
What command I should write after:
so that it boots finally from hard disk
any suggestion ? … thanks in advance
@Rakesh,
Are you installing Android on VirtualBox? if yes, please enable “VBoxVGA” under Settings –> Display –> Graphic Controller.
You know right, that not all games support x8 platform. Not the best solution in regards to gaming, one should try emulators like Anbox, Shashlik, Genymotion, etc. I prefer genymotion over others as I have been using for 3+ years and looks most stable to me.
Hi, first of all, nice guide!
My doubts/issues come in the cfdisk part. I’ve downloaded the latest version and it comes with cgdisk instead. (No clue about the differences)
So in the 9th step, I’ve chosen to use the whole disk from the advanced options.
I have already installed Android x86 on several PCs directly via a bootable USB stick. Mounted with the RUFUS app. You just have to start the pc directly on the bootable key, select the hard drive you want to format, and start the installation!
It’s a good operating system that could use some improvement. Easy and intuitive for the elderly or those who are new to computers. Where again for people who do not have the financial means to afford big pc, it is even in my opinion a solution to reuse old pc and break the digital divide of many countries without access to computer science!
When you said that you chose 2gb because your computer only has 2gb I think that you got confused.
If your computer only has 2gb of ram then you should choose 1gb for the virtual machine.
@Aaron,
Thanks corrected in the article…
I want to ask can the virtual android x86 recognize as phone or when i download the app from appstore it will show that i download it from virtual machine?
I’m having a ‘Connecting’ screen that won’t go away(its after the WiFi screen)…….And as for the kernel panic…..had it once…..all you need to do is enable virtualization technology in your BIOS settings
hi, i am not tech savvy, so forgive my lack of tech knowledge. i am running ubuntu mate, 14.04, trusty 32bit, memory 1.9gb, processor amd athlon 64 processor 3500+, its a relic system i believe a 10 yr old one. now coming to my issue, i am unable to go pass the step 9, after choosing installation in step 9. it keeps looping and rebooting. kindly advice.
Is it posible to run Android X86 as an instance of User Mode Linux? If this is true, it would be more faster or less faster than VirtualBox solution, and why?
Many thanks for your article.
David.
I’ve tried this a couple of times now but never got it to work for some reason. I have loads of RAM and disc and am running virtual box on ubuntu 14.04 on a couple of laptops.
I seem to get a kernel panic and then just a reboot this attempt on this laptop. Previous attempt got to the android splash screen but then android bootlooped. Will keep on trying as it would be fun to explore the capabilities so any tips from anyone who managed to resolve this appreciated.
Which games do actually work please?
Is this distribution with integrated libhoudini? (arm emulator)
Sorry i don’t know exactly, some games may work and some may don’t.
You could try downloading it and installing it on any virtual machine program to test it.
When I get to the end of the installation it come up with connecting then .clients 3 Google generate 204 .name not
Am I the only one that experiences errors/crashes when doing anything requiring 3d graphics or trying to access the gallery? Its also still really choppy for me. My video memory is maxed at 128 and tried 256 as well. Ram set at 2048. My host is windows 8.1 with Intel hd4400. Any insight on this is appreciated.
Well, the release in the article is an “RC” which is not very stable, try downloading this new release:
http://www.android-x86.org/releases/releasenote-4-4-r2
This actually works and is very easy to set up. Cheers and thanks!
Thanks Hanny, this is a great tutorial – the pictures saved me a lot of guesswork. Running very well on Fedora 21 on a Dell laptop with i5 chip and Intel graphics. I gave it 1GB of RAM and 32GB of hard drive space. Thanks to @fgsfds for the tip on disabling mouse integration from the vbox “Machine” menu to get the mouse working – that’s a life saver.
Howdy. I am facing a problem. When i try to install on progress (45%) it gives error of space.
I gave it 16GB space.
Some help please.
Try creating a new virtual hard drive for it.
also, the release in the article is an “RC” which is not very stable, try downloading this new release:
http://www.android-x86.org/releases/releasenote-4-4-r2
How can we install apps on android(of pc’s virtual box) that are stored on my hard disk of my pc
Hello Suraj.
You can try uploading the .apk files into some services like Dropbox, and download them on the virtualbox android system and install them later.
How to Explore my Hard Disk on android Kit kat?
Hello Basudev.
You can’t do that, android Kit Kat won’t find any partitions except those on your virtual hard disk.
Thanks.
How to Explore my Hard Disk’s NTFS partition on android Kit kat?
Guys there is generic android x86 desktop version avalilable. do google search! it will work on maximum desktop pc and laptop. installation is very easy will be completed with in 2mins. all you have to do is download generic android x86 4.0 iso on xda site. do 2gb partition and format to fat32. now download universal usb creator or something which have an option to burn android on pendrive or sd card. after that reboot your pc set boot option to usb then your usb will get detected. install android with grub menu and increase disk space from 512 to 1999mb. after that install ppp widget to connect net from any device even from ur nokia mobile. for whats app install lower version and replace the app with latest vesion will work. enjoy for supported apps and games use trashbox.ru site and search for apps and games for android x86. they have more stuff than any one.
Install is not working for me. Getting a kernel panic after following all the instructions and clicking Start within VirtualBox.
Hello Chris.
Did you check the MD5 of the ISO file you downloaded? Also, did you install the system correctly on the hard drive?
I can’t get x86 kit kat to reboot after I shut down. Any help would be awesome. Thank you!
Hello JAD.
Please provide more details about the problem so we can help you.
Hi, I have recently installed android 4.4.2 kitkat works on my acer aspire . This all went well but I WHEN android shutdown by ” button ” and I restart my laptop I come again to set the language and time . also should I enter my wifi here . then restart the laptop back well in android. I have android in ntfs ivp in ext3 will the problem be?
I also wonder how android on my laptop to shut properly.
Sincerely,
Andre Boom
You should just uncheck android iso file in the settings in the menu bar and after that u can shut down ur virtual machine.
Howdy. I’m a newbie. When installed on HP Win 8.1 x64, either gets stuck at ‘Android’ logo boot screen or distort /blinking screen. Installed on Think Pad R61i Win 7 Ult x86. all went well. Can’t access Play Store though all images and accounts linked – What do I do from here?
i install android kitkat on windows and vmware, but can’t install apps, show erorr that this os not config for install app??!!
Can you access Google Play and download apps from there with this program? I am looking for an alternative to BlueStacks now I’ve switched to Linux.
Yes you can, but some apps & games may not work for you.
Thanx a lot man ….u r genius and explained with each screenshot very helpful
god bless u bro :)
How do you get wi-fi on? I am trying to use BBC iPlayer and it asks for a network connection…
The Android x86 will not be able to run all the Android applications for example those which uses ARM binaries. Also the 3D support is quite bad in Android x86.
If you want run more applications then you need to run qemu and emulate ARM CPU, but this will make things go slower and you will lack the possibility for 3D support.
it also shows tsc calibratin failed
i tried to install games like zombie tsunami, the game cant run. is their anything that need to be setup to run games in virtualbox?
same problem in here with vmware
I just installed it on VirtualBox 4.3.12.0 in Windows 8.1 using
these same instructions,
Works great and the mouse works also.
hey, i just installed it on my pc but after reboot when i open android 4.4 rc 2 it shows a screen then some loading goes on and after that the screen starts blinking
To use mouse in Android-x86 inside Virtualbox you have to disable mouse integration (from menu or with Host+I shortcut, default Host key in Virtualbox is Right Control). After that you can use Host key to toggle keyboard and mouse capture state.
I’m just using Genymotion. It’s much better and more integrated than Android x86 solution.
I can’t see that installing Android on a PC (or in a VM, as i just did) will be very useful unless they can integrate a mouse pointer into the app. Without a touch screen, its hard to navigate and not very intuitive.
You’ve obviously not tried Android on a PC. I’ve tried it (both in VirtualBox and actual laptop hardware) and Android does have a mouse pointer. It works with any USB mouse and with the touchpad on laptops, too.
It works really well with the mouse. The roller in the middle will also scroll the desktop left and right.
The problem is that some apps are written for portrait and not landscape (e.g. BBC Radio Player which is a shame).
Bit hit and miss then, but Android itself looks brilliant, and is a worth edition to a dual (triple) booting system.
Thanks