OpenNMS (or OpenNMS Horizon) is a free and open source, scalable, extensible, highly configurable and cross-platform network monitoring and network management platform built using Java. It’s an enterprise-grade network service management platform currently being used for managing telecom and enterprise networks around the world.
Read Also: Install OpenNMS Network Monitoring in Debian and Ubuntu
OpenNMS Features:
- Supports service assurance.
- It supports device and application monitoring.
- It’s built on an event-driven architecture.
- Supports the collection of performance metrics from industry standard agents via SNMP, JMX, WMI, NRPE, NSClient++ and XMP simply through configuration.
- Allows for easy integration to extend service polling and performance data collection frameworks.
- Supports topology discovery based on SNMP information from industry standards such as LLDP, CDP and Bridge-MIB discovery.
- A provisioning system to discover your network and applications through manual, detected, or ReST API driven interfaces.
OpenNMS Requirements
- Operating System: Red Hat Enterprise Linux 7 or CentOS 7.
- Minimal Hardware: 2 CPU, 2 GB RAM, 20 GB disk
In this article, we will explain how to install and setup the latest OpenNMS Horizon network service monitoring software in RHEL and CentOS 7.x releases.
Step1: Installing Java and Setting JAVA_HOME
The first step is to install Java and its environment on your system, as OpenNMS Horizon requires at least Java 8 or higher version. We will install the latest OpenJDK Java 11 version using the following yum command.
# yum install java-11-openjdk
Once the Java installed, you can verify the version of Java on your system using the following command.
# java -version

Now set the Java environment variable for all users on boot time, by adding the following line in /etc/profile file.
export JAVA_HOME=/usr/lib/jvm/java-11
Step 2: Install OpenNMS Horizon
To install OpenNMS Horizon, add the yum repository and the import GPG key.
# yum -y install https://yum.opennms.org/repofiles/opennms-repo-stable-rhel7.noarch.rpm
# rpm --import https://yum.opennms.org/OPENNMS-GPG-KEY
Then install the opennms meta package together with all built-in dependencies such as jicmp6 and jicmp, opennms-core, opennms-webapp-jetty, postgresql and postgresql-libs.
# yum -y install opennms
Once opennms meta packages are installed, you can verify them in the /opt/opennms using the following commands.
# cd /opt/opennms
# tree -L 1
.
└── opennms
   ├── bin
   ├── contrib
   ├── data
   ├── deploy
   ├── etc
   ├── jetty-webapps
   ├── lib
   ├── logs -> /var/log/opennms
   ├── share -> /var/opennms
   └── system
Step 3: Initialize and Setup PostgreSQL
Now you need to Initialize the PostgreSQL database.
# postgresql-setup initdb
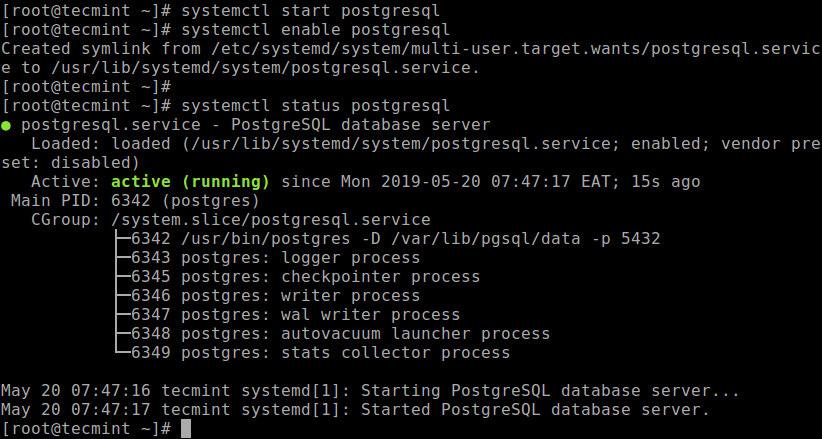
Next, start the PostgreSQL service for now and enable it to auto-start at system boot time, and check its status.
# systemctl start postgresql
# systemctl enable postgresql
# systemctl status postgresql
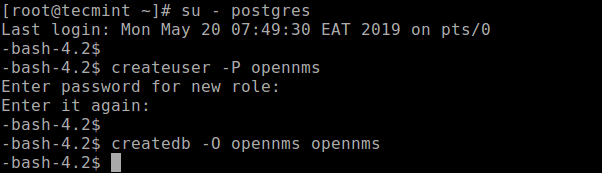
Now create access to PostgreSQL by switching to the postgres user account, then access the postgres shell and create an opennms database user with a password and create an opennms database which is owned by the user opennms as follows.
# su - postgres
$ createuser -P opennms
$ createdb -O opennms opennms
Set a password for Postgres super user.
$ psql -c "ALTER USER postgres WITH PASSWORD 'admin123';"
$ exit

Next, you need to modify the access policy for PostgreSQL in the /var/lib/pgsql/data/pg_hba.conf configuration file.
# vi /var/lib/pgsql/data/pg_hba.conf
Find the following lines and change the authentication method to md5 to allow OpenNMS Horizon accessing the database over the local network with a MD5 hashed password.
host    all             all             127.0.0.1/32            md5
host    all             all             ::1/128                 md5

Apply configuration changes for PostgreSQL.
# systemctl reload postgresql
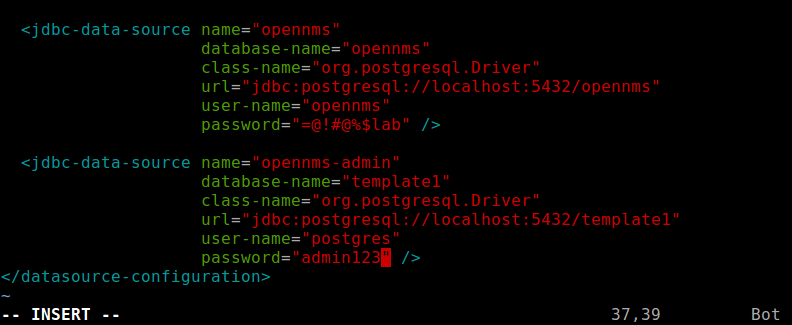
Next, you need to configure database access in OpenNMS Horizon. Open the /opt/opennms/etc/opennms-datasources.xml configuration file to set credentials to access the PostgreSQL database you created above.
# vim /opt/opennms/etc/opennms-datasources.xml
Then set credentials to access the PostgreSQL database.
<jdbc-data-source name="opennms"
                    database-name="opennms"
                    class-name="org.postgresql.Driver"
                    url="jdbc:postgresql://localhost:5432/opennms"
                    user-name="opennms"
                    password="your-passwd-here" />

<jdbc-data-source name="opennms-admin"
                    database-name="template1"
                    class-name="org.postgresql.Driver"
                    url="jdbc:postgresql://localhost:5432/template1"
                    user-name="postgres"
                    password="your-db-admin-pass-here" />
Step 4: Initialize and start OpenNMS Horizon
At this point, you need to integrate the default version of Java with OpenNMS Horizon. Run the following command to detect the Java environment and persist in the /opt/opennms/etc/java.conf configuration file.
# /opt/opennms/bin/runjava -s

Next, run the OpenNMS Installer which will initialize the database and detect system libraries persisted in /opt/opennms/etc/libraries.properties.
# /opt/opennms/bin/install -dis

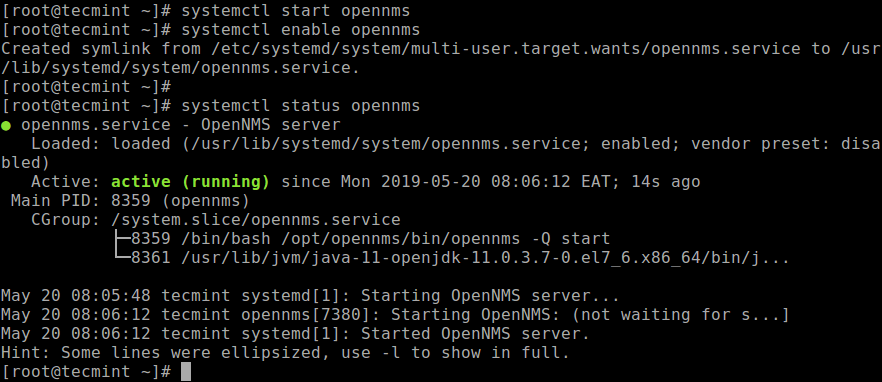
Then start OpenNMS horizon service via systemd for the mean time, enable it to auto-start at system boot and check its status.
# systemctl start opennms
# systemctl enable opennms
# systemctl status opennms
If you have a firewall running on your system, there is one critical thing you need to do, before you can access the OpenNMS Web Console. Allow access to the OpenNMS web console from remote computers via the interface port 8980 in your firewall.
# firewall-cmd --permanent --add-port=8980/tcp
# firewall-cmd --reload
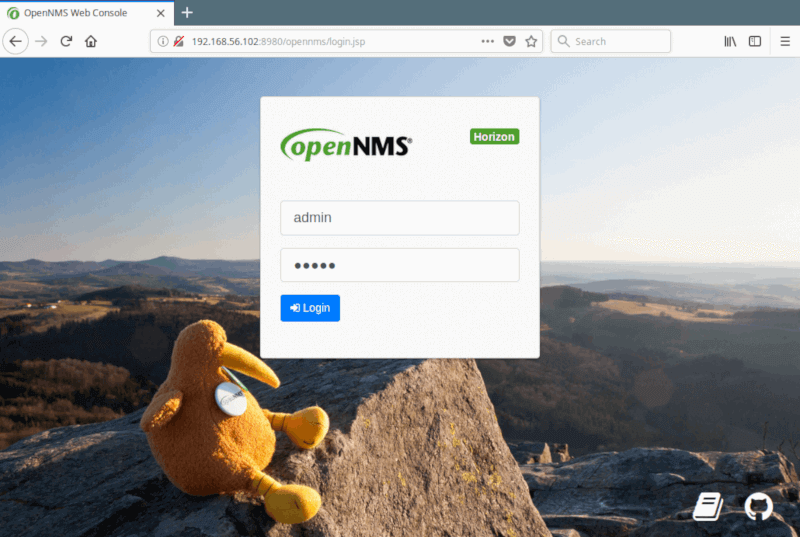
Step 5: Access OpenNMS Web Console and Login
Next, open your browser and type any of the following URL to access the web console.
http://SERVER_IP:8980/opennms
OR
http://FDQN-OF-YOUR-SERVER:8980/opennms
Once the login interface appears, the default login username is admin and the password is admin.
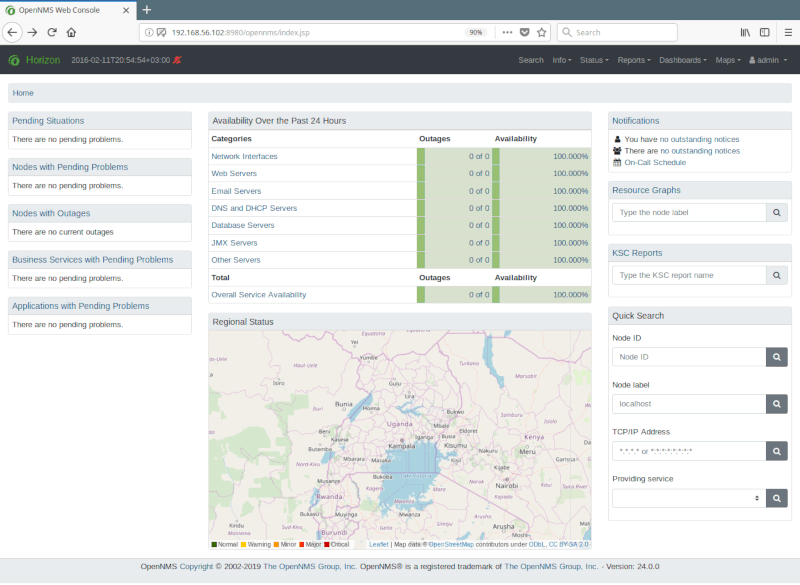
After login, you will land in the default admin dashboard. To ensure secure access to your OpenNMS web app, you need to change the default admin password. Go to the main navigation menu on “admin → Change Password, then under User Account Self-Service, click Change Password“.
Enter the old, set a new password and confirm it, then Click “Submit“. Afterwards, logout and login with your new password to use a more secure session.
Read Also: How to Add Hosts in OpenNMS Monitoring Server
Last but not least, you need to learn the few steps to setup, configure, and maintain an OpenNMS Horizon via the web console using OpenNMS Administrators Guide.
Read Also: 20 Command Line Tools to Monitor Linux Performance
OpenNMS is a free and fully open source enterprise-grade network service management platform. It is scalable, extensible and highly configurable. In this article, we have explained how to install OpenNMS in CentOS and RHEL 7. Do you have any questions or comments to share, use the feedback form below.