Written in C, MySQL is an open-source, cross-platform, and one of the most widely used Relational Database Management Systems (RDMS). It’s an integral part of the LAMP stack and is a popular database management system in web hosting, data analytics, and eCommerce applications to mention a few.
The current stable release is MySQL 8.0.25 and was released on May 11, 2021. Key highlights of the latest release include:
- InnoDB & XML enhancements.
- Transactional data dictionary.
- Enhanced support for Native JSON data and document store functionality.
- Common Table Expressions.
- Windows Functions.
- Error log improvements such as error numbering & reduced verbosity.
And so much more. You can check out the release notes for comprehensive coverage of all the features and enhancements.
In this guide, we examine how to install MySQL on Rocky Linux and AlmaLinux.
Step 1: Update Rocky Linux
When installing software packages, it’s always recommended to begin with the update of the system packages. This, in some cases, also upgrades the kernel whereupon a reboot is required.
Therefore, on the command-line, execute the following command to update the kernel and system packages:
$ sudo dnf update

Step 2: Enable MySQL Upstream Module
Moving along, we need to enable the MySQL 8.0 module that is provided by the AppStream repository. Presently, this is the only MySQL module that is provided and you can verify this by running the command:
$ sudo dnf module list mysql

To enable the MySQL module stream, run the command:
$ sudo dnf module enable mysql:8.0

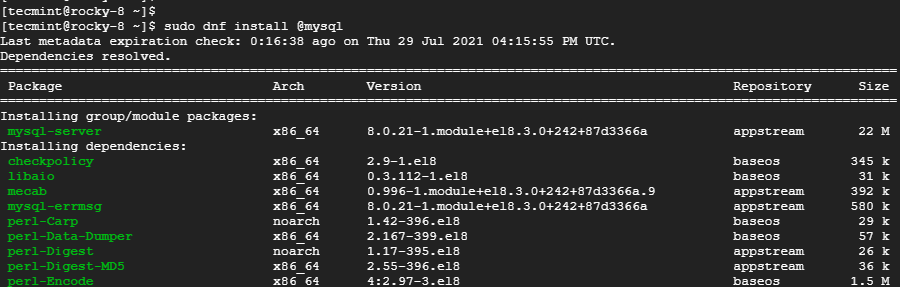
Step 3: Install MySQL 8.0 on Rocky Linux
With the module enabled, install MySQL 8.0 in Rocky Linux as follows:
$ sudo dnf install @mysql
Step 4: Enable and Start MySQL
To perform any actions with the MySQL database server, we need to start the service first. But first, let’s enable it to start on boot time as follows:
$ sudo systemctl enable mysqld
Then start the MySQL daemon.
$ sudo systemctl start mysqld
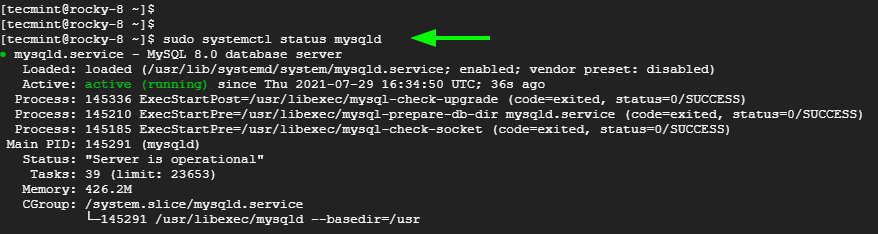
You can verify the MySQL is running by executing:
$ sudo systemctl status mysqld
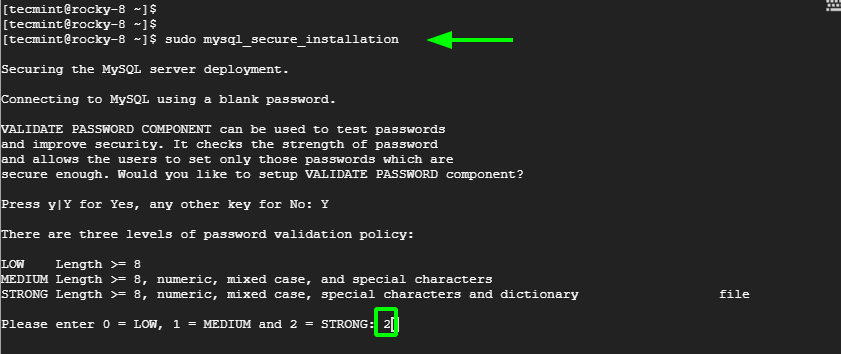
Step 5: Secure MySQL in Rocky Linux
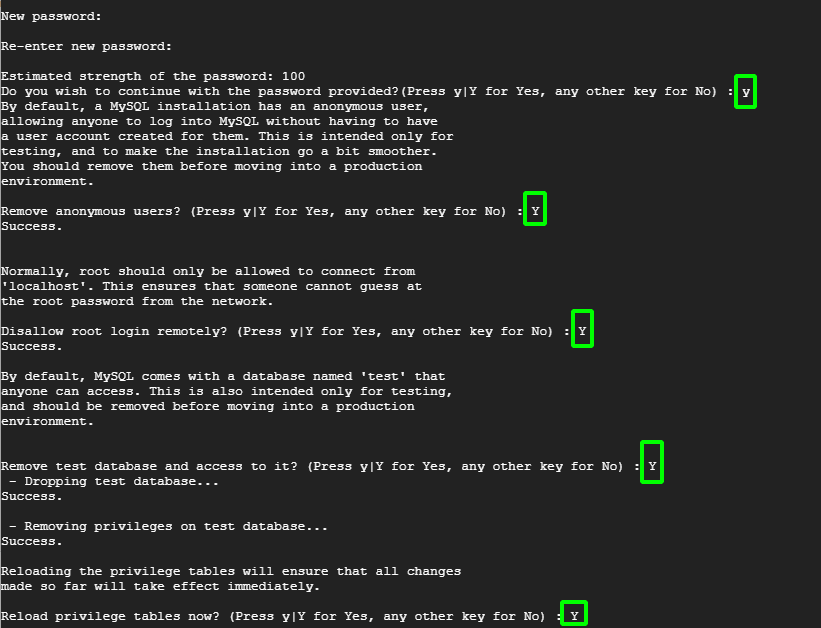
The final step is to secure the just installed MySQL database server. Why? you might ask. The reason is that by default, MySQL comes with default settings that are laden with loopholes that can be exploited by hackers. As such, we need to harden it by running the mysql_secure_installation script.
$ sudo mysql_secure_installation
When the script is executed, you will be prompted to use the VALIDATE_PASSWORD plugin which determines the level of password strength and lets users only set up robust passwords only.
To set up the plugin, Type 'Y' and press ENTER. The plugin provides 3 password policy levels namely: LOW, MEDIUM & STRONG.
Type 2 for STRONG password policy and press ENTER.
Next, be sure to set a strong MySQL root password in accordance with the password level selected.
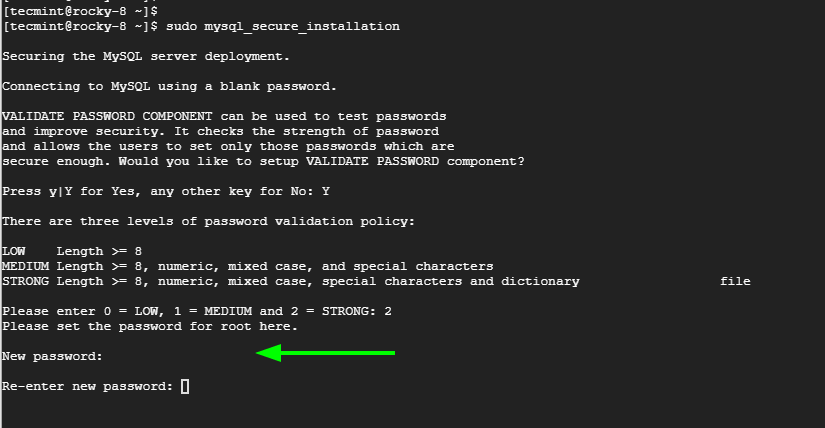
The plugin provides an estimate of the password strength, in this case, 100. This implies that we have satisfied the password strength requirement that demands a strong password to have a minimum of 8 characters which should be an assortment of numeric, mixed case, and special characters.
To proceed with the set password press ‘Y’ to continue. Otherwise, press ‘n’ to go back and make the required adjustments.
For the remaining prompts, press ‘Y’ to remove anonymous users, prevent the root user from logging in remotely, and remove the test database which should be purged before proceeding into a production environment.
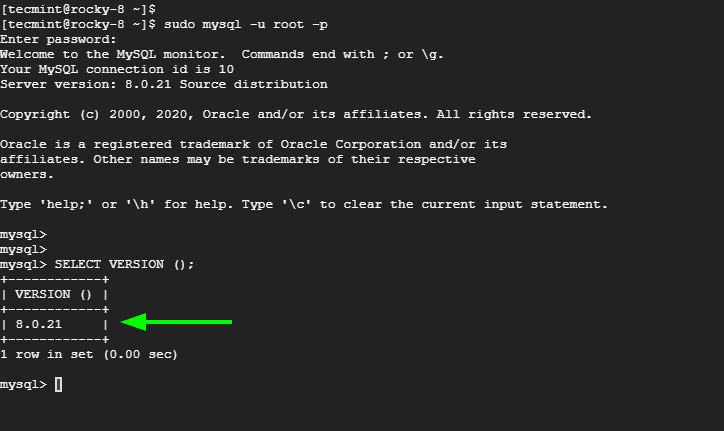
Step 6: Connect to MySQL in Rocky Linux
Once done, use the MySQL client to connect with the database as shown. Authenticate with the root password provided.
$ sudo mysql -u root -p
You can confirm the version by running the query:
mysql> SELECT VERSION ();
Installing the MySQL database on Rocky Linux or AlmaLinux is quite a simple and straightforward process. There’s no need to add any third-party repository since the AppStream repository already provides MySQL 8.0 module stream.


Hello!
I love tecmint, helps me a lot ever, to learn, to study, to read in English.
Nice and great Job.
Hi from Brazil!
Thank you