In this article, we’ll walk you through the step-by-step process of installing the latest version of PhpMyAdmin with Apache web server on RHEL-based distributions such as CentOS Stream, Fedora, Rocky Linux, and Alma Linux.
Table of Contents
What is PhpMyAdmin?
PhpMyAdmin is a popular and powerful web-based database management tool, and having the latest version ensures you have access to the most up-to-date features and security enhancements. By the end of this guide, you’ll be able to manage your MySQL or MariaDB databases with ease using PhpMyAdmin.
Prerequisites
Before we begin, make sure you have the following:
- Access to a RHEL, CentOS Stream, Fedora, Rocky Linux, or AlmaLinux system.
- Make sure you can either log in as the root user or have sudo privileges to install software.
- An existing LAMP stack, which includes Apache, MySQL/MariaDB, and PHP. If you don’t have LAMP, you can follow these steps to set it up.
Step 1: Update the System
Before installing any software, it’s crucial to ensure that your system is up to date by running the following dnf command.
sudo dnf update
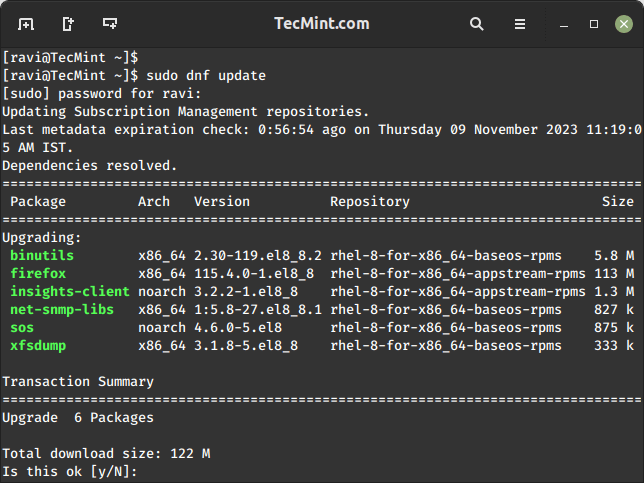
This will update all the packages on your system to the latest versions.
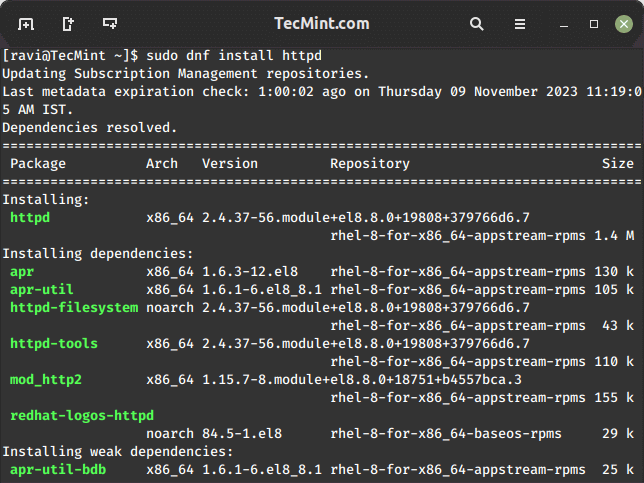
Step 2: Install Apache Web Server
PhpMyAdmin is a web-based tool, and to use it, you need to install the Apache web server using the following command.
sudo dnf install httpd
Once installed, start the Apache service and enable it to start at boot.
sudo systemctl start httpd
sudo systemctl enable httpd
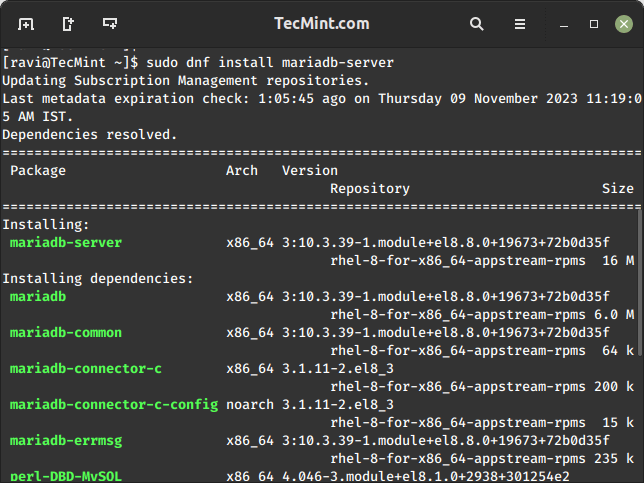
Step 3: Install MariaDB or MySQL
You will also need a database server. You can choose to install either MariaDB or MySQL, but we will go with MariaDB in this example.
sudo dnf install mariadb-server
Once installed, start the MariaDB service and enable it to start at boot.
sudo systemctl start mariadb
sudo systemctl enable mariadb
Next, secure your MariaDB installation by running the script, which will prompt you to enter a password for the root user, disallow remote root logins, and remove anonymous users. It will also remove the test database, which by default can be accessed by anonymous users.
sudo mysql_secure_installation

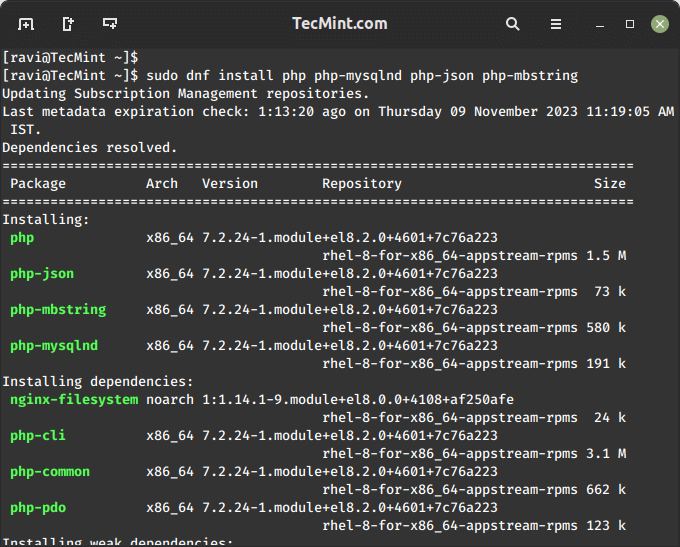
Step 4: Install PHP
PhpMyAdmin is built with PHP, so we need to install PHP and some required extensions using the following command.
sudo dnf install php php-mysqlnd php-json php-mbstring
Step 5: Install PhpMyAdmin
Now, let’s proceed with installing PhpMyAdmin on our Linux system by navigating to the web server’s document root directory /var/www/html as shown.
cd /var/www/html
Next, download the latest version of PhpMyAdmin using the following wget command as shown.
sudo wget https://www.phpmyadmin.net/downloads/phpMyAdmin-latest-all-languages.tar.gz
Once downloaded, extract the downloaded archive and rename the directory for convenience.
sudo tar -xvzf phpMyAdmin-latest-all-languages.tar.gz
sudo mv phpMyAdmin-*/ phpmyadmin
Create a configuration file for PhpMyAdmin.
sudo cp /var/www/html/phpmyadmin/config.sample.inc.php /var/www/html/phpmyadmin/config.inc.php
Edit the configuration file:
sudo nano /var/www/html/phpmyadmin/config.inc.php
Find the following line and set your own blowfish_secret:
$cfg['blowfish_secret'] = 'your_secret';
Save and exit the file.
Step 6: Open Apache Port in firewalld
By default, Apache commonly uses ports 80 and 443 for HTTP and HTTPS, respectively. To open Apache ports and allow access to PhpMyAdmin on your server, run:
sudo firewall-cmd --zone=public --add-port=80/tcp --permanent
sudo firewall-cmd --zone=public --add-port=443/tcp --permanent
sudo firewall-cmd --reload
These commands add a rule to allow incoming traffic on the specified port and reload the firewall to apply the changes.
Step 7: Restart Apache Web Server
Finally, restart Apache to apply the changes:
sudo systemctl restart httpd
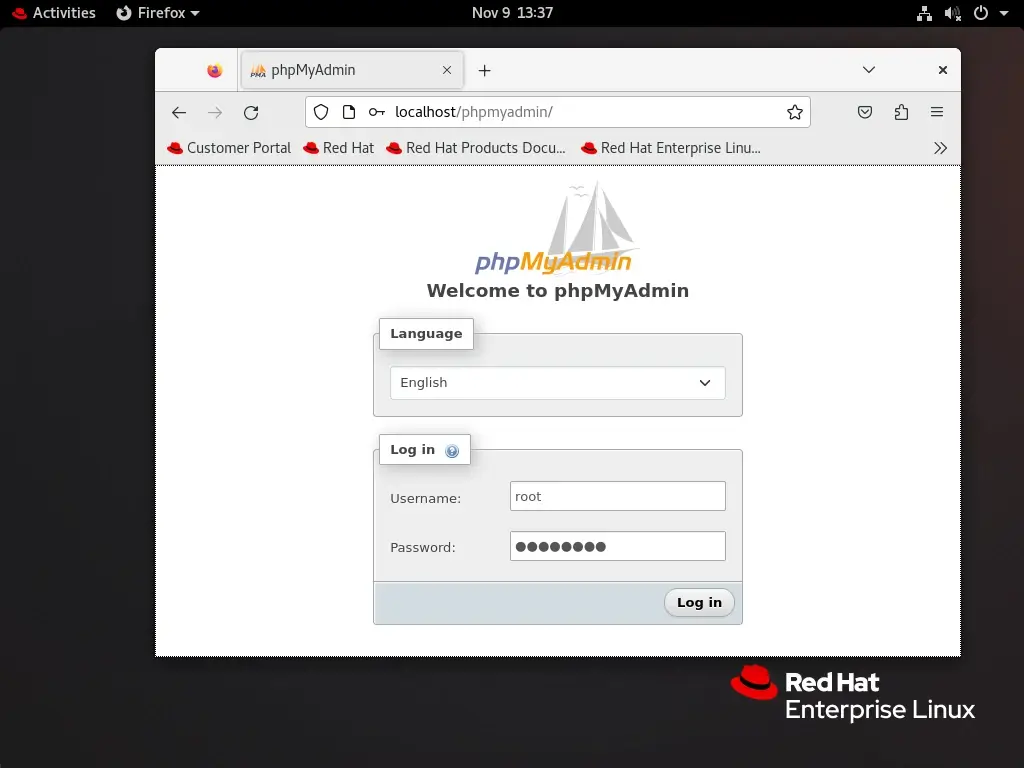
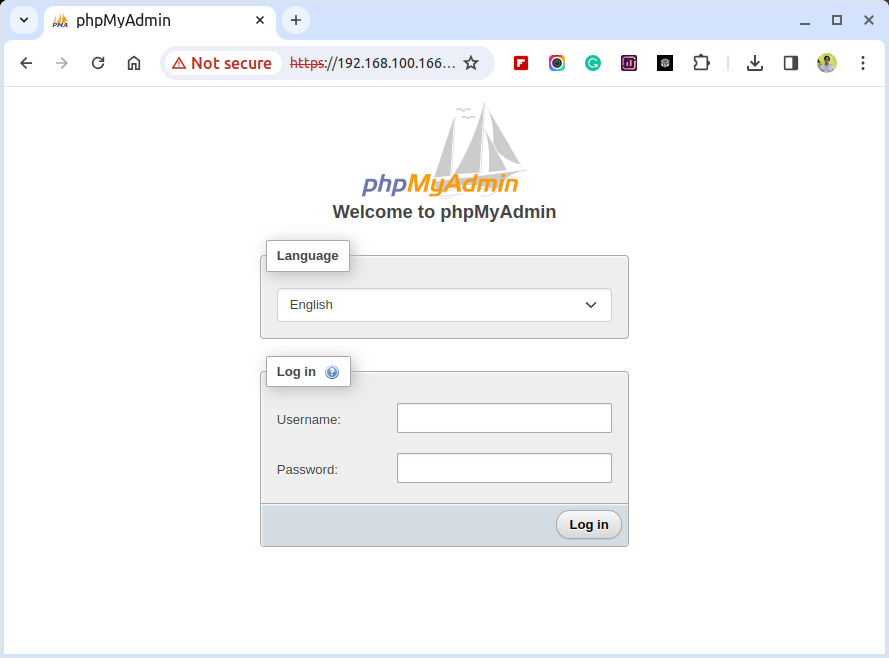
Step 8: Access PhpMyAdmin
You can now access PhpMyAdmin through your web browser by navigating to your server’s IP address or domain name followed by “/phpmyadmin” in the URL:
http://your_server_ip/phpmyadmin
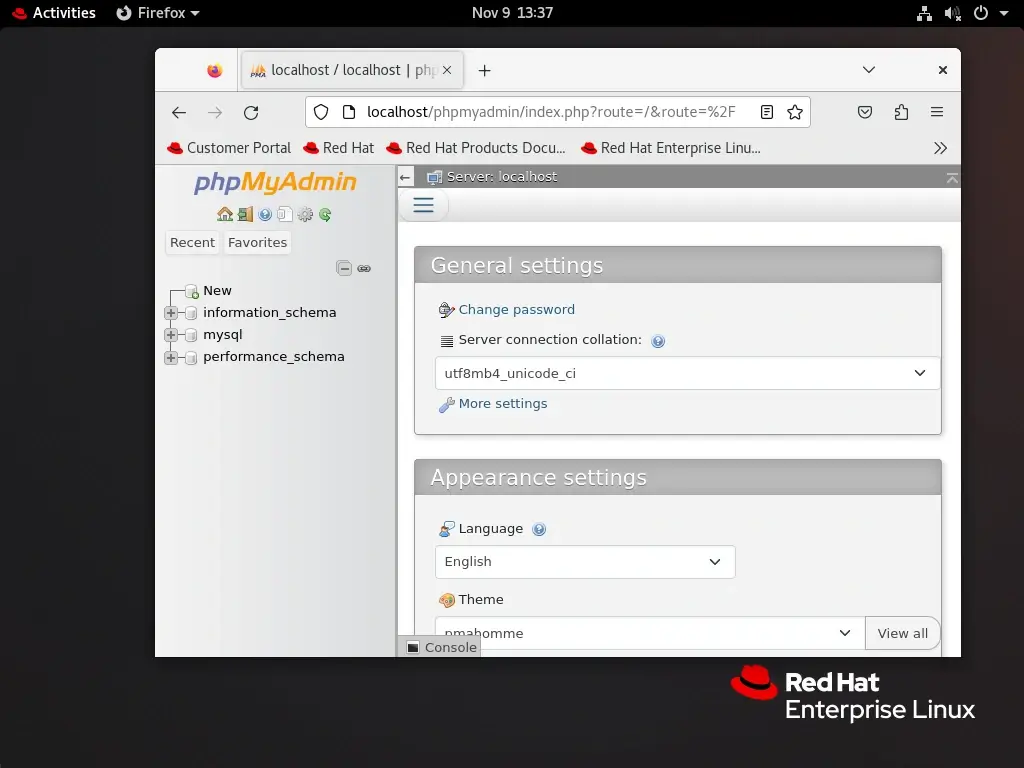
Log in using your MySQL or MariaDB credentials.
Step 9: Allow External Access in PhpMyAdmin
Open the PhpMyAdmin configuration file.
sudo vi /etc/httpd/conf/httpd.conf
Find the <Directory "/var/www/html"> section or the section where your PhpMyAdmin is configured and updates the Require directive to allow all IP addresses to access PhpMyAdmin.
<Directory "/var/www/html/phpmyadmin">
    ...
    Require all granted
    ...
</Directory>
The above configuration allows access from any IP address, but if you want to restrict access to specific IPs, replace Require all granted with Require ip your_ip.
Restart Apache to apply the changes.
sudo systemctl restart httpd
Now, you should be able to access PhpMyAdmin from the outside world using your server’s IP address or domain.
http://your_server_ip/phpmyadmin
Remember, opening access to PhpMyAdmin from the outside world can pose security risks. Make sure that you have a strong authentication mechanism in place and consider using HTTPS for encrypted communication. Additionally, restrict access to only trusted IP addresses if possible or secure PhpMyAdmin login URL.
Change phpMyAdmin Login URL
The default login URL for phpMyAdmin is predictable and commonly targeted by malicious actors attempting to exploit vulnerabilities. Changing the login URL adds an additional layer of security, making it more difficult for unauthorized users to gain access to your database management interface.
To do so, create a /etc/httpd/conf.d/phpMyAdmin.conf configuration file.
vi /etc/httpd/conf.d/phpMyAdmin.conf
Next, add the following configuration.
#Alias /phpMyAdmin /var/www/html/phpmyadmin
Alias /my /var/www/html/phpmyadmin

<Directory /var/www/htm/lphpmyadmin>
    AddDefaultCharset UTF-8

    <IfModule mod_authz_core.c>
        # Apache 2.4
        <RequireAny>
            Require all granted
            # Additional IP or hostname-based access control can be added here
        </RequireAny>
    </IfModule>

    <IfModule !mod_authz_core.c>
        # Apache 2.2
        Order Deny,Allow
        Deny from All
        Allow from 127.0.0.1
        Allow from ::1
        # Additional IP or hostname-based access control can be added here
    </IfModule>

</Directory>
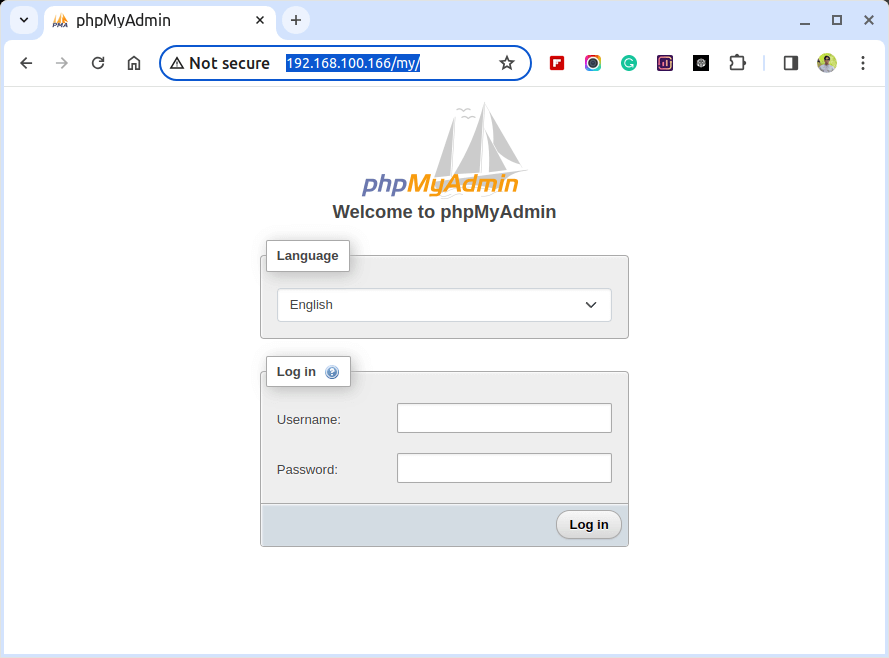
Replace /my with your desired custom login URL. Save the changes and exit the text editor.
After making changes to the configuration files, restart Apache to apply the modifications:
systemctl restart httpd
Open your web browser and navigate to the new phpMyAdmin login URL.
http://yourdomain.com/my/
Setting Up SSL for phpMyAdmin
Securing the communication between the Apache web server and phpMyAdmin is crucial to protect sensitive information such as login credentials and database content. One effective way to achieve this is by configuring SSL (Secure Socket Layer) for phpMyAdmin on an Apache web server.
To do so, first install the mod_ssl module on your server.
yum install httpd mod_ssl openssl
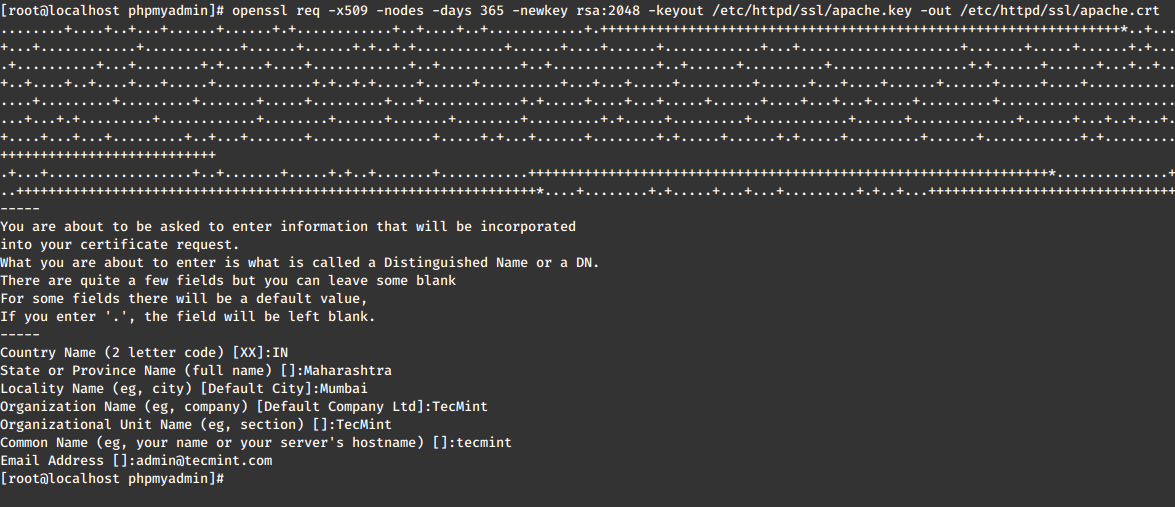
Next, create a directory to store the certificate and generate a self-signed SSL certificate and private key as shown.
mkdir /etc/httpd/ssl
openssl req -x509 -nodes -days 365 -newkey rsa:2048 -keyout /etc/httpd/ssl/apache.key -out /etc/httpd/ssl/apache.crt
After creating the SSL certificate and key, open the Apache SSL configuration file.
vi /etc/httpd/conf.d/ssl.conf
Next, add the following lines to the configuration file.
SSLEngine on
SSLCertificateFile /etc/httpd/ssl/apache.crt
SSLCertificateKeyFile /etc/httpd/ssl/apache.key
Save the changes and restart the Apache web server.
systemctl restart httpd
Now, open the phpMyAdmin configuration file.
vi /var/www/html/phpmyadmin/config.inc.php
Add the following lines to force SSL for phpMyAdmin.
$cfg['ForceSSL'] = true;
Save the changes and exit the text editor.
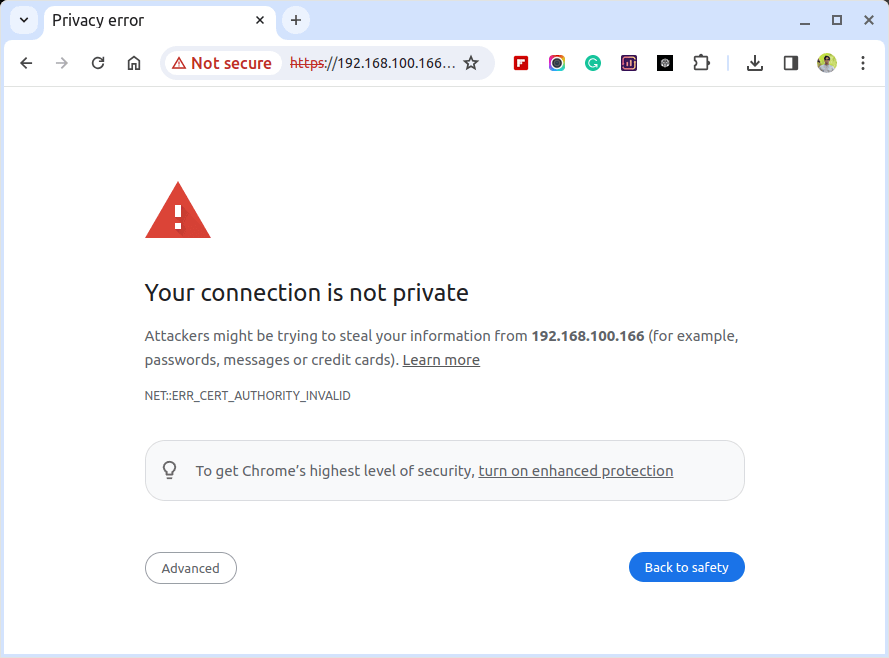
Finally, open your web browser and navigate to the following URL to access phpMyAdmin over a secure SSL connection.
https://yourdomain.com/my/
Kindly be aware that the message indicating an insecure connection is solely due to the utilization of a self-signed certificate. To proceed, click on “Advanced” and affirm the security exception.
Conclusion
Congratulations! You’ve successfully installed PhpMyAdmin with Apache on your RHEL, CentOS Stream, Rocky Linux, or AlmaLinux system. This web-based tool simplifies the management of your databases, making tasks like database creation, queries, and data management a breeze.


Hi, How do install PHPMyAdmin if I’m using centos 6.10 and php 7.325?
Good article. But can you produce the same guide for phpMyAdmin 5.
Hello
I followed the installation was great, but when i try to log to PHP i will get this error:
I’m new in Linux world, please can you help?
thanks
@Joe,
Log in to MySQL shell with root user:
and change the Authentication Plugin with the password there:
Hi, I can not run phpmyadmin I get error 403 Forbidden when I installed nginx as per your tutorial says and I followed the previous tutorial to install nginx the same works well.
Hello, Please update the EPEL repository version to latest as shown.
to
Thanks
@Chris,
Thanks for informing us, we’ve updated the article with the latest PhpMyAdmin installation instructions..
Please change in Install EPEL and Remi Repositories:
On RHEL/CentOS 7
rpm -Uvh http://dl.fedoraproject.org/pub/epel/7/x86_64/e/epel-release-7-8.noarch.rpm to
http://dl.fedoraproject.org/pub/epel/7/x86_64/e/epel-release-7-10.noarch.rpm
because there was no epel-release-7-8.noarch.rpm
@Avinash,
Thanks, corrected the EPEL link in the article to latest version..
i dont see any file or folder in /usr/share/nginx/html named as phpmyadmin which i can create symbolic link am using nginx
any work around
I followed this tutorial and installed phpMyAdmin on my RHEL7 which is running on Amazon Web Services. But, I’m unable to use it. I am getting Forbidden Error when accessing. I also changed /etc/httpd/conf.d/phpMyAdmin.conf “Allow from 192.168.0.111″‘. Still getting Forbidden Error.
@Premchand,
Have you restarted Apache web server after making changes to phpMyAdmin.conf file? Try to make it Allow from all and see. if it works..
yum –enablerepo=remi,remi-php56 install phpmyadmin
Loaded plugins: product-id, rhnplugin, search-disabled-repos, security,
: subscription-manager
This system is not registered with RHN Classic or RHN Satellite.
You can use rhn_register to register.
RHN Satellite or RHN Classic support will be disabled.
Setting up Install Process
epel/metalink | 5.5 kB 00:00
epel | 4.3 kB 00:00
remi-safe | 2.9 kB 00:00
remi-safe/primary_db | 714 kB 00:01
rhel-6-server-optional-rpms | 3.5 kB 00:00
rhel-6-server-rpms | 3.5 kB 00:00
webtatic | 3.6 kB 00:00
Resolving Dependencies
–> Running transaction check
—> Package phpMyAdmin.noarch 0:4.0.10.18-1.el6 will be installed
–> Processing Dependency: php-mcrypt >= 5.2.0 for package: phpMyAdmin-4.0.10.18-1.el6.noarch
–> Processing Dependency: php-mbstring >= 5.2.0 for package: phpMyAdmin-4.0.10.18-1.el6.noarch
–> Processing Dependency: php-gd >= 5.2.0 for package: phpMyAdmin-4.0.10.18-1.el6.noarch
–> Processing Dependency: php-xmlwriter for package: phpMyAdmin-4.0.10.18-1.el6.noarch
–> Processing Dependency: php-tcpdf-dejavu-sans-fonts for package: phpMyAdmin-4.0.10.18-1.el6.noarch
–> Processing Dependency: php-tcpdf for package: phpMyAdmin-4.0.10.18-1.el6.noarch
–> Processing Dependency: php-php-gettext for package: phpMyAdmin-4.0.10.18-1.el6.noarch
–> Running transaction check
—> Package php-gd.x86_64 0:5.3.3-48.el6_8 will be installed
—> Package php-mbstring.x86_64 0:5.3.3-48.el6_8 will be installed
—> Package php-php-gettext.noarch 0:1.0.12-1.el6 will be installed
—> Package php-tcpdf.noarch 0:6.2.13-1.el6 will be installed
–> Processing Dependency: php-tidy for package: php-tcpdf-6.2.13-1.el6.noarch
–> Processing Dependency: php-posix for package: php-tcpdf-6.2.13-1.el6.noarch
–> Processing Dependency: php-composer(fedora/autoloader) for package: php-tcpdf-6.2.13-1.el6.noarch
–> Processing Dependency: php-bcmath for package: php-tcpdf-6.2.13-1.el6.noarch
—> Package php-tcpdf-dejavu-sans-fonts.noarch 0:6.2.13-1.el6 will be installed
—> Package php-xml.x86_64 0:5.3.3-48.el6_8 will be installed
—> Package php71w-mcrypt.x86_64 0:7.1.1-1.w6 will be installed
–> Processing Dependency: php71w-common(x86-64) = 7.1.1-1.w6 for package: php71w-mcrypt-7.1.1-1.w6.x86_64
–> Processing Dependency: libmcrypt.so.4()(64bit) for package: php71w-mcrypt-7.1.1-1.w6.x86_64
–> Running transaction check
—> Package libmcrypt.x86_64 0:2.5.8-9.el6 will be installed
—> Package php-bcmath.x86_64 0:5.3.3-48.el6_8 will be installed
—> Package php-fedora-autoloader.noarch 0:0.2.1-2.el6 will be installed
—> Package php-process.x86_64 0:5.3.3-48.el6_8 will be installed
—> Package php-tidy.x86_64 0:5.3.3-48.el6_8 will be installed
–> Processing Dependency: libtidy-0.99.so.0()(64bit) for package: php-tidy-5.3.3-48.el6_8.x86_64
—> Package php71w-common.x86_64 0:7.1.1-1.w6 will be installed
–> Running transaction check
—> Package libtidy.x86_64 0:0.99.0-19.20070615.1.el6 will be installed
–> Processing Conflict: php71w-common-7.1.1-1.w6.x86_64 conflicts php-common Finished Dependency Resolution
Error: php71w-common conflicts with php-common-5.3.3-48.el6_8.x86_64
You could try using –skip-broken to work around the problem
You could try running: rpm -Va –nofiles –nodigest
Not able to install the phpmyadmin.
@Ajit,
Its due to because, you’ve multiple third-party repositories enabled your system, try to disable them and install with remi repository..
@Ravi – I also have the same issue. I have tried to remove the repos but I still have the same issue. Here is my repo list
yum -v repolist
Loading “rhnplugin” plugin
Loading “product-id” plugin
Loading “search-disabled-repos” plugin
Loading “security” plugin
Loading “subscription-manager” plugin
Updating Subscription Management repositories.
Unable to read consumer identity
Config time: 0.080
This system is receiving updates from RHN Classic or RHN Satellite.
Looking for repo options for [main]
Looking for repo options for [rhel-x86_64-server-6]
Repo ‘rhel-x86_64-server-6’ setting option ‘enabled’ = ‘1’
Repo ‘rhel-x86_64-server-6’ setting option ‘gpgcheck’ = ‘1’
Yum Version: 3.2.29
Setting up Package Sacks
pkgsack time: 0.037
Repo-id : epel
Repo-name : Extra Packages for Enterprise Linux 6 – x86_64
Repo-revision: 1491688862
Repo-tags : binary-x86_64
Repo-updated : Sat Apr 8 18:36:56 2017
Repo-pkgs : 12,293
Repo-size : 11 G
Repo-metalink: https://mirrors.fedoraproject.org/metalink?repo=epel-6&arch=x86_64
Updated : Sat Apr 8 18:36:56 2017
Repo-baseurl : http://mirror.math.princeton.edu/pub/epel/6/x86_64/ (35 more)
Repo-expire : 21,600 second(s) (last: Mon Apr 10 10:28:04 2017)
Repo-id : remi-safe
Repo-name : Safe Remi’s RPM repository for Enterprise Linux 6 – x86_64
Repo-revision: 1491761087
Repo-updated : Sun Apr 9 14:04:52 2017
Repo-pkgs : 1,770
Repo-size : 333 M
Repo-mirrors : http://rpms.remirepo.net/enterprise/6/safe/mirror
Repo-baseurl : http://rpms.remirepo.net/enterprise/6/safe/x86_64/ (32 more)
Repo-expire : 21,600 second(s) (last: Mon Apr 10 10:28:11 2017)
Repo-id : rhel-x86_64-server-6
Repo-name : Red Hat Enterprise Linux Server (v. 6 for 64-bit x86_64)
Repo-updated : Thu Apr 6 09:07:55 2017
Repo-pkgs : 19,422
Repo-size : 35 G
Repo-baseurl : https://xmlrpc.rhn.redhat.com/XMLRPC/GET-REQ/rhel-x86_64-server-6
Repo-expire : 21,600 second(s) (last: Mon Apr 10 10:28:14 2017)
repolist: 33,485
This is the error that I got:
Error: Package: php-tcpdf-6.2.13-1.el6.noarch (epel)
Requires: php-posix
Error: Package: php-tcpdf-6.2.13-1.el6.noarch (epel)
Requires: php-bcmath
Error: Package: php-tcpdf-6.2.13-1.el6.noarch (epel)
Requires: php-tidy
Error: Package: phpMyAdmin-4.0.10.19-1.el6.noarch (epel)
Requires: php-mbstring
Error: Package: php-php-gettext-1.0.12-1.el6.noarch (epel)
Requires: php-mbstring
Error: Package: php-tcpdf-6.2.13-1.el6.noarch (epel)
Requires: php-mbstring
You could try using –skip-broken to work around the problem
You could try running: rpm -Va –nofiles –nodigest
Any suggestions? Thanks
@Mallory,
Remove or Disable all Repos except Default Repo and EPEL repo and try to install PhpMyAdmin using Epel repository.
@ravi I get the same results even with disabling the other repos.
yum –disablerepo=”*” –enablerepo=”epel” install phpmyadmin
Loaded plugins: product-id, rhnplugin, search-disabled-repos, security, subscription-
: manager
This system is receiving updates from RHN Classic or RHN Satellite.
Setting up Install Process
Resolving Dependencies
–> Running transaction check
—> Package phpMyAdmin.noarch 0:4.0.10.19-1.el6 will be installed
–> Processing Dependency: php-xmlwriter for package: phpMyAdmin-4.0.10.19-1.el6.noarch
–> Processing Dependency: php-tcpdf-dejavu-sans-fonts for package: phpMyAdmin-4.0.10.19-1.el6.noarch
–> Processing Dependency: php-tcpdf for package: phpMyAdmin-4.0.10.19-1.el6.noarch
–> Processing Dependency: php-php-gettext for package: phpMyAdmin-4.0.10.19-1.el6.noarch
–> Processing Dependency: php-mcrypt for package: phpMyAdmin-4.0.10.19-1.el6.noarch
–> Processing Dependency: php-mbstring for package: phpMyAdmin-4.0.10.19-1.el6.noarch
–> Processing Dependency: php-gd for package: phpMyAdmin-4.0.10.19-1.el6.noarch
–> Running transaction check
—> Package php-mcrypt.x86_64 0:5.3.3-5.el6 will be installed
–> Processing Dependency: libmcrypt.so.4()(64bit) for package: php-mcrypt-5.3.3-5.el6.x86_64
—> Package php-php-gettext.noarch 0:1.0.12-1.el6 will be installed
–> Processing Dependency: php-mbstring for package: php-php-gettext-1.0.12-1.el6.noarch
—> Package php-tcpdf.noarch 0:6.2.13-1.el6 will be installed
–> Processing Dependency: php-xml for package: php-tcpdf-6.2.13-1.el6.noarch
–> Processing Dependency: php-tidy for package: php-tcpdf-6.2.13-1.el6.noarch
–> Processing Dependency: php-posix for package: php-tcpdf-6.2.13-1.el6.noarch
–> Processing Dependency: php-mbstring for package: php-tcpdf-6.2.13-1.el6.noarch
–> Processing Dependency: php-gd for package: php-tcpdf-6.2.13-1.el6.noarch
–> Processing Dependency: php-composer(fedora/autoloader) for package: php-tcpdf-6.2.13-1.el6.noarch
–> Processing Dependency: php-bcmath for package: php-tcpdf-6.2.13-1.el6.noarch
—> Package php-tcpdf-dejavu-sans-fonts.noarch 0:6.2.13-1.el6 will be installed
—> Package phpMyAdmin.noarch 0:4.0.10.19-1.el6 will be installed
–> Processing Dependency: php-xmlwriter for package: phpMyAdmin-4.0.10.19-1.el6.noarch
–> Processing Dependency: php-mbstring for package: phpMyAdmin-4.0.10.19-1.el6.noarch
–> Processing Dependency: php-gd for package: phpMyAdmin-4.0.10.19-1.el6.noarch
–> Running transaction check
—> Package libmcrypt.x86_64 0:2.5.8-9.el6 will be installed
—> Package php-fedora-autoloader.noarch 0:1.0.0-0.1.rc1.el6 will be installed
—> Package php-php-gettext.noarch 0:1.0.12-1.el6 will be installed
–> Processing Dependency: php-mbstring for package: php-php-gettext-1.0.12-1.el6.noarch
—> Package php-tcpdf.noarch 0:6.2.13-1.el6 will be installed
–> Processing Dependency: php-xml for package: php-tcpdf-6.2.13-1.el6.noarch
–> Processing Dependency: php-tidy for package: php-tcpdf-6.2.13-1.el6.noarch
–> Processing Dependency: php-posix for package: php-tcpdf-6.2.13-1.el6.noarch
–> Processing Dependency: php-mbstring for package: php-tcpdf-6.2.13-1.el6.noarch
–> Processing Dependency: php-gd for package: php-tcpdf-6.2.13-1.el6.noarch
–> Processing Dependency: php-bcmath for package: php-tcpdf-6.2.13-1.el6.noarch
—> Package phpMyAdmin.noarch 0:4.0.10.19-1.el6 will be installed
–> Processing Dependency: php-xmlwriter for package: phpMyAdmin-4.0.10.19-1.el6.noarch
–> Processing Dependency: php-mbstring for package: phpMyAdmin-4.0.10.19-1.el6.noarch
–> Processing Dependency: php-gd for package: phpMyAdmin-4.0.10.19-1.el6.noarch
–> Finished Dependency Resolution
Error: Package: php-tcpdf-6.2.13-1.el6.noarch (epel)
Requires: php-posix
Error: Package: php-tcpdf-6.2.13-1.el6.noarch (epel)
Requires: php-xml
Error: Package: php-tcpdf-6.2.13-1.el6.noarch (epel)
Requires: php-bcmath
Error: Package: php-tcpdf-6.2.13-1.el6.noarch (epel)
Requires: php-tidy
Error: Package: phpMyAdmin-4.0.10.19-1.el6.noarch (epel)
Requires: php-gd
Error: Package: php-tcpdf-6.2.13-1.el6.noarch (epel)
Requires: php-gd
Error: Package: phpMyAdmin-4.0.10.19-1.el6.noarch (epel)
Requires: php-mbstring
Error: Package: phpMyAdmin-4.0.10.19-1.el6.noarch (epel)
Requires: php-xmlwriter
Error: Package: php-php-gettext-1.0.12-1.el6.noarch (epel)
Requires: php-mbstring
Error: Package: php-tcpdf-6.2.13-1.el6.noarch (epel)
Requires: php-mbstring
You could try using –skip-broken to work around the problem
You could try running: rpm -Va –nofiles –nodigest
@Mallory,
Better remove all third party repositories and install PhpMyAdmin via epel repository only. The reason you getting these errors, as you having multiple repositories on the system.
Hi, Please I have a problem, when I install PhpMyAdmen and I run command service httpd restart I get the below error.
And I can’t access my http://192.0.0.0/PhpMyAdmen/
Forbidden
You don’t have permission to access /phpmyadmin on this server.
Apache/2.2.15 (CentOS) Server at 192.0.0.0 Port 80
Please help me!
@Jocovish,
That’s not error, it saying that the service could not determine the server full qualified hostname, to get rid of this error, try to add your system hostname in /etc/hosts file and then restart the httpd service..
Regarding Forbidden error, you need allow you IP address to access PhpMyAdmin..
i am getting error : forbidden you don’t have permission to access /phpmyadmin on this server.
apache/2.2.15 (Centos) server at 172.16.16.25 port 80
@Kumar,
In /etc/httpd/conf.d/phpMyAdmin.conf file, add the IP address of your machine as shown and restart Apache.
I already installed php56-remi on my Fedora 20
how can i install newest phpmyadmin?
Hi,
“sites-available” for CentOS? Are you sure? CentOs not Debian ..
Yes, it’s available on CentOS only if you use Nginx as a web server.
Ravi, note, I use CentOS with Nginx and never meet “sites-available” in config. In CentOS that folder call ‘conf.d’. “sites-available” everyone copy in website tutorials and even check it!
@Borys,
Where do you find
“sites-available”in the article, we’ve not mentioned anything about“sites-available”in the article, could you clear your browser cache and check the article again, as this article is updated last day with new instructions. I think due to cache you were getting older version of article. Please clear your browser cache and try to view article again specially Nginx section..Tried it 404.
Anyways, I suggest that you clear up what is the “server” for,
I followed the nginx format, tried IP/phpmyadmin and produced 404 error.
Did I expect different output from this guide?
So what should I do so that I can access phpmyadmin tru: IP/phpmyadmin
Thanks.
after installing phpMyAdmin and creating a symbolic link of phpMyAdmin in /usr/share/nginx/html when i try to access mydomain/phpMyAdmin i get the following error :
Cannot start session without errors, please check errors given in your PHP and/or webserver log file and configure your PHP installation properly
any help is appreciated in advance
I have already running phpmyadmin 2.11.11.3 with Apache2, PHP Version 5.3.3 & mysql
5.1.71 in CentOS release 6.4 (Final) .
Will you please share how to upgrade PhpMyAdmin 4.1.2 in this server .
Just do yum update phpmyadmin on the terminal.
Hi,
I try to install it but I get some mistake
–> Finished Dependency Resolution
Error: php55w-common conflicts with php-common-5.4.23-1.el6.remi.x86_64
You could try using –skip-broken to work around the problem
You could try running: rpm -Va –nofiles –nodigest
And with –skip-broken:
Packages skipped because of dependency problems:
dejavu-sans-fonts-2.30-2.el6.noarch from base
php-common-5.4.23-1.el6.remi.x86_64 from remi
php-php-gettext-1.0.11-4.el6.remi.noarch from remi
php-tcpdf-6.0.053-1.el6.remi.noarch from remi
php-tcpdf-dejavu-sans-fonts-6.0.053-1.el6.remi.noarch from remi
php-xml-5.4.23-1.el6.remi.x86_64 from remi
phpMyAdmin-4.1.4-1.el6.remi.noarch from remi
YOU have a idea why I have php 5.5.7 on my server Centos 6.5
Remove the older version of php55w-common using below command.
And then try to install it again.
Hi,
When I try to access the PhpMyAdmin in a web browser and I try to log in using “root”, it says:
#1045 Cannot log in to the MySQL server
Will there be a default username and password that I can use after the installation?
Please help.
Thank you.
Yes you should use default MySQL login credentials to login into PhpMyAdmin.
Hello,
I fixed the problem. I moved the phPMyAdmin directory to the document root location. :) My bad that I had missed this earlier. All good
Cheers!
Hello,
I get “403 Forbidden” when I try to access PHPMyAdmin through the web browser.
The error log says this
] 8923#0: *1 directory index of “/usr/share/nginx/html/phpMyAdmin/” is forbidden, client: 127.0.0.1, server: tecmint, request: “GET / HTTP/1.1”, host: “tecmint”
My PHP config is as below
cat /etc/httpd/conf.d/phpMyAdmin.conf
[root@centos html]# vim /etc/httpd/conf.d/phpMyAdmin.conf
[root@centos html]# cat /etc/httpd/conf.d/phpMyAdmin.conf
# phpMyAdmin – Web based MySQL browser written in php
#
# Allows only localhost by default
#
# But allowing phpMyAdmin to anyone other than localhost should be considered
# dangerous unless properly secured by SSL
Alias /phpMyAdmin /usr/share/phpMyAdmin
Alias /phpmyadmin /usr/share/phpMyAdmin
# Apache 2.4
Require local
# Apache 2.2
Order Deny,Allow
Deny from All
Allow from 127.0.0.1
Allow from ::1
# Apache 2.4
Require local
# Apache 2.2
Order Deny,Allow
#Deny from All
Allow from 127.0.0.1
Allow from ::1
# These directories do not require access over HTTP – taken from the original
# phpMyAdmin upstream tarball
#
Order Deny,Allow
Deny from All
Allow from None
Order Deny,Allow
Deny from All
Allow from None
Order Deny,Allow
Deny from All
Allow from None
# This configuration prevents mod_security at phpMyAdmin directories from
# filtering SQL etc. This may break your mod_security implementation.
#
#
#
# SecRuleInheritance Off
#
#
Please could you help me?
I tried installing phpmy admin , and followed all still i get access denied error.
I think there’s 1 thing that you forgot to add on your documentation, the starting of mysqld because when I check the service mysqld status it says mysqld is stopped so I have to run by typing service mysqld start
Worked great! Thanks, Ravi!
For logging in, I didn’t have to enter a root password.
The command in Terminal:
mysqladmin -u root password NEWPASSWORD
worked. I was able to login into PhpMyAdmin immediately.
Thanks it worked as a charm in fedora 19 64 bits
Will you please write on setting up mongodb and Postgresql on fedora 19 64 bits please
Yes! surely will write up on both databases.
After following both this tutorial https://www.tecmint.com/install-lemp-linux-nginx-mysql-php-on-rhel-centos-5-6-fedora-12-17/
And this one. I end up with 404 page not found when i enter http://*theIP*/phpmyadmin/
I have tried this about 3 times now. With no luck. The web server is working fine as I can go to http://*theIP* and phpinfo and both work fine. Do you have any idea why i’m getting these 404 errors. Running Centos6.4 on a digital ocean box. Thanks
Note that on CentOS 6.4, when I run yum –enablerepo=remi,remi-test install phpmyadmin
it gives my phpmyadmin version 2.
I must run yum –enablerepo=remi,remi-test install phpMyAdmin
With capitals, in order for it to give me version 4
I had the same issue. Thanks for adding this to the comments. Very helpful…
Thanks here as well. !!
Every time when I am trying to install php,it is showing me the following error PLEASE HELP ……….. please show me a way to resolve this php-gd-5.4.13-1 problem ……
Error: Package: php-gd-5.4.13-1.el6.remi.i686 (remi)
Requires: libjpeg.so.62(LIBJPEG_6.2)
Error: Package: php-gd-5.4.13-1.el6.remi.i686 (remi)
Requires: php-common(x86-32) = 5.4.13-1.el6.remi
Installed: php-common-5.5.0-0.22.beta2.el6.remi.i686 (@remi-test)
php-common(x86-32) = 5.5.0-0.22.beta2.el6.remi
Available: php-common-5.3.2-6.el6.i686 (rhel6repo)
php-common(x86-32) = 5.3.2-6.el6
Available: php-common-5.4.12-1.el6.remi.i686 (remi)
php-common(x86-32) = 5.4.12-1.el6.remi
Available: php-common-5.4.13-1.el6.remi.i686 (remi)
php-common(x86-32) = 5.4.13-1.el6.remi
You could try using –skip-broken to work around the problem
You could try running: rpm -Va –nofiles –nodigest
To overcome this issue, first remove the php-gd and php-common packages using.
and then try again to install php. I hope it will work..
When I use the setup facility to configure phpMyAdmin after this, I can’t seem to figure out where to move the config.inc.php file. I’ve done a “find” and have come up with these three directories:
/etc/phpMyAdmin
/var/lib/phpMyAdmin
/usr/share/phpMyAdmin
Once I’ve done the setup utility, I get the message to move config/config.inc.php from the config directory to the main directory for phpMyAdmin. The one in /var/lib/phpMyAdmin/config/config.inc.php seems to have the changes I made, and I moved it to /var/lib/phpMyAdmin/config.inc.php, and then logged out and back in, but the changes did not seem to be there.
Any ideas?
Open this /etc/httpd/conf.d/phpMyAdmin.conf with vi editor and add your IP address in allow from and then restart web service.
Hi,
i have problem, after the installation process displays a message to me at phpmy admin: You do not have permission to access / phpmyadmin on this server .. Please help
hello, open “/etc/httpd/conf.d/phpmyadmin.conf”
and find;
Order Deny,Allow
Deny from All
#Allow from 127.0.0.1
Allow from ::1
change;
Order Deny,Allow
#Deny from All
##Allow from 127.0.0.1
Allow from ::1
and will work..
Dear Ravi,
Please write some articles about Nginx and its installation on CentOS
already written, do a search you will get detailed installation on Nginx. or follow below link.
https://www.tecmint.com/category/webserver/nginx
# cd /etc/nginx/sites-enabled should be sites-available as per your original quote