CentOS 8 is reaching EOL (End Of Life) by the end of this year, 2021, and a few Linux distributions have been floated as formidable CentOS alternatives.
Among them is Rocky Linux, which is a fork of CentOS and 100% binary compatible with RHEL. In a previous guide, we introduced Rocky Linux 8.5 and how to download it. We have also touched on how you can migrate from CentOS 8 to Rocky Linux 8.5.
In this guide, we walk you through a step-by-step procedure of how you can install Rocky Linux 8.5. Since Rocky Linux is a fork of CentOS 8, the installation procedure remains more or less the same.
Prerequisites
Before you get started, ensure you have the following:
- An ISO image of Rocky Linux 8.5. You can download it from the official Rocky Linux download page. Note that the image is quite big – approximately 9GB for the DVD ISO- and therefore ensure you have a fast and stable internet connection. Alternatively, you can opt for the minimal ISO which is about 2G.
- A 16 GB USB drive for use as an installation medium. With the ISO image at hand, you can make the USB drive bootable using the UNetbootin tool or dd command.
- Minimum Hard disk space of 15 GB and 2GB RAM.
Installation of Rocky Linux
With your bootable USB drive at hand, plug it in and boot your PC. Keep in mind that you need to set the BIOS to boot from your installation medium.
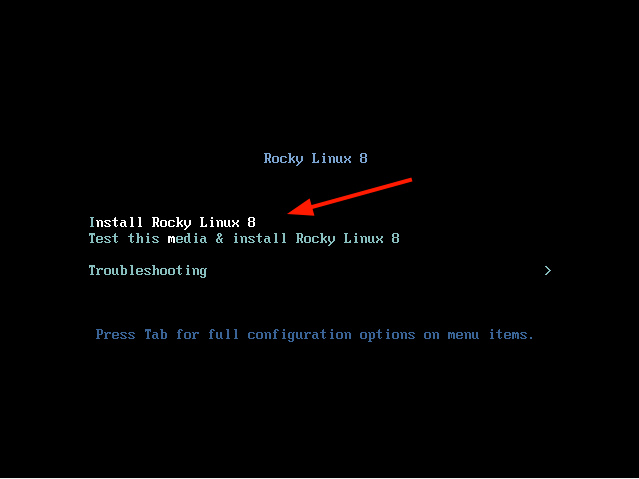
Booting the PC
Upon booting, the first screen you get is a dark screen with a list of options. Select the first option “Install Rocky Linux 8” and press the ENTER key on your keyboard.
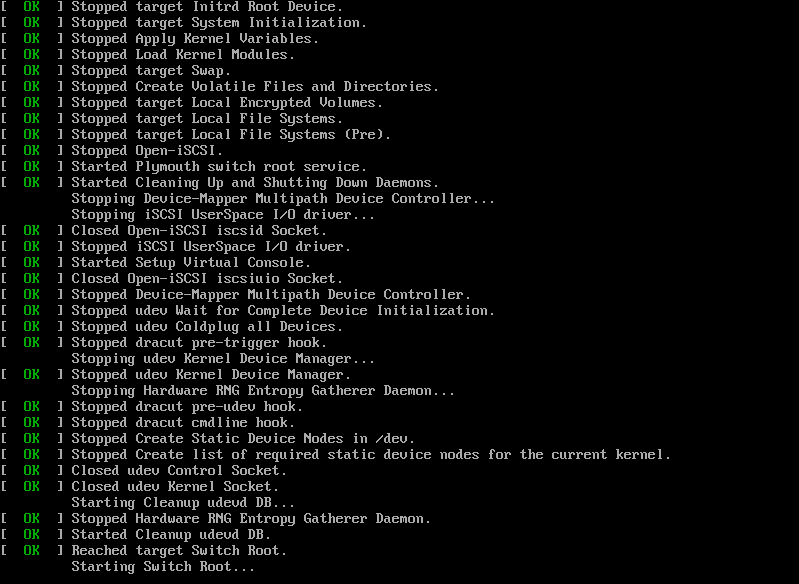
Thereafter, some boot messages will be splashed on the screen as shown.
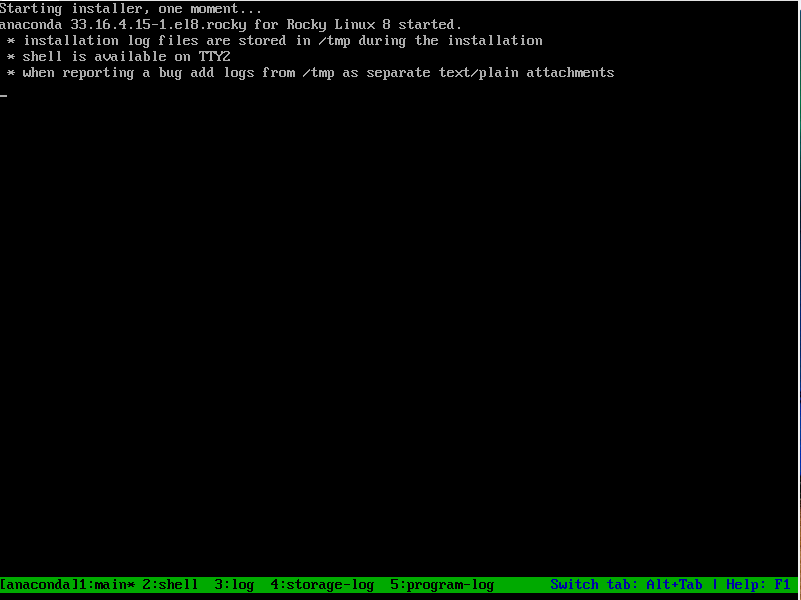
The Anaconda installer for Rocky Linux will then be started.
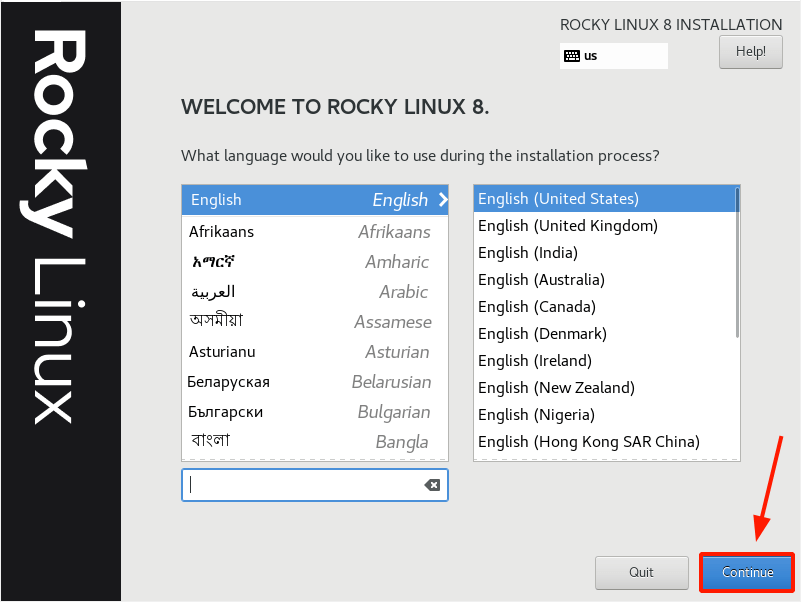
Choose Installation Language
On the Welcome page displayed, select your preferred installation language and click ‘Continue’.
Installation Summary – Configure Key Parameters
Before the installation gets underway, some crucial parameters need to be properly set or configured. These are grouped into 4 main sections:
- Localization
- Software
- System
- User settings
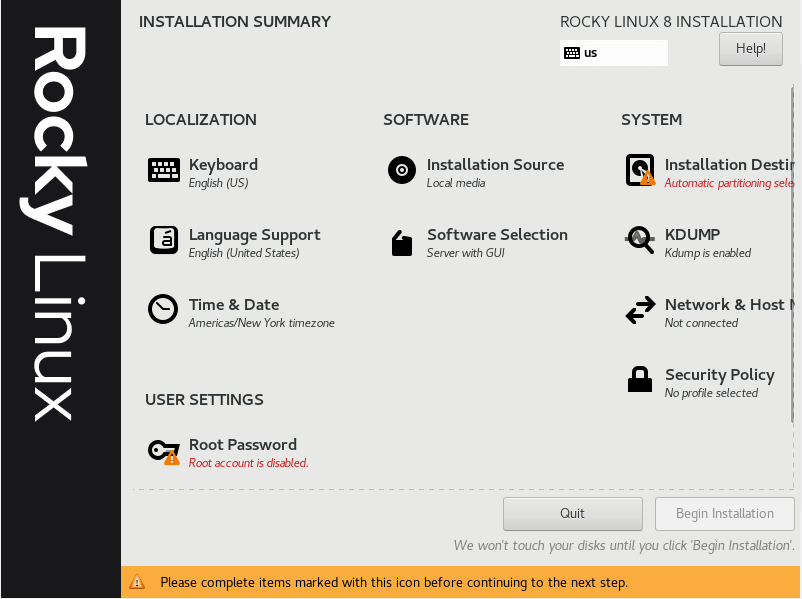
We will configure the key parameters in each of these categories.
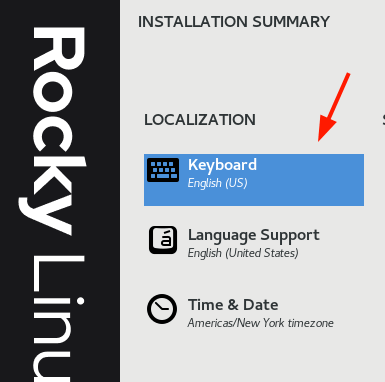
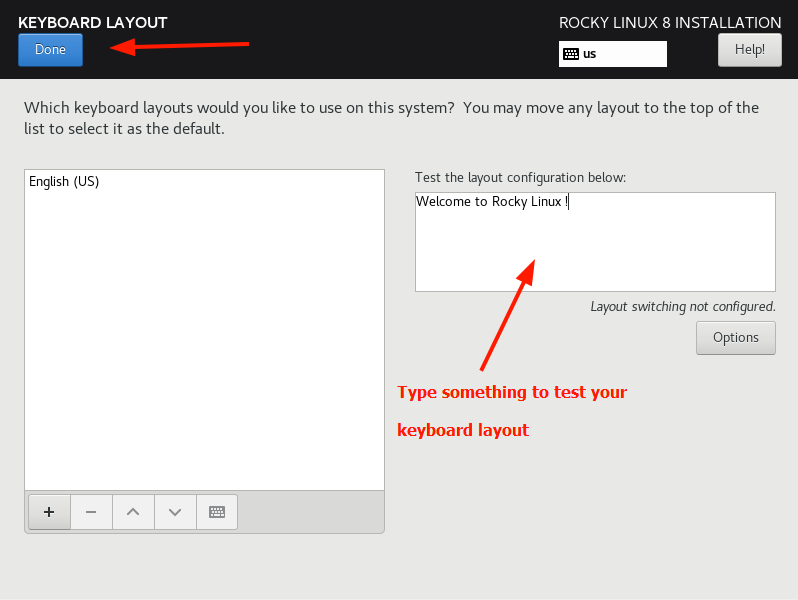
Configure the Keyboard
To configure the keyboard, click on the ‘Keyboard’ option.
The keyboard configuration is set to English (US) by default. If you need to change to something else, click on the plus sign ( + ) at the bottom and select your preferred layout.
In addition, you can type a few words in the textbox at the right to test the layout. Once you are satisfied, click on ‘Done’ to save the changes. For now, we will go with the default selection.
Configure Language Support
To choose the OS language, click on ‘Language Support’.
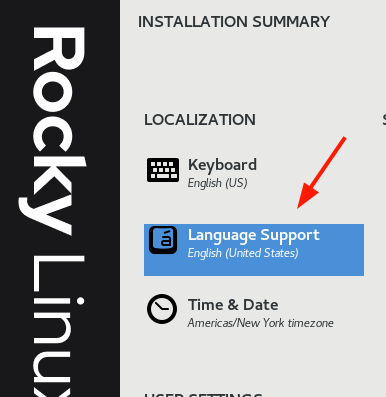
Once again, select the language that you prefer to use to administer Rocky Linux with and click on ‘Done’.

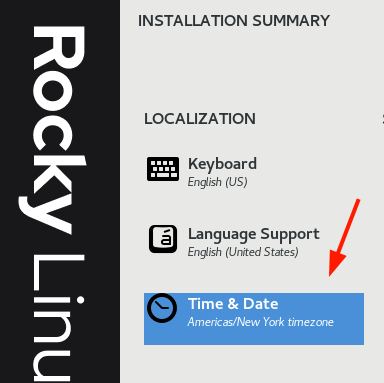
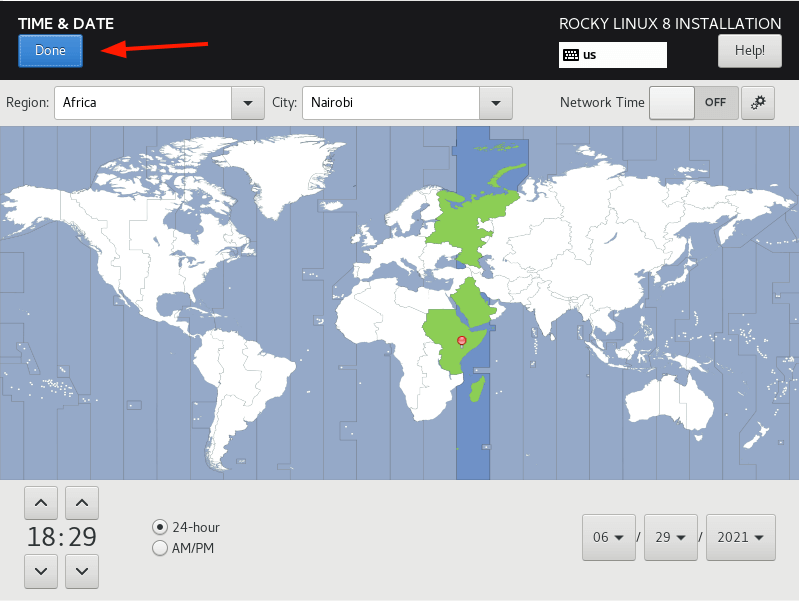
Configure Time and Date
Next up are the ‘Time and Date’ settings. Click on the option. By default, this is set to Americas/New York.
Click on the map to specify your geographical location. At the very bottom, feel free to configure the time and date settings, and hit ‘Done’ to save the changes.
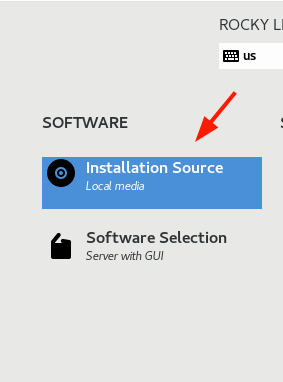
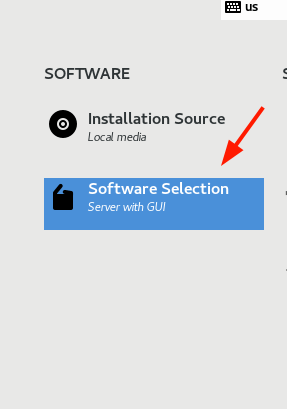
Configure Software
The next category is the ‘SOFTWARE’ which comprises ‘Installation Source’ and ‘Software Selection’.
Nothing much is required in the first option, but you can take a peek.
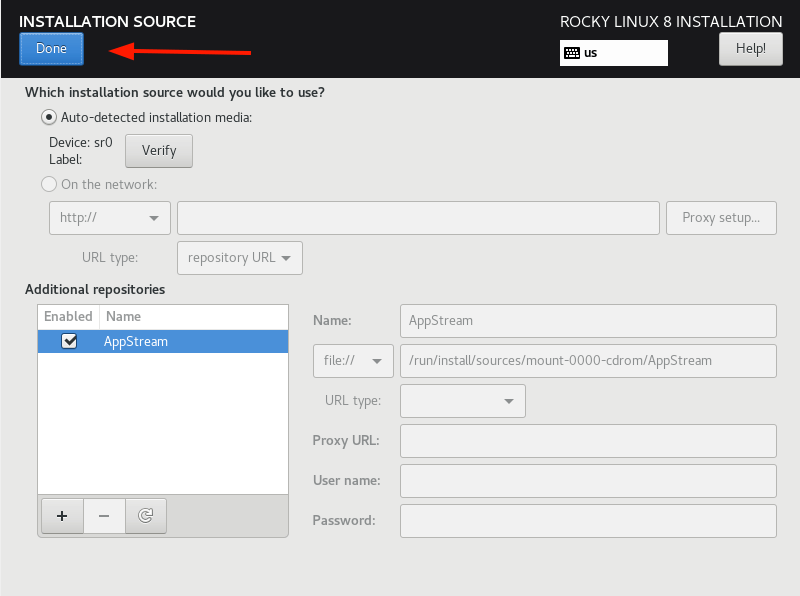
Just accept the default settings and click ‘Done’. Next up is the ‘Software Selection’ option.
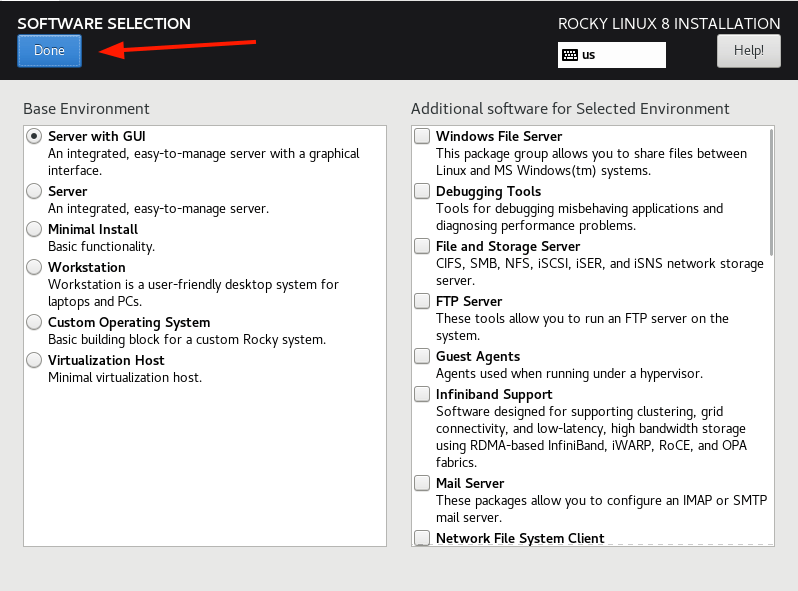
The ‘Software Selection’ section provides a couple of Base environments that you can choose from. On the right pane is a list of additional software utilities and tools that you can select to install in addition to the base environment.
Select your preferred base environment and Additional packaged and click on ‘Done’.
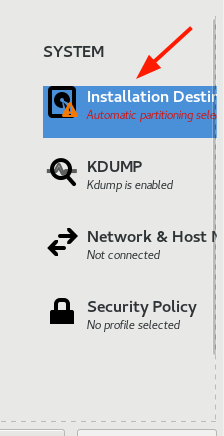
Installation Destination – Configure Partitioning
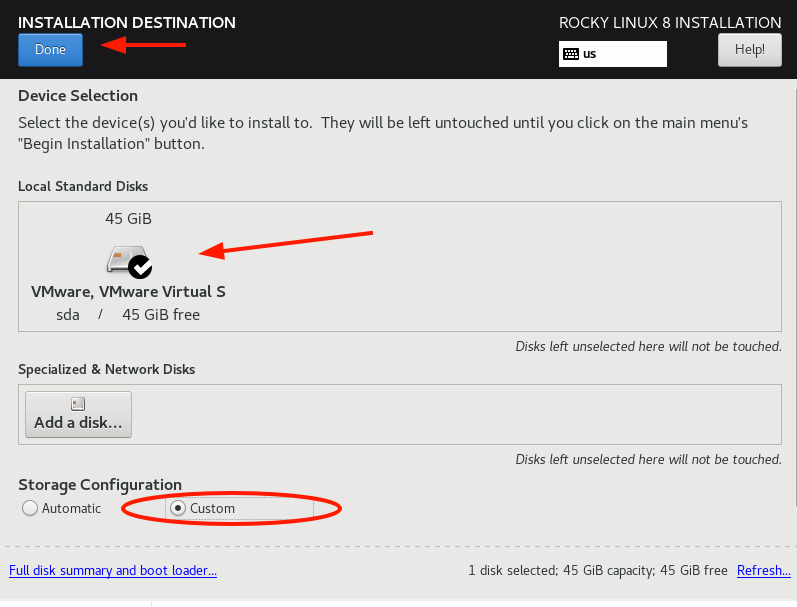
This is the most pertinent section in customization and it defines how the hard drive is to be partitioned before the installation of Rocky Linux. By default, automatic partitioning is selected.
Automatic partitioning, as the name implies, automatically partitions your hard drive without requiring your intervention. This is mostly recommended for new Linux users who are not familiar with manual partitioning or users who don’t mind about the partition sizes. The downside to automatic partitioning is that you do not get the benefit of defining your preferred mount points and their sizes.
For this reason, we will try something more ambitious and manually partition the hard drive. Therefore. Select the ‘Custom’ option and click on ‘Done’.
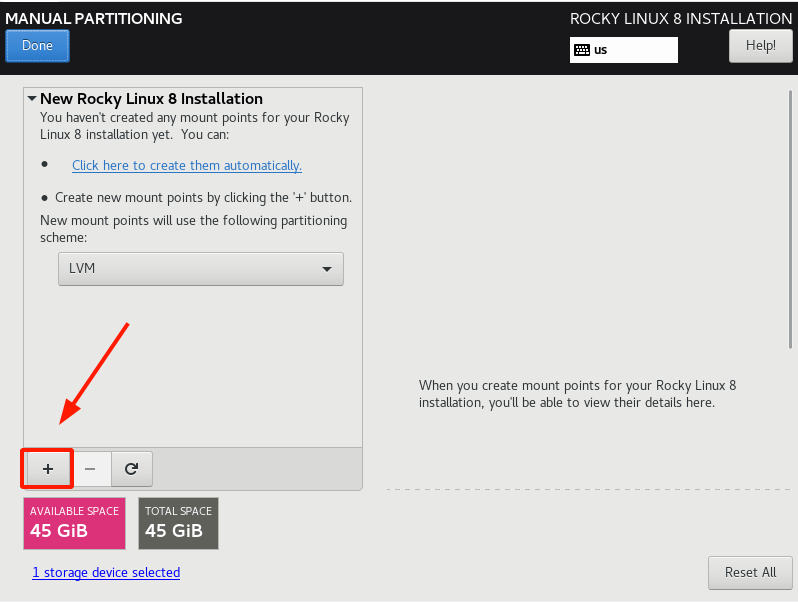
This brings you to the ‘Manual partitioning’ window as shown. We are going to create the following mount points:
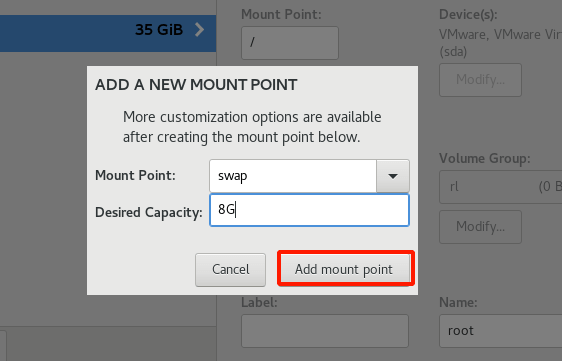
/boot		-	2GB
/		-	35GB
Swap		- 	8GB
To start creating the partitions, click on the plus ( + ) sign.
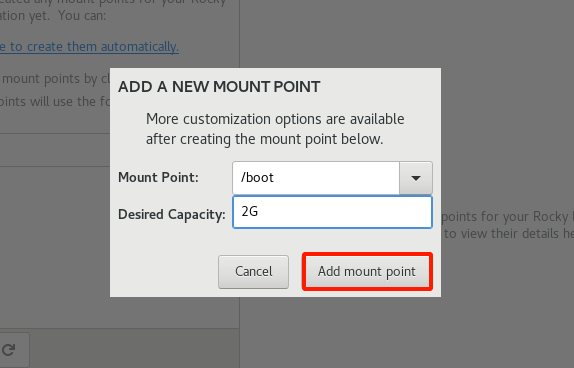
Specify the /boot partition and its desired capacity.
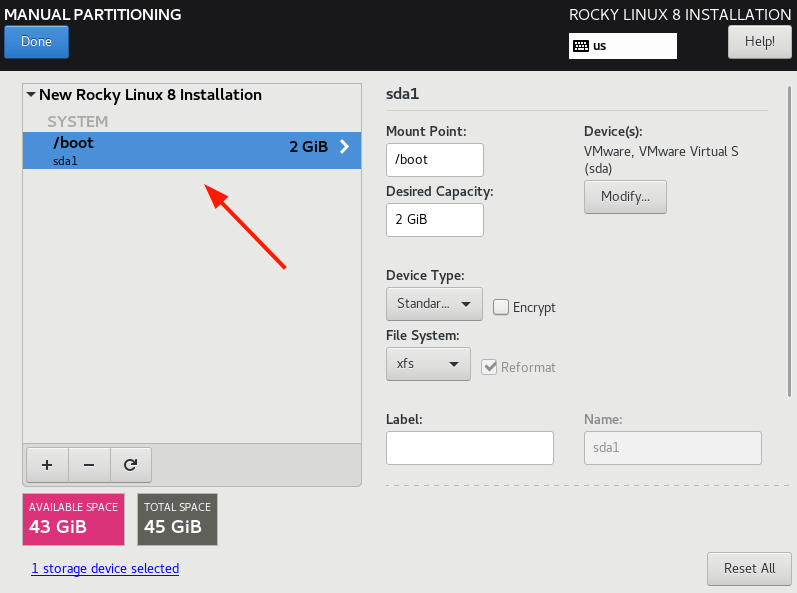
The newly created /boot partition appears on the partition table as indicated.
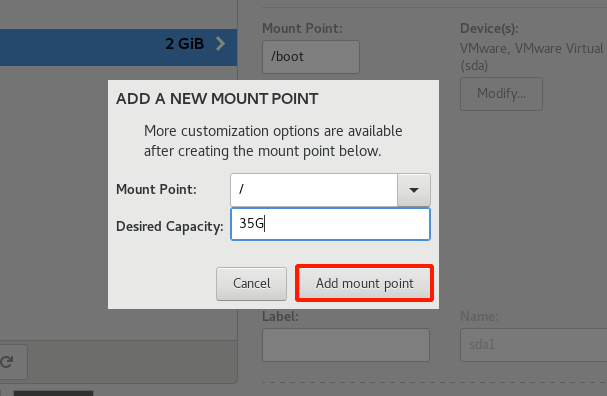
Repeat the same step and create the / (root) partition.
And do likewise to create the Swap mount point.
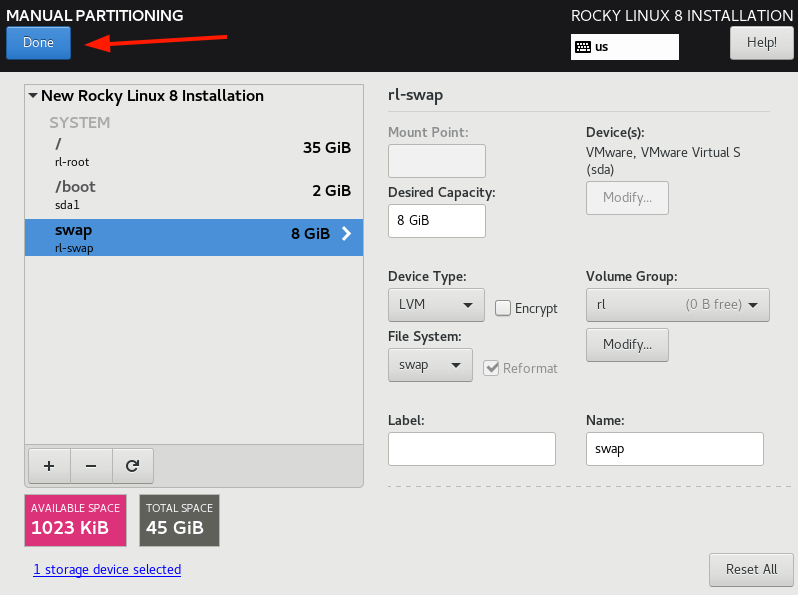
This is how the partition table looks like with all the partitions created. To save the changes made on the hard drive, click on ‘Done’.
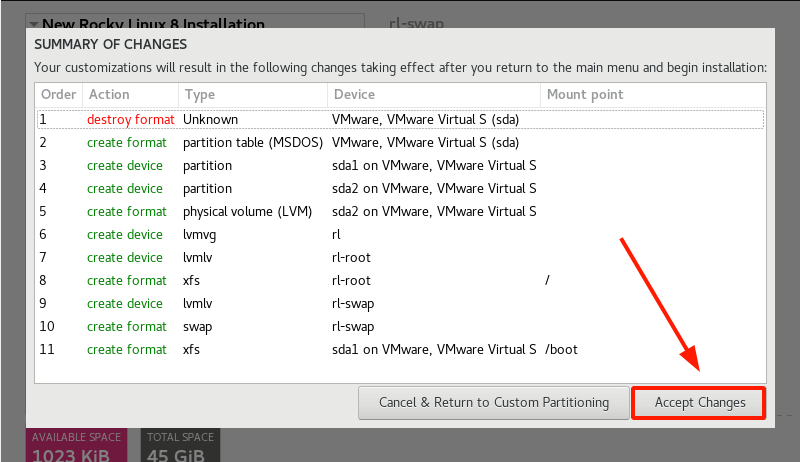
On the pop-up alert that appears, click on the ‘Accept Changes’ button to write the partitions on the disk.
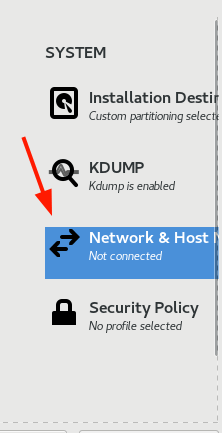
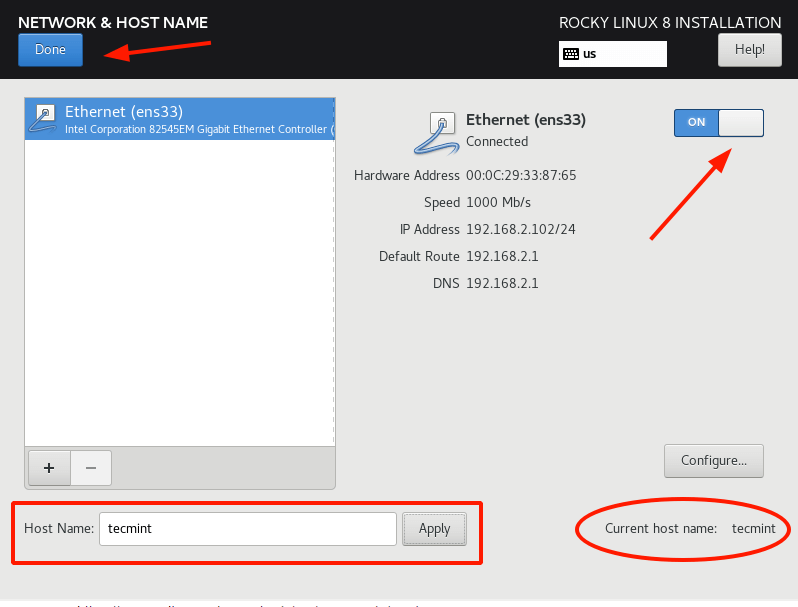
Configure Network and Hostname
Another important parameter that requires your attention is the ‘Network and Hostname’ setting.
At the far right, turn on the toggle adjacent to the network adapter- Ethernet, in our case. This ensures that your system picks an IP address dynamically using the DHCP protocol from the router. At the very bottom, specify the hostname and click ‘Apply’.
To save the changes, click on ‘Done’.
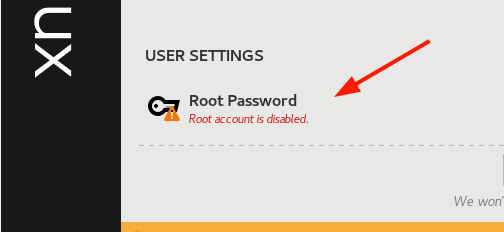
Configure User Settings
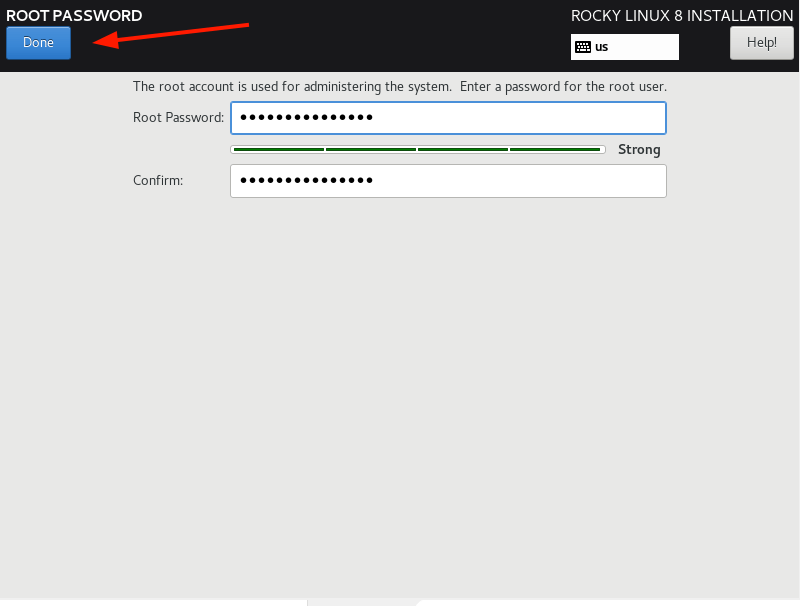
The last parameter to configure is the ‘User settings’ beginning with the root password.
Provide a robust root password and save the changes.
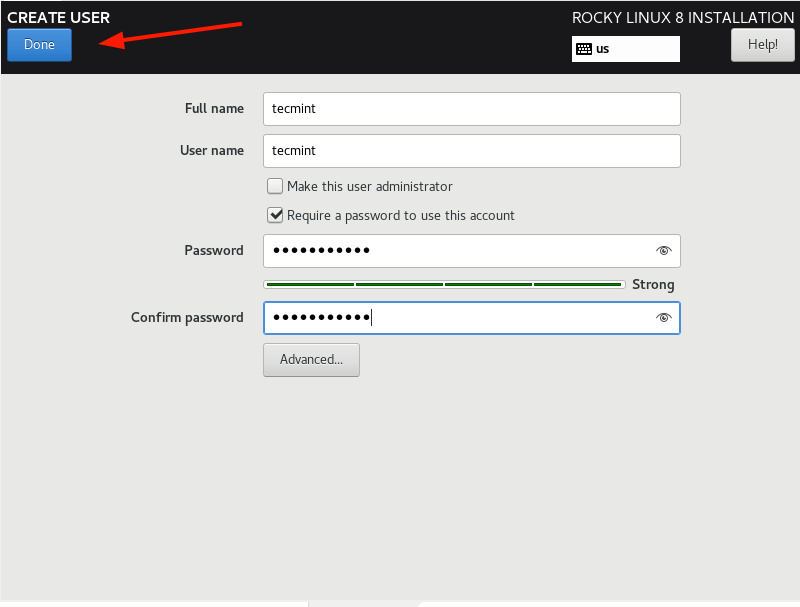
Next, proceed and create a new regular user by clicking on the ‘User creation’ option.

Provide the username and password and click on ‘Done’.
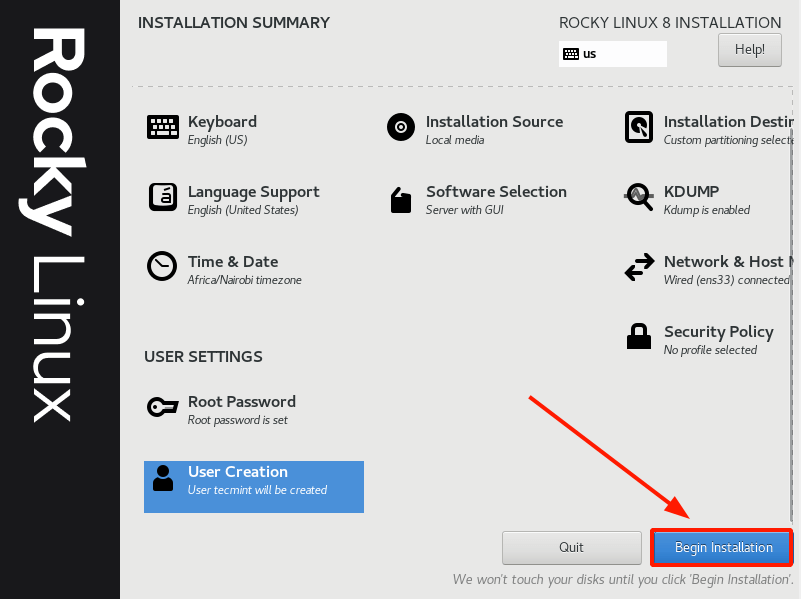
Begin the Installation of Rocky Linux 8
At this point, all the required settings have been configured. To kickstart the installation of Rocky Linux 8 on your system, click on ‘Begin Installation’.
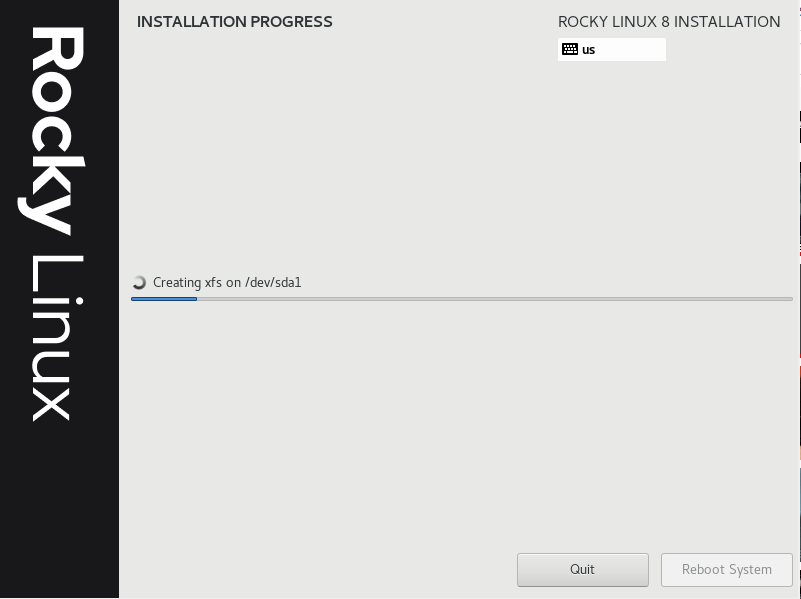
The installer will begin by writing all the partitions on the hard drive and start installing all the required software packages depending on the base environment selected. This process takes roughly 40 minutes. At this point, you can take a much-deserved break and take a stroll.
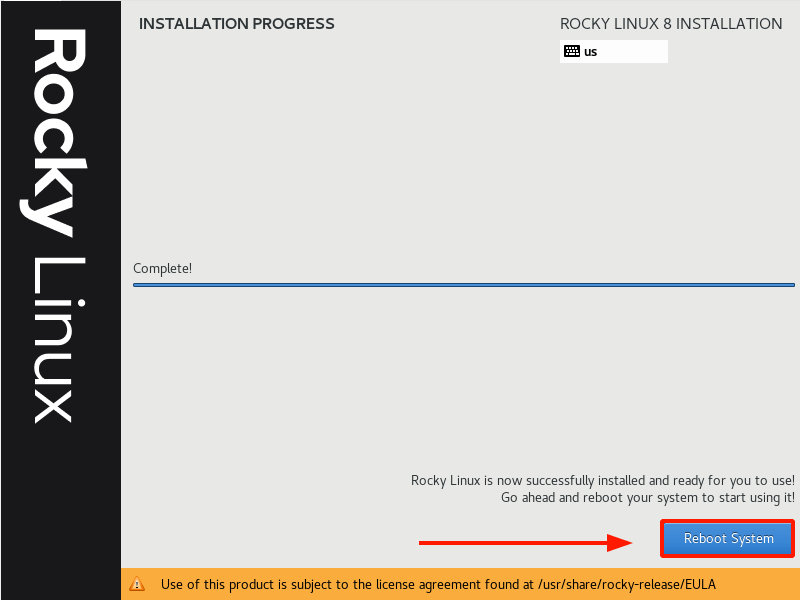
Once the installation is complete, you will be prompted to restart the system. At this point, remove your bootable USB drive and hit ‘Reboot system’.
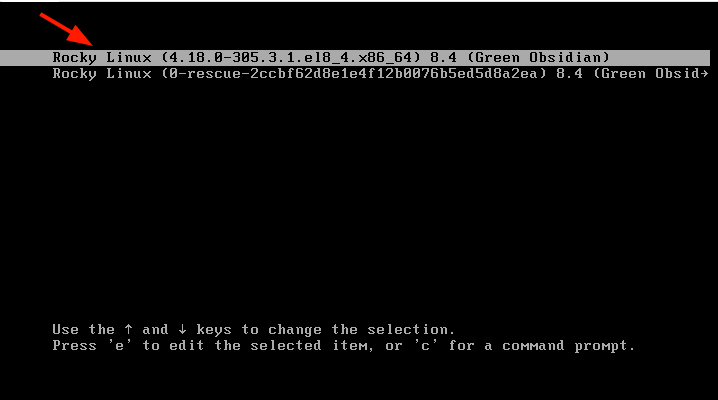
On the GRUB menu, select the first option to boot into Rocky Linux.
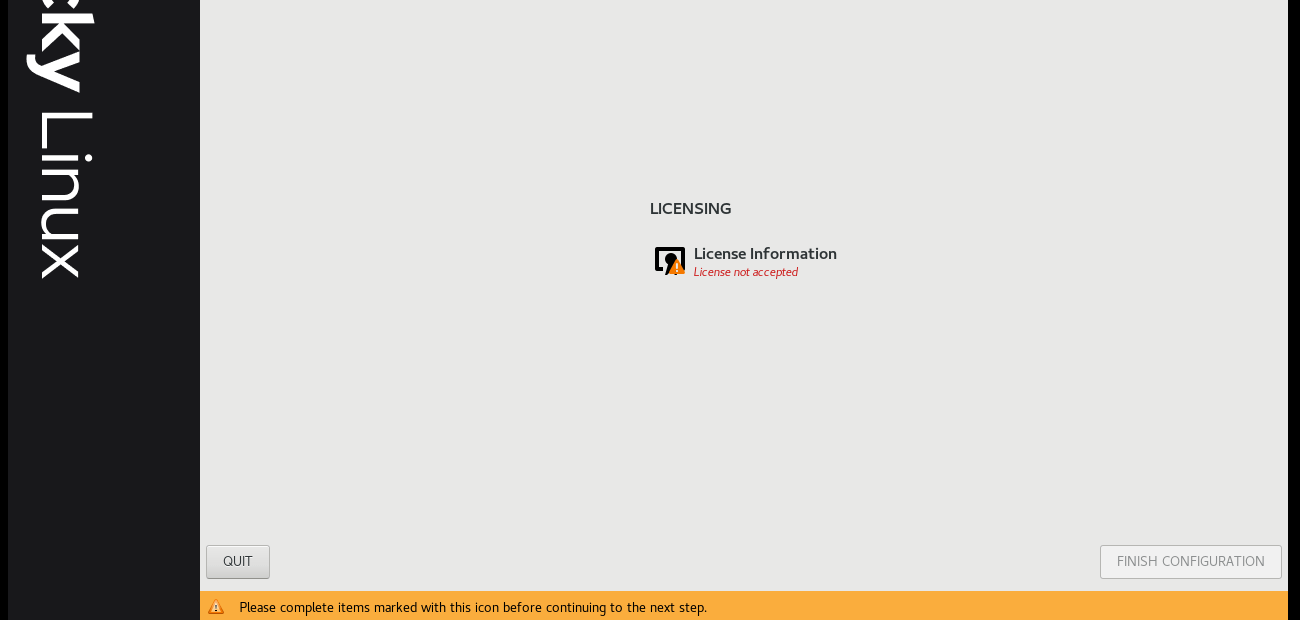
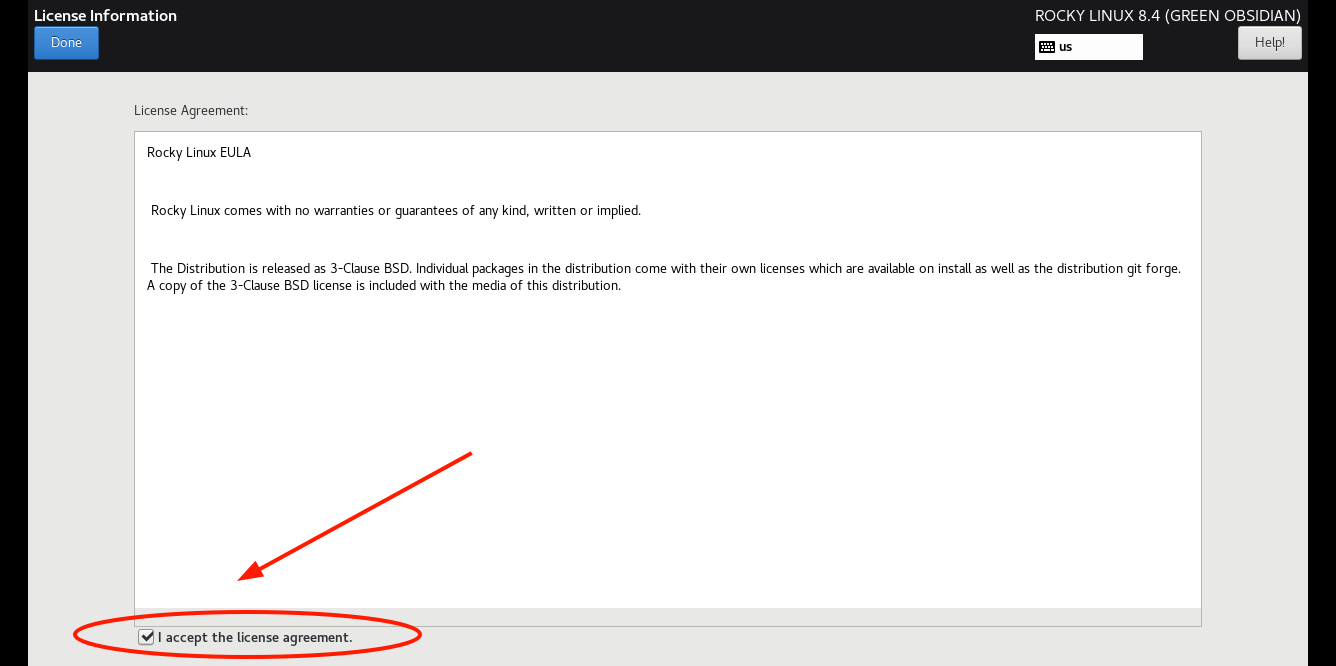
You will be required to accept the End User License agreement. So, click on the License Information section.
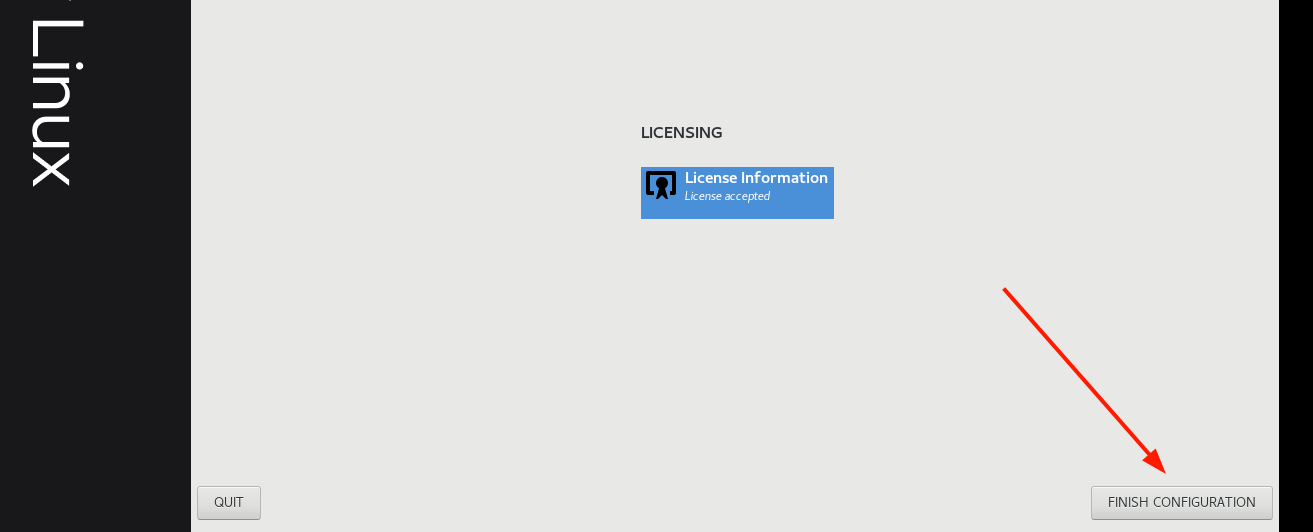
Accept the license agreement as shown.
And finally, click on ‘FINISH CONFIGURATION’.
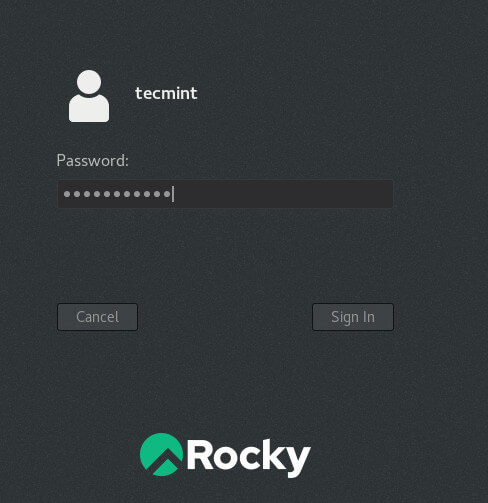
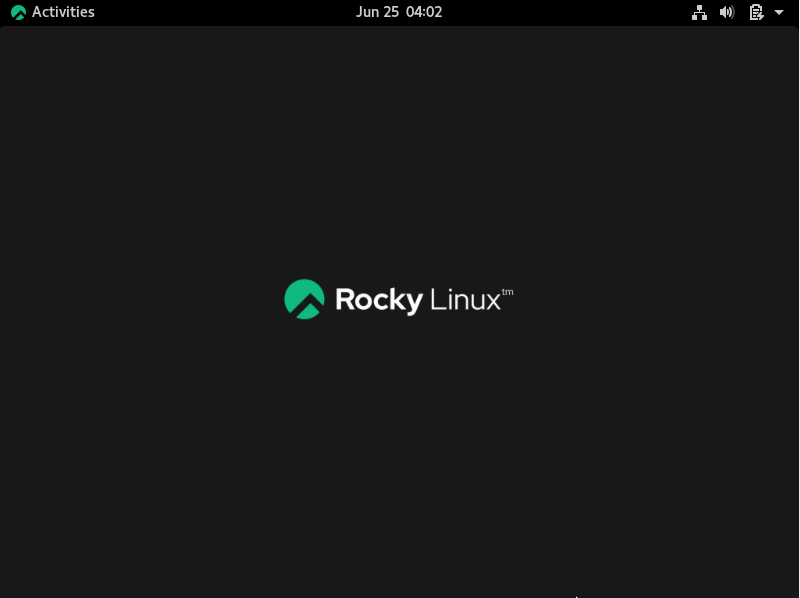
Finally, the login GUI will be displayed. Click on the login user icon and provide the password that you specified when creating a new user.
And this ushers you to the Rocky Linux desktop.
[ You might also like: How to Secure and Harden OpenSSH Server ]
Conclusion
As you have noted, the installation of Rocky Linux 8.5 mirrors that of CentOS 8 since Rocky Linux is a fork of the latter. You can now rest easy with the assurance that you have a stable and enterprise-grade system that will provide the same benefits as RHEL at absolutely no cost. In this tutorial, we have successfully installed Rocky Linux 8.5.


Some tech writing tips:
> Avoid the phrase “click on…”. You don’t say “press on the ‘Enter’ key”. Likewise, you should say “Click the ‘Keyboard’ option”.
> Regarding the phrase “This is how the partition table looks like”, the correct phrases are: “what it looks like” and “how it looks”. The phrase should either read “This is how the partition table looks”, or, “This is what the partition table looks like”.
Other than these items, congratulations on a well-written, concise guide!