WordPress is a powerful and feature-rich opensource content management system (CMS) that allows users to create powerful and stunningly beautiful websites. It’s written in PHP and powered by MariaDB or MySQL database server at the backend. WordPress is hugely popular and commands a market share of nearly 40% of all the websites hosted online.
Want to install WordPress on Rocky Linux? You’ve come to the right place. In this guide, we will demonstrate how to install WordPress on Rocky Linux 8.
Prerequisites
As a requirement, you need to have the LAMP stack installed on Rocky Linux 8. Also, be sure you have SSH access to your Rocky Linux instance and a sudo user configured.
Step 1: Install PHP Modules in Rocky Linux
A number of PHP modules are required for the installation of WordPress to proceed smoothly. In this regard, execute the following command to install them.
$ sudo dnf install install php-gd php-soap php-intl php-mysqlnd php-pdo php-pecl-zip php-fpm php-opcache php-curl php-zip php-xmlrpc wget
After the installation of the PHP modules, remember to restart the Apache webserver to load the installed PHP modules.
$ sudo systemctl restart httpd
Step 2: Create Database for WordPress
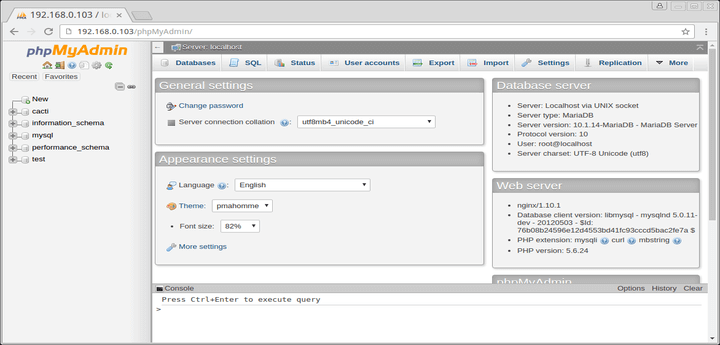
Moving forward, we are going to create a database for WordPress. This is the database that will hold all the installation and post-installation files for WordPress. Therefore, log in to the MariaDB database as follows:
$ sudo mysql -u root -p
Create the WordPress database.
CREATE DATABASE wordpress_db;
Next, create the database user and assign the password.
CREATE USER 'wordpress_user'@'localhost' IDENTIFIED BY 'your-strong-password';
Then grant all the privileges to the database user on the WordPress database.
GRANT ALL ON wordpress_db.* TO 'wordpress_user'@'localhost';
Save the changes and exit.
FLUSH PRIVILEGES;
EXIT;
The database is now in place. We are going to download the WordPress installation file and get underway with the installation.
Step 3: Download WordPress in Rocky Linux
At the moment, the latest version of WordPress is WordPress 5.8 codenamed ‘Tatum’. It is named after Art Tatum, a legendary and famous Jazz artist. We will download its archive file from the Official WordPress download site.
To achieve this, use the wget command-line tool to grab the latest archive file.
$ wget https://wordpress.org/latest.tar.gz -O wordpress.tar.gz
Once downloaded,, extract the compressed file.
$ tar -xvf wordpress.tar.gz
Next, copy the uncompressed wordpress directory to the webroot folder
$ sudo cp -R wordpress /var/www/html/
Step 4: Set Ownership and Permissions on WordPress
Next, set the ownership of the wordpress directory to apache user and group.
$ sudo chown -R apache:apache /var/www/html/wordpress
Then set the directory permissions as follows to allow global users to access the directory’s contents.
$ sudo chmod -R 775 /var/www/html/wordpress
Next, configure the SELinux context for the directory and its contents.
$ sudo semanage fcontext -a -t httpd_sys_rw_content_t "/var/www/html/wordpress(/.*)?"
For the SELinux changes to come into effect, run:
$ sudo restorecon -Rv /var/www/html/wordpress

NOTE: You are likely to bump into the error – semanage: command not found. This is an indicator that semanage – a tool that handles the configuration of certain aspects of SELinux – is missing.
Therefore, we need to install the semanage tool. To check which package provides semanage run the command:
$ sudo dnf whatprovides /usr/sbin/semanage.
From the output, we can see that policycoreutils-python-utils-2.9-14.el8.noarch package is the one that provides semanage and is readily available from the Rocky Linux BaseOS repository.
$ sudo dnf install policycoreutils-python-utils
Step 6: Create an Apache Configuration File for WordPress
Next, we are going to create an Apache configuration file for WordPress. This will point the Apache webserver to the WordPress directory and its contents.
To do this, run the command:
$ sudo vim /etc/httpd/conf.d/wordpress.conf
Then paste the following lines and save the changes.
<VirtualHost *:80>
ServerName server-IP or FQDN
ServerAdmin root@localhost
DocumentRoot /var/www/html/wordpress

<Directory "/var/www/html/wordpress">
Options Indexes FollowSymLinks
AllowOverride all
Require all granted
</Directory>

ErrorLog /var/log/httpd/wordpress_error.log
CustomLog /var/log/httpd/wordpress_access.log common
</VirtualHost>
Restart Apache webserver for the changes to be effected.
$ sudo systemctl restart httpd
Then verify if the webserver is running:
$ sudo systemctl status httpd
At this point, all the configurations are done. The only thing left is to set up WordPress from a web browser which we will embark on in the next and final stage.
But before we do so, it’s prudent that we allow HTTP and HTTPS traffic on the firewall. HTTPS will come in handy in case you decide to encrypt the site with an SSL certificate.
To allow these protocols or services across the firewall, run the commands:
$ sudo firewall-cmd --permanent --zone=public --add-service=http
$ sudo firewall-cmd --permanent --zone=public --add-service=https
Then reload the firewall for the changes to be effected.
$ sudo firewall-cmd --reload
Great. Let’s finalize the setup.
Step 7: Set Up WordPress from a Browser
Launch your browser and head over to the URL provided.
http://server-IP/
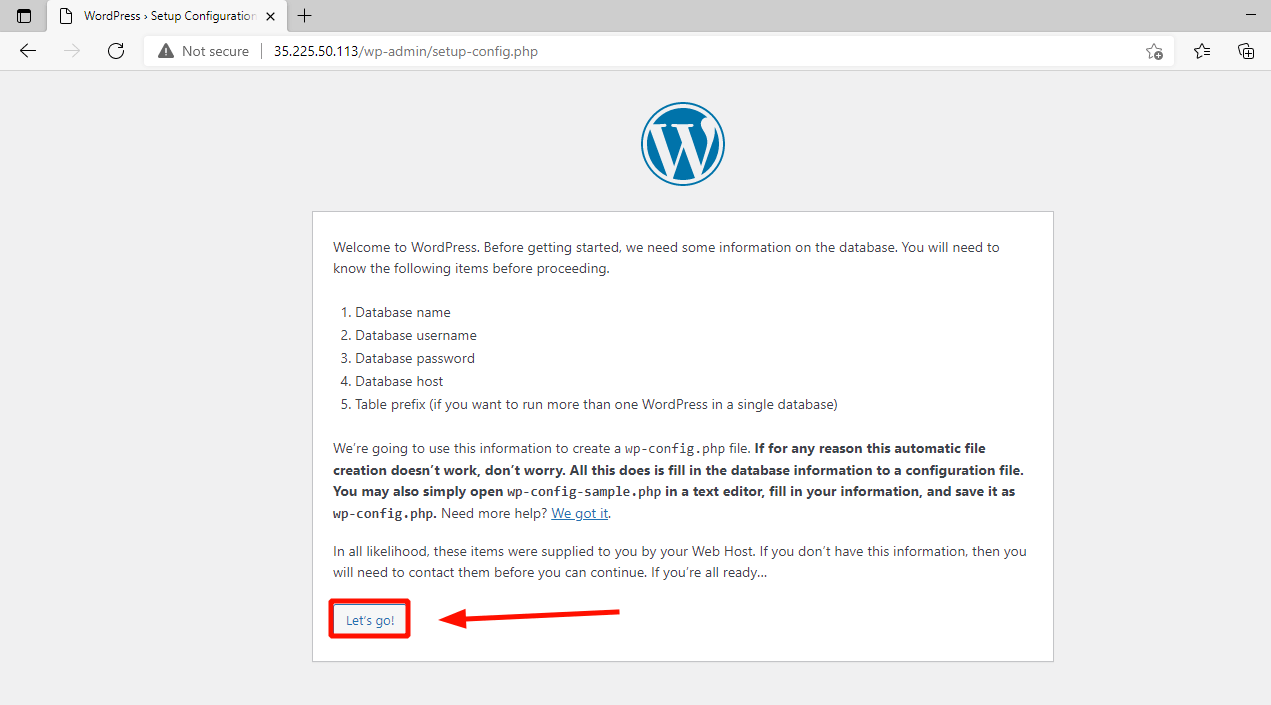
You should see the following page. Go over the instructions and click on the ‘Let’s Go’ button to proceed to the next step.
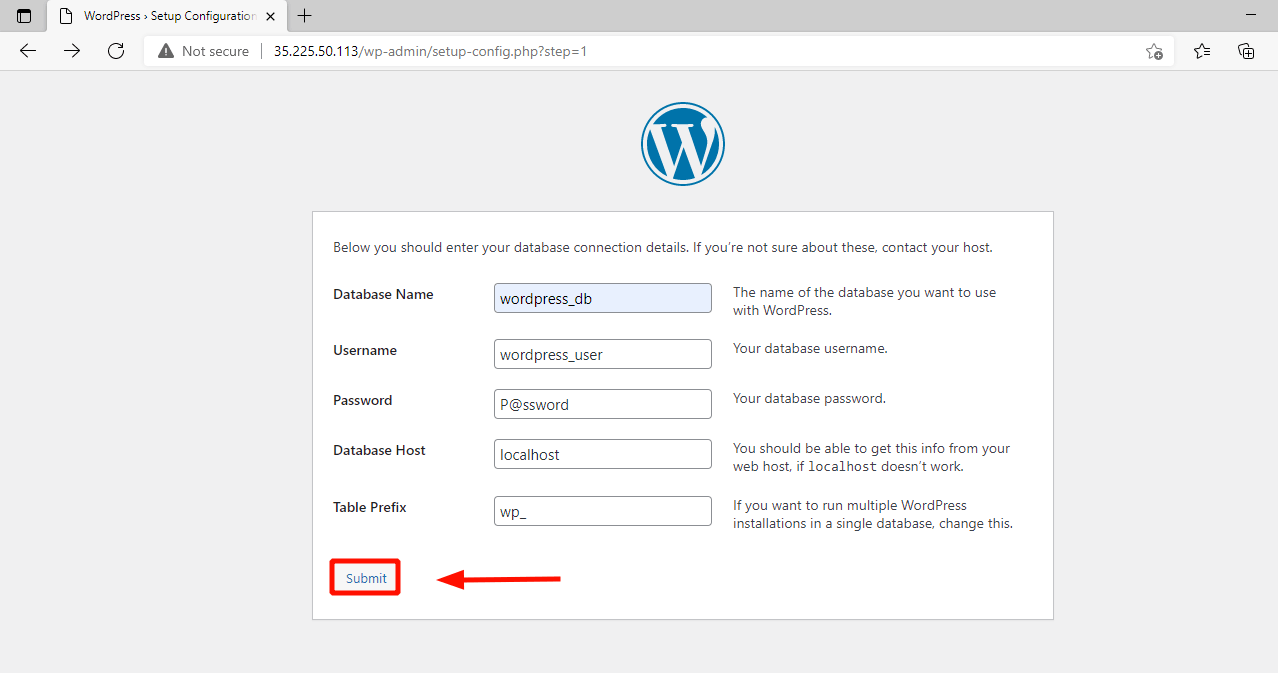
Fill out the WordPress database details and click ‘Submit’.
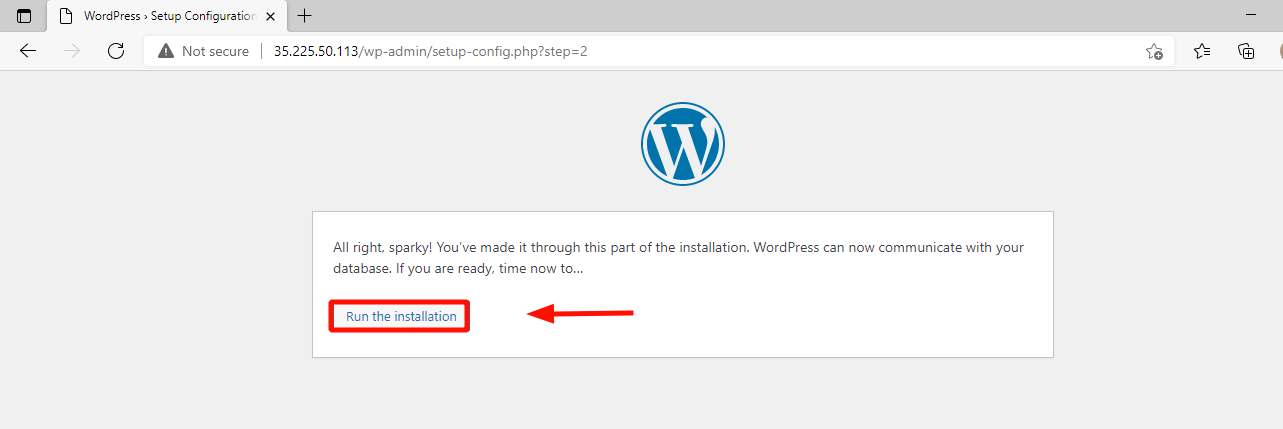
If all seems good, you will get this page that prompts you to run the installation. So, click on the ‘Run the installation’ button.
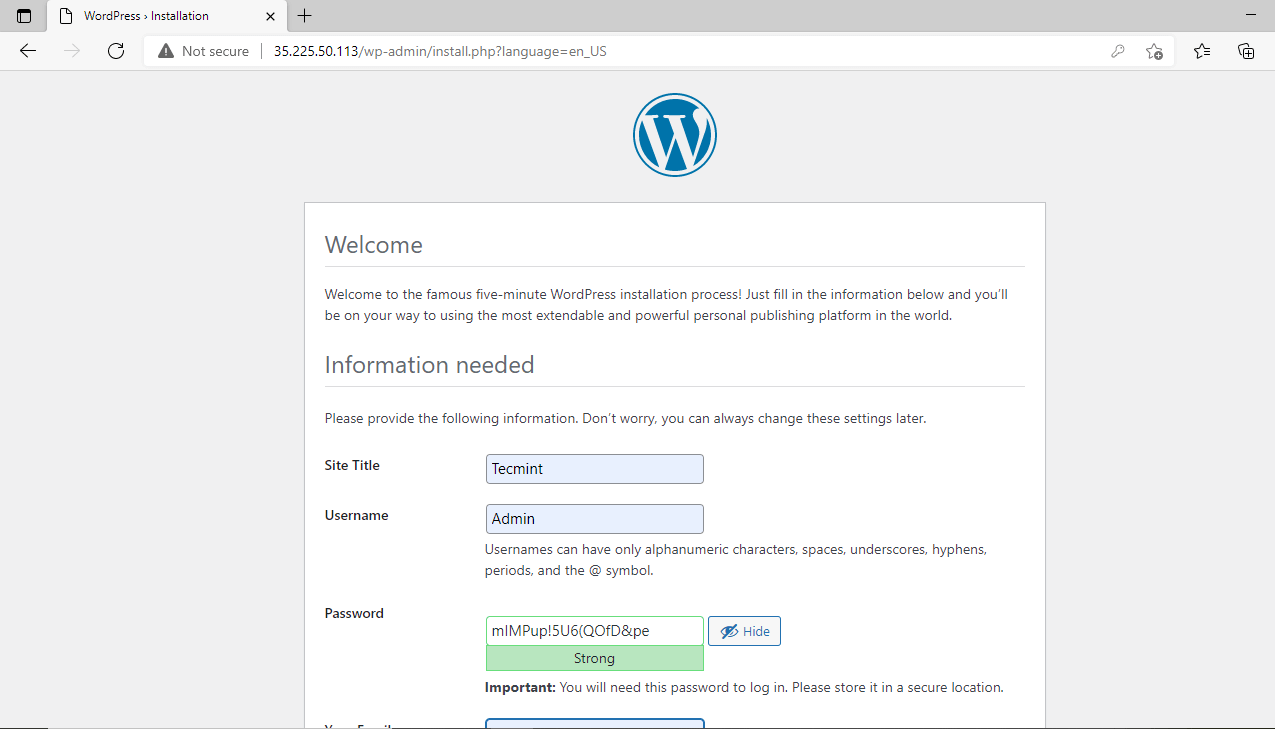
Next, provide the site details as you create an Admin user. Take careful note of the username and password details since you will use them to log in to WordPress at the very end.
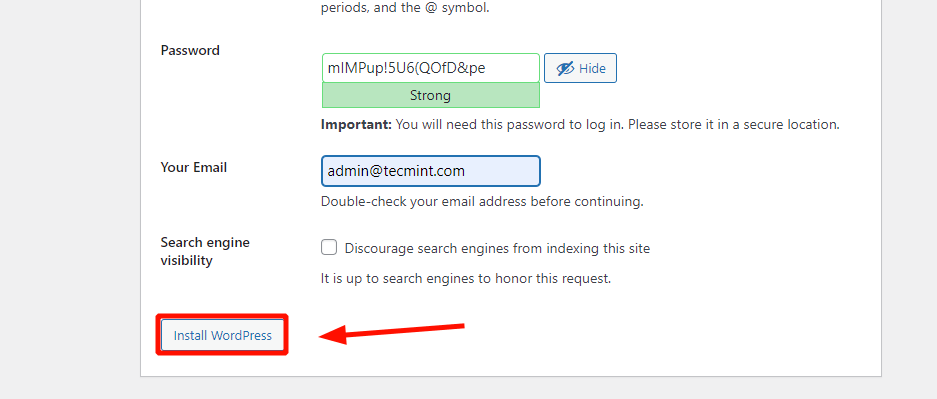
Then click on ‘Install WordPress’.
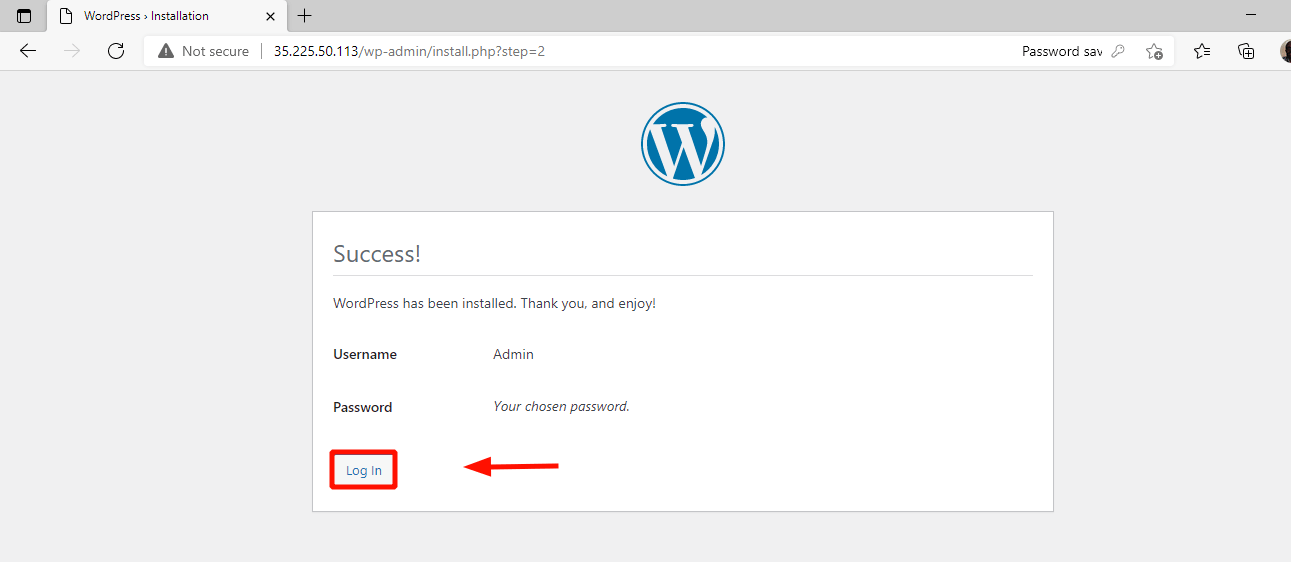
A few seconds later, you will get a notification that the installation was successful. To log in, click on the ‘Login’ button.
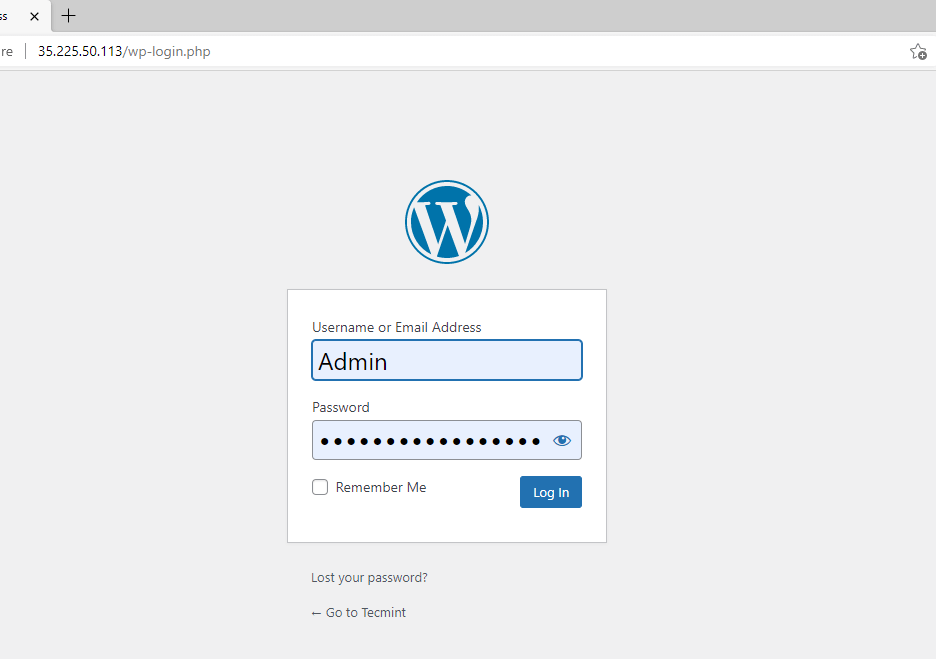
This takes you straight to the Login page. Type in the username and password we told you to take note of earlier and hit ‘Login’.
This takes you to the WordPress directory as shown.
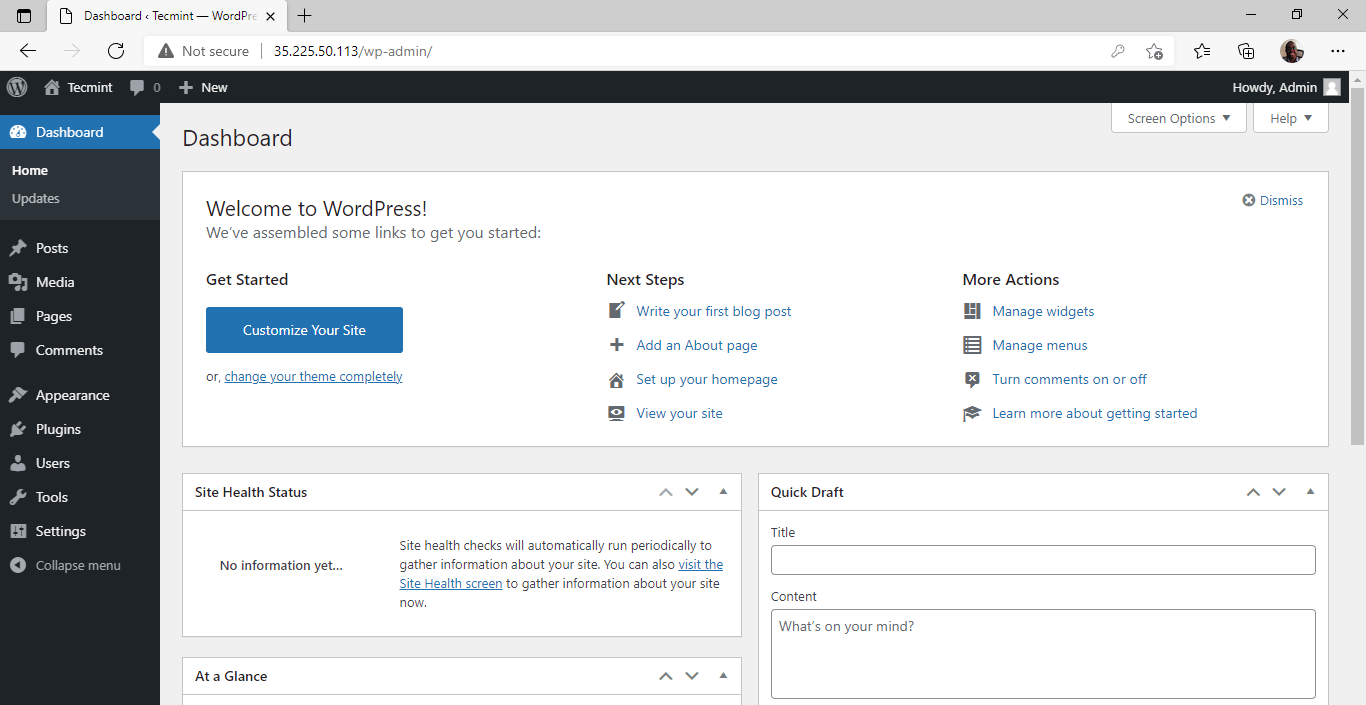
Perfect! You have successfully installed WordPress on Rocky Linux 8. From here, you can proceed and create your blog or website and enjoy the immense benefits that WordPress provides including free themes, and plugins to enhance the appeal and functionality of your site.
Furthermore, you can also enable HTTPS on your WordPress website using our guide – Secure Apache with Let’s Encrypt Certificate on Rocky Linux


