This article is about installing and configuring ZSH on Ubuntu 20.04. This step applies to all Ubuntu-based distributions. ZSH stands for Z Shell which is a shell program for Unix-like operating systems. ZSH is an extended version of Bourne Shell which incorporates some features of BASH, KSH, TSH.
Zsh Features
- Command-line completion.
- History can be shared among all shells.
- Extended file globbing.
- Better variable and array handling.
- Compatibility with shells like bourne shell.
- Spelling correction and autofill of command names.
- Named directories.
Installing Zsh in Ubuntu Linux
There are two ways to install ZSH in Ubuntu using an apt package manager and installing it from the source.
We will use the apt package manager to install ZSH on Ubuntu.
$ sudo apt install zsh
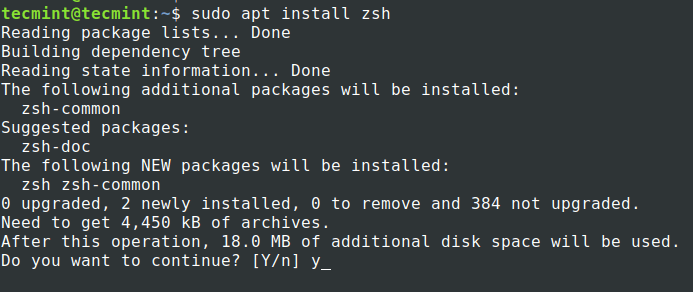
The package manager will install the latest release of ZSH which is 5.8.
$ zsh --version

zsh 5.8 (x86_64-ubuntu-linux-gnu)
Installing ZSH will not modify and set it as the default shell. We have to modify the settings to make ZSH our default shell. Use the “chsh” command with '-s' flag to switch the default shell for the user.
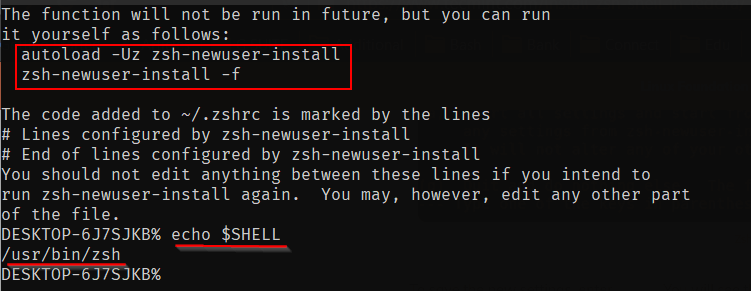
$ echo $SHELL
$ chsh -s $(which zsh)
or
$ chsh -s /usr/bin/zsh
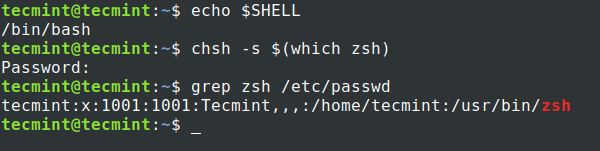
Now to use the new zsh shell, log out of the terminal and log in again.
Setting Up Zsh in Ubuntu Linux
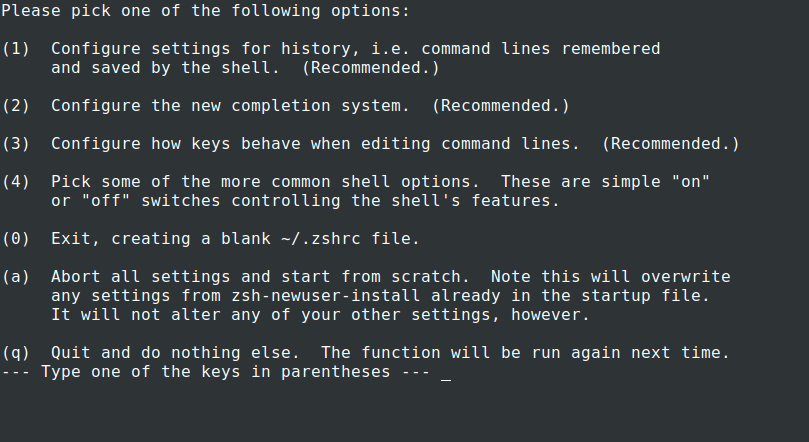
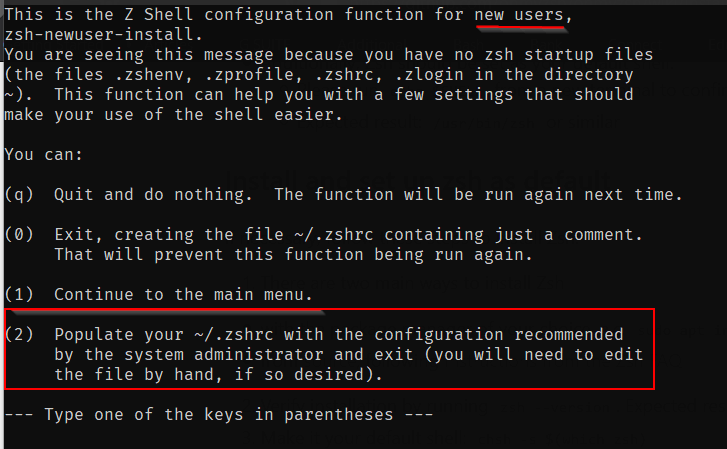
Compared to other shells like BASH, ZSH requires some first-time configuration to be taken care of. When you start ZSH for the first time it will throw you some options to configure. Let’s see what those options are and how to configure those options.
Select option “1” on the first page which will take us to the main menu.

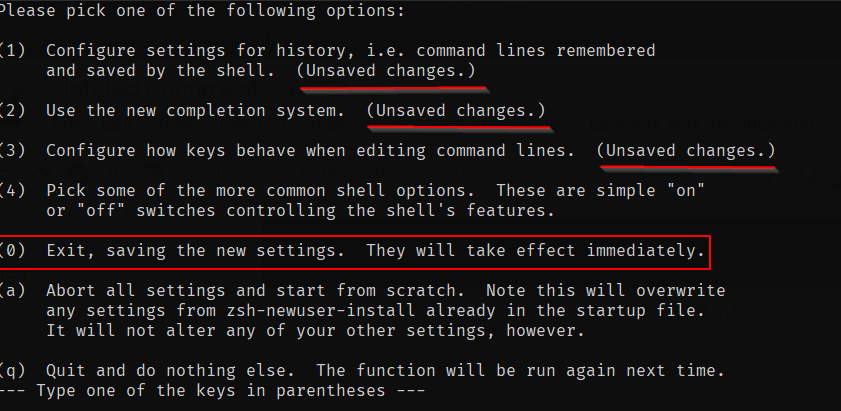
The main menu will display some recommended options to configure.
Press 1, it will take you to configure History related parameters like how many history lines to be retained and history file location. Once you are on the “History Configuration page” you can simply type "1" or "2" or "3" to change the associated configuration. Once you make the changing status will be changed from “not yet saved” to “set but not saved”.
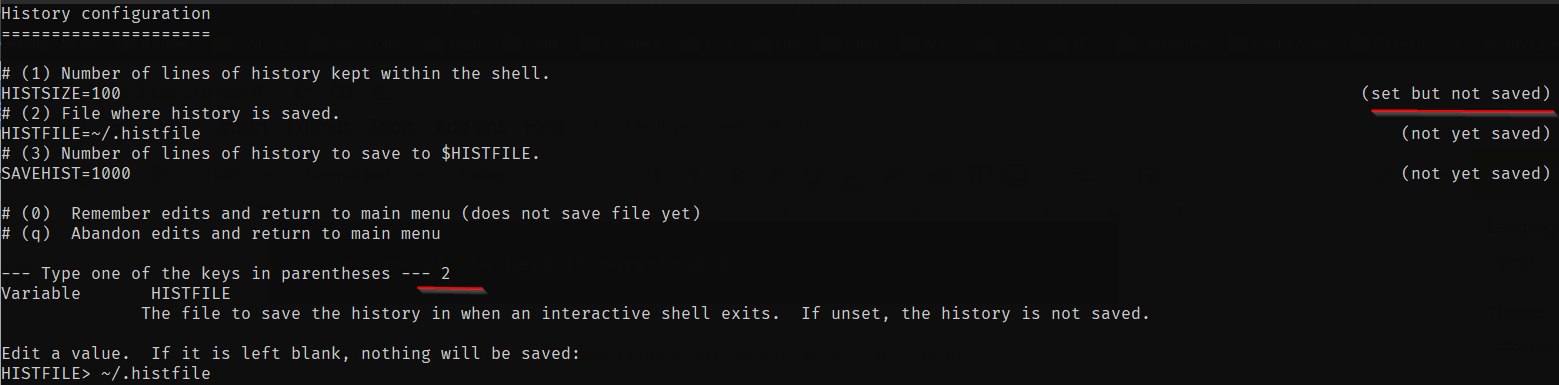
Press "0" to remember the changes. Once you come out to the main menu status will change from “recommended” to “Unsaved changes“.

Similarly, you have to modify the configuration for the completion system, keys, and common shell options. Once done press “0” to save all the changes.
Setup is completed now and it will take you to the shell. From next time your shell will not run through these initial setup, but you can run the new-user install command again as shown in the below image whenever needed.
There is an alternate and easy way instead of manually setting up each configuration. This is the way I prefer normally. Instead of choosing the option "1" and going to the main menu to set each setting, we can choose option "2" which will populate the .zshrc file with default parameters. We can change the parameters directly in the .zshrc file.
Revert to Old Bash Shell
In case you want to revert to the old shell you have to follow the below steps.
$ sudo apt --purge remove zsh
$ chsh -s $(which "SHELL NAME")
Now open a new session to see the changes to be effective
That’s all for this article. Take a look at our article on installing and configuring oh-my-zsh on ubuntu 20.04. Install ZSH and explore its features and share your experience with us.