Ytalk is a free multi-user chat program which works similar to the UNIX talk program. The main advantage of ytalk is that it allows for multiple connections and can communicate with any arbitrary number of users simultaneously.
In this article, we will explain how to install and setup a private, encrypted and authenticated chat server with Ytalk over SSH for secure, password-less access into the chat server, for each participant.
Read Also: ssh-chat – Make Group/Private Chat with Other Linux Users Over SSH
Installing Ytalk and OpenSSH Server in Linux
Install Ytalk and OpenSSH Server using APT package manager as shown.
$ sudo apt-get update
$ sudo apt-get install ytalk openssh-server
Once installed, openbsd-inetd and sshd services should be auto-started by the installer. You can check if they are up and running as shown:
$ sudo systemctl status openbsd-inetd
$ sudo systemctl status sshd
OR
$ sudo service openbsd-inetd status
$ sudo service sshd  status
Now create a user account called talkd and add it to the group tty on the system.
$ sudo useradd talkd
$ sudo usermod -a -G tty talkd
Now you need to configure inetd, open its main configuration file using your favorite text editor and edit it as explained below.
$ sudo vim /etc/inetd.conf
Scroll down to the lines:
talk dgram udp wait nobody.tty /usr/sbin/in.talkd in.talkd
ntalk dgram udp wait nobody.tty /usr/sbin/in.ntalkd in.ntalkd
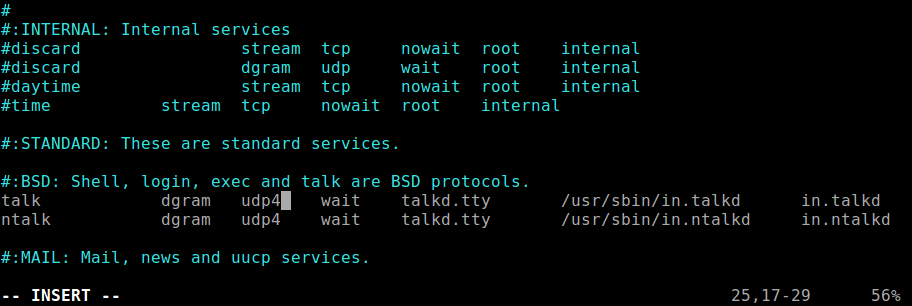
and change them to look like this (replace the username “nobody” with “talkd“).
talk dgram udp4 wait talkd.tty /usr/sbin/in.talkd in.talkd
ntalk dgram udp4 wait talkd.tty /usr/sbin/in.ntalkd in.ntalkd
Then restart the openbsd-inetd for the recent changes to take effect, by running.
$ sudo systemctl restart openbsd-inetd
OR
$ sudo service openbsd-inetd restart
Create User Accounts and Configure SSH
Now its time to create user accounts for all the participants in the chat server with the adduser command.
$ sudo adduser tecmint
$ sudo adduser ravi
Afterwards, you need to configure password-less SSH login for all user accounts. The users need to create a private and public key combination on their local machines. Then the users need to send you the administrator, the contents of their public keys to add into a file known as authorized_keys, their home directory under /home/$USER/.ssh (for each user).
For example, to setup user tecmint after receiving the contents of his public key, do the following.
$ mkdir /home/tecmint/.ssh
$ chmod 600 /home/tecmint/.ssh
$ vim /home/tecmint/.ssh/authorized_keys  #copy and paste the contents of the public key in here
$ chmod 600 /home/tecmint/.ssh/authorized_keys
Testing the Secure Chat Server
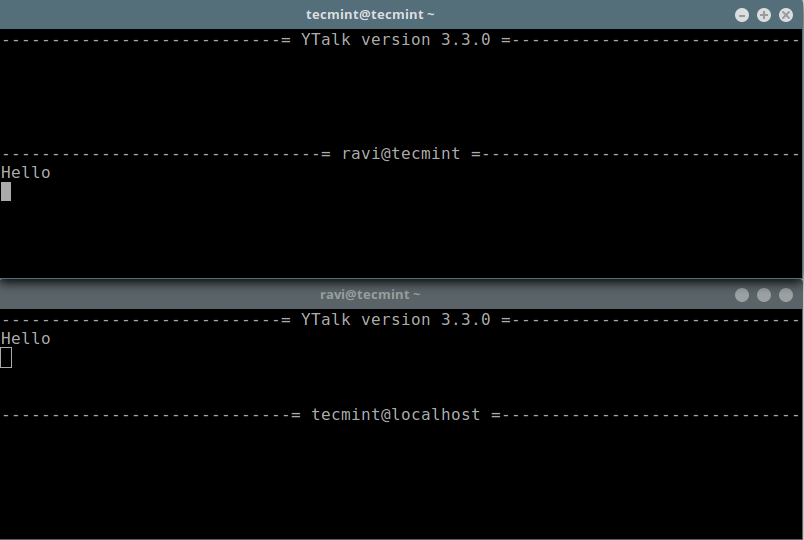
At this stage, you now need to test if the chat server is working fine. Simply log into the server then run the ytalk command. For instance, if tecmint user wishes to chat with user ravi, all he can do is run.
$ ytalk ravi
Then user ravi after login, can run the following command to start chatting.
$ ytalk tecmint
That’s all! In this article, we have shown how to setup a private chat server with Ytalk over SSH. Share your comments via the feedback form below.


Looking for live use case. Kindly explain in the context