SSH (Secure SHELL) is one of the most used network protocols to connect and login to remote Linux servers, due to its increased security provided by its cryptographic secure channel established for data flow over insecure networks and its Public Key Authentication.
While using SSH passwords to log in to remote Linux servers can provide less secure system security because a password can be brute-force cracked.
SSH Public Key Authentication provides the best secure method to perform distance logins, because it’s almost impossible to decipher the key, and the private key guarantees that the sender it’s always who it claims to be.
[ You might also like: How to Secure and Harden OpenSSH Server ]
This article will show you how you can generate and use SSH Keys from Windows-based platforms using Putty client to automatically perform remote logins on Linux servers without the need to enter passwords.
Step 1: Install Putty and Generate SSH Key Pairs
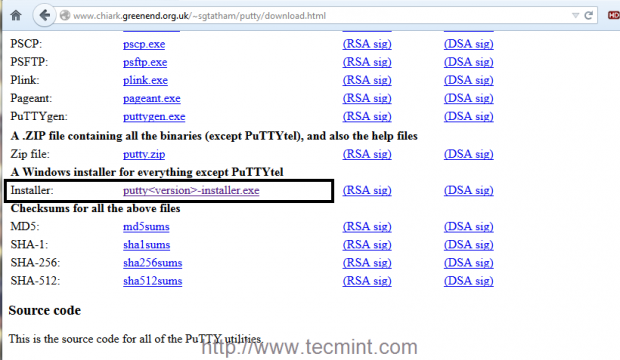
1. The first step you need to take is to go to the official Putty download page, grab the last version of the Putty Windows Installer executable package and install it onto your Windows computer.
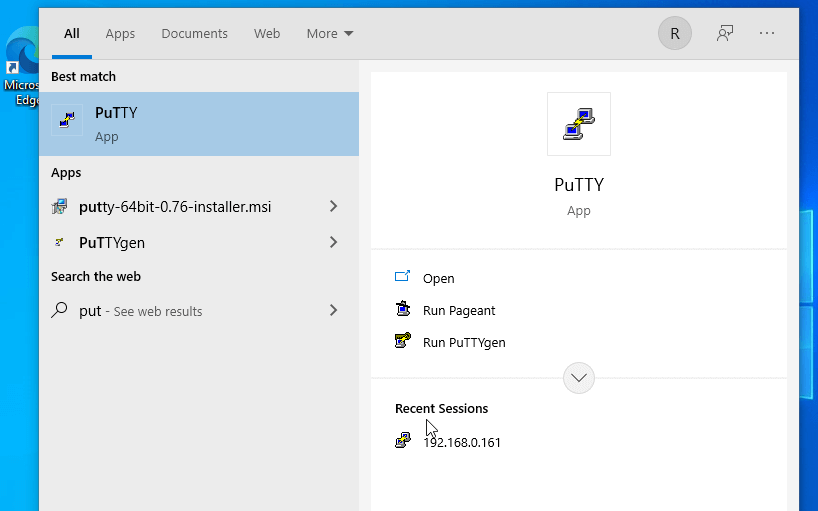
2. After you have finished installing Putty go to Windows Start, type putty string to search field, and open PuTTygen program which you will use to generate Keys pairs.
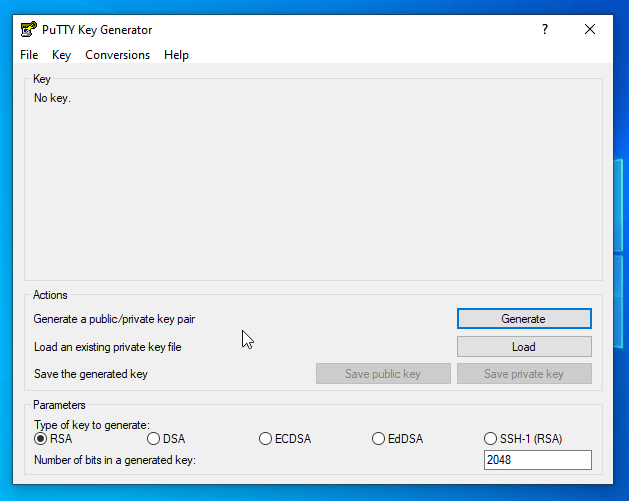
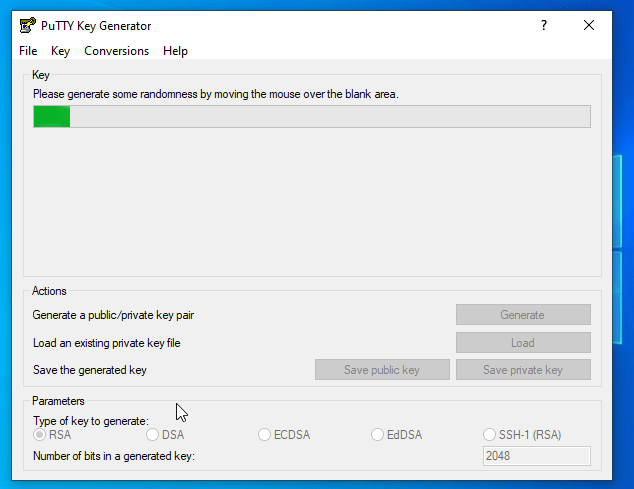
3. Once the program opened, it’s time to proceed with Keys generation. Select SSH-2 RSA Key with 2048 bits, hit the Generate button, and move the cursor randomly on the Putty Key Generator field window as presented in the screenshots below in order to produce SSH Keys.
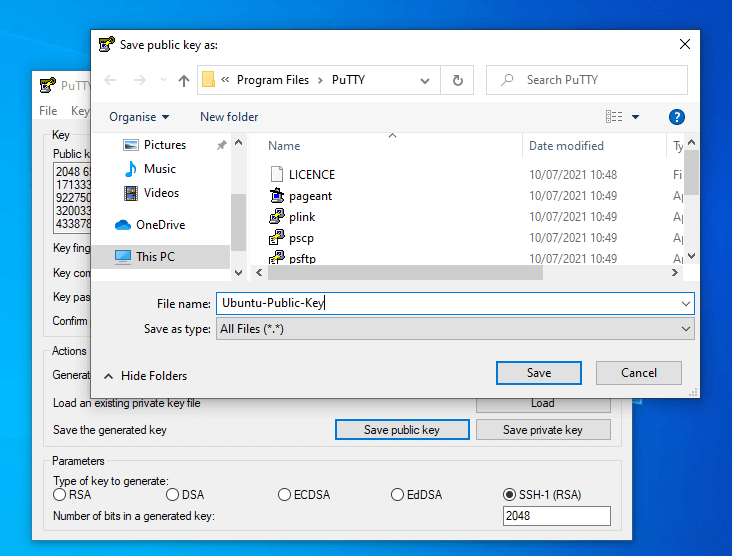
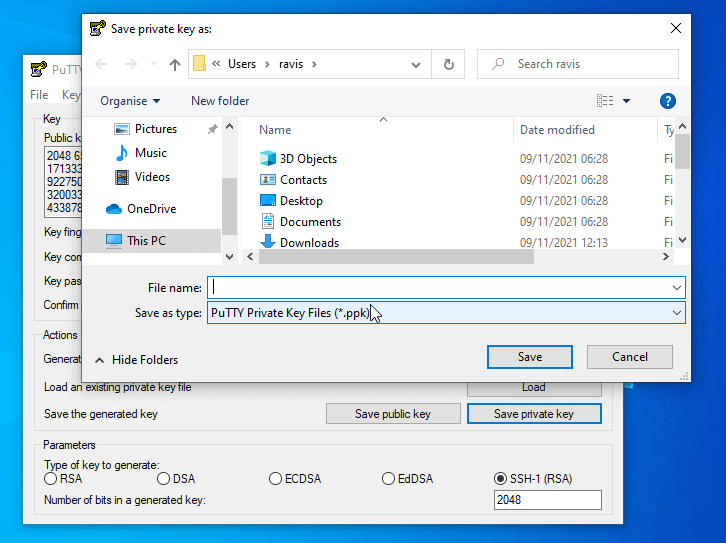
4. After the Keys are generated, add a descriptive Key comment to help you easily identify your key and Save both keys (Public and Private Keys) to a secure location on your computer.
Pay extra attention to where you save the Private Key because if anyone steals this key it can perform logins to your server without the need to enter a password.
[ You might also like: Useful PuTTY Configuration Tips and Tricks ]
Also, to enforce Keys security you can choose a passphrase to protect your keys, but you might want to avoid passwords for automated processes because it will ask you to enter the password key every time you perform server login.
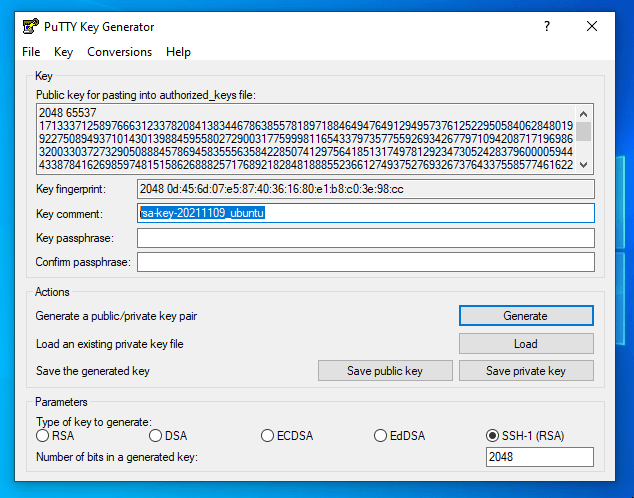

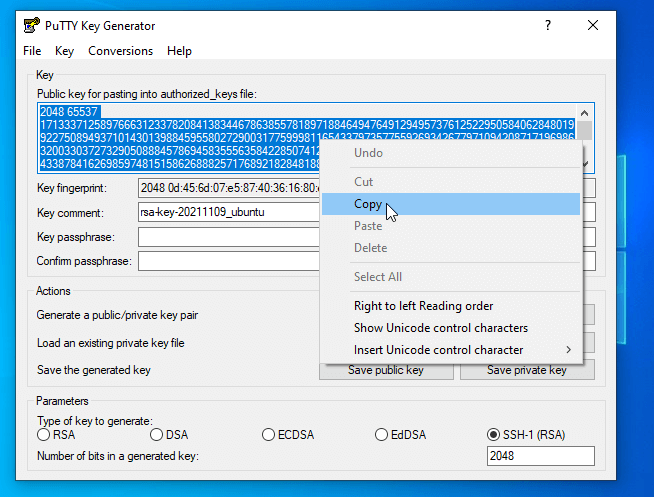
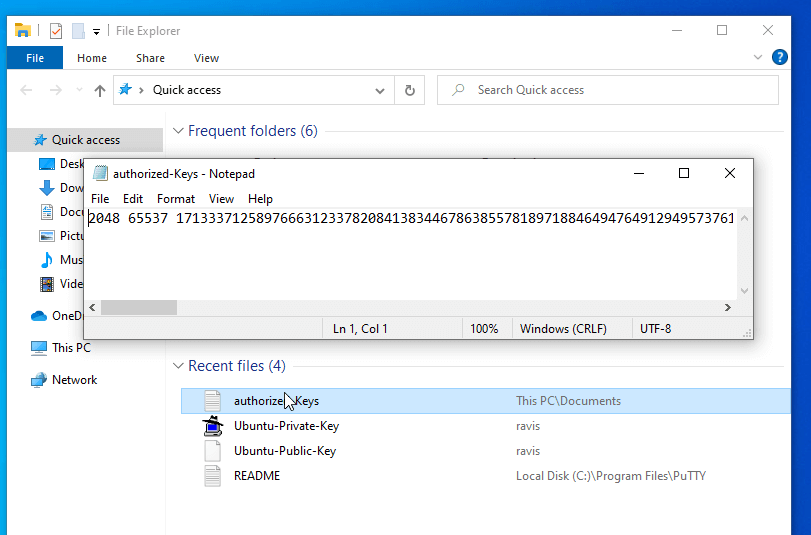
5. After you have saved both Keys, don’t close the Putty Key Generator window yet, select copy and save the text field of Public Key into a text file which will be later pasted into the OpenSSH authorized_keys file on the remote server.
Step 2: Copy SSH Key to Perform PasswordLess Login Using Putty
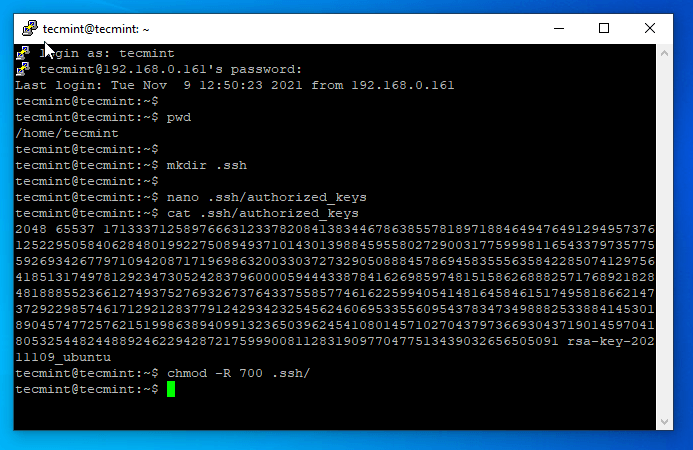
6. Now it’s time to copy the key to the destination remote server and perform automatic login connections. Login to server with your administrative user (root or an account with root powers) using Putty and create .ssh directory and authorized_keys file onto its home path by issuing the following commands.
# pwd   		## To see if you are in the correct $HOME location
# mkdir .ssh
# nano .ssh/authorized_keys
7. On the authorized_keys file opened for editing in Putty, paste the content from the Public Key that you copied earlier from Putty Key Generator, save and close the file, view the contents, protect the folder, and authorized_keys with 700 permissions, and exit from the server.
# cat .ssh/authorized_keys
# chmod -R 700 .ssh/
# exit
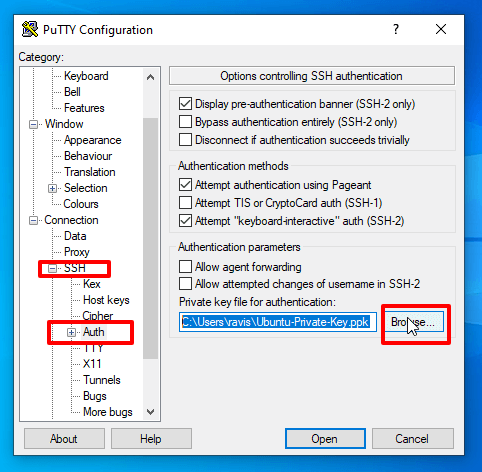
8. In order to automatically connect and login to your server you need to add the Private Key to the Putty client. Open Putty and add your server login user followed by your server IP Address or FQDN on Host Name field in the form of [email protected], enter your server SSH Port number if it was changed.
Then go to the left Category menu, select SSH –> Auth, hit the Browse button, search and add your Private Key.
9. After you added the Private Key, go back to the Session menu, enter a descriptive name to the Saved Session field, and hit the Save button to save your current Putty session.
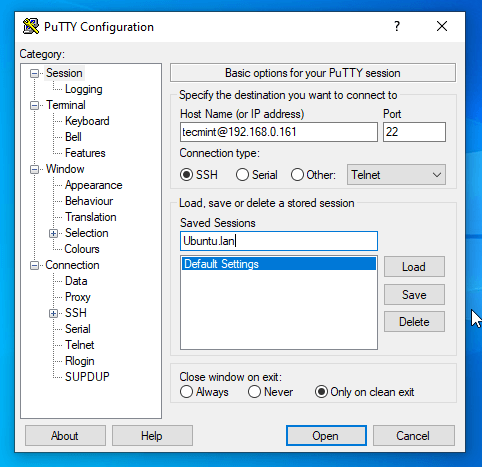
10. That’s it! Now you can automatically securely connect to your remote SSH server with Putty client by hitting the Open button without the need to enter passwords.
[ You might also like: SSH Passwordless Login Using SSH Keygen ]


Setting permissions to 700 worked for me on redhat 7.
A very handy method for debugging ssh is here on stackoverflow:
https://unix.stackexchange.com/questions/156038/ssh-server-refused-our-key-with-no-reason
That told me the file permissions were not right…
Hi Ravi Sir /Team,
There is one correction i.e, On authorized_keys permission is not working on 770 permission, its works only on 600. please check once.
Dear Mr,
I have problem with port ssh, I can`t change the default port to custom port. I use 9899 for my custom port. Can you advice me step by step, because I follow your tutorial step by step to change port on sshd_config and also enabled port in selinux but its still not work.
When I try to connect using the port from other computer in the same network the error connection refused for port 22. When I try add comment
-p 9899in the end command are still refused.Can you advice me?
Tthanks in advanced.
regard
@Helwi,
Please allow the port in Firewall also, if you are using any firewall like iptables or firewalld.
Remove the public key from authorized_keys and the private key from Putty configuration.
how do i revoke this so i can go back to manually inputting passwd
thanks
Whole ssh needs only a public key and private key. You’ve involved 3 files. Private, public and copy/paste of public key.
Thanks for the clearly written article with snapshots. Got it on the first try. Saved a heap of trouble.
I’m getting this below error. could you please help me out. Thanks in advance
Using username “tej”.
Server refused our key
[email protected]‘s password:
You did not uploaded the correct public key on the server or there is another issue with the generated keys! Generate another set of key-pairs and repeat the steps!
very good article.. clearly it helped me..
Thanks
@XFire: a solution for keeping the key save if you need to carry it to other places would be to copy it to an encrypted USB and plug the USB whenever you need to use the key from foreign locations…This is not a final solution …just an suggestion!
Before configuring step 8 the the hostname and port has been already entered for this session …so there is no risk to share the private key with other sessions configured later….the key tides only on this host configuration… if you have other host to configure, generate a new pair of keys and save the session coresponding to your new host.
After step 8, you can save to default settings, and PuTTY will try the key for any new host you log in to. If there is no authorized_keys file (or the permissions are incorrect), most SSH servers will prompt for a password.
I propose to not use PuTTY but KiTTY from http://www.9bis.net/kitty/ – it’s based on PuTTY but enhanced in many ways. For example you can configure it far better than PuTTY and it offers to save passwords for you (discouraged on unencrypted systems)…
Please, is necesary explain before about detail why this solution understand that is before of the solution, some graphic or map and the connectivity. Thanks
Hello. Frankly saying private key method seems more difficult to execute even more risky. Involve key for you to carry wherever you login, and your risk is greater to be stolen. A complex password combined with ssh fail2ban seems safer ( in my opinion ) . For more people scattered like me , it’s easier to remember a password either and complex than to remember where the hell is that key … Keeping them on the cloud that is accessible from anywhere do not think that is a solution.
Change SSH port, install and configure DenyHosts and use a *strong* SSH password, and you’re almost good to go (no need for port knocking or other overkill techniques).
I use this configuration for years, never had a single Linux server hacked via SSH.