Thonny is an Integrated Development Environment (IDE) for Python beginners. It is created with Python and released under MIT License. It is cross-platform and can run in Linux, macOS, Windows.
Why Thonny IDE
If you are new to programming or someone switching from a different language I suggest using thonny. The interface is clean and distraction-free. Newbies can concentrate on language instead of focusing on setting up the environment.
Some of the key features of thonny include
- Python 3.7 is installed by default with Thonny setup.
- Built-in Debugger and Step through evaluation.
- Variable Explorer.
- Heap, Stack, Assistant, Object Inspector.
- Built-in Python shell (Python 3.7).
- Simple PIP GUI Interface to install 3rd party packages.
- Support code completion.
- Highlights syntax errors and explain scopes.
In this article, you will learn how to install and use Thonny Python IDE in a Linux environment and exploring the features of thonny.
Setting Up Thonny Python IDE on Linux
The latest version of Thonny is 3.3.0 and there are three ways you can install thonny in Linux.
- Use Python package manager – PIP
- Download and run the install script
- Use default package manager to install it
Install Thonny IDE Using Pip
# pip3 install thonny
Install Thonny IDE Using Installer Script
# bash <(curl -s https://thonny.org/installer-for-linux)
Install Thonny IDE Using Package Manager
$ sudo apt install python3-tk thonny   [On Debian/Ubuntu]
$ sudo dnf install thonny   [On CentOS/RHEL & Fedora]
For demonstration purposes, I am using Ubuntu 20.04 and running the installer script with wget command as shown above to install thonny. At the end of the installation, you will come to know where is thonny installed. In my case, it is installed in my home directory.

To launch thonny, go to the installed directory and type “./thonny” or absolute path to thonny. Thonny will ask you to set up Language and Initial settings.
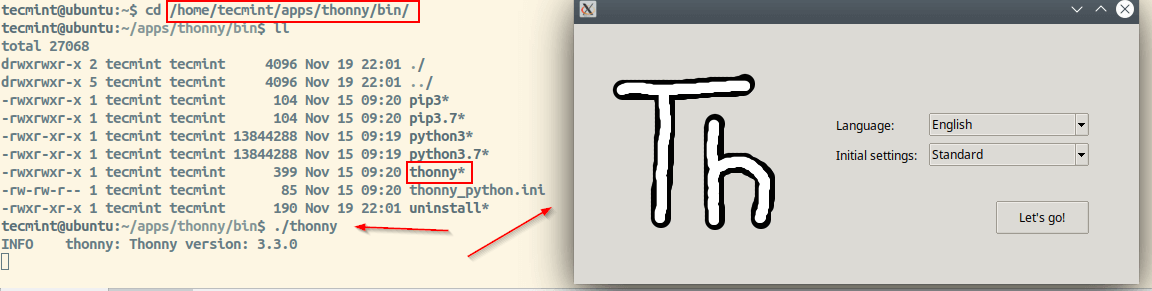
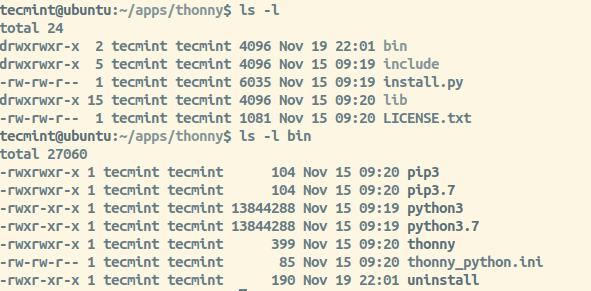
As shown in the installation section, Thonny is installed in the home directory. If you look at the thonny folder it has install script, necessary python libraries for thonny to work, binaries. Inside the bin directory, there is python 3.7 and PIP 3 that comes with thonny and thonny launch binary.
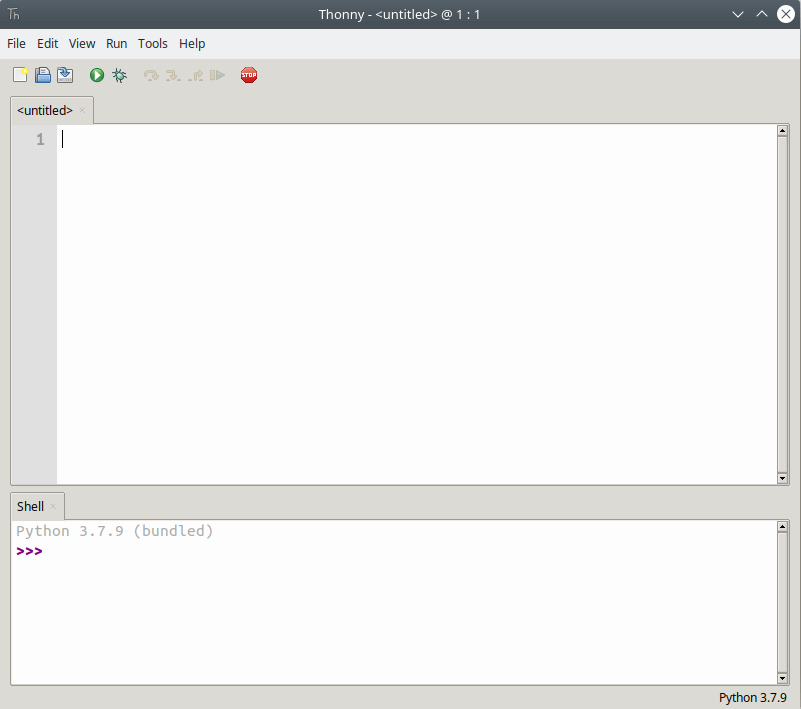
How to Use Thonny IDE in Linux
When you launch Thonny you will get a distraction-free GUI interface. You will have an editor area where you can code and shell to run the script or test codes interactively.
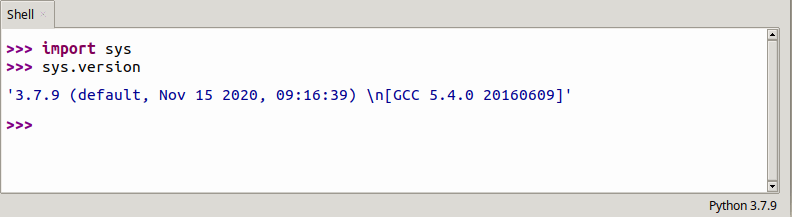
Linux distributions by default ships with python. Older version ships with Python2* and the latest versions ship with Python3*. We have already seen Python 3.7 is installed by default and thonny sets 3.7 as the default interpreter.
You can stick with the default interpreter (Python 3.7) or choose different interpreters available on the system. Go to “Menu Bar → Tools → Options → Interpreter → Set the path” or “Menu Bar → Run → Select Interpreter → Set the path”.
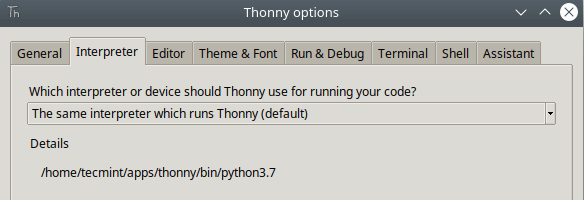
I suggest sticking with the default python installation unless you know how to fix it if something breaks when switching the interpreter.
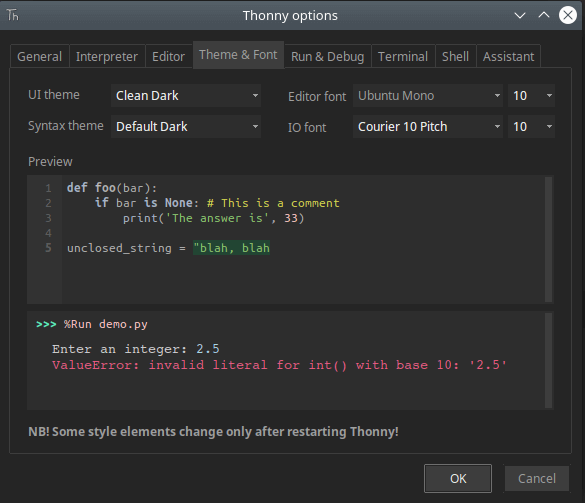
Thonny comes with Light and Dark themes. You can change themes for Editor as well as UI theme. To change Theme and Fonts Go to “Menu Bar → Tools → Options → Theme & Font”.
There are 3 ways you can run the code you created. First, your code should be saved to a file for Thonny to execute.
- Press F5 or Execute Icon as shown in Image.
- Go to “Menu Bar → Press Run → Run Current Script”.
- Press “CTRL+T” or Go to “Run → Press Run current script in terminal”.
The first two methods will switch the directory to wherever your code is and invoke the program file in the Built-in terminal.
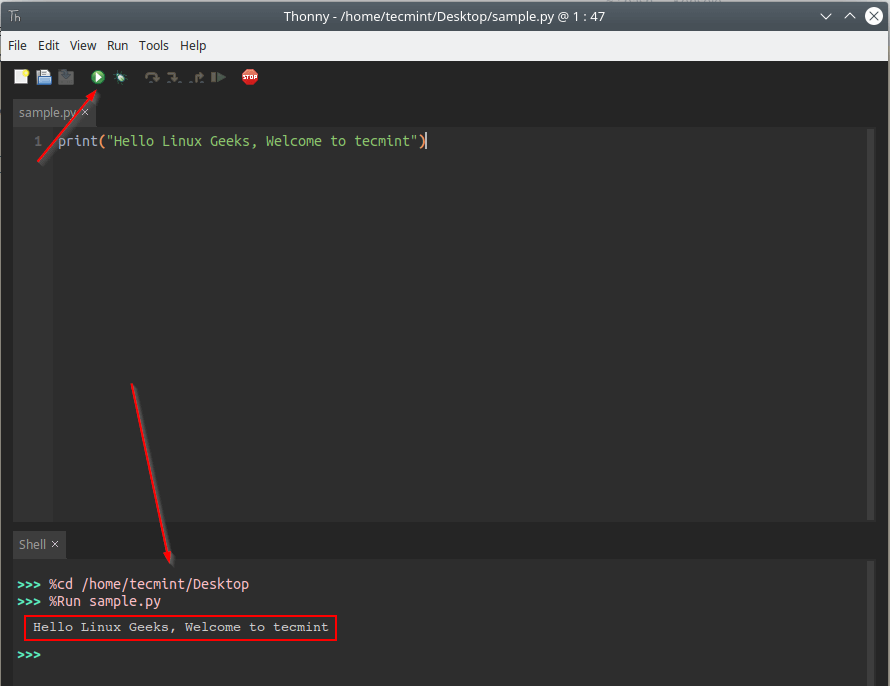
The third option allows you to run your code in an external terminal.

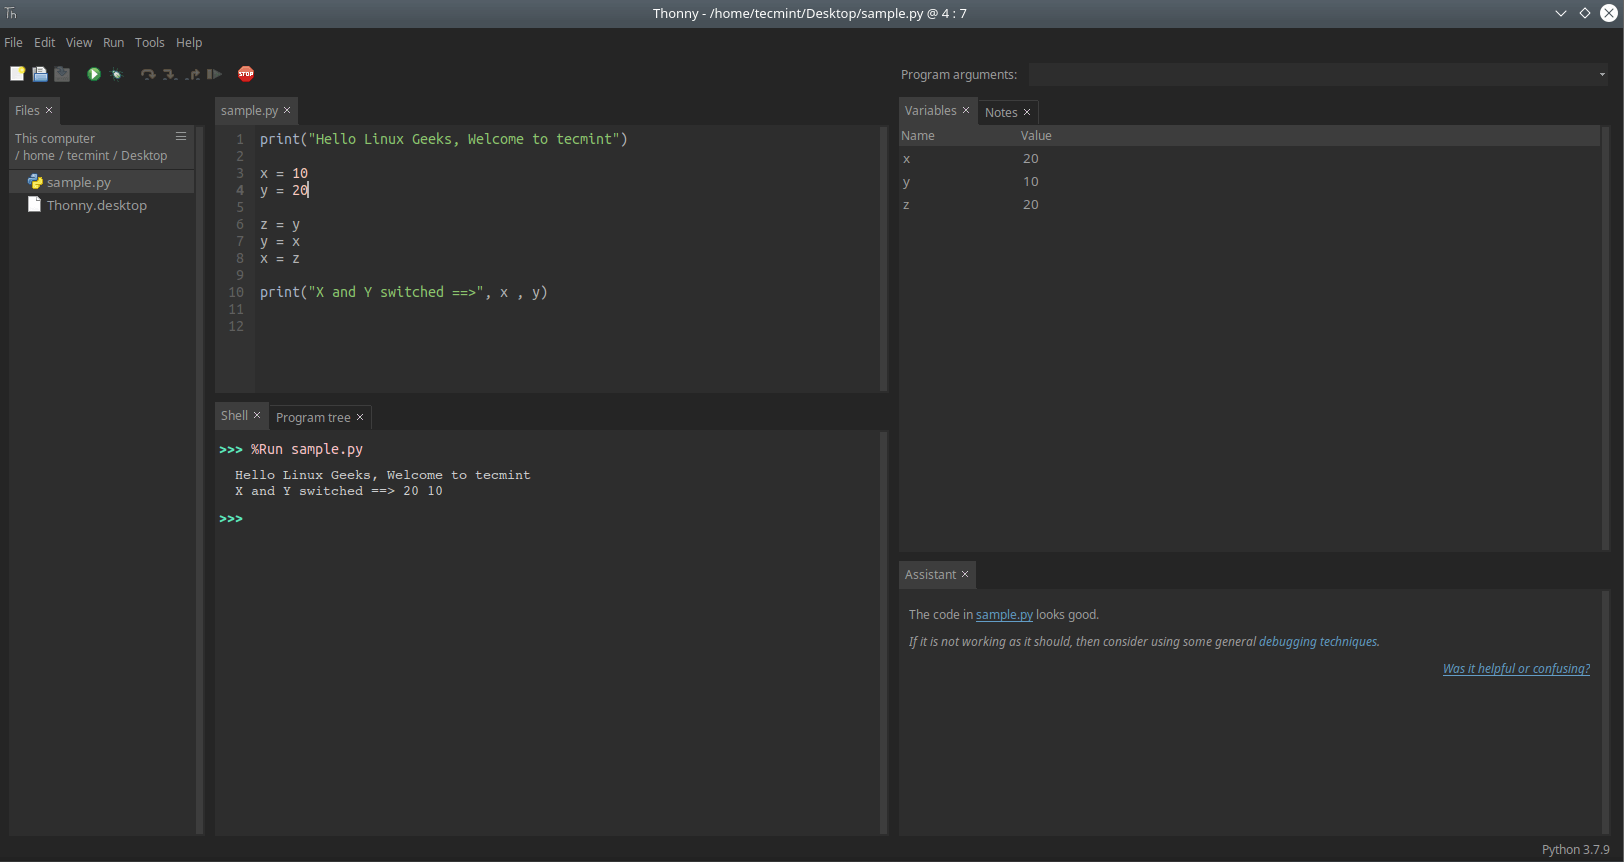
The real power of thonny comes with built-in features like File Explorer, Variable Explorer, Shell, Assistant, Notes, Heap, Outline, Stack. To Toggle on-off these features Go to “View → toggle Feature ON/OFF”.
Thonny Package Manager
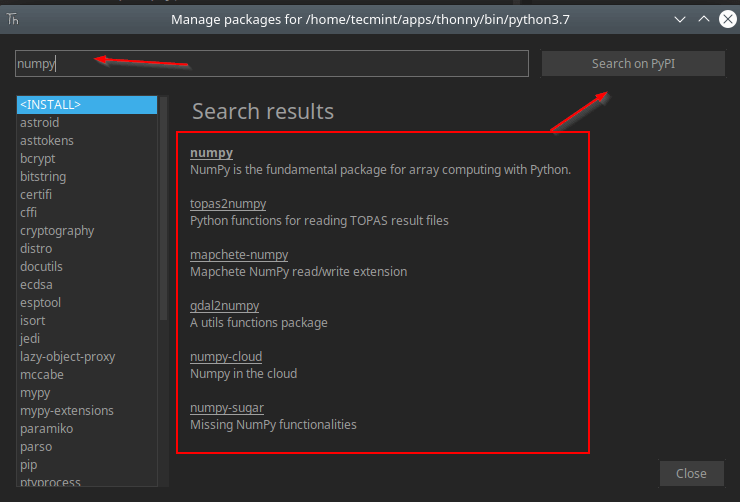
It is known that all the python packages are hosted at PyPI. We will normally use PIP (Python Package Manager) to install desired packages from PyPI. But with Thonny, a GUI interface is available to manage packages.
Go to “Menu Bar → Tools → Packages”. In the search bar, you can type a package name and press search. It will search the PyPI index and displays the list of package matching the name.
In my case, I am trying to install a package call numpy.
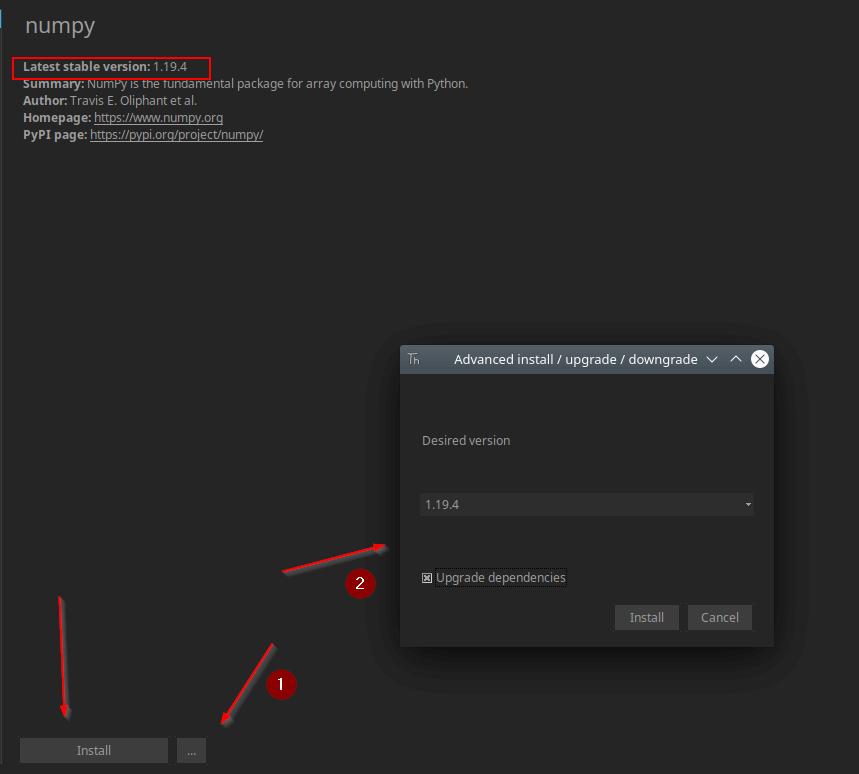
When you select the package from the list, It will take you to the installation page. You can install the latest version or choose different versions as shown in the image. Dependencies are automatically installed.
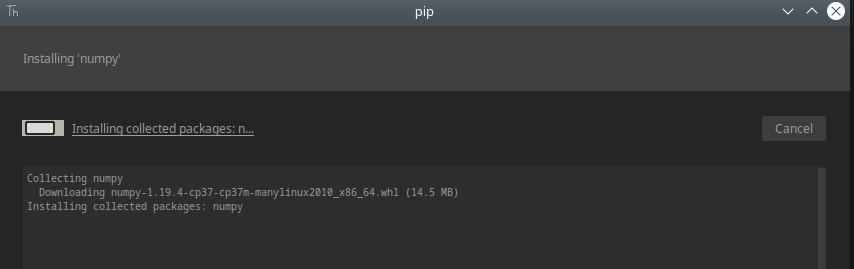
Once you press Install, it will install the package.
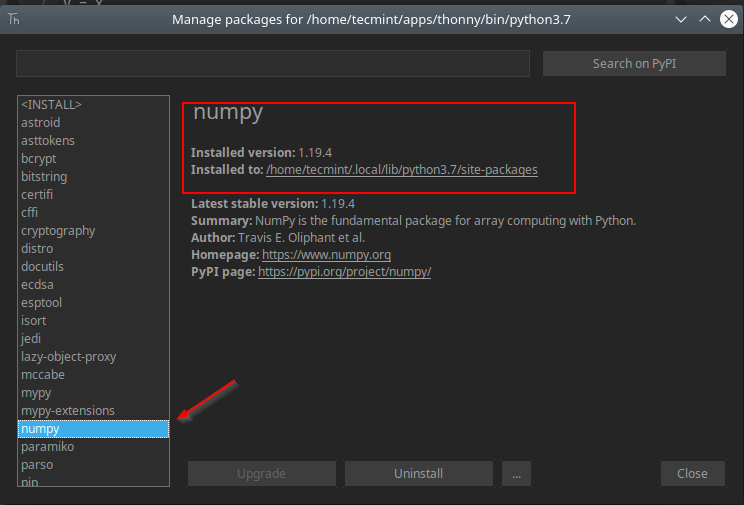
You can get the details like package version, library location once the package is installed. In case if you wish to uninstall the package, it is simple, go ahead and click the “uninstall” button at the bottom of the package as shown in the image.
Thonny Debugging
Thonny comes with a built-in debugger. Press Ctrl+F5 to run your program step-by-step, no breakpoints needed. Press F7 for a small step and F6 for a bigger step. You can also access these option from “Menu Bar → Run → Debugging options”.

Thonny Configuration
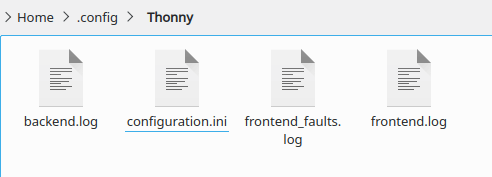
All the configurations are stored in the “configuration.ini” file. Any changes you make with your thonny session is written to this file. You can also manually edit this file to set different parameters.
To open the file go to “Menu Bar → Tools → Open Thonny data folder”.
How to Uninstall Thonny IDE in Linux
If you wish to uninstall thonny, there is an uninstall script available under the thonny installation directory.
$ /home/tecmint/apps/thonny/bin/uninstall   [Installed using Script]
$ pip3 uninstall thonny                    [If Installed using PIP]
$ sudo apt purge thonny                    [On Debian/Ubuntu]
$ sudo dnf remove thonny                   [On CentOS/RHEL & Fedora]
That’s it for this article. There is a lot more to explore in Thonny than what we discussed here. Thonny is great for beginners but it is always a personal choice of programmers to choose which IDE or Text editor to work with. Install Thonny play with it, share your feedback with us.


Thonny can now be installed through the package manager for Debian/Ubuntu and Fedora distros: https://github.com/thonny/thonny/wiki/Linux
Thank you for the Thonny installation instructions!
Not in the Buster repos, so I installed using pip3.
Has to be started from /usr/bin – not good.
then… at this point, I gave up. User friendly is something else.
Traceback (most recent call last): File "/usr/local/bin/./thonny", line 8, in sys.exit(launch()) File "/usr/local/lib/python3.9/dist-packages/thonny/__init__.py", line 213, in launch from thonny import ui_utils File "/usr/local/lib/python3.9/dist-packages/thonny/ui_utils.py", line 14, in import tkinter as tk ModuleNotFoundError: No module named 'tkinter'You can fix that Tkinter error by installing Python:
It worked for me, I was able to run Thonny after that.
Had to run it from ~/.local/bin/thonny, not the path I expected but it works.