The stable version of Ubuntu 24.04 LTS (code-named Noble Numbat) is released on April 25th 2024, if you are curious to know what is in it, you can now upgrade to the version of it from lower version for testing purposes.
Just like every new Ubuntu release, Ubuntu 24.04 ships with new features including the latest and greatest software such as the Linux kernel, GNOME 46 and refreshed state-of-the-art toolchain. You can find more information about the new changes from the release notes.
Importantly, Ubuntu 24.04 LTS will be supported for 5 years until April 2029, for Ubuntu Desktop, Ubuntu Server, and Ubuntu Core.
This guide will walk you through the process of upgrading your current Ubuntu 22.04 system to the latest Ubuntu 24.04 LTS. Additionally, we will introduce the zzUpdate script, a tool that can simplify the upgrade process.
Step 1: Back Up Ubuntu Data
To back up your data on Ubuntu 22.04 to an external drive before upgrading to Ubuntu 24.04, you can follow these commands:
To get started, plug in your external storage device like a USB drive or an external hard drive, and make sure your computer can see it.
Open the terminal and type “lsblk” to find your external drive in the list, which might look something like “/dev/sdb1“.
After identifying your external drive, you can find its mount point by running the df command and looking for an entry corresponding to your external drive’s identifier (e.g., /dev/sdb1) in the output.
The mount point will be listed in the second column of that entry, which typically looks like “/mnt/external” or “/media/username/external“. This mount point is where your external drive is currently connected and accessible in your system.
Using the rsync command to back up your Home directory to an external drive:
rsync -av --progress /home/username /path/to/external/drive
Using the tar command create a compressed archive of your Home directory and save it to the external drive:
tar -cvzf /path/to/external/drive/backup_home.tar.gz /home/username
Replace /path/to/external/drive with the path to your external drive and /home/username with the path to your Home directory.
You can also use graphical backup tools like Deja Dup or Timeshift to back up your data to an external drive.
Step 2: Preparing Ubuntu System for Upgrade
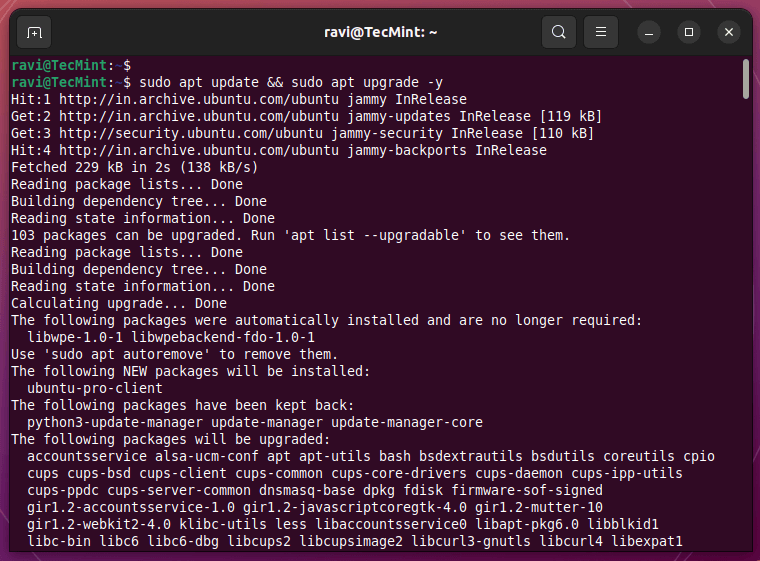
Before you start upgrading your system, it’s important to make sure there are any updates needed. After that, update and upgrade your current packages. Once the upgrade is finished, restart your system so all the changes can work properly.
sudo apt list --upgradable
sudo apt update && sudo apt upgrade -y
reboot
Step 3: Upgrade Ubuntu 22.04 LTS to 24.04 LTS
If upgrading via SSH, make sure to open port TCP port 1022 on ufw firewall for a stable connection during the upgrade process.
sudo ufw allow 1022/tcp
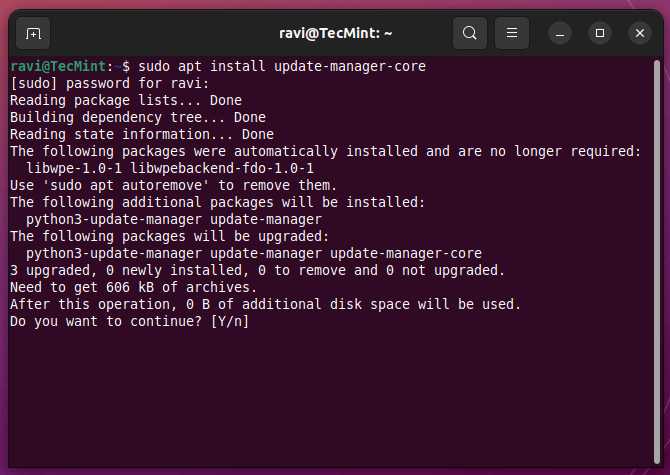
If you have physical access to your Ubuntu desktop and are upgrading locally, you don’t need to open any port. Simply install the Update Manager Core tool, which will ensure that all necessary tools for the upgrade are installed.
sudo apt install update-manager-core
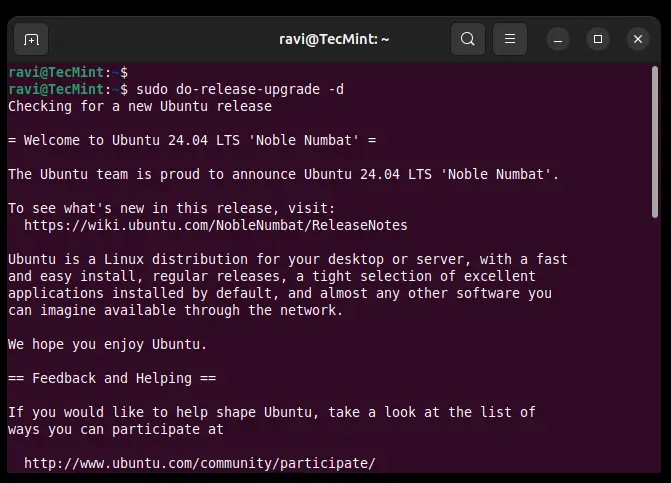
Once the Update Manager Core is installed, initiate the upgrade process by entering the following command.
sudo do-release-upgrade -d
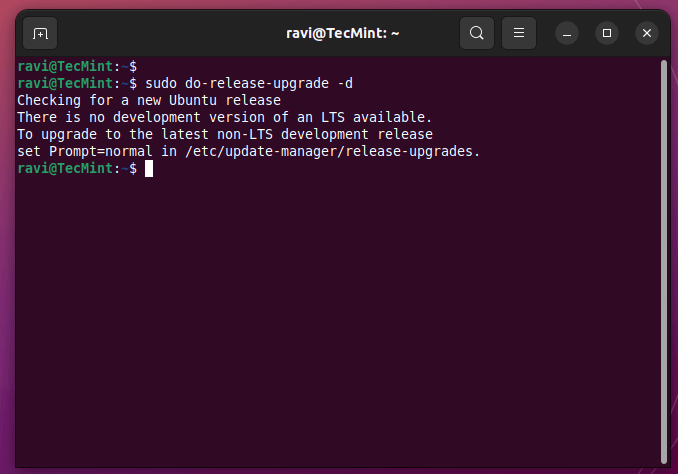
If the system doesn’t find a new release, and you get the following error?
Checking for a new Ubuntu release
There is no development version of an LTS available.
To upgrade to the latest non-LTS development release
set Prompt=normal in /etc/update-manager/release-upgrades.
The error message you received indicates that you’re trying to upgrade to a non-existent development version of an LTS release.
Here’s what’s happening and how to address it:
- Ubuntu releases come in two main types: LTS (Long Term Support) and non-LTS (development releases).
- You can’t directly upgrade from an LTS version (like 22.04 LTS) to a development version (which isn’t even available).
- The system is correctly informing you that there’s no development version of the current LTS (24.04 LTS) yet.
Since you want to upgrade from Ubuntu 22.04 LTS to the latest LTS release (24.04 LTS), here’s what you need to do:
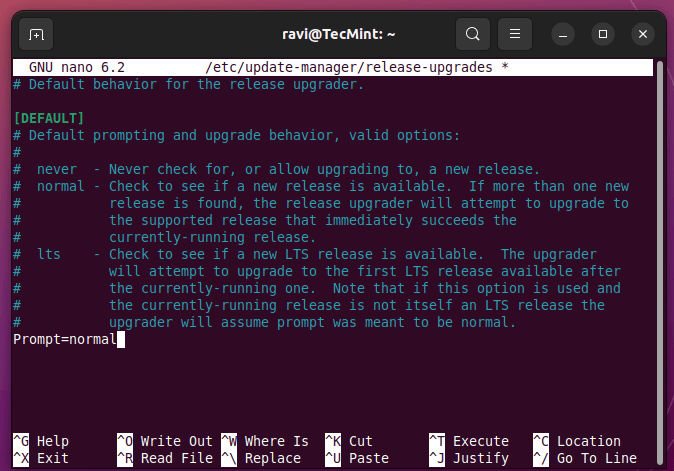
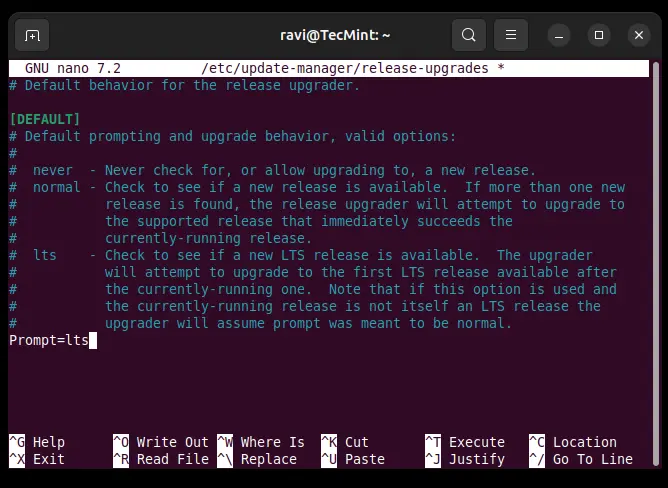
Open the /etc/update-manager/release-upgrades upgrade configuration file and change the value of “Prompt” to “normal“, which ensures you’ll be notified about the upgrade and have the option to choose whether to proceed.
sudo nano /etc/update-manager/release-upgrades
Now, use the following command to initiate the upgrade process again:
sudo do-release-upgrade
This will take you to the Ubuntu 23.10 release, right now, you can’t upgrade directly from Ubuntu 22.04 LTS to 24.04 LTS using the do-release-upgrade command because the official upgrade path isn’t available yet.
To upgrade to Ubuntu 24.04, you have to update to Ubuntu 23.10 first. Then, from there, you can upgrade to Ubuntu 24.04.

Now follow on-screen instructions to upgrade to Ubuntu 23.10 release and reboot the system.
reboot
Again open the /etc/update-manager/release-upgrades upgrade configuration file and change the value of “Prompt” to “lts“.
sudo nano /etc/update-manager/release-upgrades
Lastly, enter the command below and then continue following the rest of the guide to upgrade from version 23.10 to 24.04 LTS.
sudo do-release-upgrade -d
Step 4: Remove Obsolete Packages
To remove obsolete packages after upgrading Ubuntu to ensure system cleanliness, you can use the following command:
sudo apt autoremove
Running the above command will remove any obsolete packages that are no longer needed on your system after the upgrade, which helps in freeing up disk space and keeping your system tidy and efficient.
Step 5: Enable Third-Party Repositories on Ubuntu
To enable third-party repositories, you need to to find third-party repositories under /etc/apt/sources.list.d/ directory that may have been disabled during the upgrade process.
Next, uncomment and remove the # sign at the beginning of each line for each repository in the respective files.
Confirm that the third-party repositories are enabled by running the following command to ensure the necessary repositories are active.
ls -l /etc/apt/sources.list.d/
By following these steps, you can successfully enable third-party repositories on Ubuntu 24.04 after upgrading from Ubuntu 22.04.
There you go! We hope you have successfully upgraded your Ubuntu version from 22.04 to 24.04. If you encountered any issues along the way or have thoughts to share, use the feedback form below to reach us.


This guide was incredibly helpful! I’ve been eyeing Ubuntu 24.04 LTS ever since its release, and I was a bit unsure about how to properly upgrade from 22.04 for testing. The steps were clear and easy to follow, especially the backup process—those rsync and tar commands were lifesavers for ensuring I didn’t lose anything important.
Thanks to this article, I felt confident about upgrading my system and now I’m running Ubuntu 24.04 LTS without any issues.
After upgrading to version Ubuntu 24.04, how do I copy my backup files to the new OS?
@Faizan,
If you have taken a backup using rsync or tar, you can use the following command to restore it:
Hi, I’m facing an error in ubuntu 18.04.
Could not calculate the upgrade
An unresolvable problem occurred while calculating the upgrade.
This was likely caused by:
* Unofficial software packages not provided by Ubuntu
Please use the tool ‘ppa-purge’ from the ppa-purge
package to remove the software from a Launchpad PPA and
try the upgrade again.
If none of this applies, then please report this bug using the
command ‘ubuntu-bug ubuntu-release-upgrader-core’ in a terminal. If
you want to investigate this yourself the log files in
‘/var/log/dist-upgrade’ will contain details about the upgrade.
Specifically, look at ‘main.log’ and ‘apt.log’.
Restoring the original system state
Aborting
Reading package lists… Done
Building dependency tree
Reading state information… Done
I got this exact same problem too. I found a workaround for this. We need to use an app called Synaptic to remove all packages that are considered unofficial.
Steps:
sudo apt-get install synaptic“.Alt+F2type “update-manager -c -d” then click enter.