

When using a USB drive on a Linux system, it’s important to properly unmount and remove the drive to prevent data loss or corruption. Simply unplugging the drive without properly unmounting it can lead to issues.
In this guide, we’ll learn the simple steps and important safety tips for safely ejecting USB drives using the Linux command line.
Identify the USB Drive in Linux
First, you need to identify the device name of your USB drive by running the following lsblk command, which will list all block devices connected to your system.
lsblk
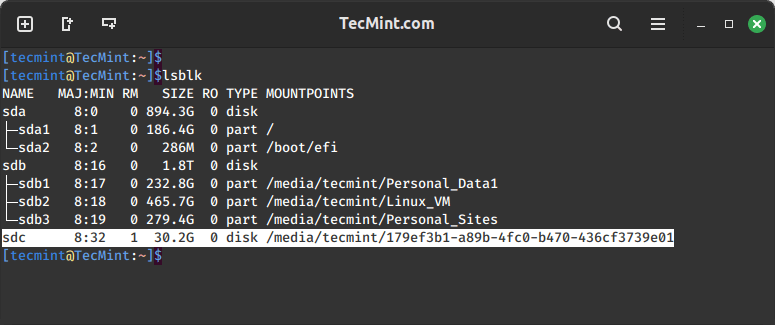
The above command displays all the storage devices connected to your system. Look for your USB drive in the list, which is usually labeled as /dev/sdX, where 'X' represents a letter (e.g., /dev/sdb, /dev/sdc, etc.).
In this example, the USB drive is identified as `/dev/sdc`. Make a note of this label; we’ll need it for the next step.
Unmount the USB Drive in Linux
Next, you need to unmount the USB drive by running the following umount command, specifying the mount point of the USB drive.
sudo umount /dev/sdc
lsblk
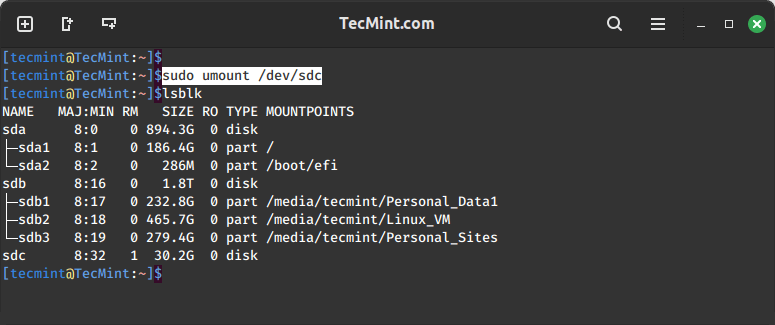
Safely Remove the USB Drive in Linux
After unmounting the drive, you can safely remove it from your system by running the following eject command.
sudo eject /dev/sdc
This will power down the USB drive and allow you to safely remove it.
Another way to safely remove a USB drive is to use the `udisksctl` command, which is part of the `udisks` package, that provides a command-line interface for interacting with storage devices.
sudo udisksctl unmount -b /dev/sdc
Then, power off the drive:
sudo udisksctl power-off -b /dev/sdc
After running these commands, you can safely remove the USB drive.
Conclusion
Safely removing a USB drive in Linux is an important step to prevent data loss or corruption. By following the steps outlined above, you can properly unmount and remove your USB drive using the Linux command line.
Remember, it’s always better to take the extra time to safely remove a drive than to risk losing your data.

Hello Ravi,
Thanks a lot for the CLI commands. Since I use a DE (desktop environment), I usually use the ‘Disks‘ application to power off the USB drives.
It does all that automatically… (I’m lazy ;) )
Bye.