As CentOS 8 draws steadily to End of Life on December 31st, 2021, efforts have been made to come up with centos alternative distributions which will fill in the big shoes left by CentOS 8. This comes following RedHat’s decision to dump CentOS 8 in favor of CentOS Stream, something which has elicited mixed reactions.
Many users have felt betrayed by RedHat’s move to cut short the life of CentOS 8 by 9 years. A good number have also expressed their concerns about the stability and security that CentOS Stream will provide.
[ You might also like: How to Migrate CentOS 8 Installation to CentOS Stream ]
Given the reluctance to shift to CentOS Stream, a few alternatives have been made available to the public as an alternative to CentOS 8. One of them is Rocky Linux which is a downstream build of CentOS 8.
Rocky Linux aims at becoming a solid and stable Linux distribution for use in production environments. Then there’s AlmaLinux, which also intends to fill the gap left by the soon-to-be demise of CentOS 8.
The first stable release of AlmaLinux was made available on March 30, 2021, as AlmaLinux 8.3. Currently, the latest stable release is AlmaLinux 8.5 and was released on November 12, 2021.
In this tutorial, we will look at how you can install AlmaLinux 8.5 step-by-step.
Prerequisites
- An ISO image file of AlmaLinux 8.5. You can download it from the official AlmaLinux download page and select the image from a wide variety of mirrors from listed regions. The ISO image is quite enormous – 9.8 G for the DVD ISO. If your internet is not stable, you can opt for the minimal ISO which is about 2G. Be advised that the minimal ISO is stripped down of all the GUI components.
- A 16 GB USB drive for use as a bootable installation medium. Once the ISO download is complete, you can use the UNetbootin or Etcher tool to make a bootable USB drive from the ISO image.
- A minimum of 15GB of hard disk space and 2GB RAM.
- A stable and fast internet connection.
Installation of AlmaLinux
Once you have created the bootable USB drive, plug it in and reboot your system Be sure that your server boots from the USB drive by modifying the boot priority in the BIOS.
Booting AlmaLinux from Bootable Drive
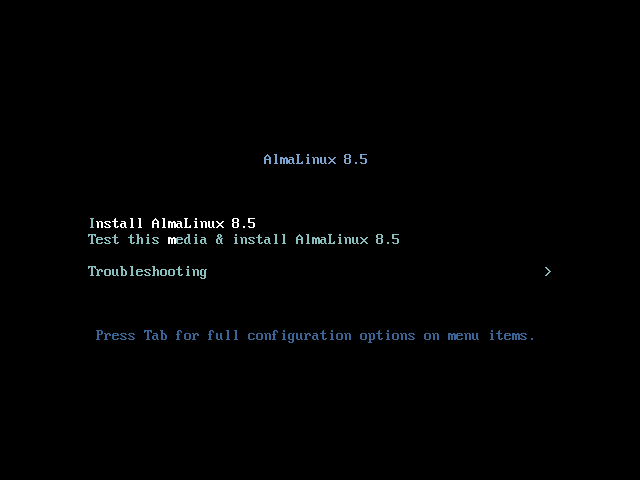
1. Once your server boots, you will be greeted by a dark screen with the following installation options. Select the first option “Install AlamLinux 8.5” and hit the ENTER key on your keyboard.
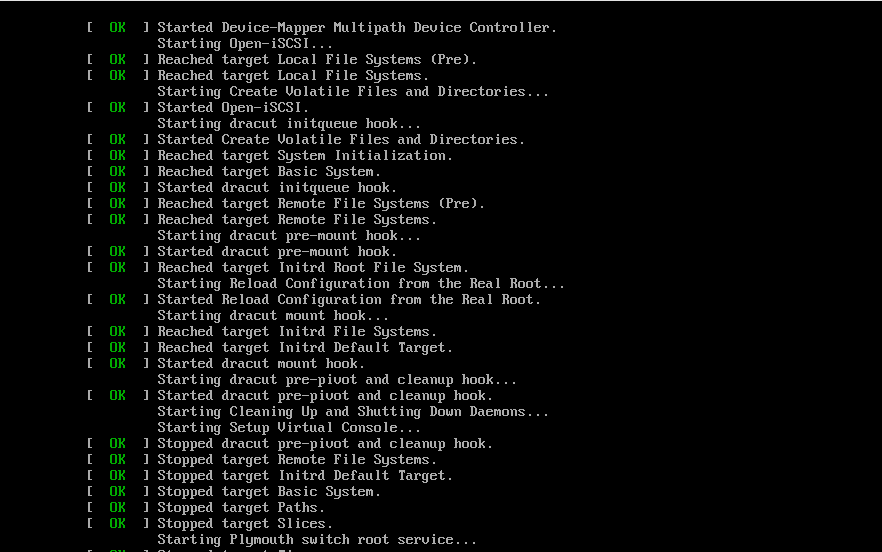
2. This will be followed later by a flurry of boot messages as you can see below.
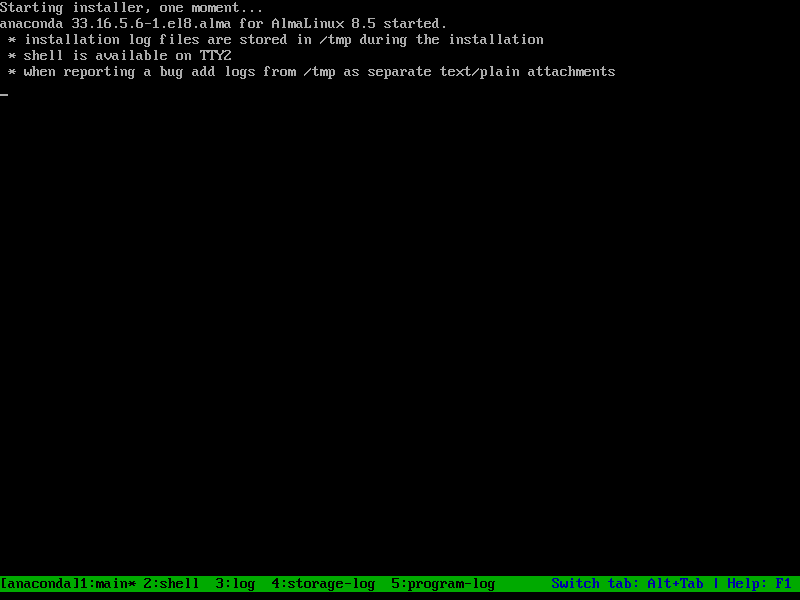
3. The installer will initialize and display a few instructions as shown below.
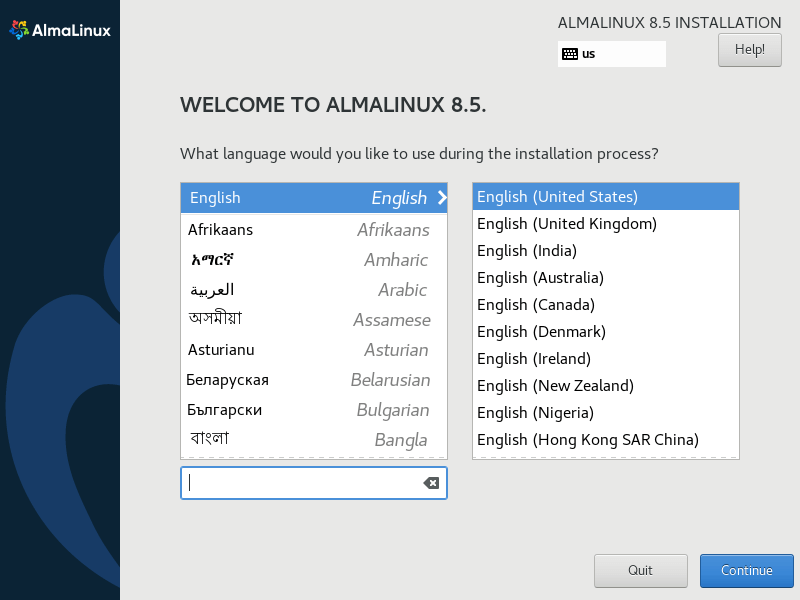
Select AlmaLinux Installation Language
4. A few seconds later, the welcome screen will come to view and will require you to select the installation language. Select the language you are most comfortable in and click “Continue”.
5. Before the installation of AlmaLinux starts, some key aspects of the operating system that fall under Localization, Software, System, and User settings need to be configured.
Let’s start with setting up the Keyboard.
Configure the Keyboard
6. To set up the keyboard, click on the ‘Keyboard’ icon under the ‘Localization’ section as shown.
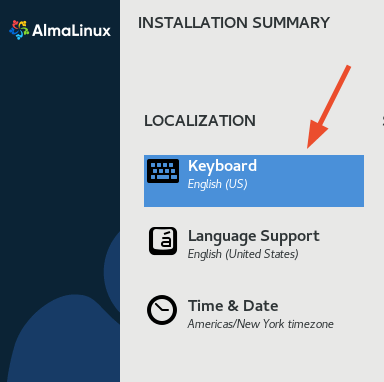
7. The default keyboard language is set to English. You can add more layouts by clicking the (+) plus sign button at the bottom and test how your text would appear at the text box on the right as indicated.
Here, I will go with the default selection since it works perfectly well for me and click on ‘Done’ at the top left corner.

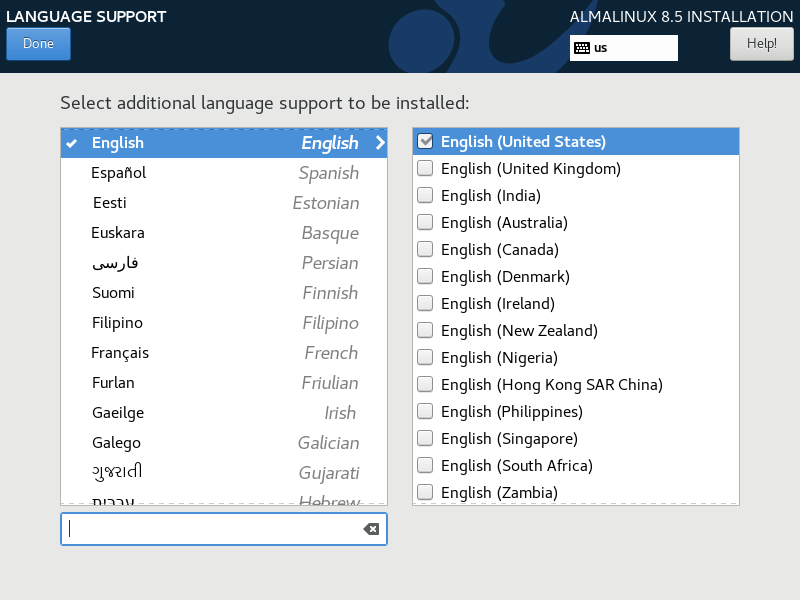
Configure Language Support
8. Next, we are going to set up language support, so click on the ‘Language Support’ icon.
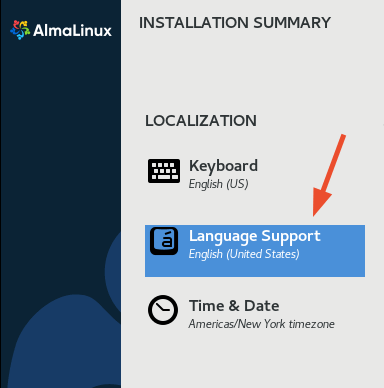
9. This allows you to add additional languages that users can choose from once the installation is complete. Select your preferred language support options and, yet again, click on ‘Done’.
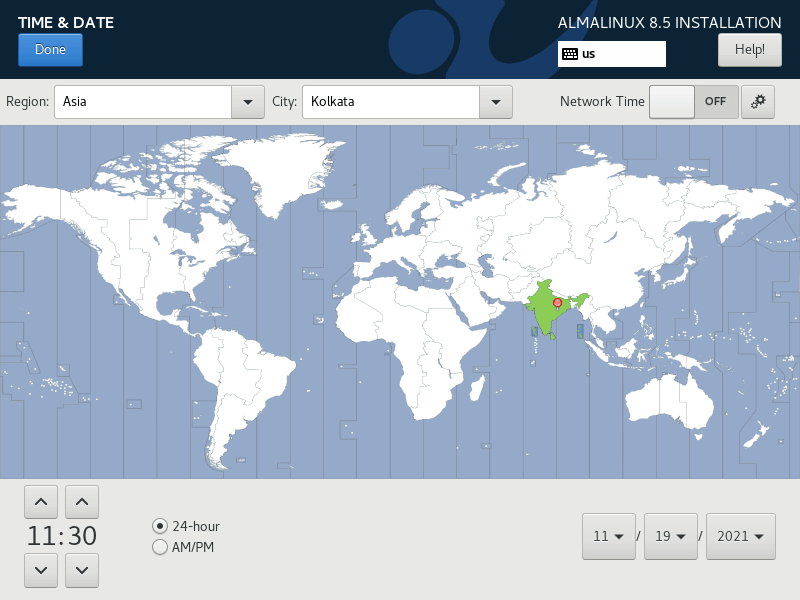
Configure Time and Date
10. Next on the line are the ‘Time and Date’ settings.
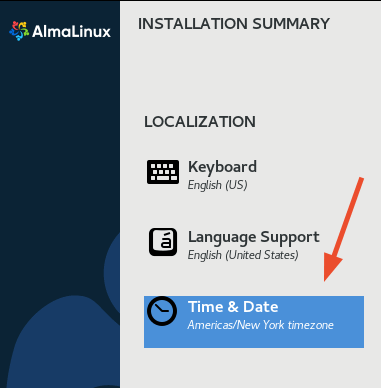
11. Click on the world map presented to set your location and later set the corresponding time and date relative to your location. Once done, click on ‘Done’.
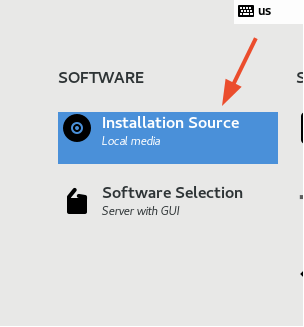
Configure Software
12. Under the ‘Software’ section, there are two items: ‘Installation Source’ and ‘Software Selection’.
Click on the ‘Installation Source’ option.
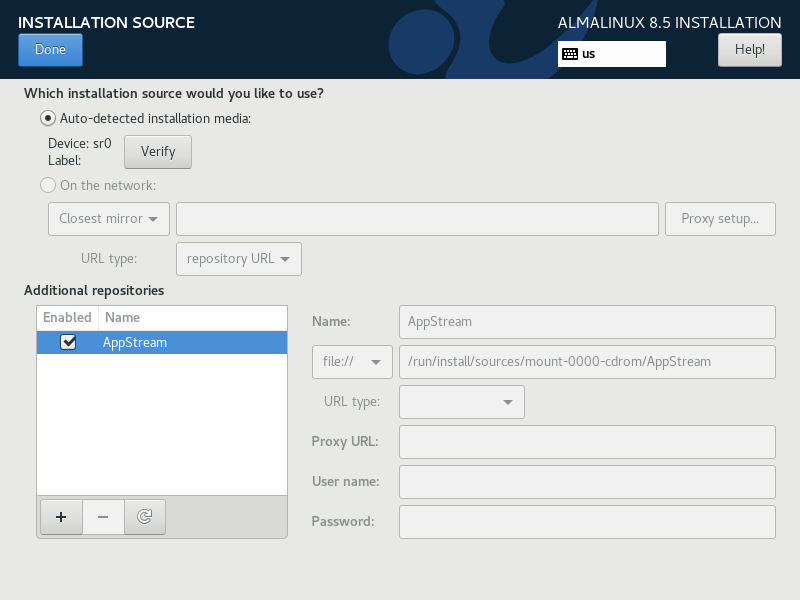
13. Very little intervention is required here as the installation source is already set to ‘Auto-detected installation media’. So simply click on the ‘Done’ button to return to the installation summary page.
14. Onto the next item which is ‘Software Selection’.
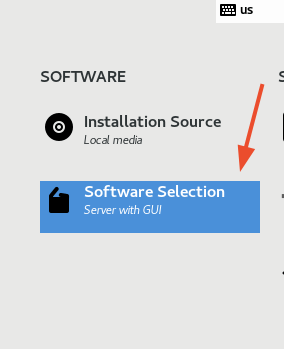
15. This section presents you with a wide array of base environments that you can choose from and additional software that you can include for the selected environment.
In this guide, we have chosen to go with the ‘Server’ selection. Feel free to select your preferred environment and select any additional components from the right panel.

Once you are happy with your selections, hit the ‘Done’ button to go back.
Configure Partitioning
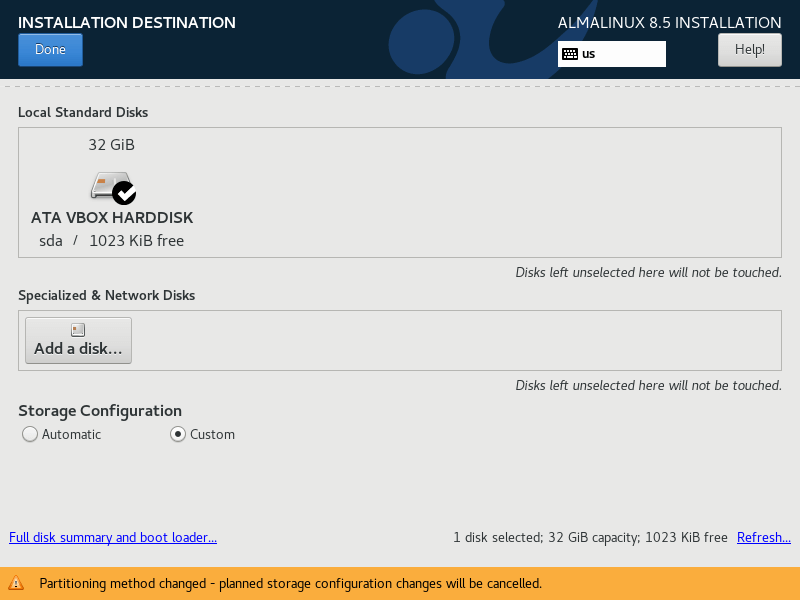
16. One of the most crucial aspects that need to be configured is the partitioning scheme of your hard drive. This is found in the ‘Installation Destination’ under ‘System’ as shown.
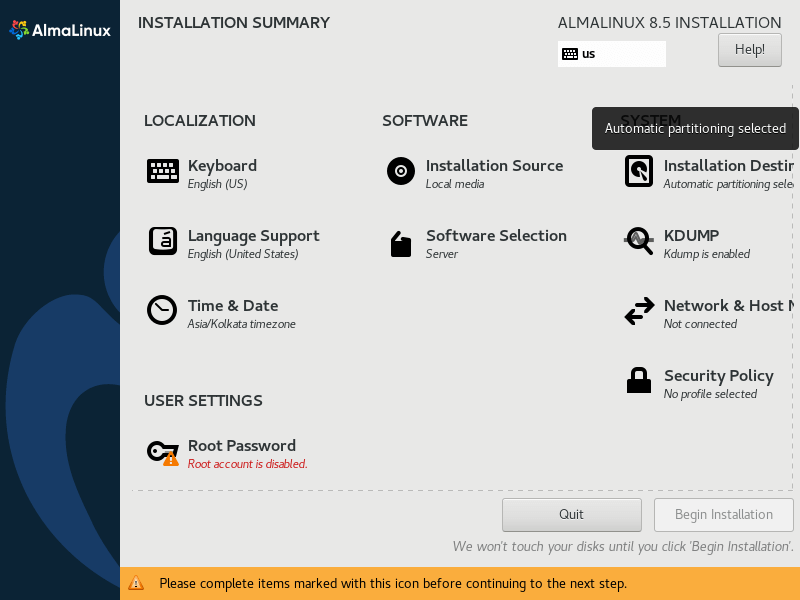
17. By default, partitioning is set to Automatic. This is cool for beginners or users who are not familiar with manually creating mount points. However, this limits you as you do not get to specify the mount points to be created and the size to be allocated to the mount points.
To have full control, we will switch to manual partitioning. To achieve this, select the ‘Custom’ option and click on ‘Done’.
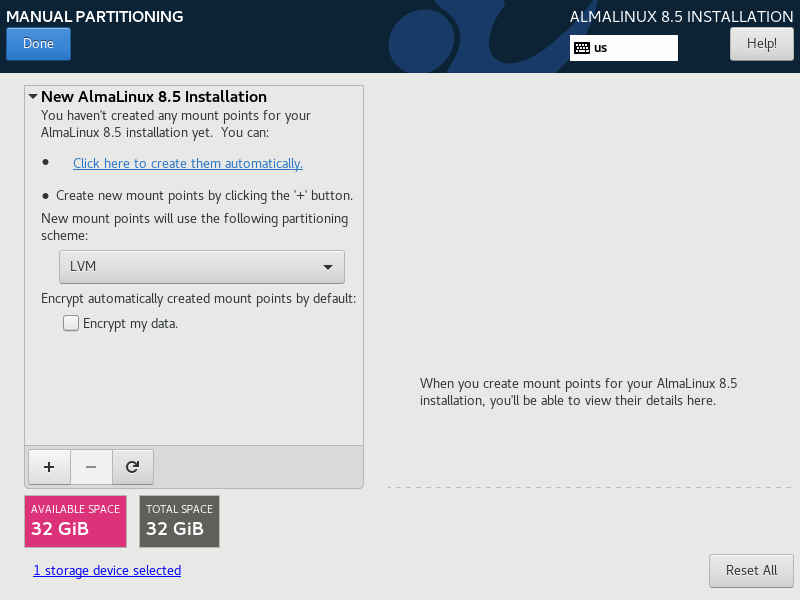
Our intended mount points will be configured as shown. Your setup might be different, but don’t fret. Simply follow along and you will get the drift.
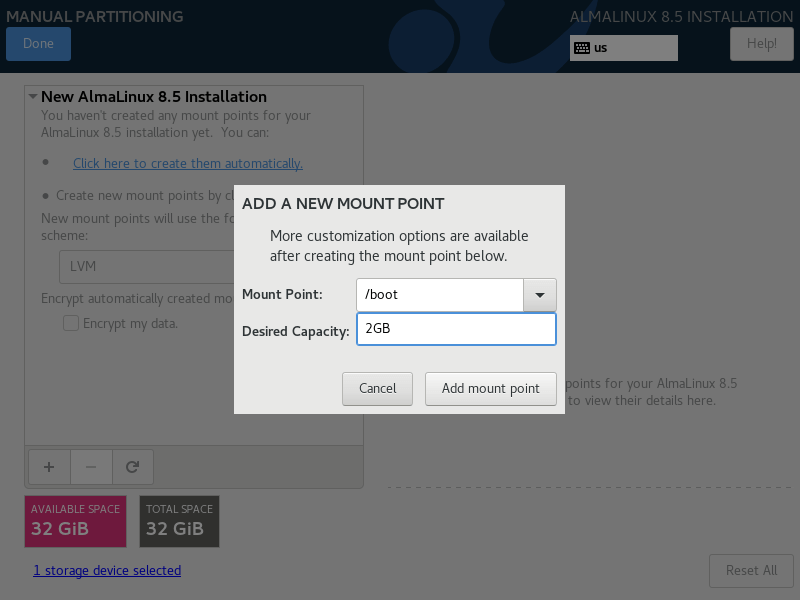
/boot	2GB
/root	26GB
Swap	4GB
18. On the ‘Manual Partitioning’ window, click the (+) plus sign button as indicated.
19. Fill in the details for the /boot mount point as shown and click the ‘Add mount Point’ button.
20. For the root mount point ( / ) fill in the details accordingly and hit the ‘Add mount Point’ button.

21. Do likewise for the swap volume.
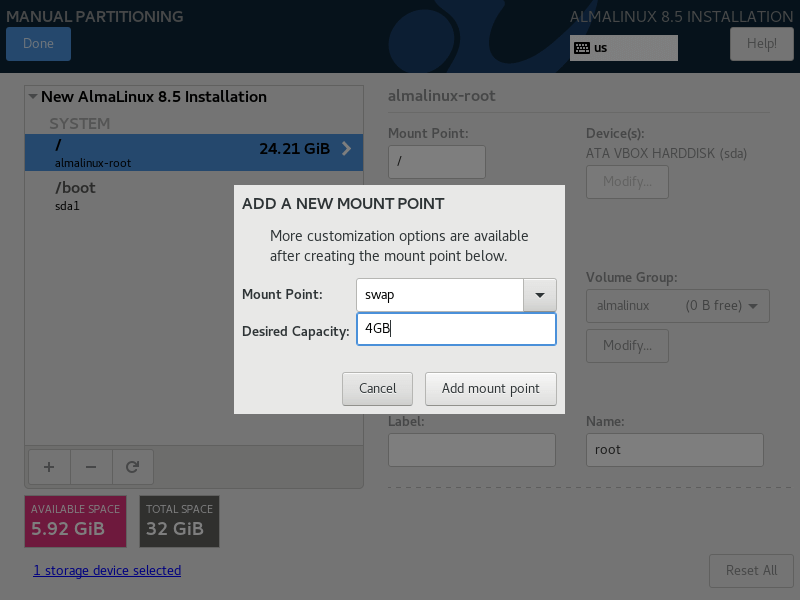
22. Our Manual partitioning scheme appears as shown. If everything looks okay, go ahead and click ‘Done’.
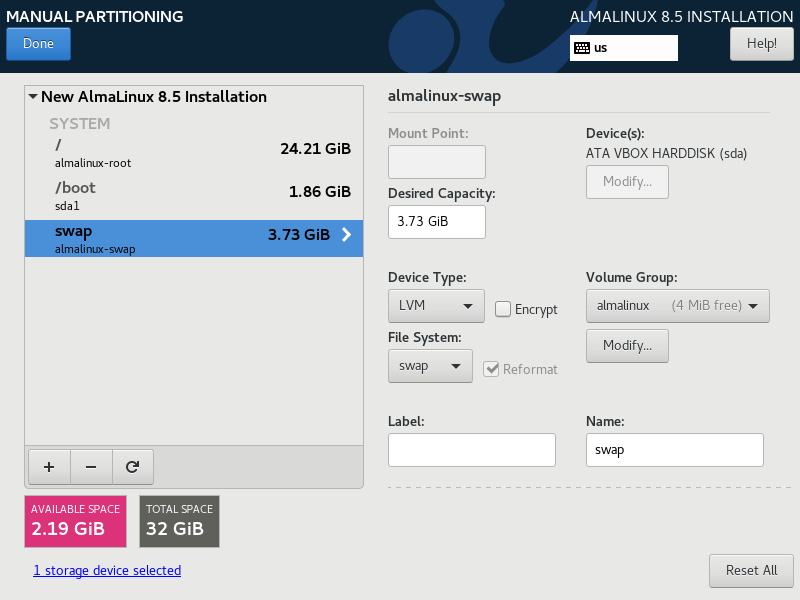
23. To confirm the changes made, click on the ‘Accept changes’ button as shown.

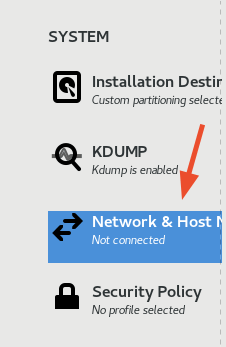
Configure Network and Hostname
24. Another crucial component that you need to set is networking and hostname.
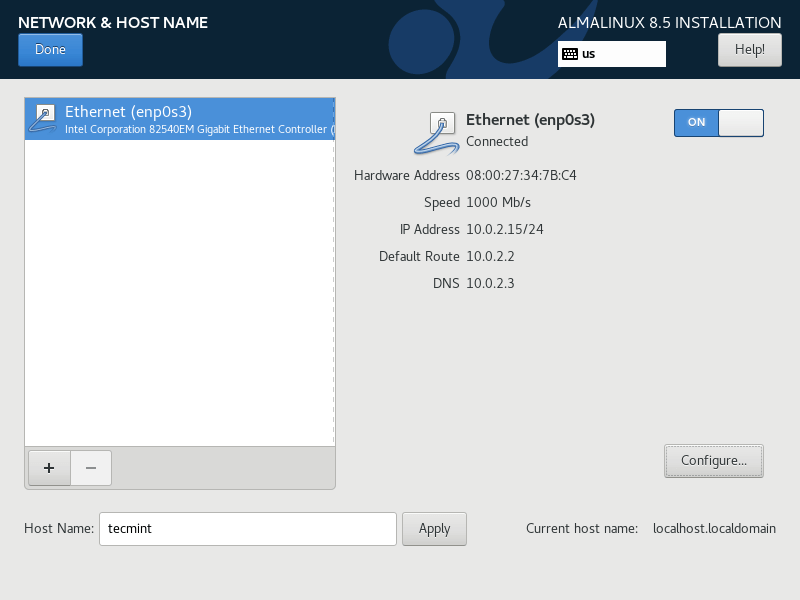
25. Toggle on your network adapter as shown to acquire an IP address dynamically using DHCP from your DHCP server – in most cases the router. At the very bottom, feel free to specify your system’s hostname and click ‘Apply’ to save the changes. Then click ‘Done’ to save all the changes.
Configure User Settings
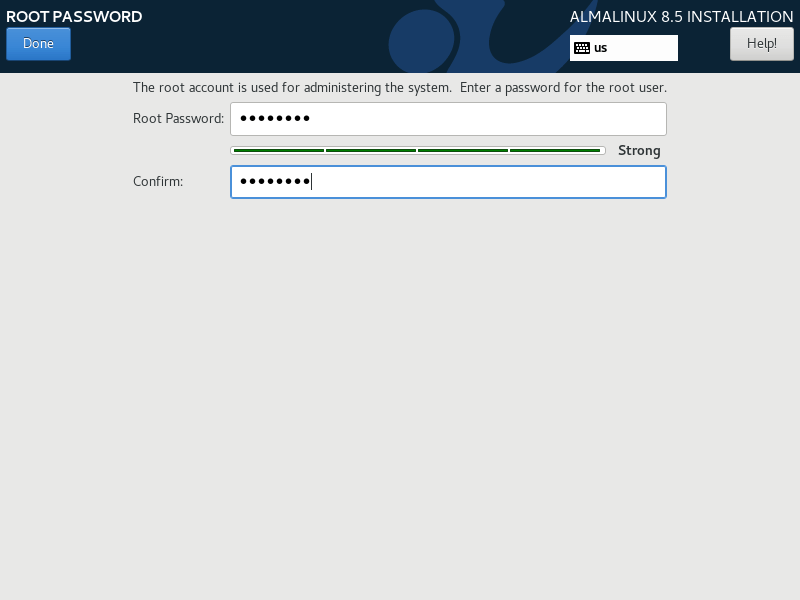
26. This is the last configuration that we are going to make before the installation gets underway. First, we will configure the root password as shown. Provide a strong root password and click ‘Done’.
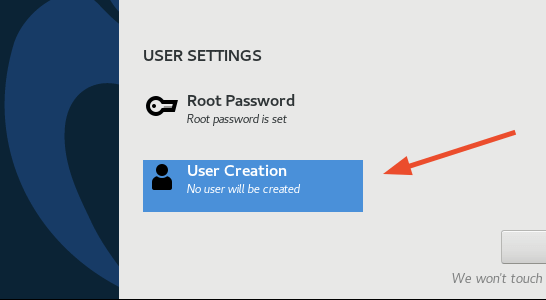
27. Next, click on ‘User Creation’ to create a regular user.
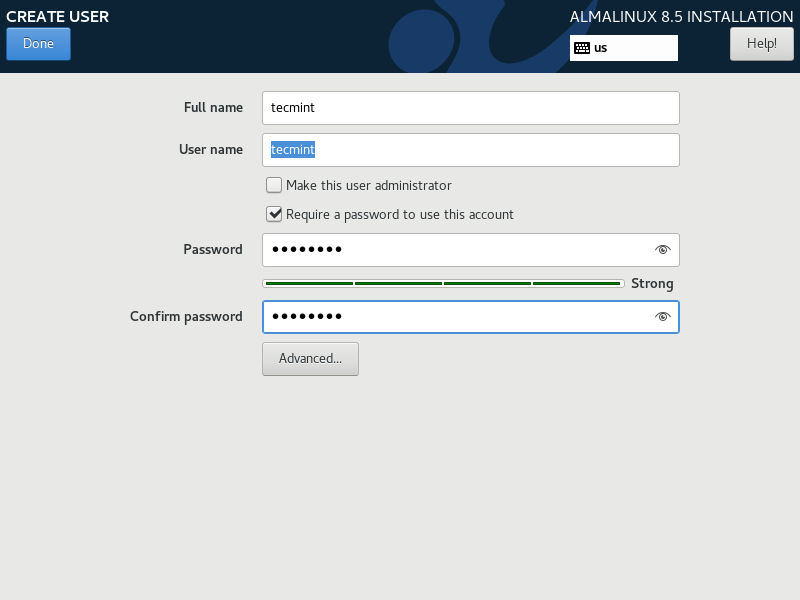
28. Specify the full name, username and provide a strong password. Finally, click on ‘Done’ to save the changes.
Begin the Installation of AlmaLinux
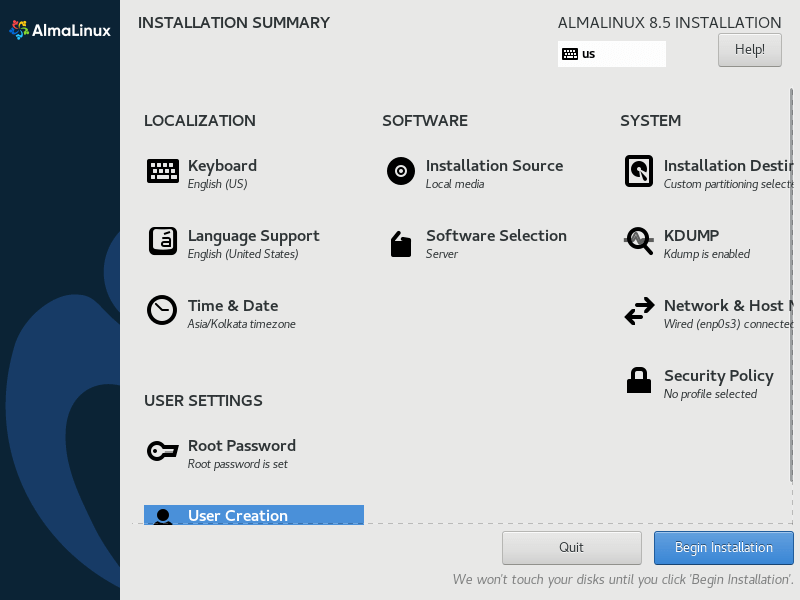
29. With all the crucial parameters configured, start the installation by clicking on the ‘Begin Installation’ button.
30. The installer will begin downloading and installing all the required packages and make the necessary system configurations.
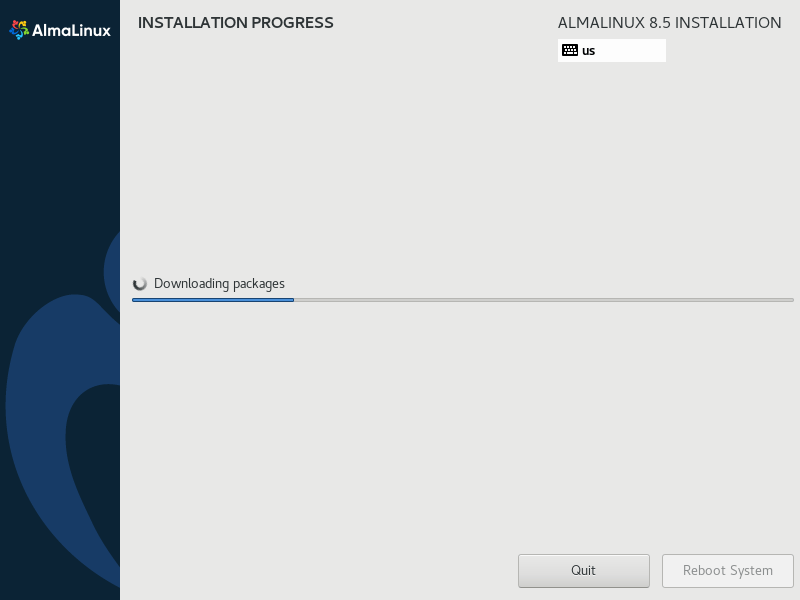
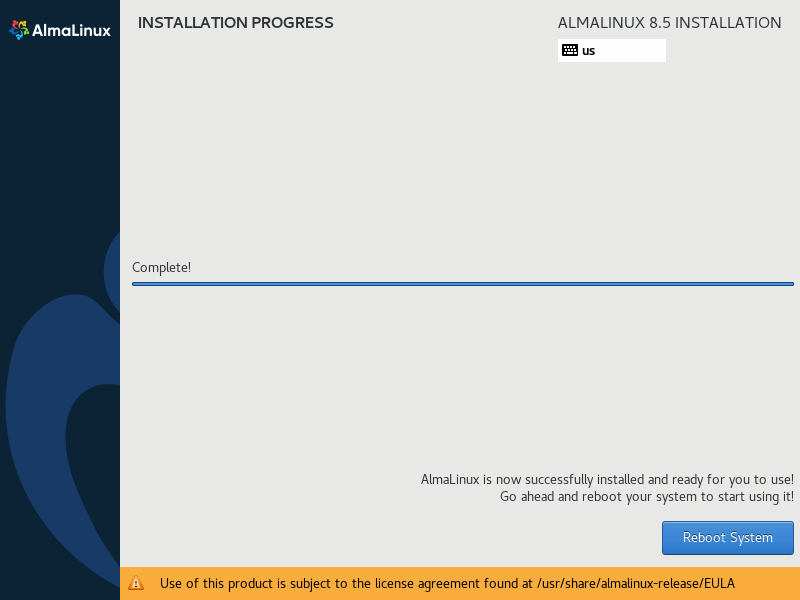
31. This will take a while, depending on your internet speed. On a fairly stable and fast connection, this should take roughly 20 minutes. Once the installation of AlmaLinux is complete, click on the ‘Reboot system’ button and remove the USB installation medium.
Starting AlmaLinux
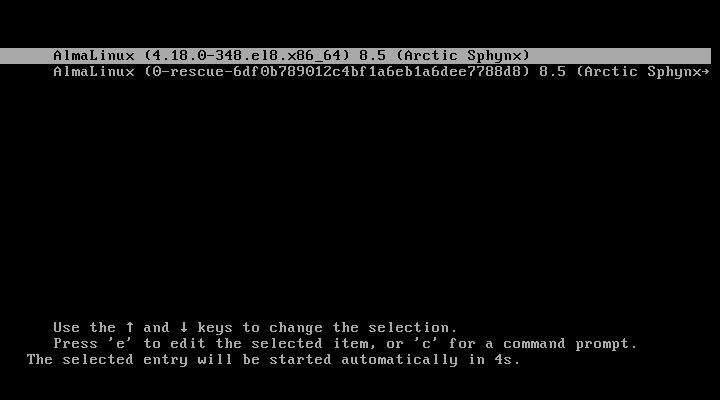
32. Upon rebooting, the AlmaLinux grub bootloader will present you with two options as shown. Select the first option to proceed.
Conclusion
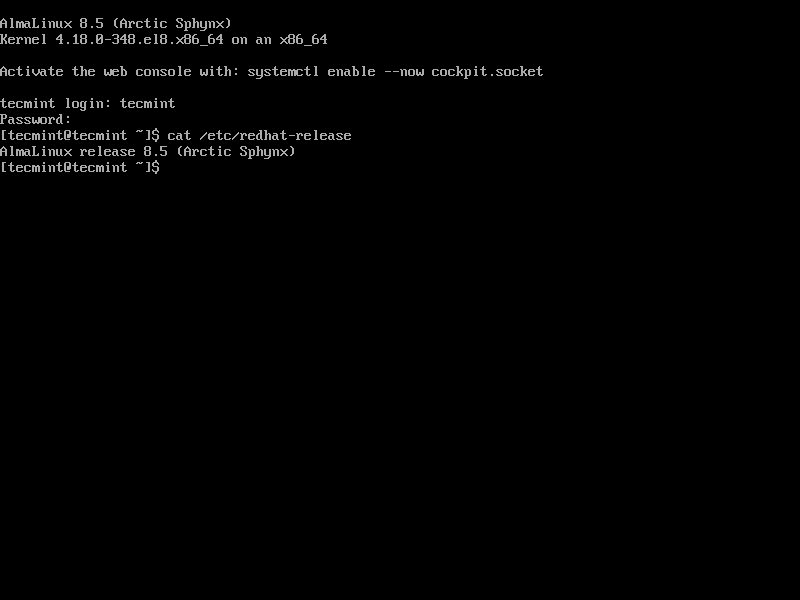
If you have followed this guide to this point, then you have successfully installed AlmaLinux 8.5 on your server. As you might have observed, the steps are similar to those ones used when installing CentOS 8. Your feedback is on this guide is highly welcome.


This process is so painful, once you download the iso file it shouldn’t take so much time to be installed as all other distros do. I am trying to install it on VM Hyper-v it definitely doesn’t work. I left my laptop overnight and nothing happened so disgustingly. Even changing the mirrors nothing happened, I believe even if the mirror was in my garage this won´t work by the way I will try to find another way.
Hey Francisco. It appears there is something amiss with the VM you created prior to installing AlmaLinux is broken. Have you tried deleting the VM and trying once more? I’d also recommended to try it on another virtualization platform such as VirtualBox. Otherwise, the installation should proceed without an issue.
Hi, I don’t know why but in the process between steps 2 and 3, instead of arriving to step 3 and then starting the configuration of installation (step 4), it restarts the process back to step 1. Any clues why could this be? I have an HP Victus 16-d0057ns, with Windows 10, and the factory specifications. Thanks.
“31. This will take a while, depending on your internet speed.”????
I thought the install was from a USB drive. Or is the installer pulling in software and doing software updates during the installation process?
Unless I’m doing a Network Install, which is very rare, I disconnect my PC from the Internet for security purposes before starting the install.
“35. To bring the installation to a close, click on ‘FINISH CONFIGURATION’.”
“36. Finally, the login prompt will appear as shown.”
Is there a reboot occurring between Steps 35 and 36? If there is a reboot, shouldn’t that be mentioned in the write-up?
Hey Dragonmouth, There is no reboot at all between Step 35 and Step 36. Shortly after clicking on the ‘FINISH CONFIGURATION button, the login screen is displayed prompting you to log in with the user you configured on Step 28.
Thanks for the answer although the process as you describe seems a little odd. Usually, once the installation ends, there is a reboot allowing for 1) the removal of the installation medium, 2) booting into the newly installed system from the HD/SSD rather than from USB.
Tecmint is supposedly a site dedicated to Linux and yet you keep recommending tools that only work on Windows, namely Rufus. According to the Rufus FAQ, there is no Linux version. I gave up Windows for Linux more than ten years ago so I am not about to go back for any reason. How about recommending a Linux tool for creating bootable USB drives?
@Dragonmouth,
I have updated the article and included UNetbootin or Etcher tools as per your suggestion…
Thank you.