Upgrading your Linux Mint operating system can bring new features, security updates, and improved performance. However, it can also introduce unexpected issues or conflicts with existing applications.
To safeguard your system, it’s wise to create a system snapshot using Timeshift before you proceed with the upgrade.
This article will guide you through the steps of creating a Timeshift snapshot, ensuring you can revert your system to its previous state if necessary.
What is Timeshift?
Timeshift is a powerful tool for creating and restoring system snapshots on Linux, which is particularly useful for backing up system files and settings, allowing you to easily recover your system in case of failure or if something goes wrong during an upgrade.
Timeshift uses the rsync and hard-linking methods to create efficient snapshots without consuming excessive disk space.
Why Use Timeshift?
- Easy Recovery: If the upgrade fails or causes issues, you can quickly restore your system to its previous state.
- Incremental Backups: Timeshift creates incremental backups, meaning it only saves changes made since the last snapshot, saving disk space and time.
- User-Friendly Interface: Timeshift offers a straightforward graphical interface, making it easy to use even for those who are not familiar with command-line tools.
Prerequisites
Before you begin, ensure that you have the following:
- Timeshift works on various Linux distributions, but this guide is specific to Linux Mint.
- Make sure you have enough free disk space to store your snapshots.
- Timeshift is often pre-installed on Linux Mint. If it’s not, you can install it using the Software Manager or via the terminal with the command:
sudo apt install timeshift
Creating a Linux Mint System Snapshot
Open the application by searching for “Timeshift” in the menu or launching it from the terminal with the command:
timeshift
If this is your first time using Timeshift, you will be prompted to configure it.
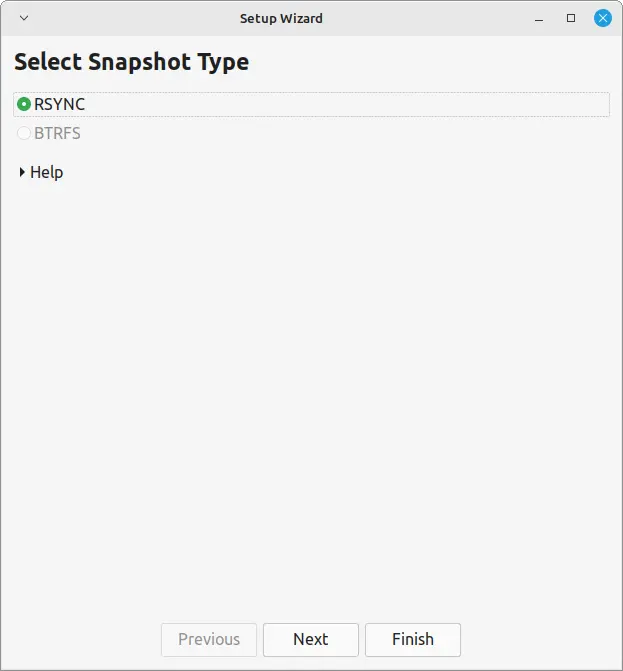
1. Choose a snapshot type, rsync is recommended for most users due to its flexibility and speed.
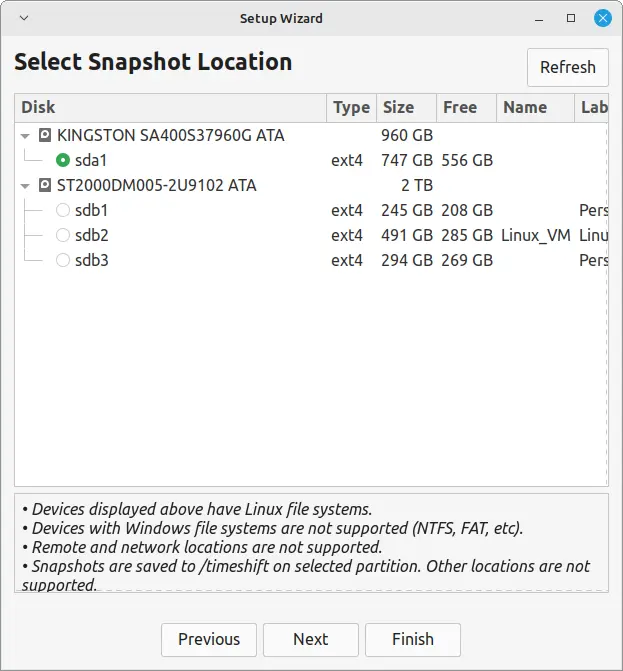
2. You can save snapshots on your primary partition or an external drive.
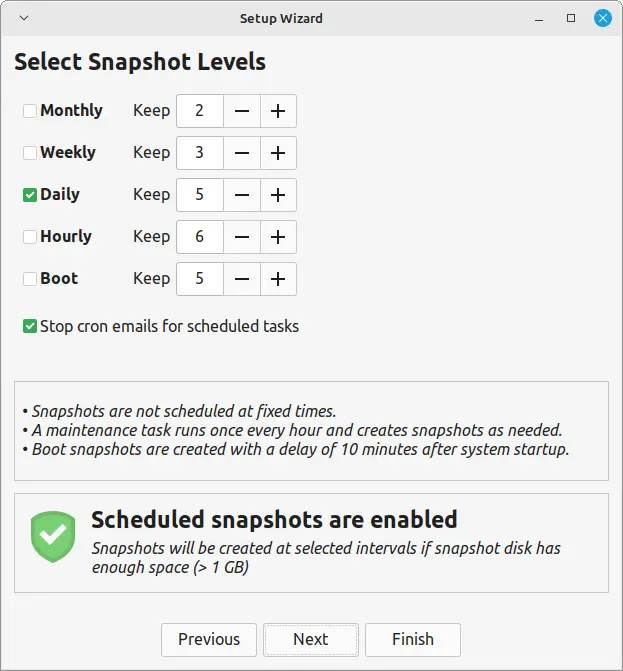
3. You can choose to schedule automatic snapshots daily, weekly, or monthly. For upgrades, manual snapshots are often sufficient.
4. Finally, click on the Create button to start creating a new snapshot.
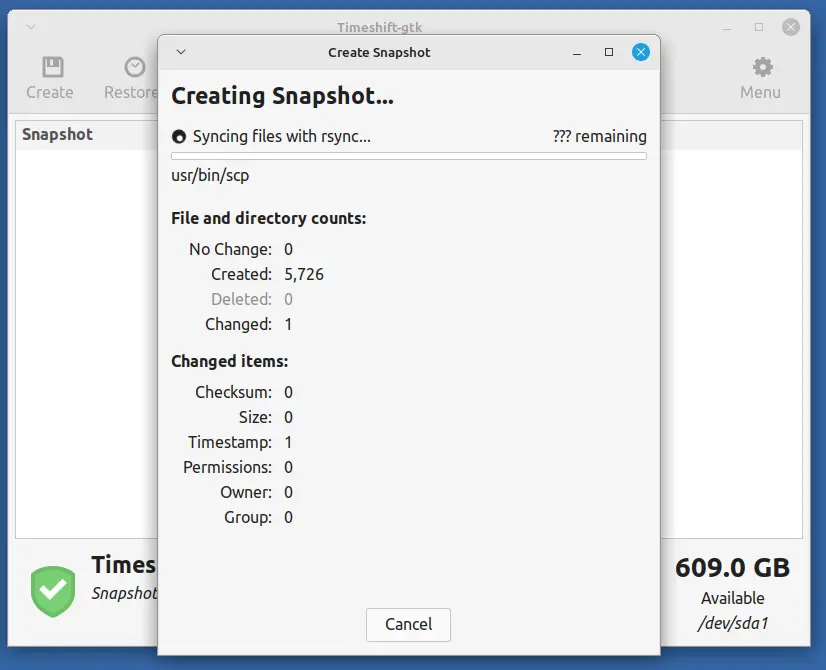
Timeshift will now begin the process of creating the snapshot, which may take some time, depending on the size of your system and the amount of data.
Upgrading Linux Mint
Now that you have a reliable snapshot, you can proceed to upgrade Linux Mint by going to Update Manager tool.
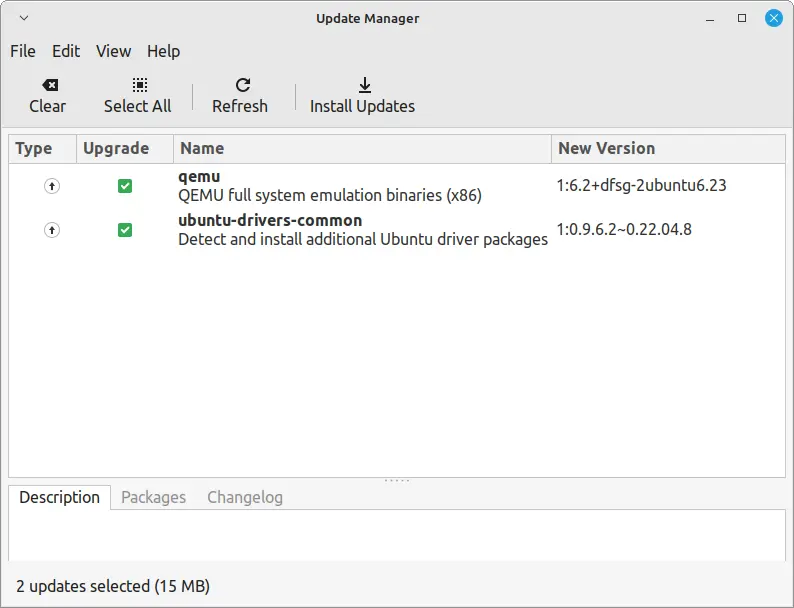
Check for updates to confirm that your system is up to date before upgrading.
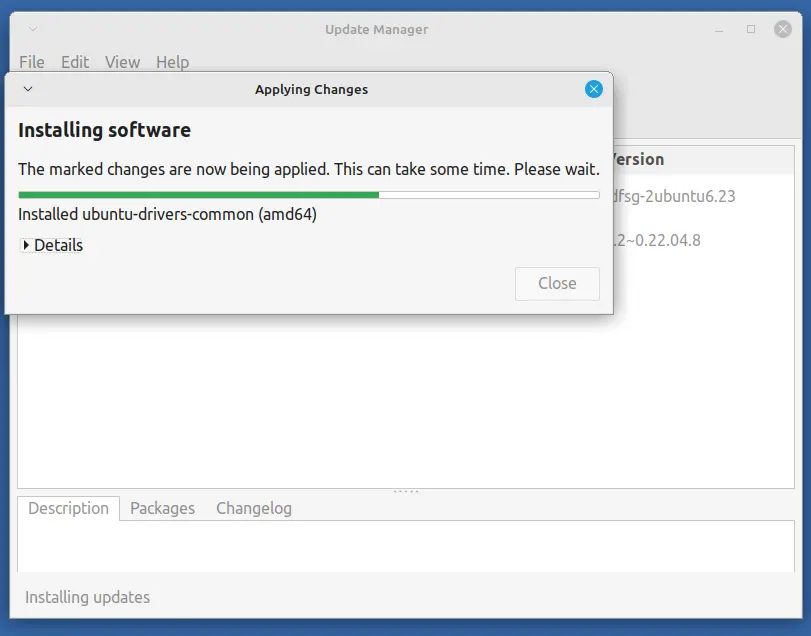
After installing updates, you may see an option for a new version of Linux Mint, just follow the prompts to start the upgrade process.
Restoring from a Snapshot
Restoring your system from a Timeshift snapshot is a straightforward process that allows you to revert to a previous state quickly, which is particularly useful if an upgrade or system change has caused issues.
In the Timeshift main window, you will see a list of all available snapshots. Each entry will include details such as the date, time, and any description you provided when creating the snapshot.
Scroll through the list and select the snapshot you wish to restore, which is usually a good idea to pick the most recent snapshot taken before the issues started occurring.
Once you have selected the desired snapshot, click the Restore button in the Timeshift toolbar.
Conclusion
Creating a system snapshot with Timeshift is a simple yet effective way to protect your Linux Mint system before an upgrade.
By following this guide, you can ensure that you have a reliable backup of your system, allowing you to roll back any changes if needed.
Regular use of Timeshift not only provides peace of mind during upgrades but also helps maintain system stability in the long run.
The download locked up my laptop. Powered down and logged in command line. Used an apt -upgrade command line option to finish the install. it worked.
Hello.
I can say one crucial thing about linux mint 15 …. Finally, he takes care of Acer completely. Before, with 14 no display and have to take an additional screen. with 15 … cool, my phone “becomes” portable. It is not life grand?
Linux thank you.
Tried it …
Updated the sources.list file as described above.
Ran “apt-get update && apt-get dist-upgrade” as root. Took a around a hour and half (download and install.
Answered “Y” to all the update questions. (i.e. accept maintainers config). When trying to reboot the system the Cinnamon UI had only square blocks where the words should be. I clicked one from memory and x-server quit and went to tty1 (console). Just sat there complaining about modem-manger (odd since I do not have one but I think this was there before upgrade). Used hard shutdown (power button) and restarted.
I did not loose any configuration: dual-boot was still there; desktop was as I left it …
Thanks!! :-)
Worked like a charm for me. All apps seem to be running well. Thanks! :)
after upgraded to version 15 and maintain the original configuration file when migrating mam single element applications such as bluetooth, system settings, and the like. I can not set the language.
double the applications menu I do not set the language after upgraded to version 15
try to tick ‘locales” in synaptic
This works great. Thank you man!