Introduced by RedHat in RHEL 7.5 and later, VDO short for Virtual Date Optimizer is a block virtualization technology that provides inline deduplication and compression of data at a block device level.
The idea of deduplication is quite simple: to remove copies of duplicate data and only remain with one copy. When an identical file is added on a block device, it is marked as a duplicate and the original file is referenced instead. In so doing, VDO helps is saving the block volume’s space.
In this tutorial, you will learn how to create a VDO volume on a storage device on the RHEL 8 system.
Step 1: Install the VDO in RHEL 8
To get started, log in to your server and update your RHEL using the dnf command.
$ sudo dnf update -y
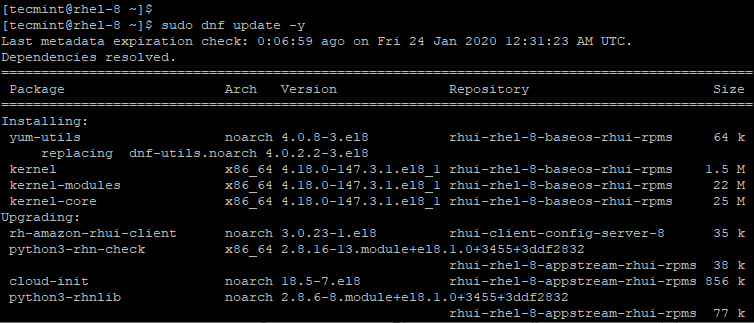
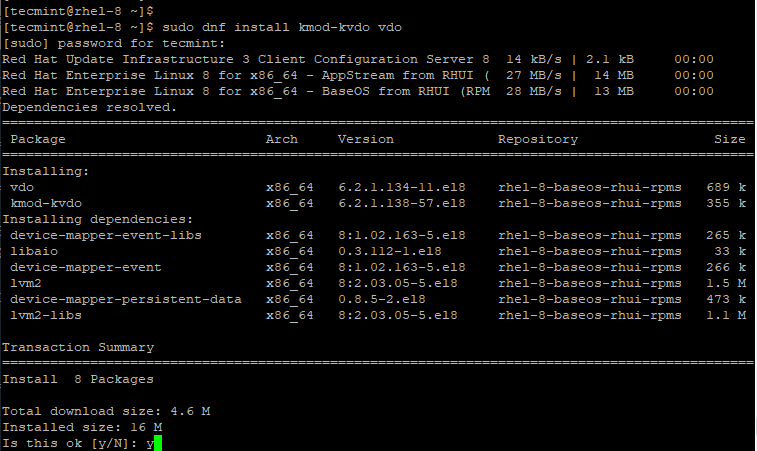
After the update of the packages & kernel is complete, proceed and install the VDO kernel modules and dependencies using the command.
$ sudo dnf install kmod-kvdo vdo
- vdo – This is a set of Management tools for Virtual Data Optimizer.
- kmod-kvdo – This is a group of Kernel Modules for Virtual Data Optimizer.
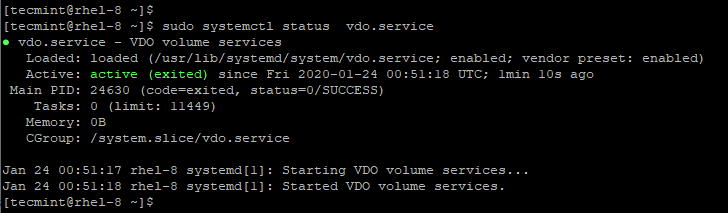
After successful installation, start, enable and verify the vdo daemon.
$ sudo systemctl start vdo
$ sudo systemctl enable vdo
$ sudo systemctl status vdo
Step 2: Create a VDO Volume in RHEL 8
Before creating a vdo volume, ensure that you have an additional hard drive on your system. In this tutorial, we have attached an additional volume xvdb . This can be demonstrated by running the lsblk command below.
$ lsblk
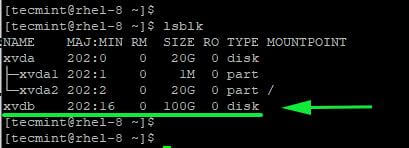
From the output, you can clearly see that the second disk has a capacity of 100GB.
Now, we shall create ane empty VDO volume on /dev/xvdb disk.
$ sudo vdo create --name=vdo1 --device=/dev/xvdb --vdoLogicalSize=300G
You will encounter the error shown.

This is a common bug and the workaround is to simply reboot your server.
$ sudo reboot
On the second trial, the command will be executed, creating an empty VDO volume on the device /dev/xvdb.
$ sudo vdo create --name=vdo1 --device=/dev/xvdb --vdoLogicalSize=300G

Let’s break down the command and have a look at the option used:
- create – This initiates the creation of the VDO volume.
- –name=vdo1 – This gives the volume a label known as vdo1. Feel free to assign any name of your choice.
- –device=/dev/xvdb – The device option specifies the disk on which the volume will be created.
- –vdoLogicalSize=300G – This indicates the effective volume capacity to be used by the operating system, in this case, 300G.
Step 3: Probing the New VDO Volume
The new VDO volume has been created at /dev/mapper/vdo1 going by the output we saw in the previous step. We can use the ls command as shown to investigate file permissions & ownership.
$ ls -l /dev/mapper/vdo1

To obtain more insightful information use the vdostats command to retrieve statistics on the size and the usage of the volume.
$ vdostats --hu
The --hu flag displays the information in a human-readable format, i.e. a format that is much easier to read and decipher with ease. We can view attributes such as the Device name, the size on the additional disk, used and available space as the % usage.

Carefully observe that the % Saving is indicated as Not Applicable (N/A).
Also, note that already we have some volume usage 4.1G which translates to 4% yet we haven’t written anything on the volume. Why is that? This is because the universal Deduplication has already been written onto the disk and it is what makes deduplication possible.
The vdostats command can be used with the --verbose flag to retrieve more detailed information as shown:
$ sudo vdostats --verbose /dev/mapper/vdo1 | grep -B6 ‘saving percent’
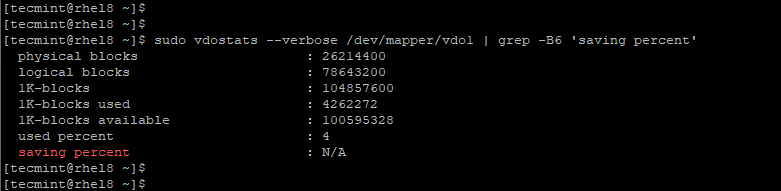
What you can see is basically the same data as the previous example but in a different format.
Step 4: Partitioning the VDO Volume
After obtaining enough insights from the volume, we need to partition it and later create a filesystem so that it can be used as a normal disk.
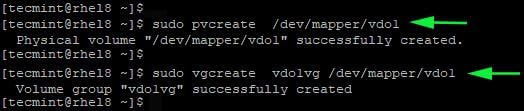
Let’s create a physical volume and volume group as shown, run the following commands.
$ sudo pvcreate /dev/mapper/vdo1
$ sudo vgcreate vdo1vg /dev/mapper/vdo1
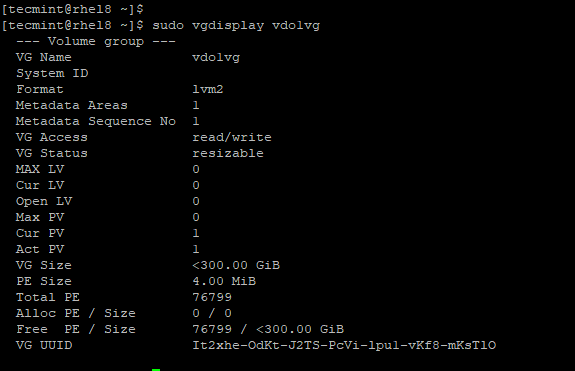
To display the statistics of the volume group run:
$ sudo vgdisplay vdo1vg
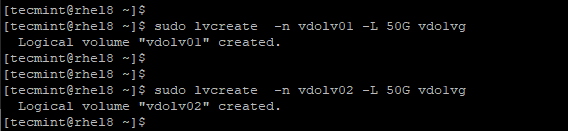
Now, we will create 2 equally sized logical volumes each with a capacity of 50G.
$ sudo lvcreate -n vdo1v01 -L 50G vdo1vg
$ sudo lvcreate -n vdo1v02 -L 50G vdo1vg
You can later view the stats of the newly created volumes by running the command.
$ sudo lvs

Step 4: Formatting and Mounting File Systems
Usually, when a filesystem is created, a trim operation is carried out on the device. This is undesirable in the case of the VDO. When formating using the mkfs command, use the -K option to instruct the command not to discard blocks during the creation fo the filesystem.
$ sudo mkfs.xfs  -K /dev/vdo1vg/vdo1v01
$ sudo mkfs.xfs  -K /dev/vdo1vg/vdo1v02
If you are using EXT$ filesystem, use the “-E nodiscard” Option.
Create the mount points for mounting the volumes:
$ sudo mkdir /data/v01
$ sudo mkdir /data/v02

Now mount the filesystems onto their mount points as shown.
$ sudo mount -o discard /dev/vdo1vg/vdo1v01  /data/v01
$ sudo mount -o discard /dev/vdo1vg/vdo1v02  /data/v02

Now when you inspect the VDO volume you’ll notice that the % saving has changed to 99% which is quite impressive. This implies that deduplication is working as expected.
$ sudo vdostats --hu

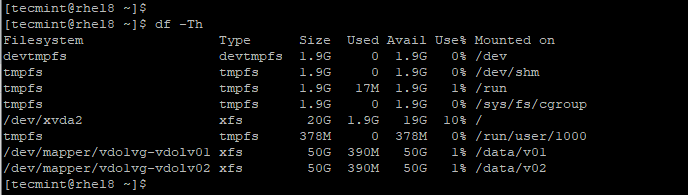
You can further investigate using the df -Th command. At the bottom section, you’ll see the filesystems mounted on /data/v01 and /data/v02 respectively.
$ df -hT
In this tutorial, we demonstrated how you can create a VDO volume from an additional storage device on RHEL 8. We later went ahead and demonstrated how you can create more volumes and create filesystems from those volumes.


What is the minimum size of the backend storage device to create vdo device?
~~~
Creating VDO vdodisk
vdo: ERROR – vdoformat: formatVDO failed on ‘/dev/disk/by-id/ata-QEMU_HARDDISK_QM00003-part2’: VDO Status: Out of space
~~~
Minimum required size for VDO volume: 5063921664 bytes
I keep getting the errors below when trying to create a VDO.
Creating VDO vdo1
However, when I try to install it I get this message.
Package vdo-6.2.2.117-13.el8.x86_64 is already installed.
Package kmod-kvdo-6.2.2.117-65.el8.x86_64 is already installed.
Dependencies resolved.
And yes my vdo is active and enable, please see below message
● vdo.service – VDO volume services
Loaded: loaded (/usr/lib/systemd/system/vdo.service; enabled; vendor preset: enabled)
Active: active (exited) since Sun 2020-10-18 01:22:02 CDT; 32min ago
Process: 1023 ExecStart=/usr/bin/vdo start –all –confFile /etc/vdoconf.yml (code=exited,>
Main PID: 1023 (code=exited, status=0/SUCCESS)
Tasks: 0 (limit: 23336)
Memory: 0B
CGroup: /system.slice/vdo.service
Oct 18 01:22:00 s1.centos8 systemd[1]: Starting VDO volume services…
Oct 18 01:22:02 s1.centos8 systemd[1]: Started VDO volume services.
Am using centos8 4.18.0-193.19.1.el8_2.x86_64. Thanks!
Thanks for that pointer Kingneutron. Let me give a shot with the
modprobecommand in loading the vdo module.This is a common bug and the workaround is to simply reboot your server.
No. This is Linux, not Windows. ‘
modprobe vdo‘ and should be good to go.Also, you should be able to create a file-based VDO device instead of having to use a partition. I will be experimenting with this.