TLS 1.3 is the latest version of the Transport Layer Security (TLS) protocol and it is based on the existing 1.2 specifications with proper IETF standard: RFC 8446. It provides stronger security and higher performance improvements over its predecessors.
In this article, we will show you a step-by-step guide to obtain a valid TLS certificate and enable the latest TLS 1.3 version protocol on your domain hosted on Apache or Nginx web servers.
Requirements:
- Apache version 2.4.37 or greater.
- Nginx version 1.13.0 or greater.
- OpenSSL version 1.1.1 or greater.
- A valid domain name with correctly configured DNS records.
- A valid TLS certificate.
Install TLS Certificate from Let’s Encrypt
To obtain a free SSL Certificate from Let’s Encrypt, you need to install Acme.sh client and also few needed packages on Linux system as shown.
# apt install -y socat git  [On Debian/Ubuntu]
# dnf install -y socat git  [On RHEL/CentOS/Fedora]
# mkdir /etc/letsencrypt
# git clone https://github.com/Neilpang/acme.sh.git
# cd acme.sh
# ./acme.sh --install --home /etc/letsencrypt --accountemail [email protected]
# cd ~
# /etc/letsencrypt/acme.sh --issue --standalone --home /etc/letsencrypt -d example.com --ocsp-must-staple --keylength 2048
# /etc/letsencrypt/acme.sh --issue --standalone --home /etc/letsencrypt -d example.com --ocsp-must-staple --keylength ec-256
NOTE: Replace example.com in the above command with your real domain name.
Once you have SSL certificate installed, you can proceed further to enable TLS 1.3 on your domain as explained below.
Enable TLS 1.3 on Nginx
As I mentioned in the requirements above, that TLS 1.3 is supported starting from Nginx 1.13 version. If you are running the older Nginx version, you need to first upgrade to the latest version.
# apt install nginx
# yum install nginx
Check the Nginx version and the OpenSSL version against which Nginx was compiled (make sure that the nginx version is at least 1.14 and openssl version 1.1.1).
# nginx -V
Sample Output
nginx version: nginx/1.14.1
built by gcc 8.2.1 20180905 (Red Hat 8.2.1-3) (GCC)
built with OpenSSL 1.1.1 FIPS  11 Sep 2018
TLS SNI support enabled
....
Now start, enable and verify the nginx installation.
# systemctl start nginx.service
# systemctl enable nginx.service
# systemctl status nginx.service
Now open the nginx vhost configuration /etc/nginx/conf.d/example.com.conf file using your favorite editor.
# vi /etc/nginx/conf.d/example.com.conf
and locate ssl_protocols directive and append TLSv1.3 at the end of the line as shown below
server {
  listen 443 ssl http2;
  listen [::]:443 ssl http2;

  server_name example.com;

  # RSA
  ssl_certificate /etc/letsencrypt/example.com/fullchain.cer;
  ssl_certificate_key /etc/letsencrypt/example.com/example.com.key;
  # ECDSA
  ssl_certificate /etc/letsencrypt/example.com_ecc/fullchain.cer;
  ssl_certificate_key /etc/letsencrypt/example.com_ecc/example.com.key;

  ssl_protocols TLSv1.2 TLSv1.3;
  ssl_ciphers 'ECDHE-ECDSA-AES256-GCM-SHA384:ECDHE-RSA-AES256-GCM-SHA384:ECDHE-ECDSA-CHACHA20-POLY1305:ECDHE-RSA-CHACHA20-POLY1305:ECDHE-ECDSA-AES128-GCM-SHA256:ECDHE-RSA-AES128-GCM-SHA256:ECDHE-ECDSA-AES256-SHA384:ECDHE-RSA-AES256-SHA384:ECDHE-ECDSA-AES128-SHA256:ECDHE-RSA-AES128-SHA256';
  ssl_prefer_server_ciphers on;
}
Finally, verify the configuration and reload Nginx.
# nginx -t
# systemctl reload nginx.service
Enable TLS 1.3 in Apache
Beginning from Apache 2.4.37, you can take advantage of TLS 1.3. If you are running the older version of Apache, you need to first upgrade to the latest version.
# apt install apache2
# yum install httpd
Once installed, you can verify the Apache and the OpenSSL version against which Apache was compiled.
# httpd -V
# openssl version
Now start, enable and verify the nginx installation.
-------------- On Debian/Ubuntu --------------
# systemctl start apache2.service
# systemctl enable apache2.service
# systemctl status apache2.service

-------------- On RHEL/CentOS/Fedora --------------
# systemctl start httpd.service
# systemctl enable httpd.service
# systemctl status httpd.service
Now open the Apache virtual host configuration file using your favorite editor.
# vi /etc/httpd/conf.d/vhost.conf
OR
# vi /etc/apache2/apache2.conf
and locate ssl_protocols directive and append TLSv1.3 at the end of the line as shown below.
<VirtualHost *:443>
SSLEngine On

# RSA
ssl_certificate /etc/letsencrypt/example.com/fullchain.cer;
ssl_certificate_key /etc/letsencrypt/example.com/example.com.key;
# ECDSA
ssl_certificate /etc/letsencrypt/example.com_ecc/fullchain.cer;
ssl_certificate_key /etc/letsencrypt/example.com_ecc/example.com.key;

ssl_protocols TLSv1.2 TLSv1.3
ssl_ciphers 'ECDHE-ECDSA-AES256-GCM-SHA384:ECDHE-RSA-AES256-GCM-SHA384:ECDHE-ECDSA-CHACHA20-POLY1305:ECDHE-RSA-CHACHA20-POLY1305:ECDHE-ECDSA-AES128-GCM-SHA256:ECDHE-RSA-AES128-GCM-SHA256:ECDHE-ECDSA-AES256-SHA384:ECDHE-RSA-AES256-SHA384:ECDHE-ECDSA-AES128-SHA256:ECDHE-RSA-AES128-SHA256';
ssl_prefer_server_ciphers on;
SSLCertificateFile /etc/letsencrypt/live/example.com/cert.pem
SSLCertificateKeyFile /etc/letsencrypt/live/example.com/privkey.pem
SSLCertificateChainFile /etc/letsencrypt/live/example.com/chain.pem

     ServerAdmin [email protected]
     ServerName www.example.com
     ServerAlias example.com
    #DocumentRoot /data/httpd/htdocs/example.com/
    DocumentRoot /data/httpd/htdocs/example_hueman/
  # Log file locations
  LogLevel warn
  ErrorLog  /var/log/httpd/example.com/httpserror.log
  CustomLog "|/usr/sbin/rotatelogs /var/log/httpd/example.com/httpsaccess.log.%Y-%m-%d 86400" combined
</VirtualHost>
Finally, verify the configuration and reload Apache.
-------------- On Debian/Ubuntu --------------
# apache2 -t
# systemctl reload apache2.service

-------------- On RHEL/CentOS/Fedora --------------
# httpd -t
# systemctl reload httpd.service
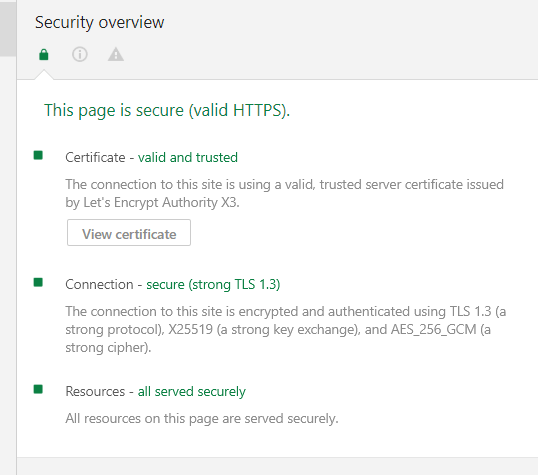
Verify Site is Using TLS 1.3
Once you’ve configured through a web server, you can check that your site is handshaking over TLS 1.3 protocol using chrome browser development tools on Chrome 70+ version.
That’s all. You have successfully enabled TLS 1.3 protocol on your domain hosted on Apache or Nginx web servers. If you have any queries about this article, feel free to ask in the comment section below.


I followed the guide but httpd still says TLSv1.3 is an illegal protocol.
adding ssl throws an error.
[root@webhost ~]# httpd -V
Server version: Apache/2.4.6 (CentOS)
Server built:   Nov 16 2020 16:18:20
Server's Module Magic Number: 20120211:24
Server loaded:  APR 1.4.8, APR-UTIL 1.5.2
Compiled using: APR 1.4.8, APR-UTIL 1.5.2
Architecture:   64-bit
Server MPM:     prefork
  threaded:     no
    forked:     yes (variable process count)
Server compiled with....
 -D APR_HAS_SENDFILE
 -D APR_HAS_MMAP
 -D APR_HAVE_IPV6 (IPv4-mapped addresses enabled)
 -D APR_USE_SYSVSEM_SERIALIZE
 -D APR_USE_PTHREAD_SERIALIZE
 -D SINGLE_LISTEN_UNSERIALIZED_ACCEPT
 -D APR_HAS_OTHER_CHILD
 -D AP_HAVE_RELIABLE_PIPED_LOGS
 -D DYNAMIC_MODULE_LIMIT=256
 -D HTTPD_ROOT="/etc/httpd"
 -D SUEXEC_BIN="/usr/sbin/suexec"
 -D DEFAULT_PIDLOG="/run/httpd/httpd.pid"
 -D DEFAULT_SCOREBOARD="logs/apache_runtime_status"
 -D DEFAULT_ERRORLOG="logs/error_log"
 -D AP_TYPES_CONFIG_FILE="conf/mime.types"
 -D SERVER_CONFIG_FILE="conf/httpd.conf"

OpenSSL 1.1.1g FIPS  21 Apr 2020
If you need more info let me know, but I think this should be working.
Apache’s configuration in that article is completely messed up.
Apache’s SSL Protocol configuration should be:
SSLProtocol -all +TLSv1.2 +TLSv1.3
instead of
ssl_protocols (<- that's nginx format, not apache)
That's why the guy called "Spelto" has failed there^^.
Hello.
Great instructions.
But we have problems with
httpd -t:Oracle Linux:
What could be the problem?
Thanks.
BR
@Dip,
TLSv1.3 is supported in Apache2 version 2.4.36 with OpenSSL 1.1.1. I see you have Apache version 2.4.6, please update it.
My apache2 doesn’t seem to recognize the ssl_protocols parameter.
Nov 01 14:16:26 x.com systemd[1]: Starting The Apache HTTP Server...Nov 01 14:16:26 x.com apachectl[29603]: AH00526: Syntax error on line 33 of /etc/apache2/sites-enabled/000-default-le-ssl.conf:
Nov 01 14:16:26 x.com apachectl[29603]: Invalid command 'ssl_protocols', perhaps misspelled or defined by a module not included in the server configuration
Nov 01 14:16:26 x.com apachectl[29603]: Action 'start' failed.
Nov 01 14:16:26 x.com apachectl[29603]: The Apache error log may have more information.
@Spelto,
Did you enable the
mod_sslmodule?Working as mentioned. Thanks.
Have a query : How to enable TLS for subdomain on nginx? (demo.example.com)
@Ramana,
Follow the same instructions to enable TLS on sub domain as well. Open your sub domain nginx vhost file and configure it as shown.
Very clear steps, just worked like robot :)
between, how do we renew letsencrypt certificate.. Nice to have that information captured here.
@Venkar,
Just run the following command to renew let’s encrypt certificate.