PostgreSQL, also known as Postgres, is a powerful, open-source object-relational database management system that uses and expands the SQL language combined with numerous features that safely keep and scale the most complex data workloads.
PostgreSQL ships with the number of features intended to help programmers to develop applications, administrators to safeguard data integrity and create fault-tolerant environments, and assist you to manage your data no matter how large or small the dataset.
In addition to being free and open-source, PostgreSQL is extremely extensible. For example, you can add your own data types, develop custom functions, even write code from various programming languages without recompiling your database!
Requirements:
- RHEL 8 with Minimal Installation
- RHEL 8 with RedHat Subscription Enabled
- RHEL 8 with Static IP Address
In this article, we will explain how to install, secure and configure PostgreSQL database management system in RHEL 8 Linux distribution.
Installing PostgreSQL Packages
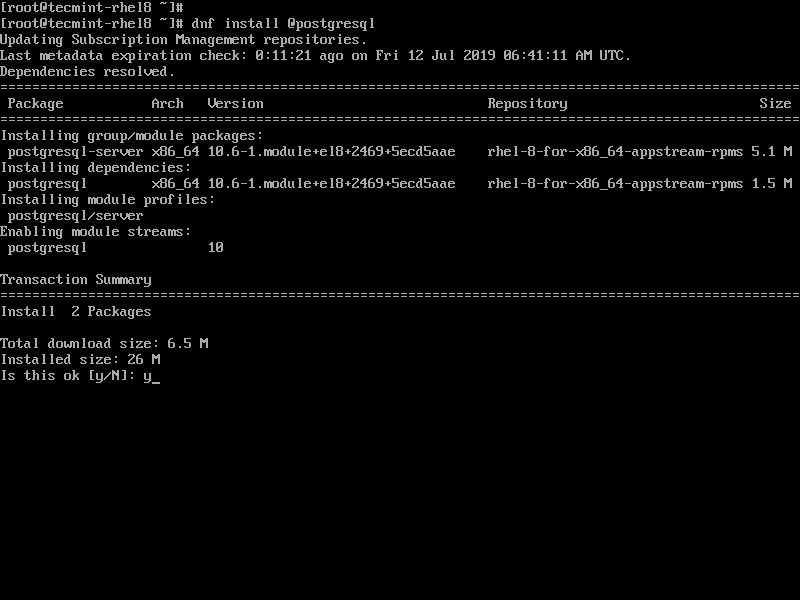
1. PostgreSQL is included in the default repositories of RHEL 8, and can be installed using the following dnf command, which will install the PostgreSQL server 10, libraries and client binaries.
# dnf install @postgresql
Note: To install PostgreSQL 11 packages on your RHEL 8 system, you need to install the PostgreSQL RPM repository, which contains many different packages such as the PostgreSQL server, client binary, and third-party add-ons.
# dnf install https://download.postgresql.org/pub/repos/yum/reporpms/EL-8-x86_64/pgdg-redhat-repo-latest.noarch.rpm
# dnf update
# dnf install postgresql11-server postgresql11  postgresql11-contrib
Initialize the PostgreSQL Database
2. Once you have installed the PostgreSQL packages, the next step is to initialize the new PostgreSQL database cluster using the /usr/bin/postgresql-setup utility, as follows.
# /usr/bin/postgresql-setup --initdb

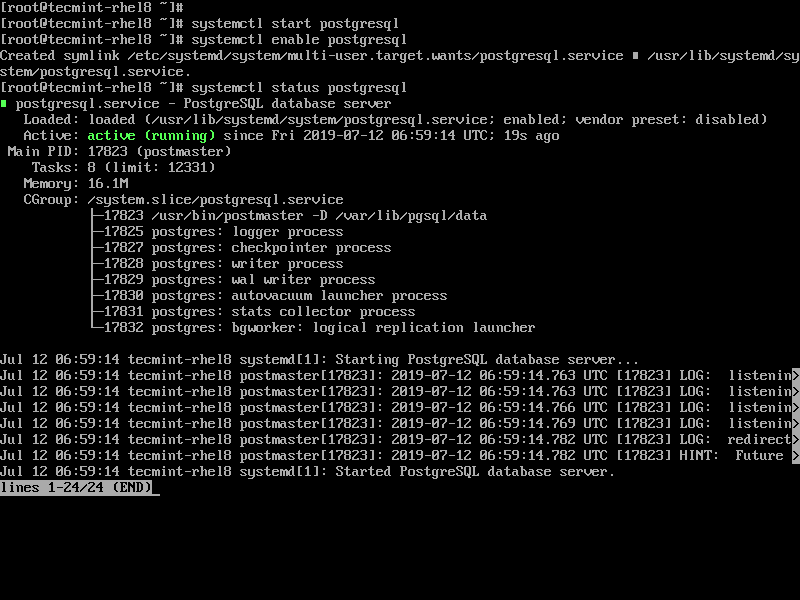
3. Now that the PostgreSQL cluster is initialized, you need to start the PostgreSQL service, for now, then enable it to auto-start at system boot and verify its status using the systemctl command.
# systemctl start postgresql
# systemctl enable postgresql
# systemctl status postgresql
Secure and Configure PostgreSQL Database
In this section, we will show how to secure the Postgres user account and the administrative user account. Then we will cover how to configure PostgreSQL, especially how to set up client authentication.
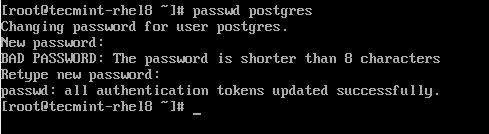
4. Create a password for a postgres system user account using the passwd utility as follows.
# passwd postgres
5. Next, switch to the postgres system user account and secure the PostgreSQL administrative database user account by creating a password for it (remember to set a strong and secure password).
$ su - postgres
$ psql -c "ALTER USER postgres WITH PASSWORD 'adminpasswdhere123';"

6. The various PostgreSQL configuration files can be found in the /var/lib/pgsql/data/ directory. To view the directory structure, you can use the tree (install it using dnf install tree) command.
# tree -L 1 /var/lib/pgsql/data/
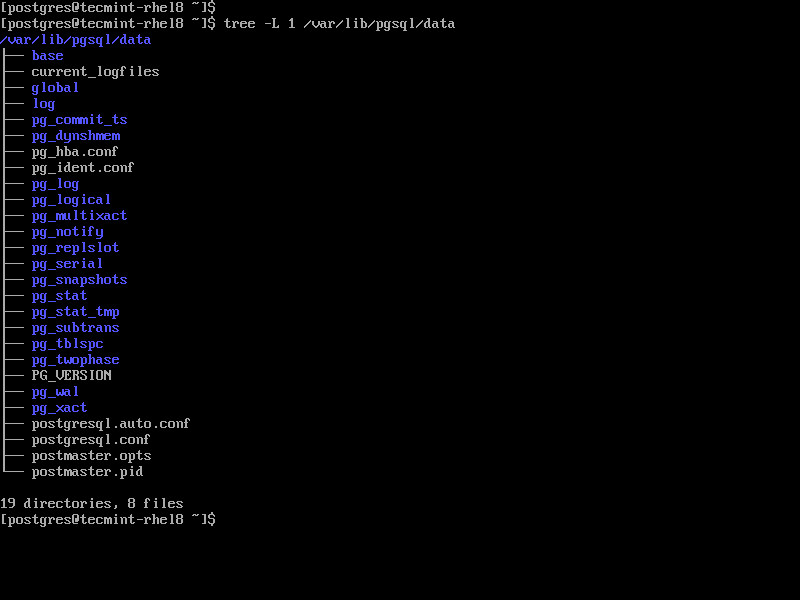
The main server configuration file is /var/lib/pgsql/data/postgresql.conf. And the client authentication can be configured using the /var/lib/pgsql/data/pg_hba.conf.
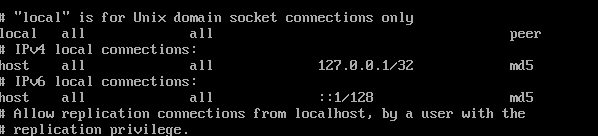
7. Next, let’s look at how to configure client authentication. PostgreSQL database system supports different types of authentication including password-based authentication. Under the password-based authentication, you can use one of the following methods: md5, crypt, or password (sends the password in clear-text).
Although the above password-authentication methods work in a similar way, the major difference between them is: which way a user’s password is stored (on the server) and sent across the connection, when entered by a user.
To prevent password sniffing by attackers and avoid storing passwords on the server in plain text, it is recommended to use md5 as shown. Now open the client authentication configuration file.
# vi /var/lib/pgsql/data/pg_hba.conf
And look for the following lines and change the authentication method to md5.
host    all             all             127.0.0.1/32            md5
host    all             all		::1/128                 md5
8. Now restart the Postgres service to apply the recent changes in the configuration.
# systemctl reload postgresql
9. At this stage, your PostgreSQL database server installation is now secure. You can switch to the postgres account and start working with PostgreSQL.
# su - postgres
$ psql
You can read the official PostgreSQL documentation (remember to select docs for the version you have installed) to understand how PostgreSQL works and how to use it for developing applications.
That’s all for now! In this guide, we have shown how to install, secure and configure PostgreSQL database management system in RHEL 8. Remember you can give us feedback via the feedback form below.