PostgreSQL, an open-source relational database management system, is widely renowned for its robust features and extensibility. While many Linux distributions provide PostgreSQL through their package managers, installing it from the source allows for greater customization and control.
In this article, we will explain how to install PostgreSQL 16 using source code installation on Linux systems.
For those seeking an easier installation method from the distribution package manager, please follow the guides below:
Prerequisites
Before diving into the PostgreSQL installation process, ensure your system meets the following prerequisites:
- A Linux distribution (in this guide, we’ll use Debian for demonstration purposes).
- A Linux system with a non-root user with sudo privileges.
- Essential development tools such as GCC and Make are installed.
1. Install Prerequisites on Linux
First, install essential development tools such as GCC and Make using the distribution package manager as shown.
On RHEL-based distributions such as CentOS, Fedora, Rocky Linux and Alma Linux:
sudo yum groupinstall development-tools
sudo yum install zlib-devel readline-devel libicu-devel
On Debian-based distributions such as Ubuntu and Linux Mint.
sudo apt install gcc build-essential zlib1g-dev libreadline6-dev libicu-dev pkg-config
2. Download the PostgreSQL Source Code
Once needed prerequisites are installed, download the source code tar file from the official postgres website using the following wget command directly on the system. As of writing, the latest version is PostgreSQL 16.1.
wget https://ftp.postgresql.org/pub/source/v16.1/postgresql-16.1.tar.bz2
Next, use the tar command to extract the downloaded tarball file. A new directory named postgresql-16.1 will be created.
tar -xvf postgresql-16.1.tar.bz2
cd postgresql-16.1/
ls -l
Sample Output:
-rw-r--r--.  1 tecmint tecmint    365 Nov  7 03:34 aclocal.m4
drwxr-xr-x.  2 tecmint tecmint   4096 Nov  7 03:47 config
-rwxr-xr-x.  1 tecmint tecmint 584560 Nov  7 03:34 configure
-rw-r--r--.  1 tecmint tecmint  87292 Nov  7 03:34 configure.ac
drwxr-xr-x. 61 tecmint tecmint   4096 Nov  7 03:47 contrib
-rw-r--r--.  1 tecmint tecmint   1192 Nov  7 03:34 COPYRIGHT
drwxr-xr-x.  3 tecmint tecmint   4096 Nov  7 03:47 doc
-rw-r--r--.  1 tecmint tecmint   4288 Nov  7 03:34 GNUmakefile.in
-rw-r--r--.  1 tecmint tecmint    277 Nov  7 03:34 HISTORY
-rw-r--r--.  1 tecmint tecmint  64601 Nov  7 03:48 INSTALL
-rw-r--r--.  1 tecmint tecmint   1875 Nov  7 03:34 Makefile
-rw-r--r--.  1 tecmint tecmint 102017 Nov  7 03:47 meson.build
-rw-r--r--.  1 tecmint tecmint   6266 Nov  7 03:34 meson_options.txt
-rw-r--r--.  1 tecmint tecmint   1213 Nov  7 03:34 README
drwxr-xr-x. 16 tecmint tecmint   4096 Nov  7 03:48 src
3. Configure PostgreSQL from Source
As postgres is an open-source database, it can be built from source code according to one’s needs/requirements. we can customize the build and installation process by supplying one or more command line options for various additional features.
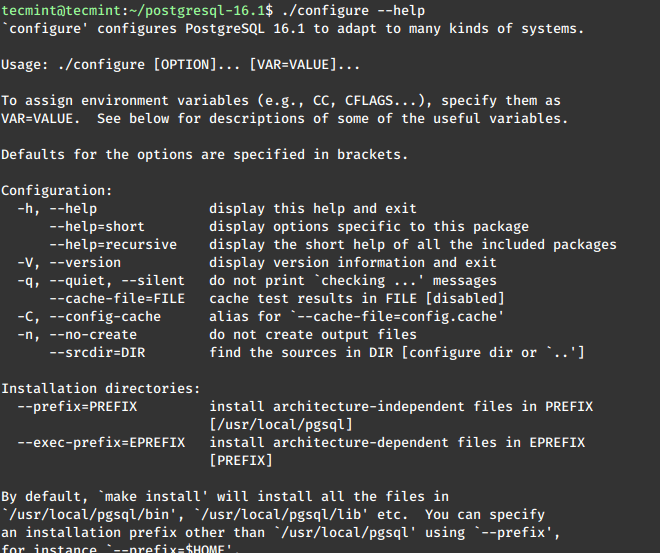
Use the following command for help with various options and configuration usage, as shown.
./configure --help
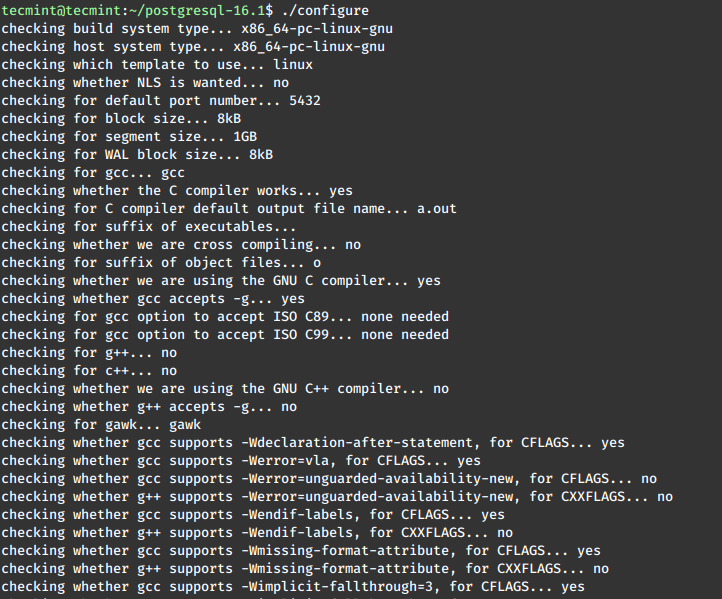
Now run the configure script, which will check your system for dependencies and configure the build accordingly.
./configure
4. Install PostgreSQL from Source
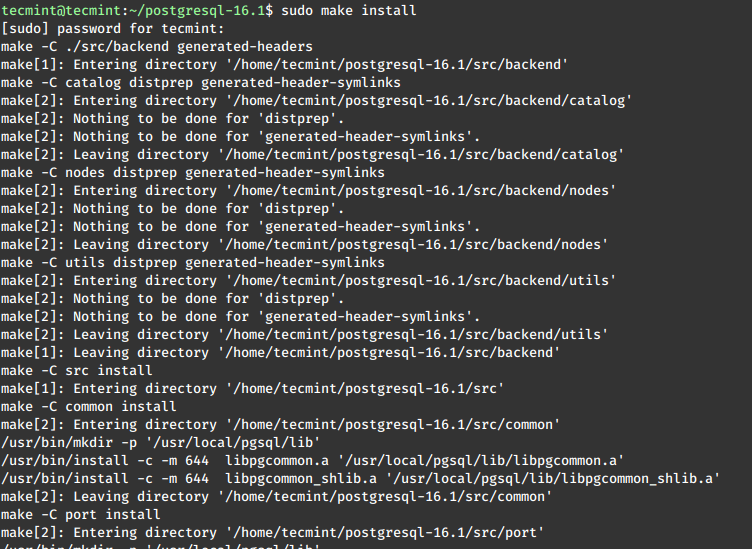
Once configured, use the following commands to build and install PostgreSQL from the source.
make
sudo make install
5. Creating Postgres User
Now create a postgres user and directory to be used as a data directory for initializing the database cluster. The owner of this data directory should be a postgres user and permissions should be 700 also set a path for postgresql binaries for our ease.
sudo useradd postgres
sudo passwd postgres
sudo mkdir -p /pgdatabase/data
sudo chown -R postgres: /pgdatabase/data
sudo sh -c "echo 'export PATH=$PATH:/opt/PostgreSQL/bin' > /etc/profile.d/postgres.sh"
source /etc/profile.d/postgres.sh
6. Initializing Postgres Database
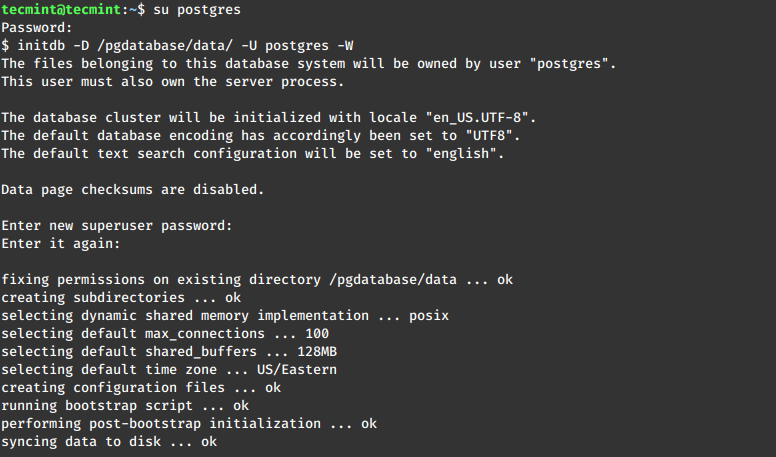
Now initialize the database using the following command as a postgres user before using any postgres commands.
su postgres
initdb -D /pgdatabase/data/ -U postgres -W
Where -D is the location for this database cluster or we can say it is the data directory where we want to initialize the database cluster, -U for database superuser name and -W for password prompt for db superuser.
For more info and options we can refer to initdb --help.
7. Start PostgreSQL Service
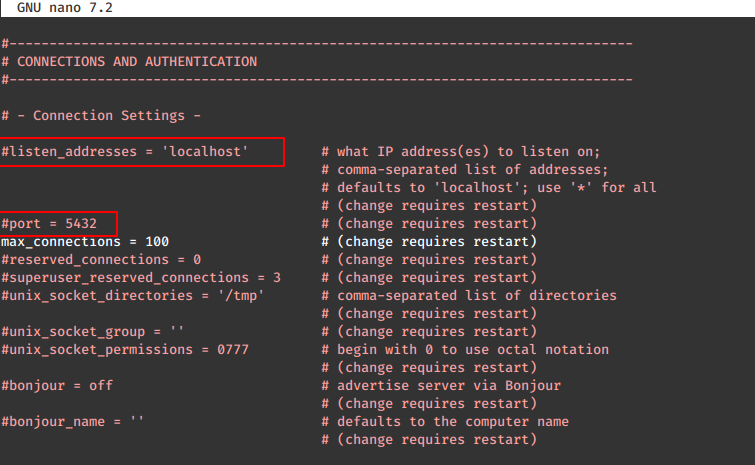
After initializing the database, start the database cluster, or if you need to change the port or listen to the address for the server, edit the /pgdatabase/data/postgresql.conf file in the data directory of the database server.
nano /pgdatabase/data/postgresql.conf
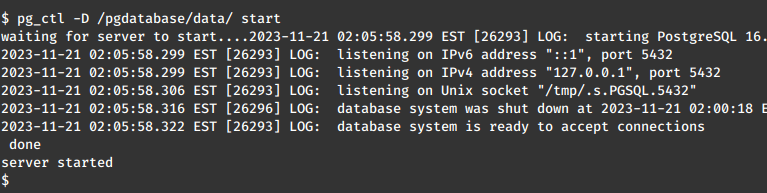
Now, start the PostgreSQL service.
pg_ctl -D /pgdatabase/data/ start
After starting the database, verify the status of the postgres server process by using the following ps and netstat commands.
ps -ef |grep -i postgres
netstat -apn |grep -i 51751
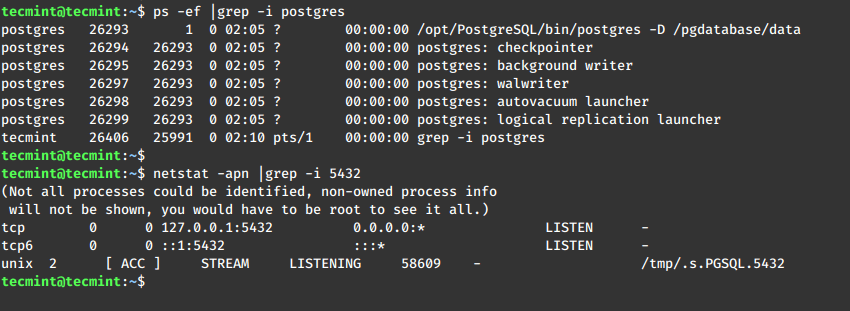
We can see that the database cluster is running fine, and startup logs can be found at the location specified with -l option while starting the database cluster.
pg_ctl -D /pgdatabase/data/ -l logfile start
8. Connect to PostgreSQL
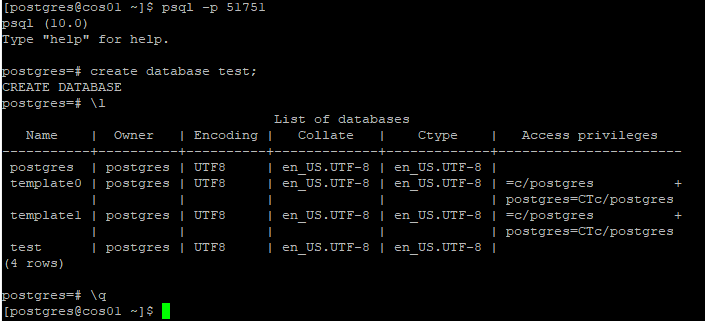
Now connect to the database cluster and create a database by using the following commands.
psql -p 5432
postgres=# create database test;
postgres=# \l to list all databases in cluster
postgres=# \q to quit form postgres console
If you are looking for a graphical tool called pgAdmin to manage your PostgreSQL, then follow these guides to install pgAdmin on your Linux distribution.
Conclusion
You have successfully installed PostgreSQL from source on your Linux system. This process provides flexibility and control over your PostgreSQL installation, allowing you to tailor it to your specific requirements.


Hi, there, and thanks for the article – how do I get postgres to start on boot?
@Pete,
To have PostgreSQL start on boot in Linux, you can use the systemd service manager which is common in many modern Linux distributions.
# initdb -D /pgdatabase/data/ -U postgres -W
Can’t use this command it said initdb command is not found..
Please help me…
Try this:
Then just insert the full path instead of “initdb“.
I have that:
Thank you guys, very helpful
Awesome, simple and all steps are covered.
I can’t use initdb, I get this error: initializing pg_authid … FATAL: wrong number of index expressions. Anybody can help me?
Use:
mkdir -p /pgdatabase/data. That will create these two folders, pgdatabase and data in that order