Modern Linux development has moved beyond the traditional approach of installing everything directly on your system. You now have access to tools that help you create isolated development environments without dealing with the overhead of full virtual machines or the complexity of manual container management.
This is where Fedora Toolbx comes into the picture – a tool that makes it simple to spin up containerized development environments while keeping the experience as seamless as working directly on your host system.
In this guide, you’ll learn how to set up and use Fedora Toolbx to create development environments that are isolated, reproducible, and easy to manage. You get to explore how Toolbx helps you work on multiple projects with conflicting dependencies while keeping your base system clean and organized.
The guide takes you through the basics of Toolbx with simple and practical explanations. You first learn what Toolbx is and why you need it, then you move on to installing and setting it up on your Fedora system. After that, you get to create your first development container and understand how to manage multiple environments effectively.
The final sections show you common workflows and best practices that help you get the most out of Toolbx in your daily development work.
Note: Toolbx was originally developed for Fedora and works best on Fedora-based systems, though you can use it on other modern Linux distributions as well, but this guide focuses primarily on Fedora.
Understanding Toolbx: What Makes It Different
Before you start working with Toolbx, it’s important to understand what it actually does and why you need it in your development workflow.
Toolbx creates containerized environments using Podman, which is a container engine similar to Docker but operates without a daemon.
What makes Toolbx stand out is how tightly it integrates these containers with your host system, giving you a seamless development experience that doesn’t feel restrictive like traditional containers.
When you work with Toolbx containers, you get several key benefits that make your development work easier:
- Seamless Home Directory Access – Your home directory gets automatically mounted into the container, which means your files, configurations, and SSH keys are immediately available without any extra setup.
- Direct Hardware Access – Graphics, audio, and other devices work right out of the box without requiring special configuration or complicated mounting procedures.
- Host Integration – You can run graphical applications, access the network, and interact with your system just as if you were working directly on your host system rather than inside a container.
You can think of Toolbx as creating a protected “bubble” around your development tools and dependencies. Inside this bubble, you get to install any packages, libraries, or tools you need for a specific project without affecting your main system.
In the following sections, you’ll learn how to install Toolbx on your Fedora system and start creating these isolated development environments.
Installing Toolbx on Fedora
On Fedora Workstation (version 28 and later), toolbx comes pre-installed, and you can verify it by running the following command.
toolbox --version
If you see a version number, you’re ready to go, if Toolbx isn’t installed, you can add it with:
sudo dnf install toolbox
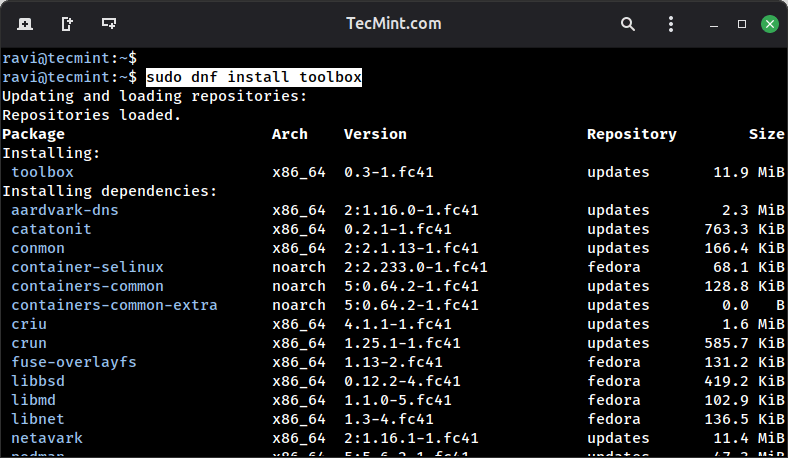
That’s it for installation. No complex configuration files, no daemon setup, no additional dependencies to worry about.
Creating Your First Toolbx Container
Creating a Toolbx container is a straightforward process that you can complete in just a single command, which will create a default container based on your current Fedora version.
If you’re running Fedora 41, for example, it automatically creates a Fedora 41 container for you. The first time you run this command, Toolbx downloads the container image, which takes a few minutes depending on your internet connection speed.
toolbox create
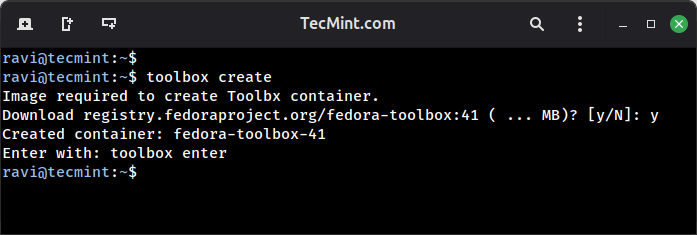
Once the container is created, you can enter it by running the next command:
toolbox enter
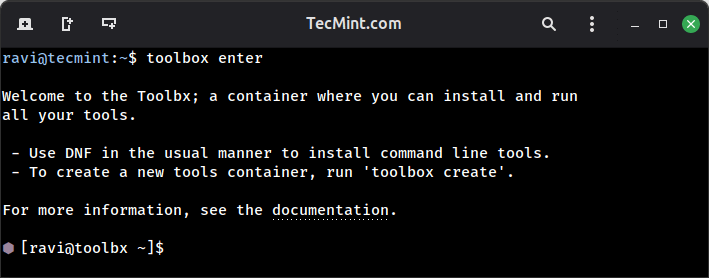
You’ll notice the small container icon (⬢) that appears in the prompt, which indicates you’re inside your Toolbx container.
Even though you’re working in a containerized environment, you’ll find that your home directory, your files, and most of your host system environment remain readily accessible just as they would be on your main system.
Using Different Fedora Versions
Sometimes you need to work with a specific Fedora version, perhaps your production servers run an older release, or you want to test compatibility with the latest version before upgrading your main system.
Toolbx makes this easy with the --release or -r flag:
toolbox create --release 39 fedora39-container
toolbox create --release 41 testing-fedora41
You can even use containers from older Fedora versions while running a newer version on your host system, giving you a convenient way to maintain compatibility with different environments.
Testing Your Container Environment
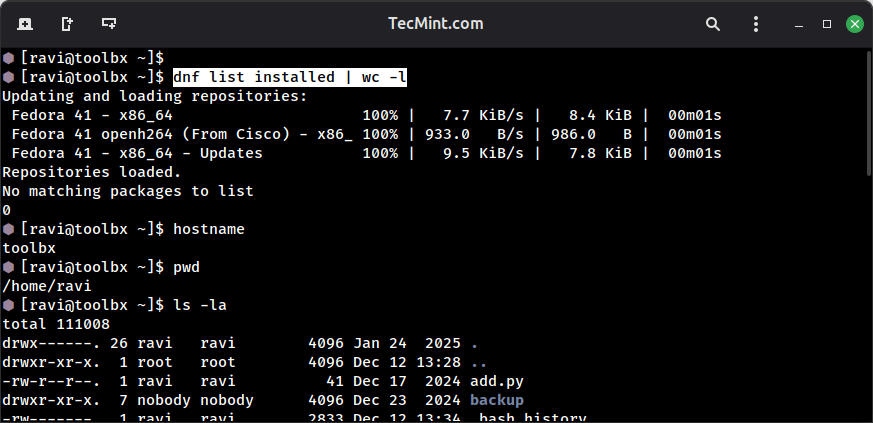
To verify that you’re actually inside the container and see how it differs from your host system, you can run a few simple commands, for example check which packages are installed.
dnf list installed | wc -l
You can also check the container’s hostname:
hostname
To see your current working directory and verify your home directory is accessible:
pwd
ls -la
You’ll notice you’re in your home directory with all your familiar files and folders visible, even though you’re inside a container.
Installing Software Inside Your Container
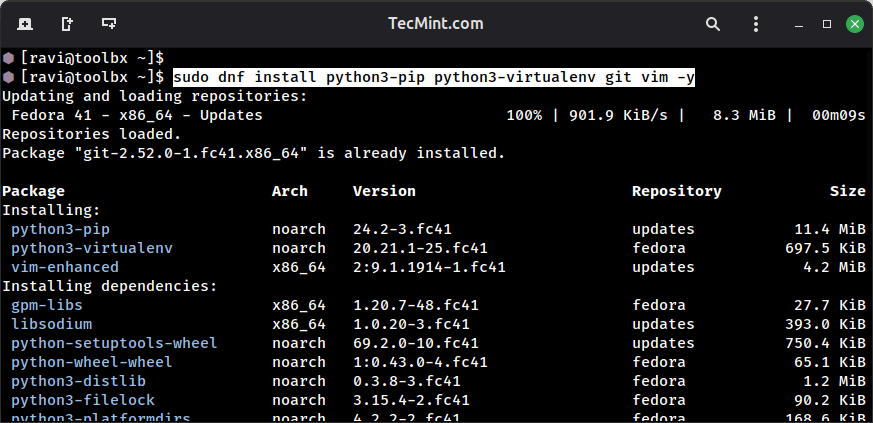
Now that you’re inside the container, you can install development tools without affecting your host system. For example, if you want to set up a Python development environment:
sudo dnf install python3-pip python3-virtualenv git vim -y
If you exit the container and check your host system, these packages won’t be installed there, they exist only within your Toolbx environment.
Let’s try another example with Node.js development tools.
sudo dnf install nodejs npm -y
node --version
npm --version
These commands install Node.js and npm, then verify the installation by checking their versions. Again, this installation is completely isolated from your host system.
When you finish working in your container, you can exit it by simply running:
exit
Creating Named Containers for Different Projects
While the default container works fine for general development work, you’ll often need separate containers for different projects or specific purposes. Creating named containers helps you organize your development environments more effectively and keep your work isolated.
To create named containers, you run the toolbox create command followed by the name you want to give your container:
toolbox create python-dev
toolbox create nodejs-project
toolbox create rust-experiments
Each of these commands creates a distinct container with its own isolated environment. When you want to work on a specific project, you enter the corresponding container by providing its name with the enter command:
toolbox enter python-dev
This approach helps you maintain completely isolated environments for different types of development work. For example, your Python container can run Python 3.12 with all its modern dependencies, while your legacy project container might use Python 3.8 with older libraries, and neither environment will interfere with the other or affect your host system in any way.
Running Graphical Applications from Toolbx
What makes Toolbx truly special is its ability to run graphical applications seamlessly from within your containers. Unlike traditional containers, which require complex X11 forwarding setup and configuration.
Toolbx handles all the display integration automatically, making it feel like you’re running applications directly on your host system.
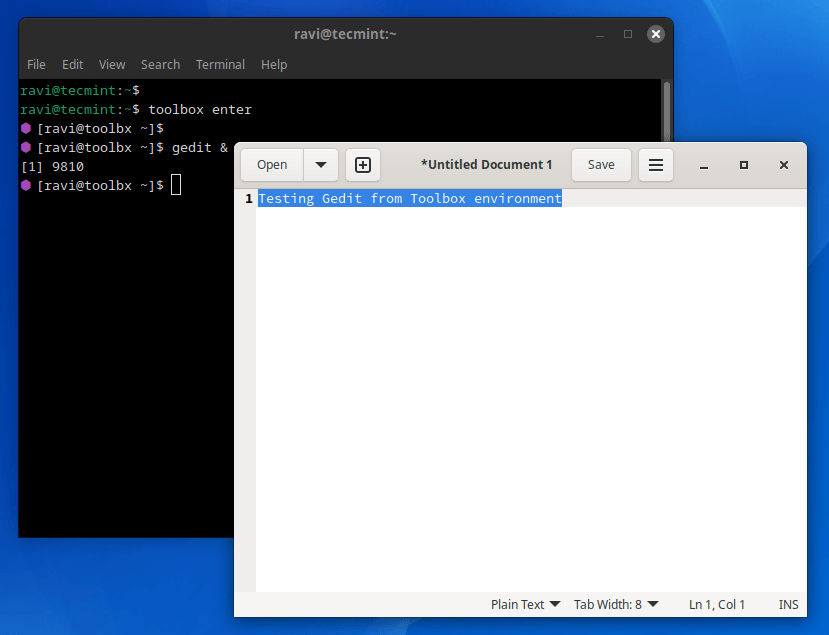
To see how this works in practice, let’s install and run a graphical text editor as an example.
toolbox enter
sudo dnf install gedit -y
Once the installation completes, you can launch the editor.
gedit &
The gedit window opens on your desktop just as if you’d launched it from your host system. You can create, edit, and save files, and everything works exactly as you’d expect.
The ampersand (&) at the end runs the application in the background, allowing you to continue using your terminal while the graphical application stays open.
Managing Multiple Toolbx Containers
As you create more containers for different projects, you’ll need a way to keep track of them and manage them effectively. Toolbx provides several commands that help you view, control, and organize your containerized environments.
Listing Your Containers
To see all the containers you’ve created, you run the list command:
toolbox list

From this output, you can see which containers are currently running and which ones have exited.
Checking Container Details
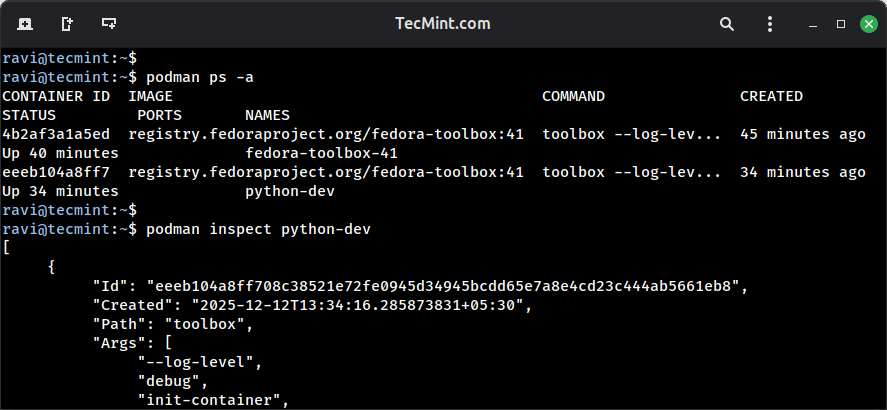
If you want more detailed information about a specific container, you can use Podman directly since Toolbx containers are regular Podman containers:
podman ps -a
You can also inspect a specific container to see its full configuration:
podman inspect python-dev
Stopping and Starting Running Containers
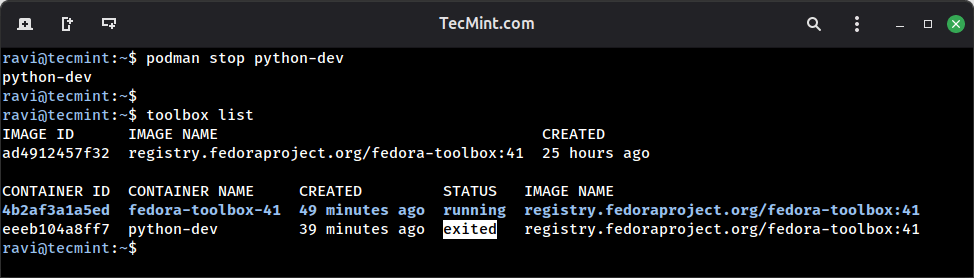
When you finish working in a container and want to free up system resources, you can stop it explicitly.
podman stop python-dev
You can verify the container has stopped by running the list command again:
toolbox list
You’ll see the container’s status has changed from “running” to “exited“.
If you have a container that’s currently stopped and you want to use it again, you simply enter it, and Toolbx automatically starts it for you:
toolbox enter python-dev
Removing Containers You No Longer Need
Over time, you might accumulate containers that you no longer use, and these containers take up disk space on your system. When you’re certain you don’t need a container anymore, you can remove it completely using the rm command:
toolbox rm python-dev
Before removing the container, Toolbx asks you to confirm the action, simply type y to confirm, and Toolbx removes the container along with all packages and configurations you installed inside it.
Important Note: Removing a container deletes all packages, system configurations, and any data stored inside the container’s filesystem, but your home directory files remain completely safe.
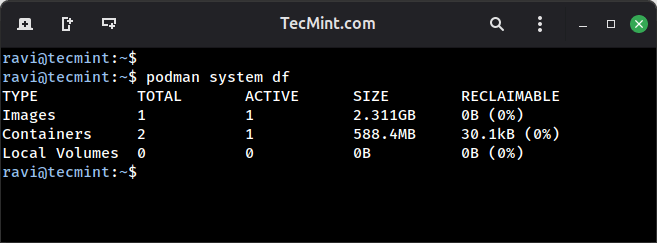
After removing, you can check the disk usage of all your containers, images, and volumes with:
podman system df
If you want to free up disk space by removing all stopped containers and unused images, you can run a cleanup command:
podman system prune
Conclusion
Toolbx gives you a powerful way to manage development environments on your Fedora system without the complexity of traditional virtual machines.
Throughout this guide, you learned how to create isolated containers, run graphical applications, and manage multiple development environments while keeping your base system clean.
Did you find this guide helpful? Share your experience, questions, or tips in the comments below. Your feedback helps us improve our content and assists other readers in their Toolbx journey.


Been using Docker for a while but honestly Toolbx feels way less complicated for day-to-day dev work. The fact that everything just works with my home directory and I can open GUI apps normally is pretty sweet.
Gonna give this a shot on my main Fedora machine.
Been using Fedora for years and somehow never heard of Toolbx.