Apache Hadoop is an Open Source framework build for distributed Big Data storage and processing data across computer clusters. The project is based on the following components:
- Hadoop Common – it contains the Java libraries and utilities needed by other Hadoop modules.
- HDFS – Hadoop Distributed File System – A Java based scalable file system distributed across multiple nodes.
- MapReduce – YARN framework for parallel big data processing.
- Hadoop YARN: A framework for cluster resource management.

This article will guide you on how you can install Apache Hadoop on a single node cluster in CentOS 7 (also works for RHEL 7 and Fedora 23+ versions). This type of configuration is also referenced as Hadoop Pseudo-Distributed Mode.
Step 1: Install Java on CentOS 7
1. Before proceeding with Java installation, first login with root user or a user with root privileges setup your machine hostname with the following command.
# hostnamectl set-hostname master
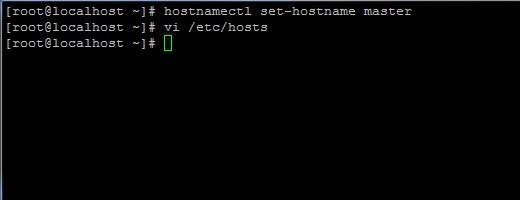
Also, add a new record in hosts file with your own machine FQDN to point to your system IP Address.
# vi /etc/hosts
Add the below line:
192.168.1.41 master.hadoop.lan
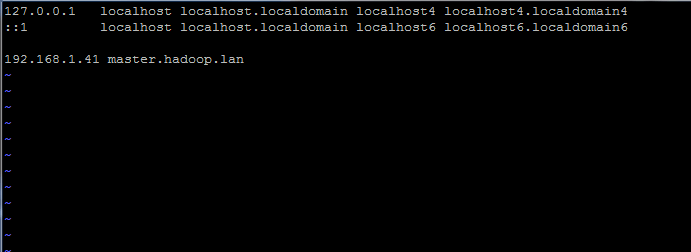
Replace the above hostname and FQDN records with your own settings.
2. Next, go to Oracle Java download page and grab the latest version of Java SE Development Kit 8 on your system with the help of curl command:
# curl -LO -H "Cookie: oraclelicense=accept-securebackup-cookie" “http://download.oracle.com/otn-pub/java/jdk/8u92-b14/jdk-8u92-linux-x64.rpm”
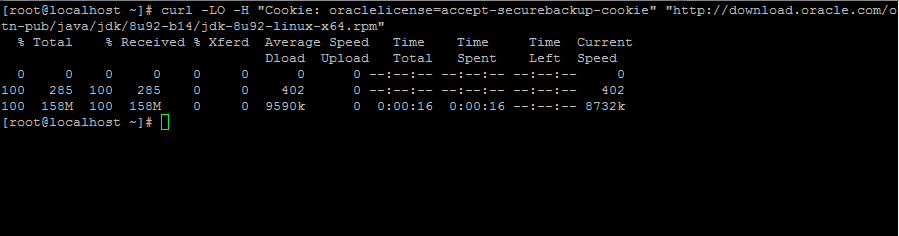
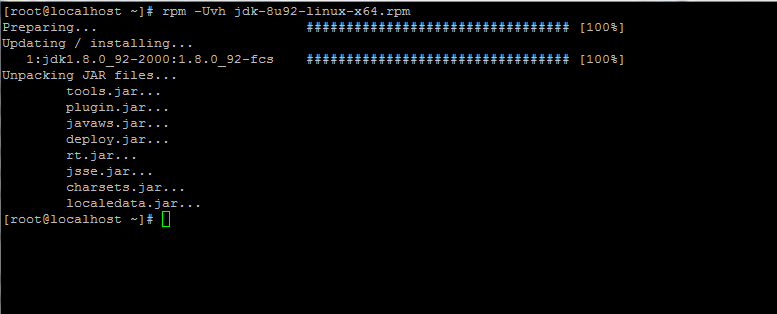
3. After the Java binary download finishes, install the package by issuing the below command:
# rpm -Uvh jdk-8u92-linux-x64.rpm
Step 2: Install Hadoop Framework in CentOS 7
4. Next, create a new user account on your system without root powers which we’ll use it for Hadoop installation path and working environment. The new account home directory will reside in /opt/hadoop directory.
# useradd -d /opt/hadoop hadoop
# passwd hadoop
5. On the next step visit Apache Hadoop page in order to get the link for the latest stable version and download the archive on your system.
# curl -O http://apache.javapipe.com/hadoop/common/hadoop-2.7.2/hadoop-2.7.2.tar.gz

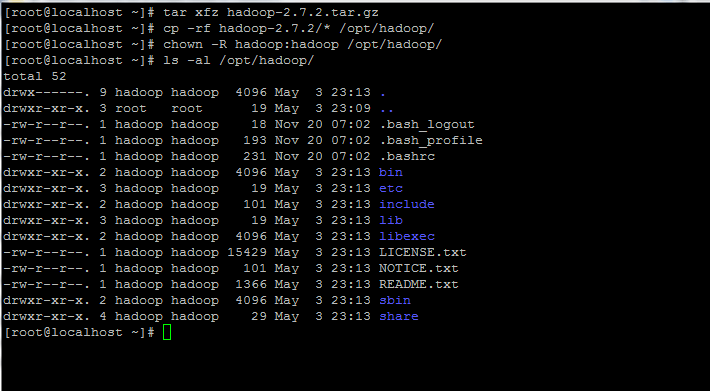
6. Extract the archive the copy the directory content to hadoop account home path. Also, make sure you change the copied files permissions accordingly.
#  tar xfz hadoop-2.7.2.tar.gz
# cp -rf hadoop-2.7.2/* /opt/hadoop/
# chown -R hadoop:hadoop /opt/hadoop/
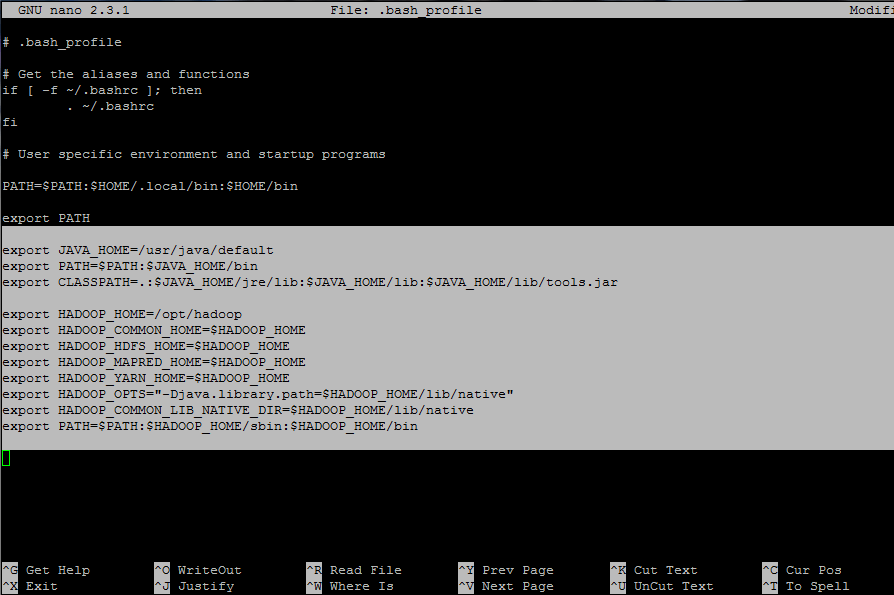
7. Next, login with hadoop user and configure Hadoop and Java Environment Variables on your system by editing the .bash_profile file.
# su - hadoop
$ vi .bash_profile
Append the following lines at the end of the file:
## JAVA env variables
export JAVA_HOME=/usr/java/default
export PATH=$PATH:$JAVA_HOME/bin
export CLASSPATH=.:$JAVA_HOME/jre/lib:$JAVA_HOME/lib:$JAVA_HOME/lib/tools.jar

## HADOOP env variables
export HADOOP_HOME=/opt/hadoop
export HADOOP_COMMON_HOME=$HADOOP_HOME
export HADOOP_HDFS_HOME=$HADOOP_HOME
export HADOOP_MAPRED_HOME=$HADOOP_HOME
export HADOOP_YARN_HOME=$HADOOP_HOME
export HADOOP_OPTS="-Djava.library.path=$HADOOP_HOME/lib/native"
export HADOOP_COMMON_LIB_NATIVE_DIR=$HADOOP_HOME/lib/native
export PATH=$PATH:$HADOOP_HOME/sbin:$HADOOP_HOME/bin
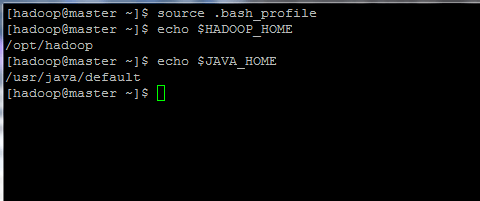
8. Now, initialize the environment variables and check their status by issuing the below commands:
$ source .bash_profile
$ echo $HADOOP_HOME
$ echo $JAVA_HOME
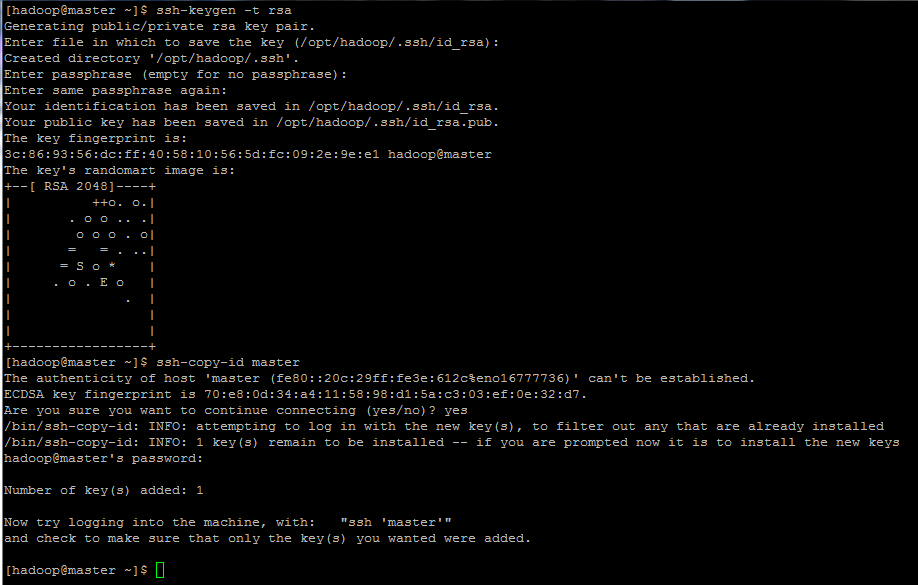
9. Finally, configure ssh key based authentication for hadoop account by running the below commands (replace the hostname or FQDN against the ssh-copy-id command accordingly).
Also, leave the passphrase filed blank in order to automatically login via ssh.
$ ssh-keygen -t rsa
$ ssh-copy-id master.hadoop.lan


dfs.data.dir and dfs.name.dir are wrong.
It should be:
Hi everybody
I install the Hadoop but now i try to upload file a get error Permission denied: user=dr.who, access=WRITE, inode=”/”:hadoop:supergroup:drwxr-xr-x
Following this guide while doing this step – ssh-copy-id master.
I am getting errors:
/bin/ssh-copy-id: INFO: attempting to log in with the new key(s), to filter out any that are already installed
/bin/ssh-copy-id: INFO: 1 key(s) remain to be installed — if you are prompted now it is to install the new keys
##################################################################################
NOTE: You have accessed a system owned by FIWARE Lab. You must have authorisation
before using it, and your use will be strictly limited to that indicated in the
authorisation.
Unauthorised access to this system or improper use of the same is prohibited and
is against the FIWARE Terms & Conditions Policy and the legislation in force. The
use of this system may be monitored.
#################################################################################
Permission denied (publickey,gssapi-keyex,gssapi-with-mic).
Please help me out.
I am not able to start yarn, can please help me out here:
Step 5: Start and Test Hadoop Cluster
After entering this command i am getting following error. Please help me to resolved this issue.
Sample Error
18/07/02 15:41:05 ERROR conf.Configuration: error parsing conf mapred-site.xml com.ctc.wstx.exc.WstxParsingException: Illegal processing instruction target ("xml"); xml (case insensitive) is reserved by the specs. at [row,col,system-id]: [2,5,"file:/opt/hadoop/etc/hadoop/mapred-site.xml"] at com.ctc.wstx.sr.StreamScanner.constructWfcException(StreamScanner.java:621) at com.ctc.wstx.sr.StreamScanner.throwParseError(StreamScanner.java:491) at com.ctc.wstx.sr.BasicStreamReader.readPIPrimary(BasicStreamReader.java:4019) at com.ctc.wstx.sr.BasicStreamReader.nextFromProlog(BasicStreamReader.java:2141) at com.ctc.wstx.sr.BasicStreamReader.next(BasicStreamReader.java:1181) at org.apache.hadoop.conf.Configuration.loadResource(Configuration.java:2799) at org.apache.hadoop.conf.Configuration.loadResources(Configuration.java:2728) at org.apache.hadoop.conf.Configuration.getProps(Configuration.java:2605) at org.apache.hadoop.conf.Configuration.get(Configuration.java:1103) at org.apache.hadoop.conf.Configuration.getTrimmed(Configuration.java:1157) at org.apache.hadoop.conf.Configuration.getLong(Configuration.java:1434) at org.apache.hadoop.security.Groups.(Groups.java:112) at org.apache.hadoop.security.Groups.(Groups.java:101) at org.apache.hadoop.security.Groups.getUserToGroupsMappingService(Groups.java:449) at org.apache.hadoop.security.UserGroupInformation.initialize(UserGroupInformation.java:323) at org.apache.hadoop.security.UserGroupInformation.ensureInitialized(UserGroupInformation.java:290) at org.apache.hadoop.security.UserGroupInformation.loginUserFromSubject(UserGroupInformation.java:850) at org.apache.hadoop.security.UserGroupInformation.getLoginUser(UserGroupInformation.java:820) at org.apache.hadoop.security.UserGroupInformation.getCurrentUser(UserGroupInformation.java:689) at org.apache.hadoop.hdfs.tools.GetConf.run(GetConf.java:315) at org.apache.hadoop.util.ToolRunner.run(ToolRunner.java:76) at org.apache.hadoop.util.ToolRunner.run(ToolRunner.java:90) at org.apache.hadoop.hdfs.tools.GetConf.main(GetConf.java:332) Exception in thread "main" java.lang.RuntimeException: com.ctc.wstx.exc.WstxParsingException: Illegal processing instruction target ("xml"); xml (case insensitive) is reserved by the specs. at [row,col,system-id]: [2,5,"file:/opt/hadoop/etc/hadoop/mapred-site.xml"] ....In .bash_profile, I have appended the following lines:
Java version is:
but, after entering the command.
I am getting bellow error.
/opt/hadoop/bin/hdfs: line 319: /usr/java/default//bin/java: No such file or directory
Please help me out to resolved this issue sir…..
Hi Sir,
When i am entering this following command.
I am getting error like /opt/hadoop/bin/hdfs: line 319: /usr/java/default//bin/java: No such file or directory
My complete command is.
will u please help me in this sir……..?
HI Sir,
su root password?
what is su root password> Please help me out here.
what is ” su root ” password is…please help me
root password is what you set for the root while installing or setting up the Operating System
name node doesn’t format and it shows error in mapredcode
i am not able to install java file. When i run the command in the terminal it shows “rpm failed file not found”
@Siva,
Better, download the latest Java from the Java download page and install it using rpm command.
thanks @Ravi
Please help me in Namenode Formation
[root@cserver ~]# tar xfz hadoop-2.7.2.tar.gz
gzip: stdin: not in gzip format
tar: Child returned status 1
tar: Error is not recoverable: exiting now
I did try to install gzip but it did not worked.
The gzip archive has not been completely downloaded.
The Oracle URL is expired, use curl or wget as follows.
Good article with clear instructions, very helpful a newbie like me.
That’s for the great tutorial on how to install Hadoop. A lot of beginners like me would be benefited by your work. I just want to suggest, perhaps including a small addendum on how to read and write from the HDFS would be great.
Hi Matei,
I’ve learned so much from the knowledgebae you’ve put together here, thank you very much!
Please be kind to add to your already so helpful tutorial also the following suggestion for users to allow the HADOOP web ports in the CentOS host so that they can actually browse the webUI from external, since the Linux box has the Firewall ports blocked as default:
[root@master ~]# firewall-cmd –permanent –add-port=80/tcp #not needed I think
success
[root@master ~]# firewall-cmd –permanent –add-port=50070/tcp
success
[root@master ~]# firewall-cmd –permanent –add-port=8088/tcp
success
After this reload your firewall on CentOS to finally get to the site
[root@master ~]# firewall-cmd –reload
NB: I firstly though that maybe I needed to yum -y install httpd, but you don’t need a full blown Apache2 module on your pseudo distributed HADOOP distribution, as all the web related components came incorporated in the hadoop install itself.
Thank you very much for the great tutorial, Matei.
When I run the command “systemctl status rc-loca”, I got Permission denied error. May suggestion for this issue?
Thanks
Andy
[root@localhost ~]# systemctl status rc-local
● rc-local.service – /etc/rc.d/rc.local Compatibility
Loaded: loaded (/usr/lib/systemd/system/rc-local.service; static; vendor preset: disabled)
Active: active (exited) since Tue 2017-10-31 11:31:02 EDT; 5min ago
Oct 31 11:30:54 localhost.localdomain rc.local[941]: 0.0.0.0: Permission denied, please try again.
Oct 31 11:30:54 localhost.localdomain rc.local[941]: 0.0.0.0: Permission denied, please try again.
Oct 31 11:30:54 localhost.localdomain rc.local[941]: 0.0.0.0: Permission denied (publickey,gssapi-keyex,gssapi-with-mic,password).
Oct 31 11:31:00 localhost.localdomain su[2424]: (to hadoop) root on none
Oct 31 11:31:00 localhost.localdomain rc.local[941]: starting yarn daemons
Oct 31 11:31:00 localhost.localdomain rc.local[941]: starting resourcemanager, logging to /opt/hadoop/logs/yarn-hadoop-resourcemanager-localhost.localdomain.out
Oct 31 11:31:02 localhost.localdomain systemd[1]: Started /etc/rc.d/rc.local Compatibility.
Oct 31 11:31:02 localhost.localdomain rc.local[941]: localhost: Permission denied, please try again.
Oct 31 11:31:02 localhost.localdomain rc.local[941]: localhost: Permission denied, please try again.
Oct 31 11:31:02 localhost.localdomain rc.local[941]: localhost: Permission denied (publickey,gssapi-keyex,gssapi-with-mic,password).
Dear Mr Matei,
Thank your very much, the concept of Firewall settings has solved my problem. Can you kindly help me can be distribute a single node cluster for 60 clients in our training institute. Please clarify
Verify the firewall rules on the server, on the client or other intermediary devices of your network to allow hadoop traffic ports to to pass.
Dear Matei,
Kindly clarify me these two queries please
1) Is it necessary that we execute hadoop single/multi-node cluster in Class C: IP’s only (i.e 192.168.xx.xx) or it can be configured to Class A: IP’s also (i.e., 10.199.xx.xx).
2) I have configured single node cluster in Class A: IP (10.199.xx.xx), I could resolve 10.199.XX.XX:50070), but unable to resolve 10.199.xx.xx:8088 port). Please help me
After completing this process of installation of hadoop. When i tried accessing 10.199.21.102:8088, it am getting an error unable to connect
Hey, what should I type at hadoop@master’s password:? it keeps asking for the password and if I just enter, it says “Permission denied, please try again.”
Finally fixex in CentOS 6.5, I needed to set hostname as below.
and edit as below
and edit as below
and tried ssh-keygen rsa & ssh-copy-id master
finally, it works!.
thanks.
I also put X.X.X.X master.hadoop.lan master at /etc/hosts as Andres commented below.
when i am executing jps command i cannot find the data node and its port number I did exactly written in this tutorial
Hey ons, i had the same issue so i figured it out, basically when you edit vim /etc/hosts put a line like:
then i got it
thanks
i have a problem , hostnamectl set-hostname master doesn’t work, i installed systemd package for it but no one of them work
You need to reboot the system in order to apply hostnamectl settings. Seems like hostnamectl does not apply settings on-fly. What does hostname -f command output shows you?
Great!! Wonderful!! It worked for me.
I have followed the instruction and is getting the following error:
start-dfs.sh
Java HotSpot(TM) Client VM warning: You have loaded library /opt/hadoop/lib/native/libhadoop.so.1.0.0 which might have disabled stack guard. The VM will try to fix the stack guard now.
It’s highly recommended that you fix the library with ‘execstack -c ‘, or link it with ‘-z noexecstack’.
16/11/08 18:59:56 WARN util.NativeCodeLoader: Unable to load native-hadoop library for your platform… using builtin-java classes where applicable
Starting namenodes on [master.hadoop.lan]
master.hadoop.lan: starting namenode, logging to /opt/hadoop/logs/hadoop-hadoop-namenode-master.out
localhost: mv: cannot stat ‘/opt/hadoop/logs/hadoop-hadoop-datanode-master.out.4’: No such file or directory
master.hadoop.lan: mv: cannot stat ‘/opt/hadoop/logs/hadoop-hadoop-datanode-master.out.3’: No such file or directory
master.hadoop.lan: mv: cannot stat ‘/opt/hadoop/logs/hadoop-hadoop-datanode-master.out.2’: No such file or directory
master.hadoop.lan: mv: cannot stat ‘/opt/hadoop/logs/hadoop-hadoop-datanode-master.out.1’: No such file or directory
localhost: starting datanode, logging to /opt/hadoop/logs/hadoop-hadoop-datanode-master.out
master.hadoop.lan: mv: cannot stat ‘/opt/hadoop/logs/hadoop-hadoop-datanode-master.out’: No such file or directory
master.hadoop.lan: starting datanode, logging to /opt/hadoop/logs/hadoop-hadoop-datanode-master.out
localhost: ulimit -a for user hadoop
localhost: core file size (blocks, -c) 0
localhost: data seg size (kbytes, -d) unlimited
localhost: scheduling priority (-e) 0
localhost: file size (blocks, -f) unlimited
localhost: pending signals (-i) 32109
localhost: max locked memory (kbytes, -l) 64
localhost: max memory size (kbytes, -m) unlimited
localhost: open files (-n) 1024
localhost: pipe size (512 bytes, -p) 8
Starting secondary namenodes [0.0.0.0]
0.0.0.0: starting secondarynamenode, logging to /opt/hadoop/logs/hadoop-hadoop-secondarynamenode-master.out
Java HotSpot(TM) Client VM warning: You have loaded library /opt/hadoop/lib/native/libhadoop.so.1.0.0 which might have disabled stack guard. The VM will try to fix the stack guard now.
It’s highly recommended that you fix the library with ‘execstack -c ‘, or link it with ‘-z noexecstack’.
16/11/08 19:00:22 WARN util.NativeCodeLoader: Unable to load native-hadoop library for your platform… using builtin-java classes where applicable
[hadoop@master ~]$
I have followed your tutorial. However, I am experiencing some problems when I run the command ‘start-dfs.sh’, see output below:
stop-dfs.sh
OpenJDK Server VM warning: You have loaded library /opt/hadoop/lib/native/libhadoop.so.1.0.0 which might have disabled stack guard. The VM will try to fix the stack guard now.
It’s highly recommended that you fix the library with ‘execstack -c ‘, or link it with ‘-z noexecstack’.
16/11/05 12:22:24 WARN util.NativeCodeLoader: Unable to load native-hadoop library for your platform… using builtin-java classes where applicable
Stopping namenodes on [master.hadoop.lan]
master.hadoop.lan: no namenode to stop
localhost: no datanode to stop
master.hadoop.lan: no datanode to stop
Stopping secondary namenodes [0.0.0.0]
0.0.0.0: no secondarynamenode to stop
OpenJDK Server VM warning: You have loaded library /opt/hadoop/lib/native/libhadoop.so.1.0.0 which might have disabled stack guard. The VM will try to fix the stack guard now.
It’s highly recommended that you fix the library with ‘execstack -c ‘, or link it with ‘-z noexecstack’.
16/11/05 12:22:32 WARN util.NativeCodeLoader: Unable to load native-hadoop library for your platform… using builtin-java classes where applicable
[hadoop@master ~]$ clear
[hadoop@master ~]$ start-dfs.sh
OpenJDK Server VM warning: You have loaded library /opt/hadoop/lib/native/libhadoop.so.1.0.0 which might have disabled stack guard. The VM will try to fix the stack guard now.
It’s highly recommended that you fix the library with ‘execstack -c ‘, or link it with ‘-z noexecstack’.
16/11/05 12:23:01 WARN util.NativeCodeLoader: Unable to load native-hadoop library for your platform… using builtin-java classes where applicable
Starting namenodes on [master.hadoop.lan]
master.hadoop.lan: starting namenode, logging to /opt/hadoop/logs/hadoop-hadoop-namenode-master.out
localhost: mv: cannot move ‘/opt/hadoop/logs/hadoop-hadoop-datanode-master.out.4’ to ‘/opt/hadoop/logs/hadoop-hadoop-datanode-master.out.5’: No such file or directory
localhost: mv: cannot stat ‘/opt/hadoop/logs/hadoop-hadoop-datanode-master.out.3’: No such file or directory
localhost: mv: cannot stat ‘/opt/hadoop/logs/hadoop-hadoop-datanode-master.out.2’: No such file or directory
localhost: mv: cannot stat ‘/opt/hadoop/logs/hadoop-hadoop-datanode-master.out.1’: No such file or directory
master.hadoop.lan: mv: cannot stat ‘/opt/hadoop/logs/hadoop-hadoop-datanode-master.out’: No such file or directory
localhost: starting datanode, logging to /opt/hadoop/logs/hadoop-hadoop-datanode-master.out
master.hadoop.lan: starting datanode, logging to /opt/hadoop/logs/hadoop-hadoop-datanode-master.out
localhost: ulimit -a for user hadoop
localhost: core file size (blocks, -c) 0
localhost: data seg size (kbytes, -d) unlimited
localhost: scheduling priority (-e) 0
localhost: file size (blocks, -f) unlimited
localhost: pending signals (-i) 32109
localhost: max locked memory (kbytes, -l) 64
localhost: max memory size (kbytes, -m) unlimited
localhost: open files (-n) 1024
localhost: pipe size (512 bytes, -p) 8
Starting secondary namenodes [0.0.0.0]
0.0.0.0: starting secondarynamenode, logging to /opt/hadoop/logs/hadoop-hadoop-secondarynamenode-master.out
OpenJDK Server VM warning: You have loaded library /opt/hadoop/lib/native/libhadoop.so.1.0.0 which might have disabled stack guard. The VM will try to fix the stack guard now.
It’s highly recommended that you fix the library with ‘execstack -c ‘, or link it with ‘-z noexecstack’.
16/11/05 12:23:33 WARN util.NativeCodeLoader: Unable to load native-hadoop library for your platform… using builtin-java classes where applicable
I am running fedora 24. My java installation is at /usr/lib/jvm/java-1.8.0-openjdk-1.8.0.111-1.b16.fc24.i386/jre/bin/java.
my JAVA setting for the .bash_profile file is:
## JAVA env variables
export JAVA_HOME=/usr/lib/jvm/java-1.8.0-openjdk-1.8.0.111-1.b16.fc24.i386/jre
export PATH=$PATH:$JAVA_HOME/bin
export CLASSPATH=.:$JAVA_HOME/jre/lib:$JAVA_HOME/lib:$JAVA_HOME/lib/tools.jar
please let me know what I am do wrong.
It works for me with this line instead of the prosed one:
curl -LO -H “Cookie: oraclelicense=accept-securebackup-cookie” ‘http://download.oracle.com/otn-pub/java/jdk/8u92-b14/jdk-8u92-linux-x64.rpm’
Why not SystemD configuration?
Unit files… :(
i have the same problem
Great Tutorial. Thanks for taking the time to do this. I followed the tutorial to the point, but when I execute : hdfs namenode -format, I’m getting the following error:
/opt/hadoop/bin/hdfs: line 35: /opt/hadoop/bin../libexec/hdfs-config.sh: No such file or directory
/opt/hadoop/bin/hdfs: line 304: exec: : not found
Any help would be appreciated. thnks!
Seems like those scripts are not found in the correct path or don’t have the execute bit set on them. Do a recursive listing of /opt/hadoop/bin directory for those commands and set the correct path and permissions.
Hi Metai
Nice how to and I have a suggestion , we have to edit yarn-site.xml and add this
yarn.nodemanager.aux-services.mapreduce.shuffle.class
org.apache.hadoop.mapred.ShuffleHandler
yarn.resourcemanager.resource-tracker.address
hmaster:8025
yarn.resourcemanager.scheduler.address
hmaster:8030
yarn.resourcemanager.address
hmaster:8050
Else we will get the following error
STARTUP_MSG: java = 1.8.0_101
************************************************************/
16/09/12 14:00:46 INFO namenode.NameNode: registered UNIX signal handlers for [TERM, HUP, INT]
16/09/12 14:00:46 INFO namenode.NameNode: createNameNode [-format]
16/09/12 14:00:47 WARN conf.Configuration: bad conf file: element not
16/09/12 14:00:47 WARN conf.Configuration: bad conf file: element not
16/09/12 14:00:47 WARN conf.Configuration: bad conf file: element not
16/09/12 14:00:47 WARN conf.Configuration: bad conf file: element not
Also I required hive installation steps like this fantastic how to
correctly said
It’s really helpful, thanks!
Now automate it in an Ansible role and publish it on Galaxy. Then nobody needs to do this manually anymore.
@David,
I totally agree with you and its saves so much of time, but I think only experts can able to automate it in Ansible, a newbie can’t….
thanks , super tutorial