Step 4: Configuring HAProxy Global Settings
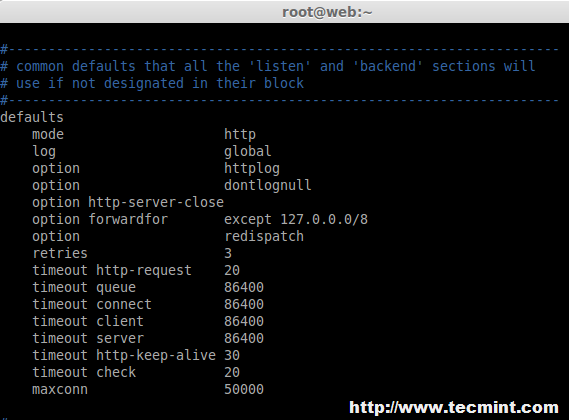
7. Now, here we need to set default variables in ‘/etc/haproxy/haproxy.cfg‘ for HAProxy. The changes needs to make for default under default section as follows, Here some of the changes like timeout for queue, connect, client, server and max connections need to be defined.
In this case, I suggest you to go through the HAProxy man pages and tweak it as per your requirements.
#---------------------------------------------------------------------
defaults
    mode                    http
    log                     global
    option                  httplog
    option                  dontlognull
    option http-server-close
    option forwardfor       except 127.0.0.0/8
    option                  redispatch
    retries                 3
    timeout http-request    20
    timeout queue           86400
    timeout connect         86400
    timeout client          86400
    timeout server          86400
    timeout http-keep-alive 30
    timeout check           20
    maxconn                 50000
8. Then we need to define front-end and back-end as shown below for Balancer in ‘/etc/haproxy/haproxy.cfg‘ global configuration file. Make sure to replace the IP addresses, hostnames and HAProxy login credentials as per your requirements.
frontend LB
   bind 192.168.0.125:80
   reqadd X-Forwarded-Proto:\ http
   default_backend LB

backend LB 192.168.0.125:80
   mode http
   stats enable
   stats hide-version
   stats uri /stats
   stats realm Haproxy\ Statistics
   stats auth haproxy:redhat		# Credentials for HAProxy Statistic report page.
   balance roundrobin			# Load balancing will work in round-robin process.
   option httpchk
   option  httpclose
   option forwardfor
   cookie LB insert
   server web1-srv 192.168.0.121:80 cookie web1-srv check		# backend server.
   server web2-srv 192.168.0.122:80 cookie web2-srv check		# backend server.
   server web3-srv 192.168.0.123:80 cookie web3-srv check		# backend server.
   server web4-srv 192.168.0.124:80 check backup			# backup fail-over Server, If three of the above fails this will be activated.
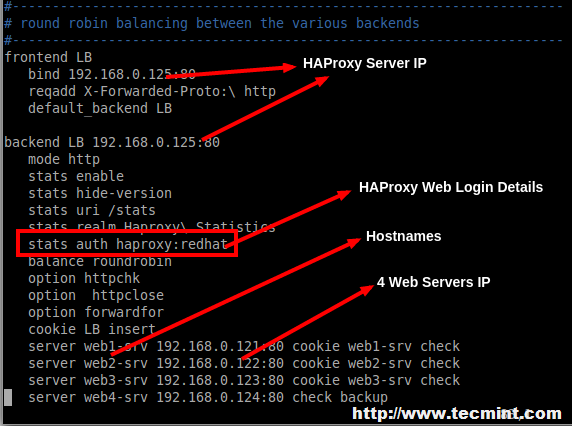
9. After adding above settings, our load balancer can be accessed at ‘http://192.168.0.125/stats‘ with HTTP authentication using login name as ‘haproxy‘ and password ‘redhat‘ as mentioned in the above settings, but you can replace them with your own credentials.
10. After you’ve done with the configuration, make sure to restrat the HAProxy and make it persistent at system startup on RedHat based systems.
# service haproxy restart
# chkconfig haproxy on
# chkconfig --list haproxy
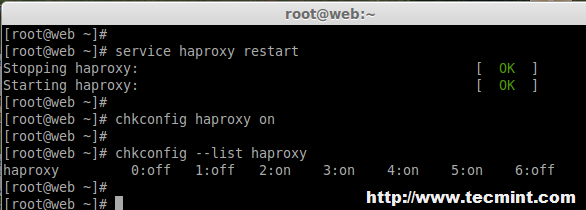
For Ubuntu/Debian users to need to set “ENABLED” option to “1” in ‘/etc/default/haproxy‘ file.
ENABLED=1
Step 5: Verify HAProxy Load Balancer
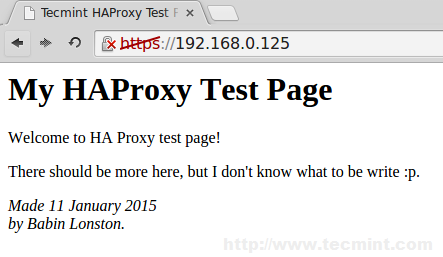
11. Now it’s time to access our Load balancer URL/IP and verify for the site whether loading. Let me put one HTML file in all four servers. Create a file index.html in all four servers in web servers document root directory and add the following content to it.
<html>
<head>
  <title>Tecmint HAProxy Test Page</title>
</head>

<body>
<!-- Main content -->
<h1>My HAProxy Test Page</h1>

<p>Welcome to HA Proxy test page!

<p>There should be more here, but I don't know
what to be write :p.

<address>Made 11 January 2015<br>
  by Babin Lonston.</address>

</body>
</html>
12. After creating ‘index.html‘ file, now try to access the site and see whether I can able access the copied html file.
http://192.168.0.125/

Site has been successfully accessed.
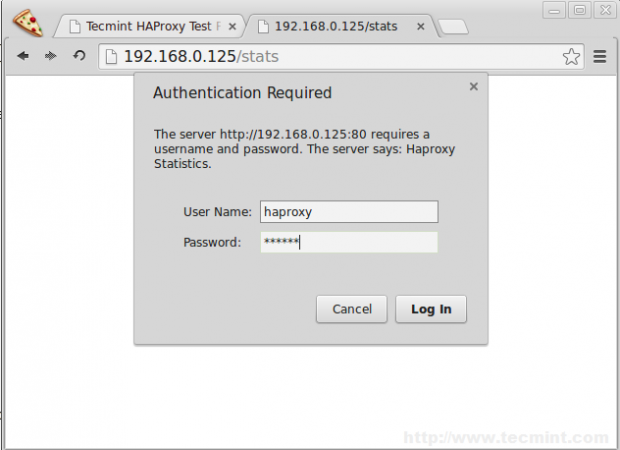
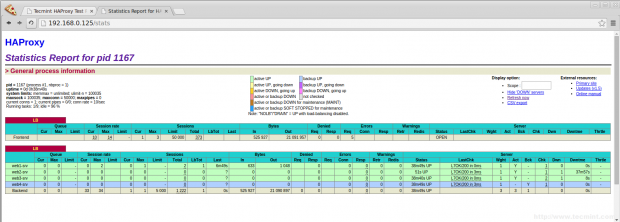
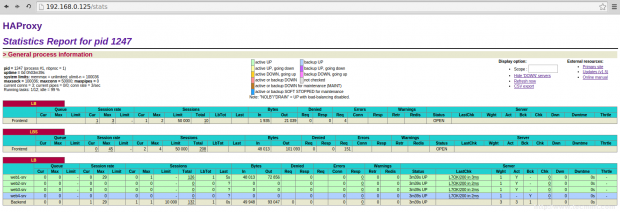
Step 6: Verify Statistic of Load Balancer
13. To get the statistic page of HAProxy, you can use the following link. While asking for Username and password we have to provide the haproxy/redhat.
http://192.168.0.125/stats
Step 7: Enabling SSL in HAProxy
14. To enable SSL in HAProxy, you need to install mod_ssl package for creating SSL Certificate for HAProxy.
On RHEL/CentOS/Fedora
To install mod_ssl run the following command
# yum install mod_ssl -y
On Ubuntu/Debian
By default under Ubuntu/Debian SSL support comes standard with Apache package. We just need to enable it..
# a2enmod ssl
After you’ve enabled SSL, restart the Apache server for the change to be recognized.
# service apache2 restart
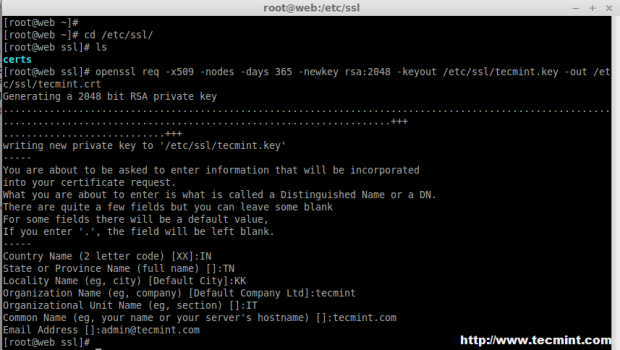
15. After restarting, Navigate to the SSL directory and create SSL certificate using following commands.
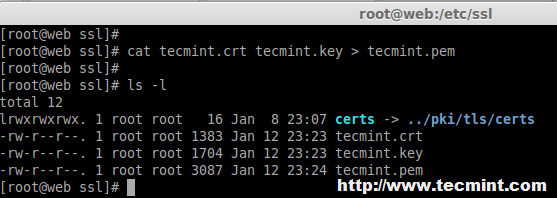
# cd /etc/ssl/
# openssl req -x509 -nodes -days 365 -newkey rsa:2048 -keyout /etc/ssl/tecmint.key -out /etc/ssl/tecmint.crt
# cat tecmint.crt tecmint.key > tecmint.pem
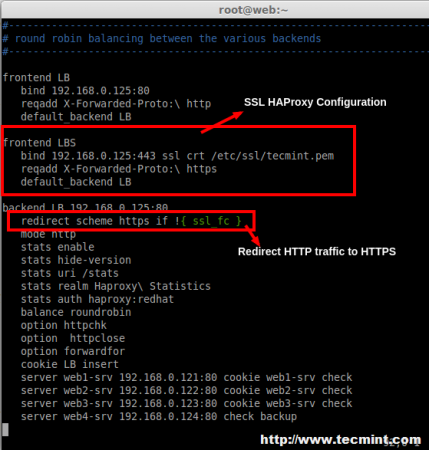
16. Open and edit the haproxy configuration and add the SSL front-end as below.
# vim /etc/haproxy/haproxy.cfg
Add the following configuration as frontend.
frontend LBS
   bind 192.168.0.125:443 ssl crt /etc/ssl/tecmint.pem
   reqadd X-Forwarded-Proto:\ https
   default_backend LB
17. Next, add the redirect rule in backend configuration.
redirect scheme https if !{ ssl_fc }
18. After making above changes, make sure to restart the haproxy service.
# service haproxy restart
While restarting if we get the below warning, we can fix it by adding a parameter in Global Section of haproxy.

tune.ssl.default-dh-param 2048
19. After restarting, try to access the site 192.168.0.125, Now it will forward to https.
http://192.168.0.25
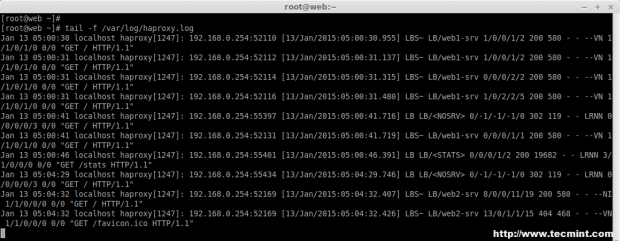
20. Next, verify the haproxy.log under ‘/var/log/‘ directory.
# tail -f /var/log/haproxy.log
Step 8: Open HAProxy Ports on Firewall
21. Open the port’s for web service and Log reception UDP port using below rules.
On CentOS/RHEL 6
iptables -A INPUT -m state --state ESTABLISHED,RELATED -j ACCEPT
iptables -A INPUT -i eth0 -p udp --dport 514 -j ACCEPT
iptables -A INPUT -i eth0 -p tcp --dport 80 -m state --state NEW,ESTABLISHED -j ACCEPT
iptables -A INPUT -i eth0 -p tcp --dport 443 -m state --state NEW,ESTABLISHED -j ACCEPT
On CentOS/RHEL 7 and Fedora 21
# firewallcmd permanent zone=public addport=514/tcp # firewallcmd permanent zone=public addport=80/tcp # firewallcmd permanent zone=public addport=443/tcp # firewallcmd reload
On Debian/Ubuntu
Add the following line to ‘/etc/iptables.up.rules‘ to enable ports on firewall.
A INPUT p tcp dport 514 j ACCEPT A INPUT p tcp dport 80 j ACCEPT A INPUT p tcp dport 443 j ACCEPT
Conclusion
In this article, we’ve installed Apache in 4 server’s and shared a website for reducing the traffic load. I Hope this article will help you to setup a Load Balancer for web server’s using HAProxy and make your applications more stable and available
If you have any questions regarding the article, feel free to post your comments or suggestions, I will love to help you out in whatever the best way I can.


Hi Babin Lonston
Instead of apache can we use apache-tomcat on client machines for web application load balancing ??
What will be the www “A” record for my website is it haproxy IP ? or among 4 webserver IP. I am little bit confuse.
Nice tutorial, I have request for next tutorial about haproxy. how to force redirect when visitor try access http url redirect to https url, how to configuring to increase secure haproxy and how to tune that tool, the last.
how to upgrade/update to the latest version of haproxy in centos 7 which is that os use 1.5 veersion. thanks in advanced
Nice document, can you share best practices for HAProxy on Linux.
Nice document, can you share best practices for HAProxy on Linux.
how to install the latest version of haproxy? its possible?
how to access load balancer using url instead of ip ?
@Vincent,
Just you need to have a valid DNS entry.
And your hostname/IP A, AAA, PTR record should be created in DNS Server.
Thanks & Regards,
Bobin Lonston
Can we add another HA Proxy Server? To make it a distributed system?
this is not High availability setup.. LB doesnt have a failover
What happens if HAProxy server not ping at any situation?…
The article is really good to understand quite good stuff, I got. I have a question, while testing the load balancer if it is working fine why we are accessing loadbalancer IP address where we have created all index.html file in the 4 web server.
So the testing should be like when we access the web server by name we should be able to see from the log that which web server out of 4 it is using to server the request, isn’t it?
This is an amazing article. works for me and also helped in understanding how HAProxy works.
Thanks a ton !!
@Vikas,
Thanks for finding this article very useful and I am glad that you know now about HAProxy work flow..keep visiting Tecmint for more such quality articles..
It is a good article , but I have some question regarding the article
1- what is the difference between tcp and http mode in haproxy .. I am confused on this topic.
2- as you have mentioned this article as high availability with HA proxy .. this architecture does not seems high availability ,as per my view as you are using a single load balancer here , in a case if it gets down then architecture will fails as web servers are communicating with a single load balancers .. so it not seems a high availability architecture as my side .
Hi Babin ,
It is a good article , but I have some question regarding the article
1- what is the difference between tcp and http mode in haproxy .. I am confused on this topic.
2- as you have mentioned this article as high availability with HA proxy .. this architecture does not seems high availability ,as per my view as you are using a single load balancer here , in a case if it gets down then architecture will fails as web servers are communicating with a single load balancers .. so it not seems a high availability architecture as my side .
I am not criticizing , article is good , but I was expecting little more from you ..
thanks ,
Ashish
Hi Nice tutorial , just have one question
Where you are installing SSL, on load-balancer or webserver,
and if in load-balancer why you need to install apache2 ?
Please need this information
Great article!!! I like very much but I have questions…
Can I configure LBS in other section without redirect http to https? And…
I have different subdomain, certificates in the webserver…Now I use the heartbeat + ipvsadmin for the load balance and failover.
Can I configure haproxy for use all certificates my websites?
Example sites:
example.es
example.com
example.net
example.br
etc…
I put this configuration in haproxy.cfg and It works very well in http and https… could improve cache SSL connections to users or something?
———————-
# GLOBAL SETTINGS
global
log 127.0.0.1 local2
tune.ssl.default-dh-param 2048
chroot /var/lib/haproxy
user haproxy
group haproxy
daemon
stats socket /var/run/haproxy.sock mode 600
#———————————————————————
defaults
mode http
log global
option dontlognull
option http-server-close
option redispatch
retries 3
timeout http-request 20
timeout queue 86400
timeout connect 86400
timeout client 86400
timeout server 86400
timeout http-keep-alive 30
timeout check 20
maxconn 50000
frontend LB
bind *:80
mode tcp
default_backend LB
frontend LBS
bind *:443
mode tcp
reqadd X-Forwarded-Proto:\ https
default_backend LBS
backend LB
mode tcp
balance roundrobin # Load balancing will work in round-robin process.
server web1 192.168.0.203:80 check # backend server.
server web2 192.168.0.204:80 check # backend server.
# server web4-srv 192.168.0.124:80 check backup # backup fail-over Server, If three of the above fails this will be activated.
backend LBS
mode tcp
stick-table type ip size 200k expire 30m
stick on src
default-server inter 1s
balance roundrobin # Load balancing will work in round-robin process.
#option ssl-hello-chk
server web1 192.168.0.203:443 check # backend server.
server web2 192.168.0.204:443 check # backend server.
# server web4-srv 192.168.0.124:80 check backup # backup fail-over Server, If three of the above fails this will be activated.
Very nice!
Thx
What if the Load Balancer itself becomes unavailable (power outage, connection outage, etc), isn’t all of the backend servers will also become unavailable as well? What would you recommend for such a situation?
You should have fallout server, so like there’s Active and passive Loadbalancer with same configuration. just install the apache heatbeat so once the Active is down the passive will take over.
I have been using HAProxy for several years for our intranet, and have just recently converted half to ssl, but not able to get the forwarding correct. Your tutorial here shows how to add ssl to the load balancer, but will the ssl need to be installed on the webservers as well? And will the certificate have to be the same on all servers?
No, Only we have to install SSL in LB.. There are two types of SSL configuration in HAProxy SSL termination or SSL pass through
How does data replicate between the web servers. We have users upload some picture which are stored in a specific location on the web server. If the users connection lands on different web server, those files are not found. How to manage this?
@Suman we using 7 Server’s for our deployment with NFS for files storage, No idea about your issue will review about your issue
You can also setup an SSHFS connection (which is basically just like a dropbox), mount it as a virtual hard drive on your servers, when a file is being placed on that drive, it will be sync-ed across all of the other drives on other servers.
do we have performances stat for HA proxy? what is the requirement if load test needs to be done using this load balancer?
@snehal HAProxy’s website show that they can support over a million connections a second with sessions. “Load” is determined by what your site is hosting and how many connections are being served. “Load” also is determined whether the site is dynamic or static. My use is a multi-master LAMP cluster. From an independent computer, I load a php script that writes to the databases as fast as it can execute. Each loop that it goes thru, has its own connection, insert, and disconnect. At 10,000 loops, the timestamps on the records between the first and the last are measured in milliseconds and are evenly split between the masters. Now when I access the site directly thru the load balanced virtual ip(which it is), the connection to the database is a one to one connection, meaning that it connects only to one server for the data, even thru a load balancer. This is the same for static pages. The load balancer spreads the load across multiple machines so that the SPF(Single Point of Failure) can be mitigated and that “load” is off set to other machines.