Java is a collection of software better known for it’s cross platform availability was developed by Sun Microsystems in 1995. Java platform is used by millions of applications and websites (specially used in banking sites) due to its fast, secure and reliable nature. Today, Java is everywhere, from desktops to data-centers, game consoles to scientific computers, mobile phones to the Internet, etc…
There are more than one version of Java can be installed and running on same computer and also it’s possible to have different version of JDK and JRE simultaneously on a machine, actually there are abundant of applications that requires Java-jre (Java Runtime Environment) and those who are developer required Java-sdk (Software Development Kit).
A lots of Linux distribution comes with other version of Java called OpenJDK (not the one developed by Sun Microsystems and acquired by Oracle Corporation). OpenJDK is an open source implementation of Java application.
Latest stable release of Java version is 9.0.4.
Install Java 9 in Linux
1. Before installing Java, make sure to first verify the version of installed Java.
# java -version

java version "1.7.0_75"
OpenJDK Runtime Environment (IcedTea 2.5.4) (7u75-2.5.4-2)
OpenJDK 64-Bit Server VM (build 24.75-b04, mixed mode)
It’s clear from the output above that the installed version of Java is OpenJDK 1.7.0_75.
2. Make a directory where you want to install Java. For global access (for all users) install it preferably in the directory /opt/java.
# mkdir /opt/java && cd /opt/java
3. Now it’s time to download Java (JDK) 9 source tarball files for your system architecture by going to official Java download page.
For reference, we have provided the source tarball file-name, please select and download these below mentioned file only.
jdk-9.0.4_linux-x64_bin.tar.gz
Alternatively, you may use wget command to download file directly into the /opt/java directory as shown below.
# cd /opt/java
# wget --no-cookies --no-check-certificate --header "Cookie: oraclelicense=accept-securebackup-cookie" http://download.oracle.com/otn-pub/java/jdk/9.0.4+11/c2514751926b4512b076cc82f959763f/jdk-9.0.4_linux-x64_bin.tar.gz
4. Once file has been downloaded, you may extract the tarball using tar command as shown below.
# tar -zxvf jdk-9.0.4_linux-x64_bin.tar.gz
5. Next, move to the extracted directory and use command update-alternatives to tell system where java and its executables are installed.
# cd jdk-9.0.4/
# update-alternatives --install /usr/bin/java java /opt/java/jdk-9.0.4/bin/java 100
# update-alternatives --config java

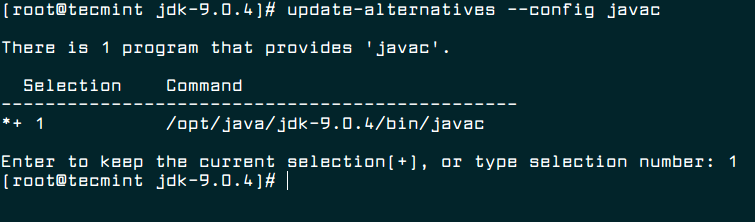
6. Tell system to update javac alternatives as:
# update-alternatives --install /usr/bin/javac javac /opt/java/jdk-9.0.4/bin/javac 100
# update-alternatives --config javac
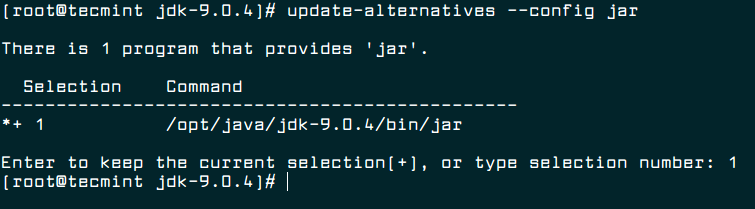
7. Similarly, update jar alternatives as:
# update-alternatives --install /usr/bin/jar jar /opt/java/jdk-9.0.4/bin/jar 100
# update-alternatives --config jar
8. Setting up Java Environment Variables.
# export JAVA_HOME=/opt/java/jdk-9.0.4/
# export JRE_HOME=/opt/java/jdk-9.0.4/jre
# export PATH=$PATH:/opt/java/jdk-9.0.4/bin:/opt/java/jdk-9.0.4/jre/bin

9. Now You may verify the Java version again, to confirm.
# java -version

java version "9.0.4"
Java(TM) SE Runtime Environment (build 9.0.4+11)
Java HotSpot(TM) 64-Bit Server VM (build 9.0.4+11, mixed mode)
Suggested: If you are not using OpenJDK (open source implementation of java), you may remove it as:
# yum remove openjdk-*      [On CentOs/RHEL]
# apt-get remove openjdk-*  [On Debian/Ubuntu]
Enable Java Support in Firefox
10. To enable Java 9 JDK Support in Firefox, you need to run following commands to enable Java module for Firefox.
On Debian, Ubuntu and Mint
# update-alternatives --install /usr/lib/mozilla/plugins/libjavaplugin.so libjavaplugin.so /opt/java/jdk-9.0.4/lib/libnpjp2.so 20000
On RHEL, CentOS and Fedora
# alternatives --install /usr/lib/mozilla/plugins/libjavaplugin.so libjavaplugin.so /opt/java/jdk-9.0.4/lib/libnpjp2.so 20000
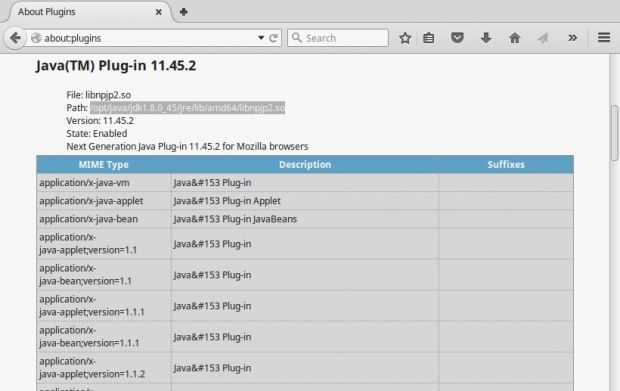
11. Now verify the Java support by restarting Firefox and enter about:plugins on the address bar. You will get similar to below screen.
That’s all for now. Hope this post of mine will help you in setting oracle Java, the easiest way. I would like to know your view on this. Keep connected, Stay tuned! Like and share us and help us get spread.


Hello, I am a lack experience engineer. please explain to me what is the meaning of 20000 at the end of the sentence, I could not find that at oracle official website.
@Jin,
It is a priority number to the version number of the jre.
Java is only supported on Firefox ESR 52.
I get this error when write # java -version
Error occurred during initialization of VM
java/lang/NoClassDefFoundError: java/lang/Object
Nice article! The steps are easy to follow. This helped me alot. Thanks!
wget –no-cookies –no-check-certificate –header “Cookie: gpw_e24=http%3A%2F%2Fwww.oracle.com%2F; oraclelicense=accept-securebackup-cookie” “http://download.oracle.com/otn-pub/java/jdk/8u45-b14/jdk-8u45-linux-x64.tar.gz”
above command giving error
HTTP request sent, awaiting response… 404 Not Found
2017-09-10 21:53:31 ERROR 404: Not Found.
Please explain
@Tarun,
Please go to the oracle download section and download the latest version of Java and follow the instructions to install it on Linux..
thanks but that i know. I just wanted to know why the above command giving error
@Tarun,
That because the package is no more available to download, may be removed from Oracle site, thats the reason getting 404 not found error..
Its still showing previous version
Hi Guys, Here I am writing some simple steps to install JAVA JDK AND JRE on Linux systems.
First download jdk-8u112-linux-x64.tar.gz and jre-8u112-linux-x64.tar.gz
Note: Here I am sharing my Java installation instructions, which I have done in my Linux system using root user account or sudo privileges will also work.
1. Switch to root user.
amit@Deepin:~$sudo -i
[sudo] password for amit: *******
{after this you will reach into root privileged}
2. Create one folder where you would like to copy your both JDK and JRE software, In my case I place my software in /usr/local/java directory.
So after downloading go into downloading directory folder mostly it will be: /home/amit/Downloads – in your case username will be yours.
3. Now copy both jdk and jre into your desire system location:
4. Extract the content of both files.
Verify the contents
5. Now set tha Java environment variables.
root@Deepin:~# gedit /etc/profile
At the bottom you just copy and paste below lines.
Now just save and close page:
6. After this perform some commands in terminal.
7. Finally, you can check java version, JAVA HOME, and JRE Home. PATH.
root@Deepin:~# echo $PATH

/u01/app/oracle/product/11.2.0/xe/bin:/usr/local/sbin:/usr/local/bin:/usr/sbin:/usr/bin:/sbin:/bin:/usr/local/java/jdk1.8.0_112/bin:/usr/local/java/jre1.8.0_112/bin
Thanks..
‘java -version’ command still shows the previous version.
@Arpit,
Seems your Java installation was not successful, try to follow the instructions again carefully..
yes because he wrote export command in wrong way, you should write it as :
export PATH=/opt/java/jdk1.8.0_45/bin:/opt/java/jdk1.8.0_45/jre/bin
then you will notice that the new version installed
really cool, thanks a lot. this saved me a lot of time
This is great, I always come back to this
The title is about installing yet later in the procedure what you’re doing is to update the existing one.
I want to perform step 5 onwards with the help of a shell script.
This is my script
——————————————–
update-alternatives –install /usr/bin/java java /usr/java/jdk1.8.0_72/bin/java 100
update-alternatives –install /usr/bin/javac javac /usr/java/jdk1.8.0_72/bin/javac 100
update-alternatives –install /usr/bin/jar jar /usr/java/jdk1.8.0_72/bin/jar 100
export JAVA_HOME=/usr/java/jdk1.8.0_72/
export JRE_HOME=/usr/java/jdk1.8.0._72/jre
export PATH=/usr/java/jdk1.8.0_72/bin:/usr/java/jdk1.8.0_72/jre/bin:$PATH
echo JAVA_HOME is $JAVA_HOME
echo JRE_HOME is $JRE_HOME
echo PATH is $PATH
————————————————————————————-
But still when i do java -version, it shows the open jdk version & not the latest jdk1.8.0_72 version.
Please help !
thank you very much, you save my day! xD
heyy thank you it works on my backbox (ubuntu 14.04)
now i can use my eclipse bro
Thank you very much :)
Hi Ravi,
Could you change this “export JRE_HOME=/opt/java/jdk1.8.0._45/jre ” to export JRE_HOME=/opt/java/jdk1.8.0_45/jre (Remove the “.” in (jdk1.8.0._45). It will cause tomcat to fail during startup.
I am getting below mentioned error while trying to do above:
/usr/bin/java: /lib/ld-linux.so.2: bad ELF interpreter: No such file or directory
Please ignore, I downloaded wrong version of Java.
Thanks,
When I type “update-alternatives –config java”, it says “Nothing to configure.”. Then how?
And finally “bash: /usr/bin/java: cannot execute binary file: Exec format error” when I type java -version. Need solution, please.
@Atok,
You were typing wrong command, thats the reason you getting “Nothing to configure” error, the actual command is
Great tutorial, but I’d like to complete it: In step 5, when Terminal say “Press enter to keep the current choice[*], or type selection number:” You don’t tell what number choose, then I press Enter and nothing works here. So I decided to choose ‘1’, for java, javac and jar, and works fine here.
I get Permission denied on step #5 for the second command. Using –force didn’t install it properly. Anyone else has this issue? How do I fix it?
@Hoquem,
I think you’ve logged in as normal user, try to use sudo to run those commands, I am sure they will work..
Thank you dude. You really save me!
I am creating an installer . I need to first update jdk to 1.8 on the client machine and then run my set up. Can you give me a script where i can install jdk 1.8 on linux machines(Redhat,CentOS)
This article helped me install jre1.8.45… Thanks for that!!…. BUT…
I am still not able to install plugins to firefox browsers using the instructions provided.
I’ve RHEL 6.5 with kernal 3.8.13 and its a 64 bit x86 machine…
After runnign command #alternatives –install based on the article, when I go to Firefox and type about:plugins, it reflect lots of plugins except java plugin.
PLEASE HELP RESOLVING THIS!!
How to install jdk rpm file in rhel
@Jegatheesh,
Use the following command to install rpm package in rhel system.
Thanks for your tutorial, you do a good job.
I can’t thank you enough for this!
@Jack,
Does the instructions not worked for you? Please tell us your problem so that we can help you out or even needed we will update the article based on your thoughts..
The instructions were awesome. It’s the most informative site on updating java for linux users that I have found.
not updating, may need a reboot/restart of some services, will check it out
You did gud job…Its help me to install jdk in kali linux..
Gracias!!!
Gracias por sus gracias.
I Don’t know Spanish much :) Keep connected.
Good to see the steps and easy to install.. no need to scratch the head … Appreciate your efforts
Thanks Siva for your feedback.
Keep connected! we always follow KISS rule.
KISS : Keep It Simple Stupid.