Joomla is a popular free and open-source Content Management System (CMS) written in PHP. Although it’s not as popular as its counterpart WordPress, it’s still used for creating blogs/websites with limited or no web programming knowledge.
It comes with a neat and intuitive web interface that is easy to use and packed with numerous add-ons that you can use to enhance the appearance and functionality of your website.
In this article, you will learn how to install Joomla on CentOS 8.
Prerequisites
Since Joomla is a PHP platform that will be administered on the front-end and store data, you need to have a LAMP stack installed on CentOS 8. This is an acronym for Linux, Apache, MariaDB / MySQL, and PHP.
Step 1: Install PHP Modules in CentOS 8
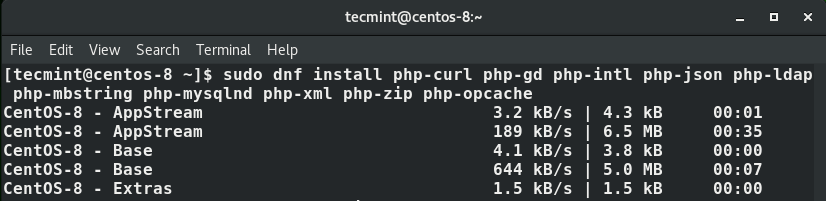
Once you have a LAMP setup in place, you can begin installing a few additional PHP modules, which are crucial for the Joomla installation.
$ sudo dnf install php-curl php-xml php-zip php-mysqlnd php-intl php-gd php-json php-ldap php-mbstring php-opcache
Step 2: Create Joomla Database
Once the PHP modules are installed, We have to create a database for Joomla to hold files during and after the installation.
Let’s start MariaDB server and confirm the status of the MariaDB server.
$ sudo systemctl start mariadb
$ sudo systemctl status mariadb
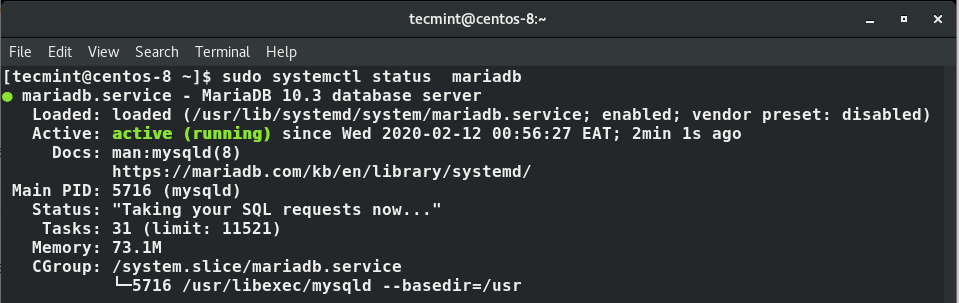
The server is up and running, which is great. Now log in to MariaDB database engine as shown.
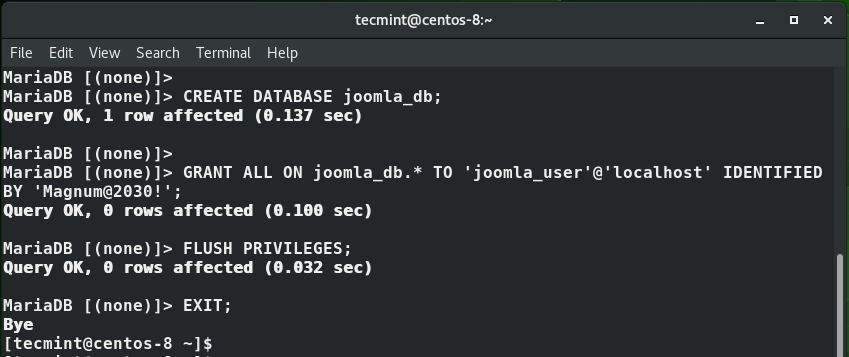
$ mysql -u root -p
Now create a database and a database user for Joomla by executing the commands below in the MariaDB database engine.
MariaDB [(none)]> CREATE DATABASE joomla_db;
MariaDB [(none)]> GRANT ALL ON joomla_db.* TO ‘joomla_user’@’localhost’ IDENTIFIED BY ‘StrongP@ssword’;
MariaDB [(none)]> FLUSH PRIVILEGES;
MariaDB [(none)]> EXIT;
Step 3: Download Joomla Installation Package
After creating the database for storing Joomla’s files, next proceed to Joomla’s official website and download the latest installation package. At the time of penning down this guide, the latest version is Joomla 3.9.16.
So, use the wget command to download the zipped package as shown:
$ sudo wget https://downloads.joomla.org/cms/joomla3/3-9-16/Joomla_3-9-16-Stable-Full_Package.zip?format=zip
Once downloaded, unzip the file to the /var/www/html directory as shown.
$ sudo unzip Joomla_3-9-16-Stable-Full_Package.zip -d /var/www/html
Assign the appropriate file permissions and ownership as shown.
$ sudo chown -R apache:apache /var/www/html/joomla
$ sudo chmod 755 /var/www/html/joomla
Step 4: Configure Apache for Joomla
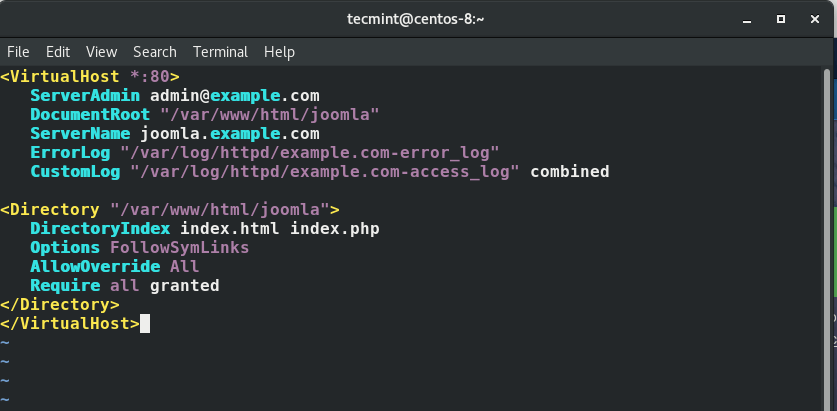
We need to configure our Apache web server to serve Joomla’s webpages. For this to be successful, we are going to create a virtual host file.
$ sudo /etc/httpd/conf.d/joomla.conf
Append the lines below.
<VirtualHost *:80>
   ServerAdmin [email protected]
   DocumentRoot "/var/www/html/joomla"
   ServerName joomla.example.com
   ErrorLog "/var/log/httpd/example.com-error_log"
   CustomLog "/var/log/httpd/example.com-access_log" combined

<Directory "/var/www/html/joomla">
   DirectoryIndex index.html index.php
   Options FollowSymLinks
   AllowOverride All
   Require all granted
</Directory>
</VirtualHost>
Save the changes and exit the file.
To apply the changes, restart the Apache webserver.
$ sudo systemctl restart httpd
We’re almost done with the configurations. However, we need to allow access to external users to access Joomla from our server. To achieve this, we need to open ports 80 and 443 which are the HTTP and HTTPS ports.
$ sudo firewall-cmd --permanent --add-service=http
$ sudo firewall-cmd --permanent --add-service=https
To apply the changes, reload the firewall as shown.
$ sudo firewall-cmd --reload
Step 5: Finalizing the Joomla Installation
The only step remaining is to complete the installation via a web browser. To do this, type your server’s IP address in the URL bar as shown:
http://server-IP
You will be greeted by the screen as shown.
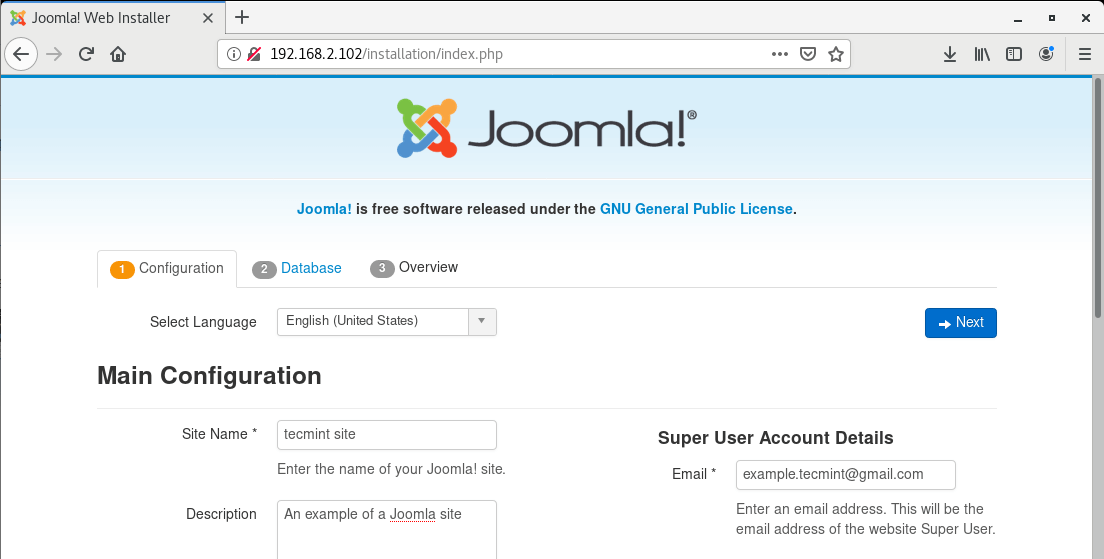
Fill in all the necessary details such as the site name, site information, admin username & password, email address and click on the ‘Next’ button.
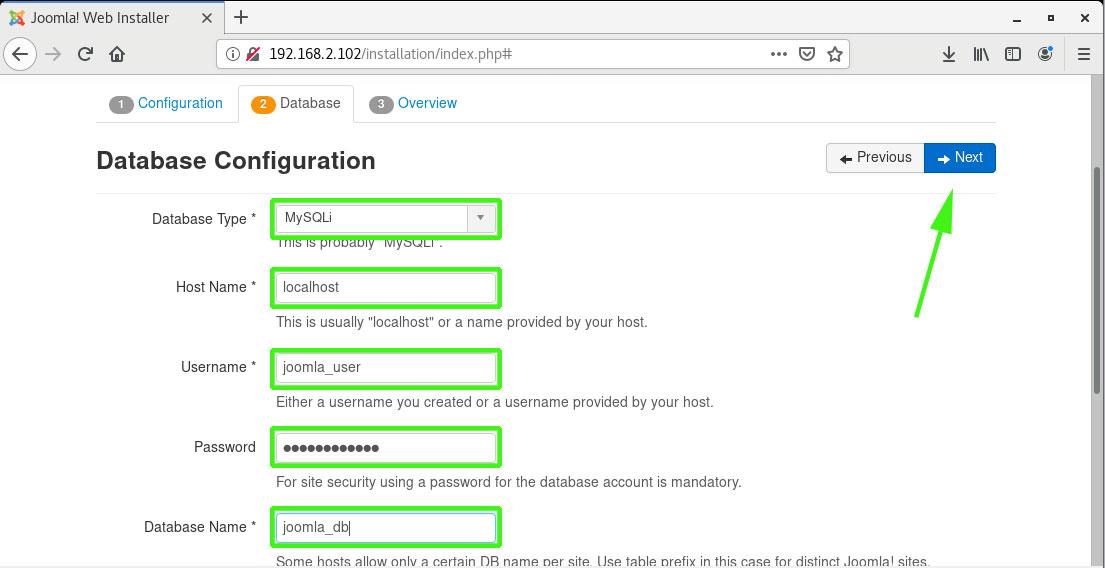
This webpage will prompt for your database details. So, supply the Database type as MySQL, and key in the rest of the details such as database name, username, and password.
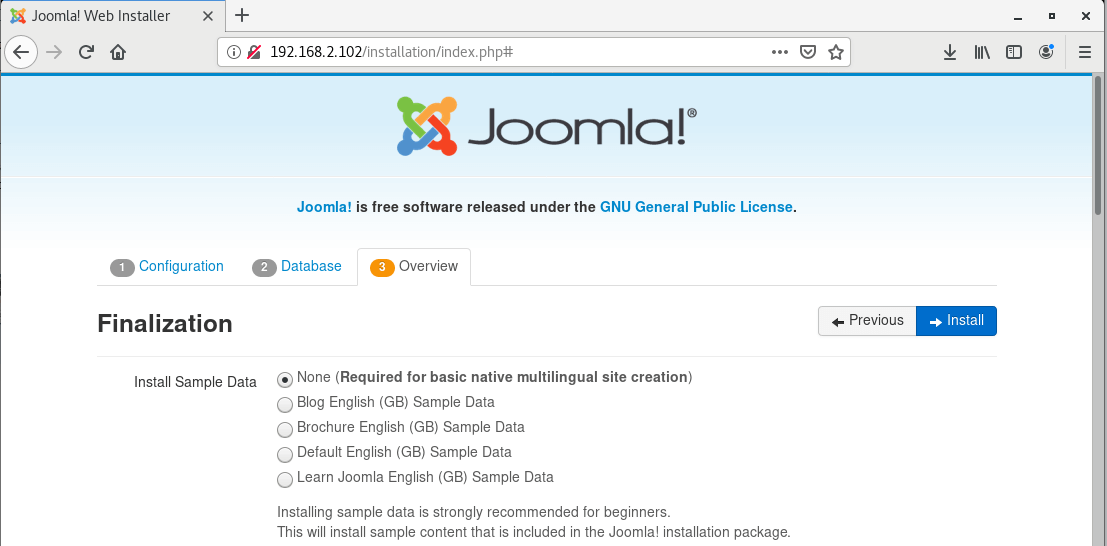
Then click on the ‘Next’ button. This brings you to this page where you will be required to review all the settings. If all looks Ok. click on the ‘Install’ button.
If all went well, you will get a notification that Joomla has been installed.
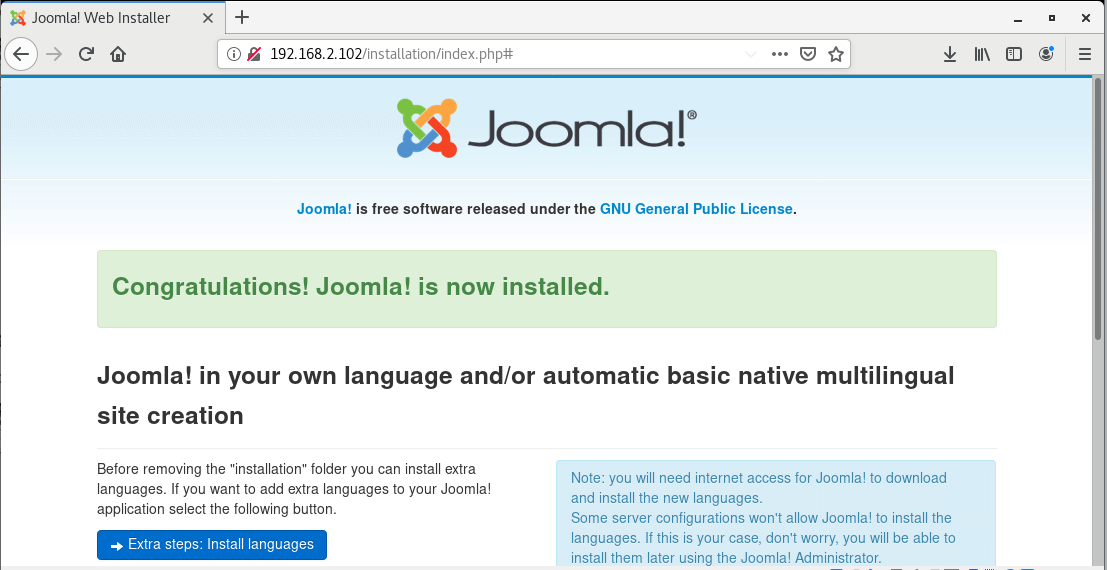
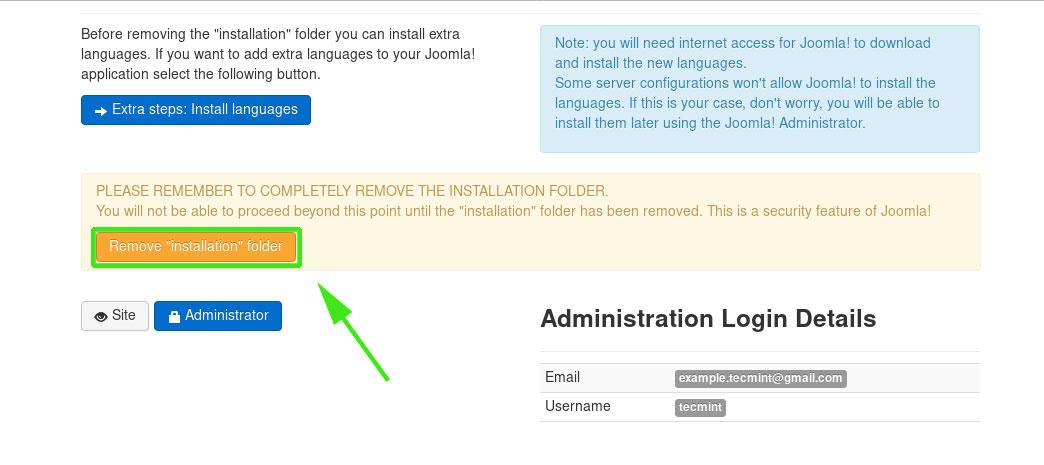
To complete the installation it’s recommended that you delete the installation folder. Therefore click on the “Remove installation folder” button to completely purge the installation directory.
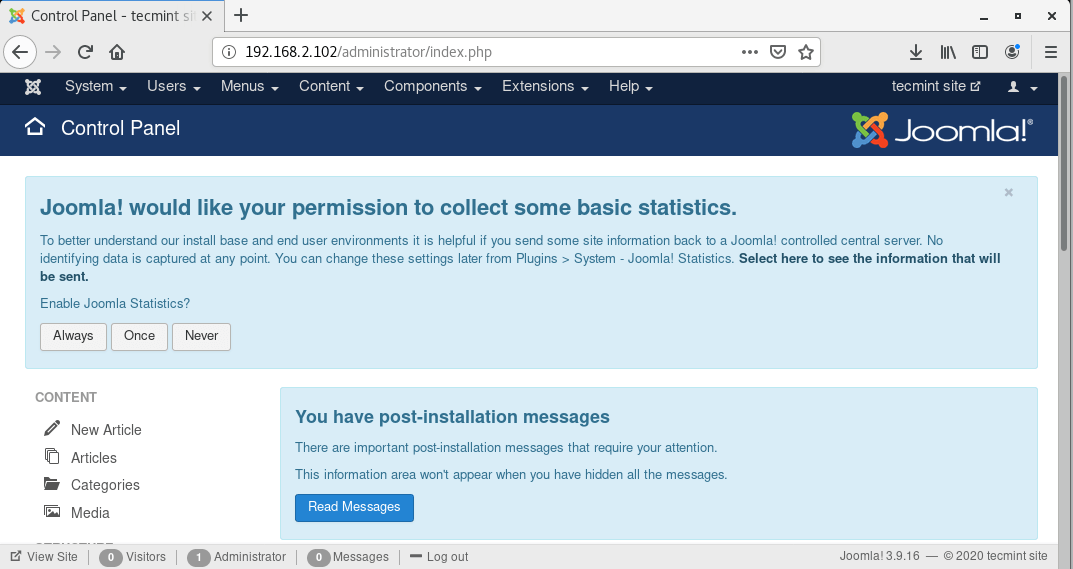
To access the Joomla control panel type the following in the URL bar.
http://server-IP/administrator
Provide the username and password and hit the ‘Login’ button. And there goes Joomla’s dashboard! You can now start creating stunning blogs and websites.
We have successfully installed Joomla on CentOS 8. Your feedback is welcome.


Hello sir I configure everything and after that, I am trying to install the webserver but the installation taking a longer time. It’s been 15 to 20 minutes passed, but installation still not done. So, help me for this I don’t know that this error is a normal process of installing.
Thank you for the general effort, but there are numerous mistakes in the code and information. This is likely to confuse and create more problems than help beginners.
There is no information for creating a database user, no information for assigning database to that user, the path to the unzipped files is wrong and the apache configuration info is wrong as the conf file is executed instead of opened with the editor.
Even if that is done, the path inside that file is also wrong
generally, very sloppy and untested. It is a puzzle why somebody would publish this.
@Evan,
Everything is mentioned in the article, have a close look at Step 2 and 3.