CentOS 7 stopped getting updates on June 30, 2024, which means it doesn’t get security updates or bug fixes from Red Hat anymore. New options like Rocky Linux have come up to help users who use CentOS and need ongoing support.
Moving from one type of Linux to another needs careful planning and doing things step by step. First, you have to switch from CentOS 7 to Rocky Linux 8, and then move from Rocky Linux 8 to Rocky Linux 9 using tools like the Leapp framework and ELevate project to make this process easier.
This guide will help you migrate from CentOS 7 to Rocky Linux 9 by giving you clear, easy-to-follow steps.
Prerequisites
The prerequisites for migrating CentOS 7 to Rocky Linux 9 include:
- A system running CentOS 7.
- Administrator access.
- An internet connection.
Upgrade CentOS 7 to Rocky Linux 8
The next parts of this article will show you how to migrate from CentOS 7 to Rocky Linux 8 using the ELevate project and the Leapp framework.
These two projects can help you move your system from one RHEL-based operating system to another.
Step 1: Backup CentOS 7 Data
Before starting the migration process, it is important to back up all your important files, which ensures that in case of any issues during the migration, you can restore your data without any loss.
If you want to backup specific files or directories, you can use the tar command with the -cvzf options to create a compressed archive file.
sudo tar -cvzf /backup/home_user1_backup.tar.gz /home/user1
To back up the entire system, you can use the tar command with the --exclude option to exclude certain directories (e.g., /proc, /sys, /dev, etc.) and then create a compressed archive file.
sudo tar -cvzf /backup/full_system_backup.tar.gz --exclude=/proc --exclude=/sys --exclude=/dev --exclude=/backup /
Alternatively, you can use the rsync command to synchronize files and directories between two locations, either locally or over a network.
sudo rsync -av --delete /source_directory /backup
If your CentOS 7 system hosts MySQL or MariaDB databases, you can use the mysqldump command to backup databases to SQL files.
mysqldump -u username -p dbname > dbname_backup.sql
Step 2: Install ELevate and Leapp Packages
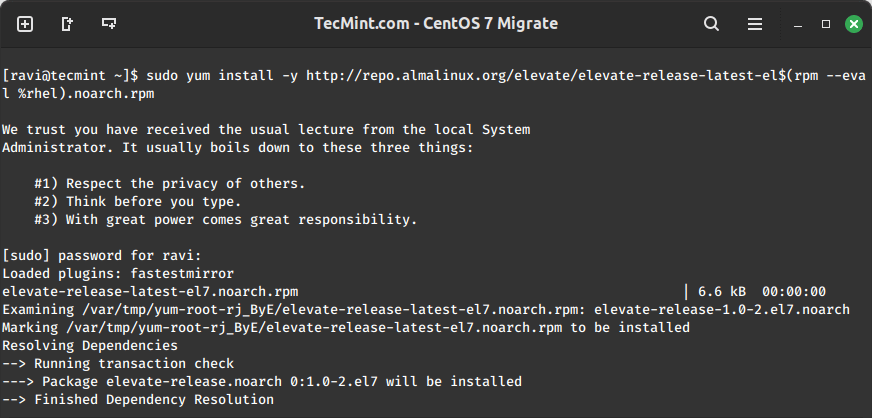
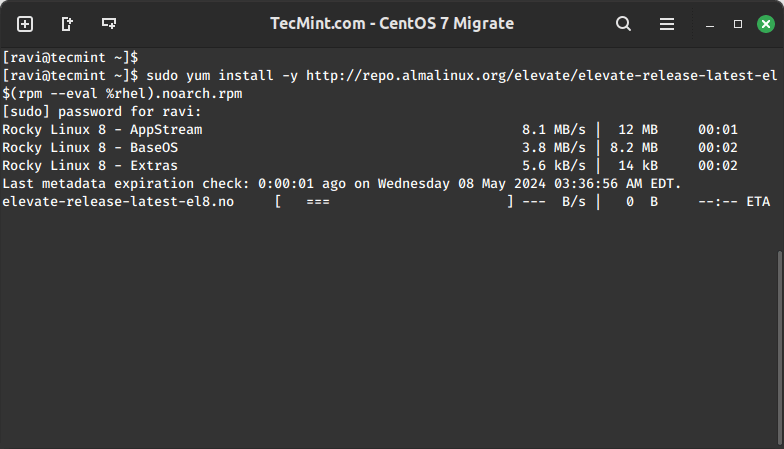
To install the elevate-release package from the repository for the latest version, you can use the following command:
sudo yum install -y http://repo.almalinux.org/elevate/elevate-release-latest-el$(rpm --eval %rhel).noarch.rpm
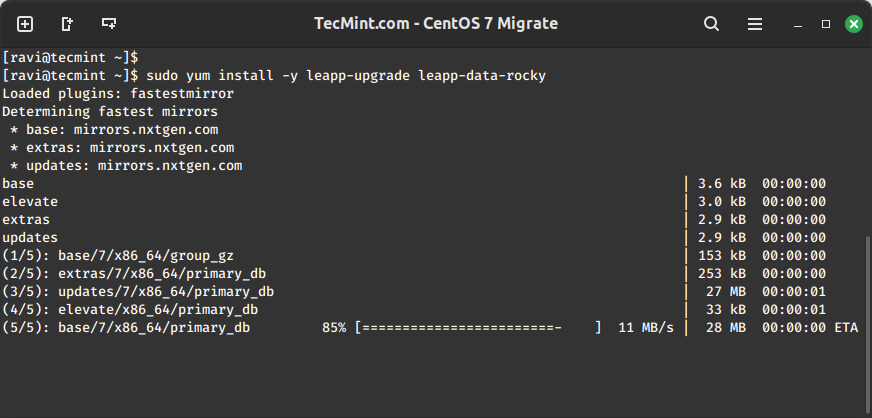
Next, install the Leapp upgrade tool that is used for system upgrades and migrations and leapp-data-rocky which contains data files specific to the Rocky Linux distribution.
sudo yum install -y leapp-upgrade leapp-data-rocky
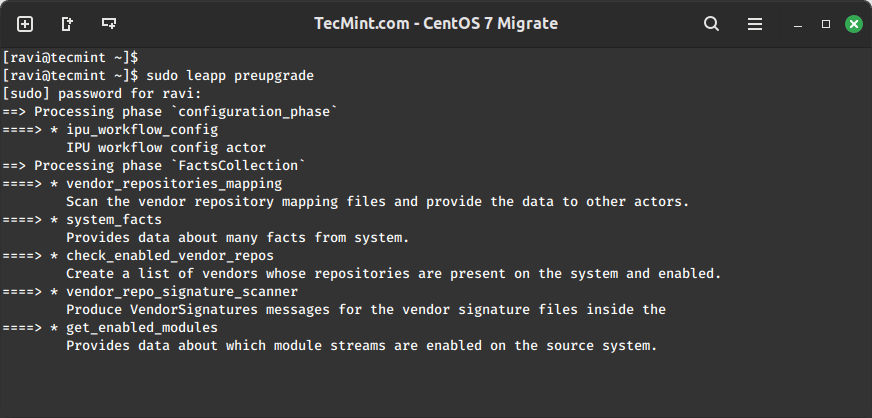
Step 3: Run Pre-Upgrade Checks
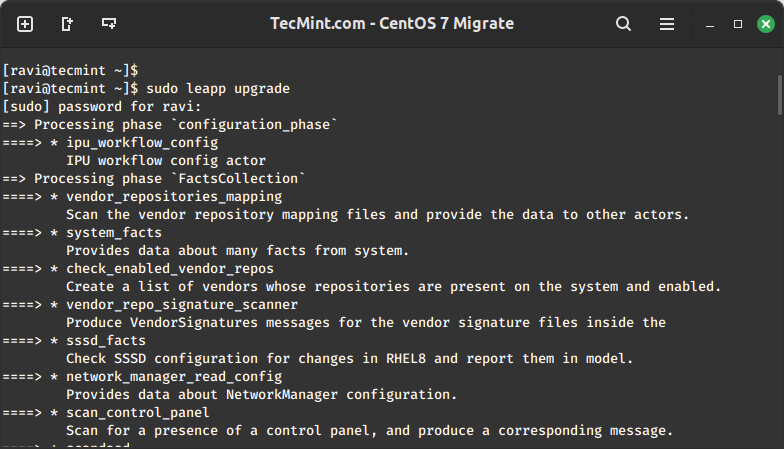
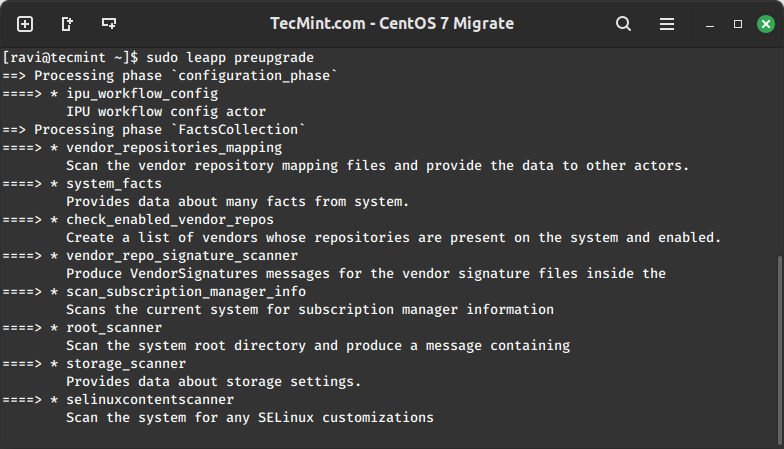
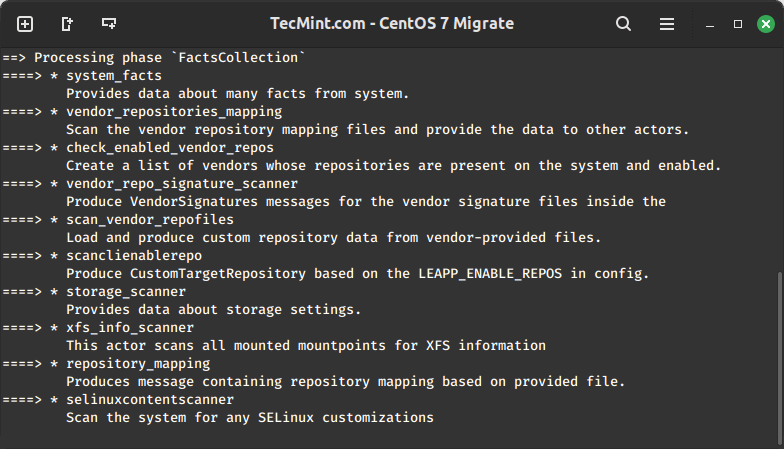
Now run the following command to initiate the pre-upgrade process, where Leapp prepares the system for an upgrade by identifying potential issues, checking compatibility, performing necessary pre-upgrade tasks, and generating a pre-upgrade report.
sudo leapp preupgrade
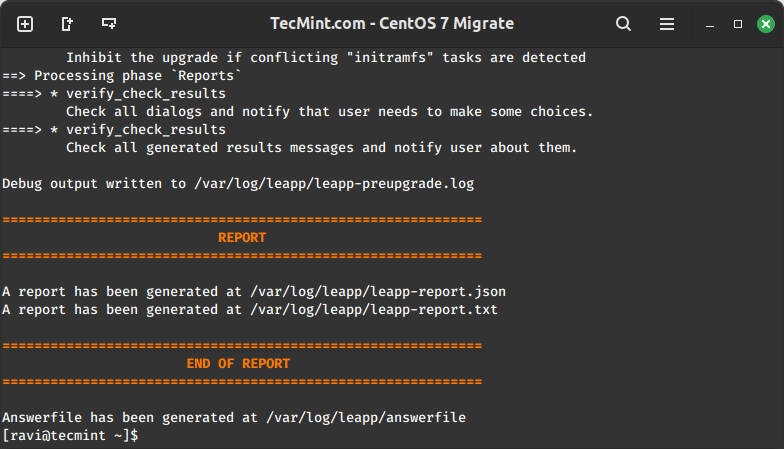
The pre-upgrade process can take some time to complete. Once it’s done, the Leapp tool will create files in the /var/log/leapp/ directory that contain important files and information about any potential issues that may come up during the upgrade, and how to fix them.
sudo ls -l /var/log/leapp/
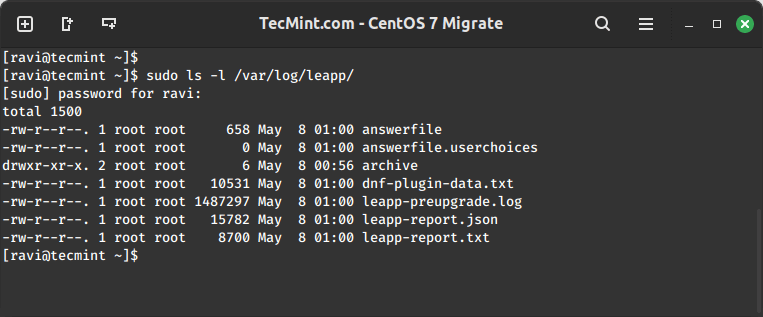
Here are the key files you should look at:
- answerfile – This file has questions that need a yes or no answer to continue the upgrade.
- leapp-report.txt – This file lists all the issues and solutions to fix before or after the upgrade.
- leapp-preupgrade.log – This file shows the full log and detailed information from the pre-upgrade process.
Before upgrading your system, check the first two files and take care of any necessary steps to fix the following common issues when moving from CentOS 7.
1. Removing the pata_acpi kernel module:
sudo rmmod pata_acpi
2. Updating the /etc/ssh/sshd_config config file to permit root login:
echo PermitRootLogin yes | sudo tee -a /etc/ssh/sshd_config
3. Disable the pam_pkcs11 module in the PAM configuration to make the upgrade process uninterrupted.
sudo leapp answer --section remove_pam_pkcs11_module_check.confirm=True
After fixing all common issues, re-run the pre-upgrade command to confirm everything is fixed:
sudo leapp preupgrade
The upgrade is ready when the “Upgrade Inhibited” message is no longer shown.
Step 4: Perform Upgrade
Finally, run the upgrade command, which will start the upgrade procedure, which includes tasks such as downloading necessary packages, applying system configuration changes, and updating the system to the target version.
sudo leapp upgrade
Wait until the upgrade finishes. If it doesn’t work, go back to the step before and fix any problems that were missed during the pre-upgrade check.
After the upgrade process finishes without any problems, restart the computer.
reboot
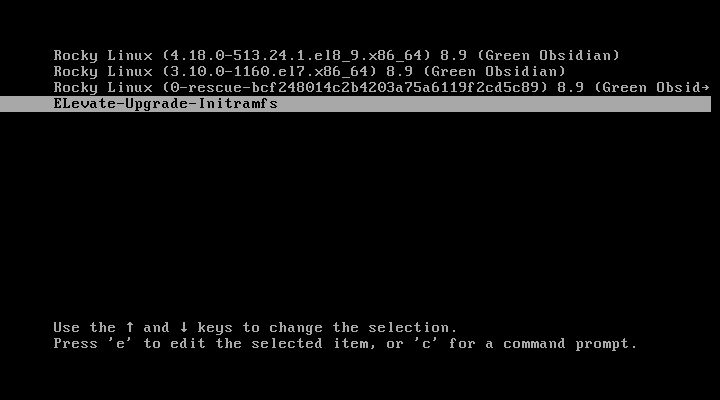
Once you reboot, you will see an entry called ELevate-Upgrade-Initramfs in the GRUB menu.
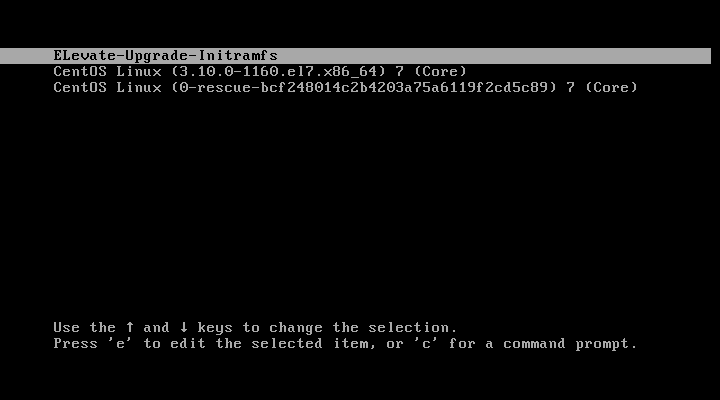
After waiting for five seconds, the system will automatically start the upgrade process.
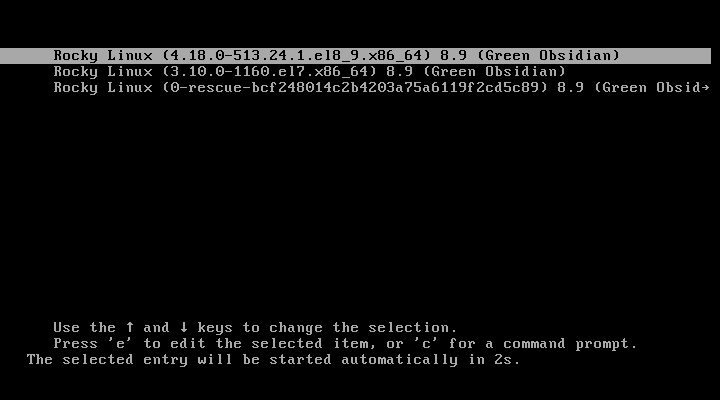
After the upgrades, the system will restart two more times. Once the restarts are done, you’ll see a Rocky Linux 8 option in the GRUB menu, which means the upgrade from CentOS 7 to Rocky Linux 8 was successful.
Now log in as the root user and verify the release.
cat /etc/redhat-release

Rocky Linux release 8.9 (Green Obsidian)
Step 5: Post-Upgrade Steps
After migrating to Rocky Linux 8, you need to clean all packages left from the previous CentOS version.
$ sudo rpm -qa | grep el7
$ sudo rpm -qa | grep elevate
$ sudo rpm -qa | grep leapp
$ sudo rpm -qa | grep el7 | xargs sudo rpm -e
$ sudo rm -fr /root/tmp_leapp_py3
$ sudo dnf clean all
Upgrade Rocky Linux 8 to Rocky Linux 9
To upgrade from Rocky Linux 8 to Rocky Linux 9, you need to use the same ELevate repository and the Leapp framework.
Step 1: Install ELevate and Leapp Packages
First, install the elevate-release package which offers the latest version of the package for the specific version of the operating system installed on the system.
sudo yum install -y http://repo.almalinux.org/elevate/elevate-release-latest-el$(rpm --eval %rhel).noarch.rpm
Next, run the following command to set exclusion rules, allowing yum to install or update all packages without any exclusions.
sudo yum config-manager --save --setopt exclude=''
Next, install leapp-upgrade and leapp-data-rocky packages that provide functionalities to facilitate the upgrade process from one version of an operating system to another.
sudo yum install -y leapp-upgrade leapp-data-rocky
Step 2: Run Pre-Upgrade Checks
Now run the following command to initiate the pre-upgrade process, where Leapp prepares the system for an upgrade by identifying potential issues, checking compatibility, performing necessary pre-upgrade tasks, and generating a pre-upgrade report.
sudo leapp preupgrade
The pre-upgrade process creates similar files as before, but with different suggested solutions. Look at the answerfile to find all the suggested steps and fix them as shown.
1. Adjusting the settings of the firewalld.
sudo sed -i "s/^AllowZoneDrifting=.*/AllowZoneDrifting=no/" /etc/firewalld/firewalld.conf
2. Delete the network setup file for a type of network device that isn’t supported.
sudo rm /etc/sysconfig/network-scripts/ifcfg-[device_name]
3. Skipping the VDO device check requirement in the answer file.
sudo leapp answer --section check_vdo.no_vdo_devices=True
After fixing all common issues, re-run the pre-upgrade command to confirm everything is fixed.
sudo leapp preupgrade

The upgrade is ready when the “Upgrade Inhibited” message is no longer shown.
Step 3: Perform Upgrade
Finally, run the upgrade command, which will start the upgrade procedure, which includes tasks such as downloading necessary packages, applying system configuration changes, and updating the system to the target version.
sudo leapp upgrade
Wait for the upgrade to finish. If it doesn’t work, see if the report shows any troublesome packages. Often, the make-devel and rocky-logos packages cause problems during the upgrade.
sudo dnf remove rocky-logos make-devel
Run the upgrade again after removing the problematic packages.
sudo leapp upgrade
After the upgrade process finishes without any problems, restart the computer.
reboot
Once you reboot, you will see an entry called ELevate-Upgrade-Initramfs in the GRUB menu.
After waiting for five seconds, the system will automatically start the upgrade process.
After the upgrades, the system will restart two more times. Once the restarts are done, you’ll see a Rocky Linux 9 option in the GRUB menu, which means the upgrade from Rocky Linux 8 to Rocky Linux 9 was successful.

After booting your computer, log in and see how the migration went. Make sure you’re using the right operating system. Check logs and any leftover packages from the old OS version. You might want to remove or update them yourself.
cat /etc/redhat-release
cat /etc/os-release
rpm -qa | grep el8
cat /var/log/leapp/leapp-report.txt
cat /var/log/leapp/leapp-upgrade.log
After following the steps in this guide, you’ve now upgraded from CentOS 7 to Rocky Linux 9. Explore more about CentOS alternatives and why Rocky Linux stands out as one of the top choices.


Thanks for your work.
Now that the factory default is gone, I had to fix the el7 repos before installing the leapp stuff.
This site was helpful: https://github.com/AtlasGondal/centos7-eol-repo-fix/
Hello Ravi,
Great article! The steps were easy to follow, and I successfully migrated my old CentOS 7 server to Rocky Linux 9 without encountering any issues.
Many thanks!
Hi Ravi
My question not related to Centos, actually it is related to fedora. I install fedora 19 in my desktop and after update Schrödinger CAT is booting. this is good for me but today when I restart my system, the system automatic updated again. After updating rebooted by system itself and during rebooting the screen freeze and message showing “varifying DMI pool data………….” the dot is blinking continuously for longer duration. I search in google what it means it showing problem with BIOS setting, which I did not touch. This problem I faced second time with same OS. I am using three Hard disk capacity 2TB, 1TB and 500 GB.
Could you give help me to sort out this problem
Thank you
Mysql rpm’s are part of the upgrading media (DVD). So you might have not had problem in upgrading your Sql server. Oracle database rpm’s and third party rpms used in application hosting may cause the system to break. I will duplicate the server setup in virtual environment and experiment with your suggestion.
First part of the question still remains unanswered. If possible can you write a article on offline repo for distribution of rpms to server/client machines
thanks
Yes! surely will provide an article on offline repo.
Hi,
Thanks for wonderful articles/guides. All your guides are very helpful and makes sysadmin’s life simpler. I have one question regarding the above article. This up-gradation needs server machines to be available on internet for yum sync and updates installation. Can you please advise me on the up-gradation method to do a offline up-gradation for servers operating in private network without a internet connectivity.
I have already covered offline installation of packages using CentOS CD/DVD with YUM tool. Please follow the below link for offline installation of packages.
https://www.tecmint.com/install-software-packages-via-yum-command-using-centos-65-installation-dvdcd/
Thanks.. I had gone through that article. The said article mentions about manual installation of updated packages from DVD. I am looking for a complete offline update server solution to distribute updated packages to number of Linux servers/clients present on our private network. It is like setting up a offline repo as WSUS server in windows networks.
secondly, we have Cent OS 5.6 server with Oracle database for hosting various applications in our LAN setup. Can i use “yum upgrade” command to do a version upgrade in my Linux machine (manually) using DVD media like CentOS 5.9. Will that keep my current server in running state after reboot. I am deliberating a dependency issues may arise leading to server collapse. Please advise.
I have upgraded my own working Mysql Server CentOS 5.6 to Centos 5.9 using DVD method. I have not faced any problems after up-gradation and server is working fine. My advice is to go ahead.
Hey Ravi,
First of all thanks for all your articles. they really make life on linux enhancements much simpler. i have a Centos 6.3 ( updated kernel 3.7) installed and would like to make it a dual boot with Ubuntu 12.10 but currently i am not able to shrink LVM based Centos6.3 partions to make way for ubuntu. please can u publish an article or at least guide me on e mail with detailed instructions on how to first shrink the centos LVM partions and then install ubuntu or even fedora for a dual boot. Basic problem is shrinking the size of Centos LVM partion using Gparted in rescue mode using installation dvd. please help me as i find yyour solutions to be the most explanatory on the web. here is the partion detail of my disk :
Filesystem Size Used Avail Use% Mounted on
/dev/mapper/vg_thakurrajeshsingh-lv_root 50G 16G 31G 35% /
tmpfs 1.2G 296K 1.2G 1% /dev/shm
/dev/sda1 485M 79M 381M 18% /boot
/dev/mapper/vg_thakurrajeshsingh-lv_home 407G 24G 363G 7% /home
yay ! Finally i was able to shrink LVM and do a ubuntu12.10 dual install with centos 6.3. now the question is when 6.4 update comes later this month(since RHEL6.4 beta was released on 4th dec), when i will do a yum update, how to avoid centos 6.4 grub from overwriting the relatively new ubuntu grub ??
If your grub boot loader is overwritten, then you don’t have choice to boot the recently installed operating system, In that case you have to restore an overwritten grub boot loader by using Live CD. Boot the system using Live CD and mount the partition and install grub again. This is the recommended way to restore the overwritten grub. And also let me know how you able to shrink the LVM?