Laravel is a free open source, powerful PHP framework with an expressive and appealing syntax. It has a refined, simple, and readable syntax for developing modern, robust and powerful applications from the ground up. In addition, Laravel provides several tools you need for writing clean, modern and maintainable PHP code.
Read Also: How to Install Laravel PHP Framework on Ubuntu
Key Laravel Features:
- Powerful ORM (Object-Relational Mapping) for working with your database.
- Uncomplicated and fast routing mechanism.
- Powerful dependency injection container.
- Provides a unified API across multiple queue backends including Amazon SQS and Redis and many more, for session and cache storage.
- Supports a simple authentication mechanism.
- Supports real-time event broadcasting.
- Also supports database agnostic migrations and schema builder.
- Supports background job processing and more.
System Requirements
Your system must satisfy the following requirements to be able to run the latest version of Laravel:
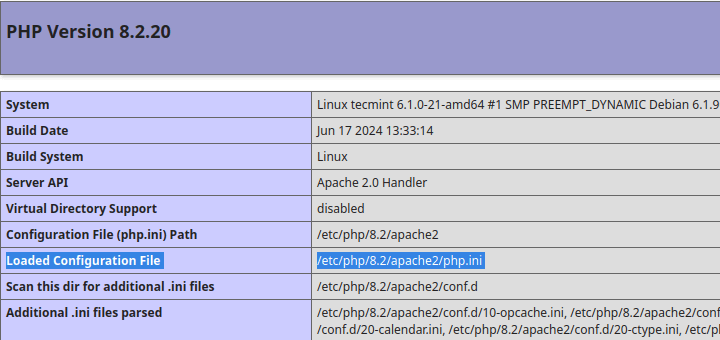
- PHP >= 7.1.3 with OpenSSL, PDO, Mbstring, Tokenizer, XML, Ctype and JSON PHP Extensions.
- Composer – an application-level package manager for the PHP.
Test Environment:
In this article, we will explain how to install latest version of Laravel 5.6 PHP Framework on CentOS, Red Hat, Fedora systems.
Step 1: Setup Yum Repositories
1. First of all, you need to enable REMI and EPEL repositories in your Linux distribution to have the updated packages (PHP, Nginx, MariaDB, etc.) using following commands
------------- On CentOS/RHEL 7.x -------------
rpm -Uvh https://dl.fedoraproject.org/pub/epel/epel-release-latest-7.noarch.rpm
rpm -Uvh http://rpms.famillecollet.com/enterprise/remi-release-7.rpm

------------- On CentOS/RHEL 6.x -------------
rpm -Uvh https://dl.fedoraproject.org/pub/epel/epel-release-latest-6.noarch.rpm
rpm -Uvh http://rpms.famillecollet.com/enterprise/remi-release-6.rpm
Step 2: Install Nginx, MySQL and PHP
2. Next, we need to install a working LEMP environment on your system. If you already have a working LEMP stack, you can skip this step, if not install it using following commands.
Install Nginx
# yum install nginx [On CentOS/RHEL]
3. Once nginx has been installed, then start the web server and enable it to start at system boot and then verify the status using following commands.
------------- On CentOS/RHEL 7.x -------------
# systemctl start nginx
# systemctl enable nginx
# systemctl status nginx

------------- On CentOS/RHEL 6.x -------------
# service nginx start
# chkconfig nginx on
# service nginx status
4. To access nginx from public network, you need to open a port 80 on your system firewall to receive external requests as shown.
------------- On CentOS/RHEL 7.x -------------
# firewall-cmd --permanent --add-port=80/tcp
# firewall-cmd --reload

------------- On CentOS/RHEL 6.x -------------
# iptables -A INPUT -p tcp --dport 80 -j ACCEPT
# service iptables restart
Install MySQL
# yum install mariadb-server php-mysql
# systemctl start mariadb.service
# /usr/bin/mysql_secure_installation
Install PHP
# yum install yum-utils
# yum-config-manager --enable remi-php72
# yum install php php-fpm php-common php-xml php-mbstring php-json php-zip
5. Next, start and enable PHP-FPM service and check if it is up and running.
------------- On CentOS/RHEL 7.x -------------
# systemctl start php-fpm
# systemctl enable php-fpm
# systemctl status php-fpm

------------- On CentOS/RHEL 6.x -------------
# service php-fpm start
# chkconfig php-fpm on
# service php-fpm status
Step 3: Install Composer and Laravel PHP Framework
6. Now install Composer (dependency manager for PHP) for installing required Laravel dependencies using the following commands.
# curl -sS https://getcomposer.org/installer | php
# mv composer.phar /usr/local/bin/composer
# chmod +x /usr/local/bin/composer
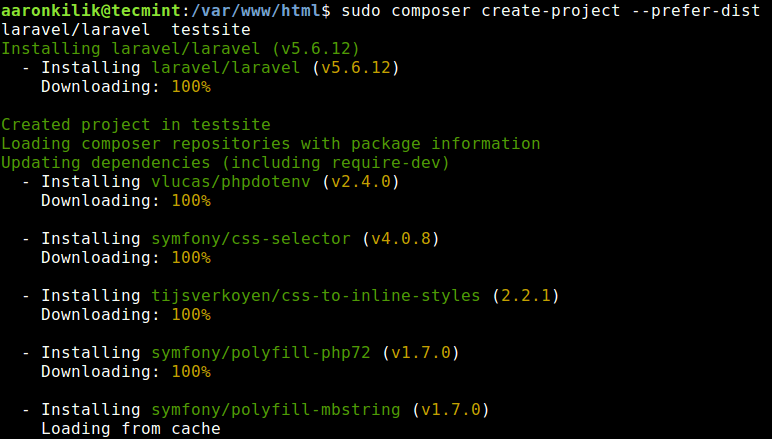
7. Once you have installed Composer, you can install Laravel by running the composer create-project command, as follows.
# cd /var/www/html/
# sudo composer create-project --prefer-dist laravel/laravel testsite
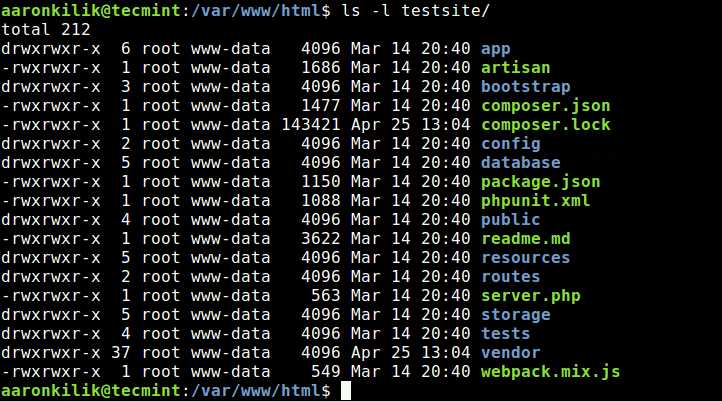
8. Now when you do a long listing of your web document root, the testsite directory should exist in there, containing your laravel files.
$ ls -l /var/www/html/testsite
Step 4: Configure Laravel Installation
9. Now set the appropriate permissions on the testsite directory and laravel files using following commands.
# chmod -R 775 /var/www/html/testsite
# chown -R apache.apache /var/www/html/testsite
# chmod -R 777 /var/www/html/testsite/storage/
10. In addition, if you have SELinux enabled, you need to update the security context of the storage and bootstrap/cache directories using following commands.
# semanage fcontext -a -t httpd_sys_rw_content_t '/var/www/html/testsite/bootstrap/cache(/.*)?'
# semanage fcontext -a -t httpd_sys_rw_content_t '/var/www/html/testsite/storage(/.*)?'
# restorecon -Rv '/usr/share/nginx/html/testapp'
11. Then create a environment file for your application, using the sample file provided.
# cp .env.example .env
12. Next, Laravel uses an application key to secure user sessions and other encrypted data. So you need to generate and set your application key to a random string using following command.
# php artisan key:generate
Step 5: Configure Nginx Server Block For Laravel
13. In this step, you need to configure a Nginx server block for testsite, in order to access it from a web browser. Create a .conf file for it under /etc/nginx/conf.d/ directory as shown.
# vi /etc/nginx/conf.d/testsite.conf
And add the following configuration in it (use values applicable to your environment, in this example, our dummy domain is testinglaravel.com). Note that the laravel index file is stored in /var/www/html/testsite/public, this will be the root of your site/application.
server {
	listen      80;
	server_name testinglaravel.com;
	root        /var/www/html/testsite/public;
	index       index.php;

	charset utf-8;
	gzip on;
	gzip_types text/css application/javascript text/javascript application/x-javascript 	image/svg+xml text/plain text/xsd text/xsl text/xml image/x-icon;
	location / {
		try_files $uri $uri/ /index.php?$query_string;
	}

	location ~ \.php {
		include fastcgi.conf;
		fastcgi_split_path_info ^(.+\.php)(/.+)$;
		fastcgi_pass unix:/var/run/php/php7.2-fpm.sock;
	}
	location ~ /\.ht {
		deny all;
	}
}
Save the file and exit. Then restart your web server for the recent changes to take effect.
# systemctl restart nginx
Step 6: Access Laravel Website
14. Next, if you do not have a fully registered domain name, you need to use the /etc/hosts file to create a local DNS for testing purposes.
Add the the following line in your /etc/hosts file as shown (use your system IP address and domain instead of 192.168.43.31 and testinglaravel.com respectively).
192.168.43.31 testinglaravel.com
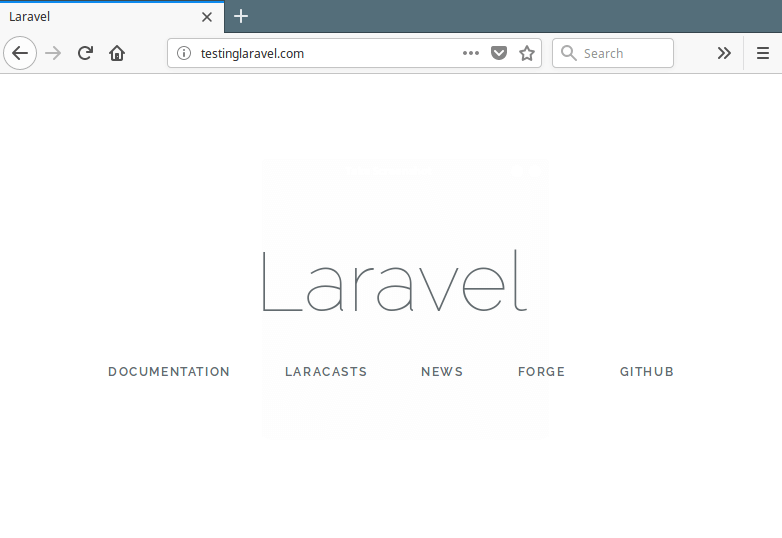
15. Finally access your Laravel site from a browser, using the following URL.
http://testinglaravel.com
OR
http://your-ip-address
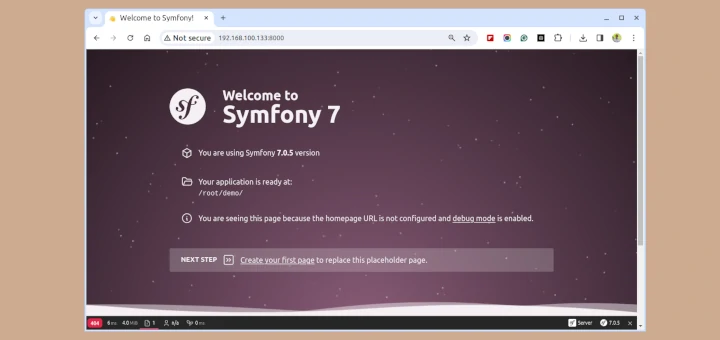
If you are developing locally, you may employ PHP’s built-in development server to serve your application or site, as follows. This command will start a development server at http://localhost:8000 or http://127.0.0.1:8000. On CentOS/REHL, this port should be opened in the firewall for you to serve your application this way.
# php artisan serve
From this point, you are ready to go, you can start developing your site. For additional configurations such as cache, database and sessions, you can go to the Laravel homepage.
Laravel is a PHP framework with an expressive and beautiful syntax for practical, modern web development. We hope that everything went on well during the installation, if not, use the comment form below to share your queries with us.


Dear Sir,
I flow the instruction step by step but when finish setup I access my IP. The error is “502 Bad Gateway nginx/1.16.1“. I open error file and see “/var/run/php/php7.2-fpm.sock failed“.
I checked on my VPS but the folder “php” in folder “run” is not exist even I install PHP as the instruction below.
Help me please…
@Dang,
Have you restarted the php-fpm service after creating server block?
Dear Sir/Madam,
On step 3: Install Composer and Laravel PHP Framework
I added “sudo” on the second command because my account is not admin.
Next I goto foler:
And try to create a laravel project
I received a message “sudo: composer: command not found“.
Please help me.
Thanks
@Dang,
Use ‘sudo‘ for all commands…
chmod +x /usr/local/bin/compose => spelling mistake, it is composer not compose.
how install on apache?
When I try to install Laravel on my machine (Centos 7, php7) I get the following error “You can also run` php -ini` inside terminal to see which files are used by PHP in CLI mode. “
Very nice, your article was of much help. I was conversant on installing laravel in windows and never did it on a linux environment.