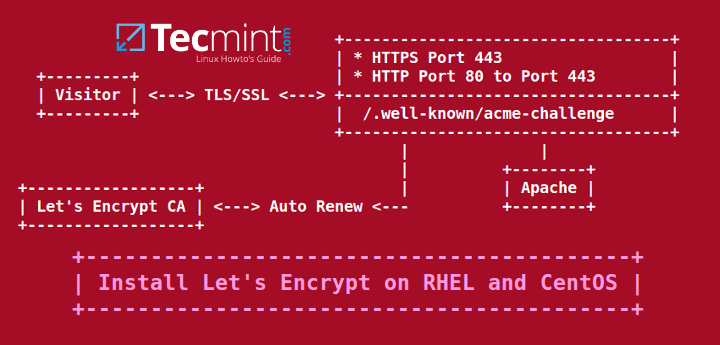
Extending the last Let’s Encrypt tutorial regarding SSL/TLS free certificates, in this article we are going to demonstrate how to obtain and install free SSL/TLS certificates issued by Let’s Encrypt Certificate Authority for Apache web server on CentOS/RHEL 7/6 and Fedora distributions too.
If you’re looking to install Let’s Encrypt for Apache on Debian and Ubuntu, follow this guide below:
Setup Let’s Encrypt to Secure Apache on Debian and Ubuntu
Testing Sample Environment
Requirements
- A registered domain name with valid
Arecords to point back to your server public IP Address. - Apache server installed with SSL module enabled and Virtual Hosting enabled in case you’re hosting multiple domains or subdomains.
Step 1: Install Apache Web Server
1. If not already installed, httpd daemon can be installed by issuing the below command:
# yum install httpd
2. In order for Let’s encrypt software to work with Apache, assure that the SSL/TLS module is installed by issuing the command below:
# yum -y install mod_ssl
3. Finally, start Apache server with the following command:
# systemctl start httpd.service          [On RHEL/CentOS 7]
# service httpd start                    [On RHEL/CentOS 6]
Step 2: Install Let’s Encrypt SSL Certificate
4. The simplest method of installing Let’s Encrypt client is by cloning github repository in your filesystem. To install git on your system you must enable Epel repositories with the following command.
# yum install epel-release
5. Once Epel repos are added in your system, go ahead and install git client by running the command below:
# yum install git
6. Now , once you have installed all the required dependencies in order to deal with Let’s Encrypt, go to /usr/local/ directory and start pulling the Let’s Encrypt client form its official github repository with the following command:
# cd /usr/local/
# git clone https://github.com/letsencrypt/letsencrypt
Step 3: Obtain a Free Let’s Encrypt SSL Certificate for Apache
7. The process of obtaining a free Let’s Encrypt Certificate for Apache is automated for CentOS/RHEL thanks to the apache plugin.
Let’s run Let’s Encrypt script command in order to obtain a SSL Certificate. Go to Let’s Encrypt installation directory from /usr/local/letsencrypt and run the letsencrypt-auto command by providing --apache option and the -d flag for every subdomain you need a certificate.
# cd /usr/local/letsencrypt
# ./letsencrypt-auto --apache -d your_domain.tld

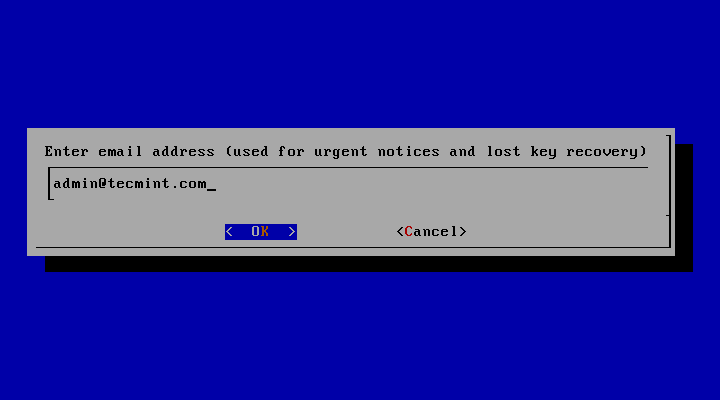
8. Supply the email address that will be used by Let’s Encrypt to recover your lost key or for urgent notices and press Enter to continue.
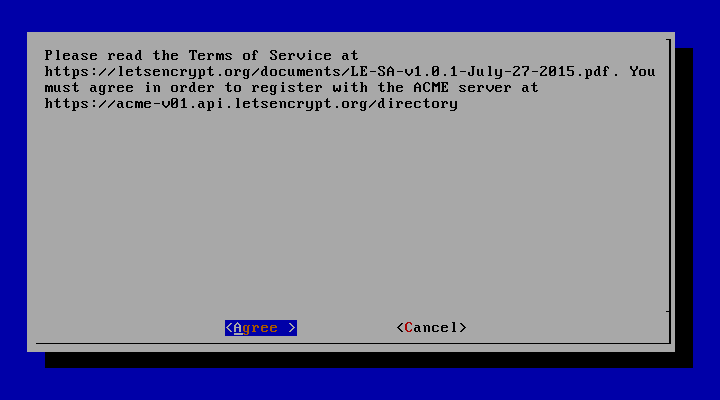
9. Agree the terms of the license by hitting Enter key.
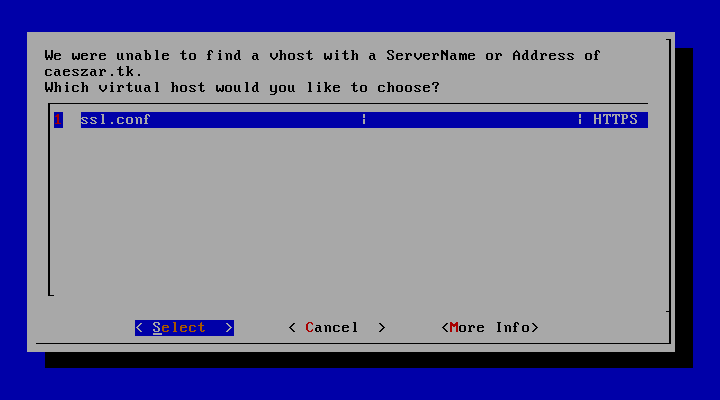
10. On CentOS/RHEL, by default, Apache server does not use the concept of separating directories for enabled hosts from available (inactive) hosts as Debian based distribution do.
Also, virtual hosting is disabled by default. The Apache statement which specifies the name of the server (ServerName) it’s not present on SSL configuration file.
To activate this directive, Let’s Encrypt will prompt you to select a virtual host. Because it does not find any Vhost available, select the ssl.conf file to be automatically modified by Let’s Encrypt client and press Enter to continue.
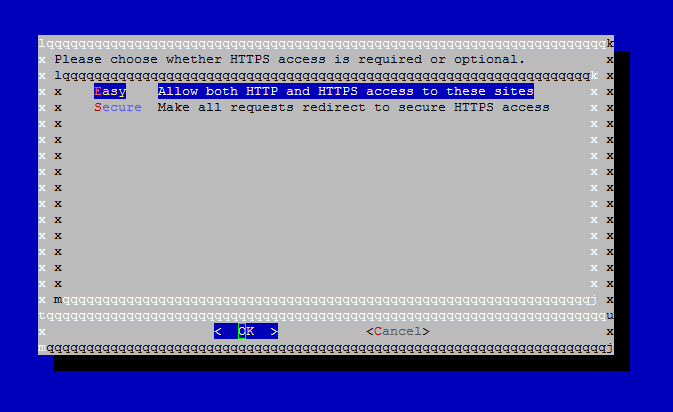
11. Next, choose the Easy method for HTTP requests and press Enter to move forward.
12. Finally, if everything went smooth, a congratulation message should be displayed on the screen. Press Enter to release the prompt.
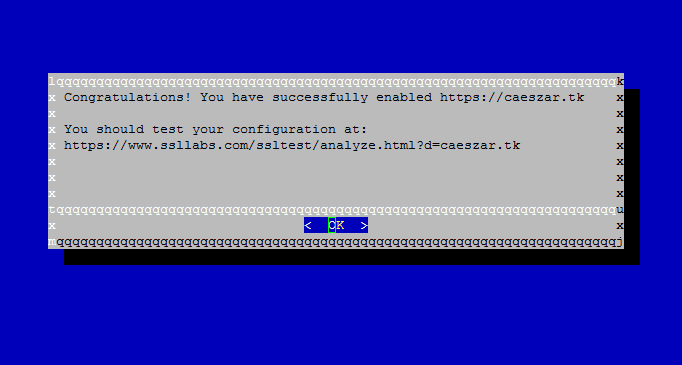
That’s it! You have successfully issued a SSL/TLS certificate for your domain. Now you can start browsing your website using HTTPS protocol.
Step 4: Test Free Let’s Encrypt Encryption on Domain
13. In order to test the straightness of your domain SSL/TLS handshake visit the below link and test your certificate on your domain.
https://www.ssllabs.com/ssltest/analyze.html
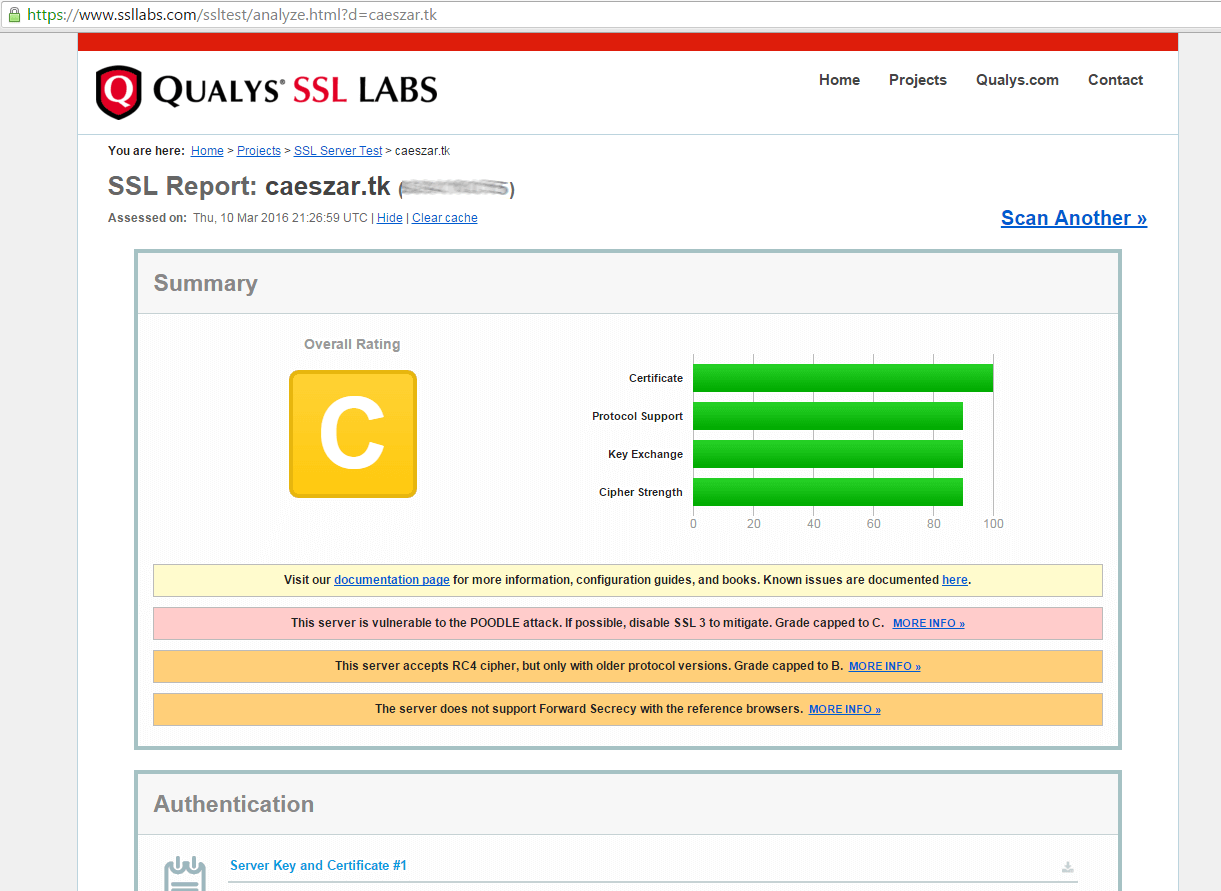
14. If you receive a series of reports concerning your domain vulnerability in the conducted tests, then you need to fix those security holes urgently.
An overall rating of C class makes your domain very insecure. To fix these security problems, open Apache SSL configuration file and make the following changes:
# vi /etc/httpd/conf.d/ssl.conf
Search for line with SSLProtocol statement and add -SSLv3 at the end of the line.
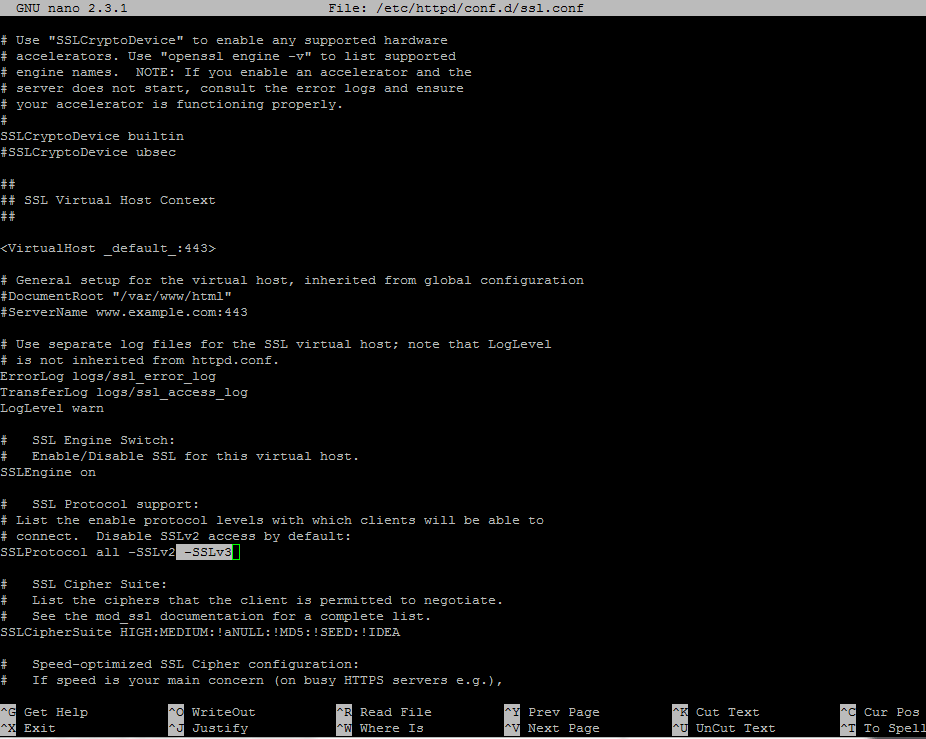
Go deeper in the file, search and comment the line with SSLCipherSuite by placing a # in front of it and add the following content under this line:
SSLCipherSuite          ECDHE-RSA-AES128-GCM-SHA256:ECDHE-ECDSA-AES128-GCM-SHA256:ECDHE-RSA-AES256-GCM-SHA384:ECDHE-ECDSA-AES256-GCM-SHA384:DHE-RSA-AES128-GCM-SHA256:DHE-DSS-AES128-GCM-SHA256:kEDH+AESGCM:ECDHE-RSA-AES128-SHA256:ECDHE-ECDSA-AES128-SHA256:ECDHE-RSA-AES128-SHA:ECDHE-ECDSA-AES128-SHA:ECDHE-RSA-AES256-SHA384:ECDHE-ECDSA-AES256-SHA384:ECDHE-RSA-AES256-SHA:ECDHE-ECDSA-AES256-SHA:DHE-RSA-AES128-SHA256:DHE-RSA-AES128-SHA:DHE-DSS-AES128-SHA256:DHE-RSA-AES256-SHA256:DHE-DSS-AES256-SHA:DHE-RSA-AES256-SHA:AES128-GCM-SHA256:AES256-GCM-SHA384:AES128-SHA256:AES256-SHA256:AES128-SHA:AES256-SHA:AES:CAMELLIA:DES-CBC3-SHA:!aNULL:!eNULL:!EXPORT:!DES:!RC4:!MD5:!PSK:!aECDH:!EDH-DSS-DES-CBC3-SHA:!EDH-RSA-DES-CBC3-SHA:!KRB5-DES-CBC3-SHA
SSLHonorCipherOrder     on
SSLOptions +StrictRequire
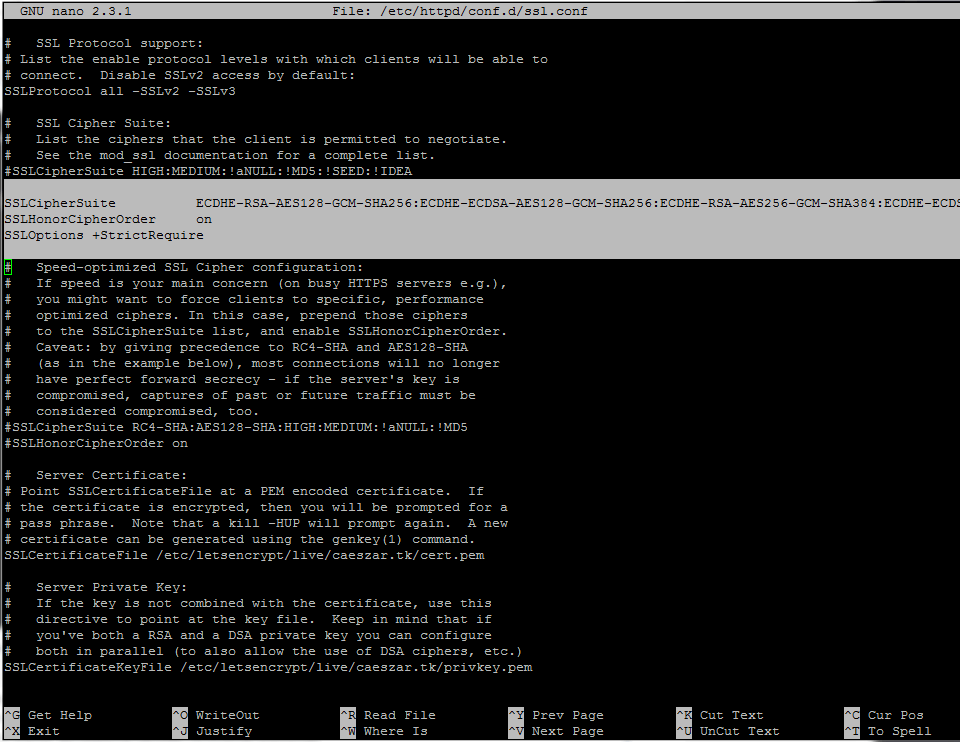
15. After you’ve made all the above changes, save and close the file, then restart Apache daemon to apply changes.
# systemctl restart httpd.service          [On RHEL/CentOS 7]
# service httpd restart                    [On RHEL/CentOS 6]
16. Now, tests the status of your domain encryption again, by visiting the same link as above. To perform retests hit the Clear cache link from the website.
https://www.ssllabs.com/ssltest/analyze.html
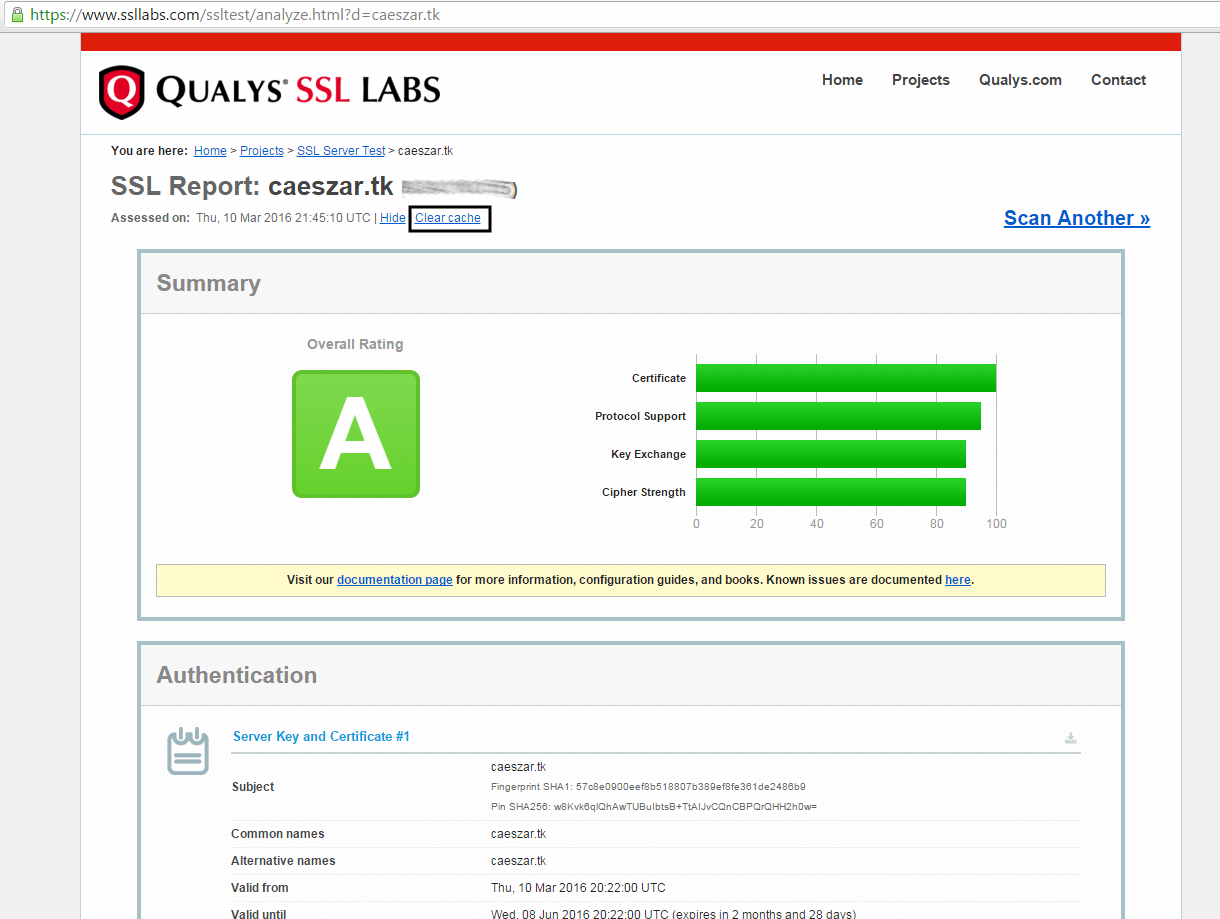
Now you should get a class A overall rating, which means your domain is highly secured.
Step 4: Auto Renew Let’s Encrypt Certificates on Apache
17. This beta version of Let’s Encrypt software releases certificates with expiration date after 90 days. So, in order to renew the SSL certificate, you must execute the letsencrypt-auto command again before expiration date, with the same options and flags used to obtain the initial certificate.
An example on how to manually renew the certificate is presented below.
# cd /usr/local/letsencrypt
# ./letsencrypt-auto certonly --apache --renew-by-default  -d your_domain.tld
18. To automate this process, create the following bash script provided by github erikaheidi, in /usr/local/bin/ directory with the following content. (the script is slightly modified to reflect our letsencrypt installation directory).
# vi /usr/local/bin/le-renew-centos
Add the following content to le-renew-centos file:
!/bin/bash

domain=$1
le_path='/usr/local/letsencrypt'
le_conf='/etc/letsencrypt'
exp_limit=30;

get_domain_list(){
        certdomain=$1
        config_file="$le_conf/renewal/$certdomain.conf"

        if [ ! -f $config_file ] ; then
                echo "[ERROR] The config file for the certificate $certdomain was not found."
                exit 1;
        fi

        domains=$(grep --only-matching --perl-regex "(?<=domains \= ).*" "${config_file}")
        last_char=$(echo "${domains}" | awk '{print substr($0,length,1)}')

        if [ "${last_char}" = "," ]; then
                domains=$(echo "${domains}" |awk '{print substr($0, 1, length-1)}')
        fi

        echo $domains;
}

if [ -z "$domain" ] ; then
        echo "[ERROR] you must provide the domain name for the certificate renewal."
        exit 1;
fi

cert_file="/etc/letsencrypt/live/$domain/fullchain.pem"

if [ ! -f $cert_file ]; then
        echo "[ERROR] certificate file not found for domain $domain."
        exit 1;
fi

exp=$(date -d "`openssl x509 -in $cert_file -text -noout|grep "Not After"|cut -c 25-`" +%s)
datenow=$(date -d "now" +%s)
days_exp=$(echo \( $exp - $datenow \) / 86400 |bc)

echo "Checking expiration date for $domain..."

if [ "$days_exp" -gt "$exp_limit" ] ; then
        echo "The certificate is up to date, no need for renewal ($days_exp days left)."
        exit 0;
else
        echo "The certificate for $domain is about to expire soon. Starting renewal request..."
        domain_list=$( get_domain_list $domain )
        "$le_path"/letsencrypt-auto certonly --apache --renew-by-default --domains "${domain_list}"
        echo "Restarting Apache..."
        /usr/bin/systemctl restart httpd
        echo "Renewal process finished for domain $domain"
        exit 0;
fi
19. Grant execution permissions for the script, install bc package and run the script in order to test it. Use your domain name as a positional parameter for the script. Issue the below commands to accomplish this step:
# yum install bc
# chmod +x /usr/local/bin/le-renew-centos
# /usr/local/bin/le-renew-centos your_domain.tld
20. Finally, using Linux scheduling, add a new cron job in order to run the script every two months, assuring that your certificate will be updated before expiration date.
# crontab -e
Add the following line at the bottom of the file.
0 1 1 */2 * /usr/local/bin/le-renew-centos your_domain.tld >> /var/log/your_domain.tld-renew.log 2>&1
That’s it! Your Apache server running on top of CentOS/RHEL system is now serving SSL content using a free Let’s Encrypt SSL certificate.




Hello,
This now doesn’t work on Centos 6. I’m using 6.10 and the error which I get is “Your system is not supported by certbot-auto anymore. Certbot cannot be installed.”
Please suggest
@systemadmin,
Try run the following commands to install Certbot on CentOS 6.x
Hi, I try to install lets encrypt on centos 7, i can generate certificate successfully, but i don’t know why can not load my test page in https, it is TLS handshake fail likely.
Do you have any clue to spot where is the problem, other info i installed centos with cis security profile at that time.
Thanks for your kind help.
Hi,
I have followed your instructions above but i stuck.
when i hit below command it install package and asked me to enter e-mail address after enter e-mail address below is full details:
Can anybody help me out as i have no idea about the error.
[root@demotoday letsencrypt]# ./letsencrypt-auto –apache -d demotoday.com
{Saving debug log to /var/log/letsencrypt/letsencrypt.log
Plugins selected: Authenticator apache, Installer apache
Enter email address (used for urgent renewal and security notices) (Enter ‘c’ to
cancel): [email protected]
——————————————————————————-
Please read the Terms of Service at
https://letsencrypt.org/documents/LE-SA-v1.2-November-15-2017.pdf. You must
agree in order to register with the ACME server at
https://acme-v01.api.letsencrypt.org/directory
——————————————————————————-
(A)gree/(C)ancel: A
——————————————————————————-
Would you be willing to share your email address with the Electronic Frontier
Foundation, a founding partner of the Let’s Encrypt project and the non-profit
organization that develops Certbot? We’d like to send you email about EFF and
our work to encrypt the web, protect its users and defend digital rights.
——————————————————————————-
(Y)es/(N)o: N
Obtaining a new certificate
Performing the following challenges:
http-01 challenge for demotoday.com
Waiting for verification…
Cleaning up challenges
Error while running apachectl graceful.
Job for httpd.service invalid.
Unable to restart apache using [‘apachectl’, ‘graceful’]
Failed authorization procedure. demotoday.com (http-01): urn:acme:error:unauthorized :: The client lacks sufficient authorization :: Invalid response from http://demotoday.com/.well-known/acme-challenge/YXy_G1Ii2rJOFsVRJfOycRoJoWDGhlK6B0tyiH9jQyo: ”
<ht"
IMPORTANT NOTES:
– The following errors were reported by the server:
Domain: demotoday.com
Type: unauthorized
Detail: Invalid response from
http://demotoday.com/.well-known/acme-challenge/YXy_G1Ii2rJOFsVRJfOycRoJoWDGhlK6B0tyiH9jQyo:
"
<ht"
To fix these errors, please make sure that your domain name was
entered correctly and the DNS A/AAAA record(s) for that domain
contain(s) the right IP address.
– Your account credentials have been saved in your Certbot
configuration directory at /etc/letsencrypt. You should make a
secure backup of this folder now. This configuration directory will
also contain certificates and private keys obtained by Certbot so
making regular backups of this folder is ideal. }
Hey, thanks for the tutorial, everything seams to have installed fine however I get a privacy error on Chrome when I try and access my site on https. Is there something I’ve missed?
Thanks for the great article. Worked flawlessly with the first domain I tried. However I came up with a problem when I went to do it for another domain on my VPS. Substep 10 (where you are asked for which vhost), I get a warning msg ‘note: conf files with multiple vhosts are not yet supported’. Is there any way around this?
You can try to split the configuration files for each vhost. Create one .conf file file for each domain and one for each port 80 and port 443 .
Great article, thank you!!
I have a small question regarding sub-step 19 where it says “Use your domain name as a positional parameter for the script.”. If you originally requested the certificate for multiple sub domains in sub-step 7 (ie. -d sub1.domain.com -d sub2.domain.com), would you declare those multiple domains as your positional parameter, or would you have to schedule two separate cron jobs to renew each sub domain? or do you just declare one sub domain and it knows to renew that cert with the Subject Alt Names?
It’s safer to use a separate cron job for every subdomain you want to renew certificate.
Hi,
I followed the guide and finished the setup
but unfortunately ,
https://www.ssllabs.com/ssltest/analyze.html?d=abc.gkxim.com#whyNotTrusted
ssllabs alert “This server’s certificate is not trusted”
I deploy on AWS
Please help
Thanks,
An,
From the link it seems there is a problem with your server FQDN and certificate Common Name value. Try to generate a new certificate and make sure your server FQDN has the same value for certificate’s Common Name. Also, seems to me that your web server is behind a firewall: ip-10-145-137-246 MISMATCH.
Great, thank you… but you missed your_domain.tld in the cronjob. Correct:
0 1 1 */2 * /usr/local/bin/le-renew-centos your_domain.tld >> /var/log/your_domain.tld-renew.log 2>&1
@Kicko,
Thanks, we’ve included that missing domain section in the crontab entry..