You have a newly registered domain name and your web server operates with a SSL Self-Signed Certificate issued by you which is causing headaches for your clients while they visit the domain due to certificate’s generated errors? You have a limited budget and you can’t afford to buy a certificate issued by a trusted CA? This is when Let’s Encrypt software comes into scene and saves the day.
If you’re looking to install Let’s Encrypt for Apache or Nginx on RHEL, CentOS, Fedora or Ubuntu and Debian, follow these guides below:
Setup Let’s Encrypt to Secure Apache on RHEL and CentOS 7/6
Setup Let’s Encrypt to Secure Nginx on Ubuntu and Debian
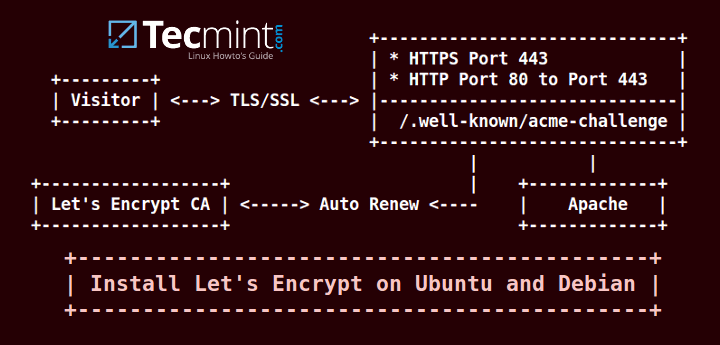
Let’s Encrypt is a Certificate Authority (CA) which facilitates you in acquiring free SSL/TLS certificates needed for your server to run securely, making a smooth browsing experience for your users, without any errors.
Testing Sample Environment
All the steps required to generate a certificate are, mostly, automated for Apache webserver. However, despite your web server software, some steps must be manually done and the certificates must be manually installed, especially in case your website content is served by Nginx daemon.
This tutorial will guide you on how you can install Let’s Encrypt software on Ubuntu or Debian, generate and obtain a free certificate for your domain and how you can manually install the certificate in Apache and Nginx webservers.
Requirements
- A public registered domain name with valid
Arecords to point back to your server external IP Address. In case your server is behind a firewall take the necessary measures to ensure that your server is word-wide accessible from internet by adding port forward rules on the router side. - Apache web server installed with SSL module enabled and virtual hosting enabled, in case you host several domains or subdomains.
Step 1: Install Apache and Enable SSL Module
1. If you don’t have Apache webserver already installed on your machine issue the following command to install apache daemon.
$ sudo apt-get install apache2
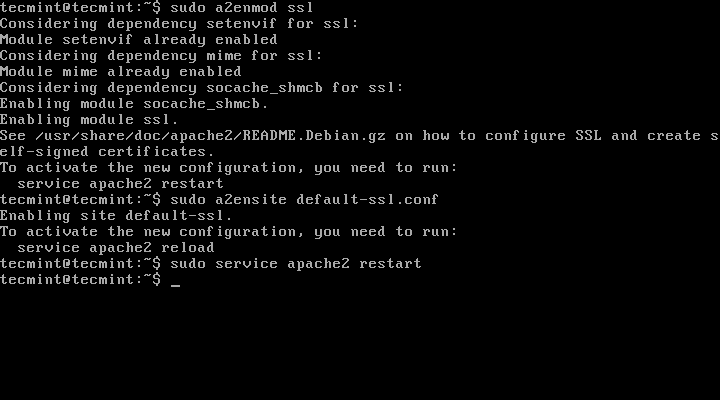
2. SSL module activation for Apache webserver on Ubuntu or Debian it’s quite straightforward. Enable SSL module and activate apache default SSL virtual host by issuing the below commands:
$ sudo a2enmod ssl
$ sudo a2ensite default-ssl.conf
$ sudo service apache2 restart
or
$ sudo systemctl restart apache2.service
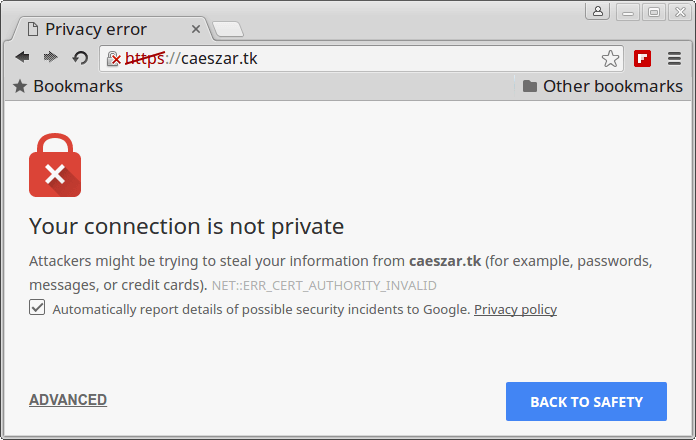
Visitors can now access your domain name via HTTPS protocol. However, because your server self-signed certificate is not issued by a trusted certificate authority an error alert would be displayed on their browsers as illustrated on the image below.
https://yourdomain.com
Step 2: Install Free Let’s Encrypt Client
3. In order to install Let’s Encrypt software on your server you need to have git package installed on your system. Issue the following command to install git software:
$ sudo apt-get -y install git
4. Next, choose a directory from your system hierarchy where you want to clone Let’s Encrypt git repository. In this tutorial we will use /usr/local/ directory as installation path for Let’s Encrypt.
Switch to /usr/local directory and install letsencrypt client by issuing the following commands:
$ cd /usr/local
$ sudo git clone https://github.com/letsencrypt/letsencrypt
Step 4: Generate a SSL Certificate for Apache
5. The process of obtaining a SSL Certificate for Apache is automated thanks to Apache plugin. Generate the certificate by issuing the following command against your domain name. Provide your domain name as a parameter to the -d flag.
$ cd /usr/local/letsencrypt
$ sudo ./letsencrypt-auto --apache -d your_domain.tld
For instance, if you need the certificate to operate on multiple domains or subdomains add them all using the -d flag for each extra valid DNS records after the base domain name.
$ sudo ./letsencrypt-auto --apache -d your_domain.tld -d www. your_domain.tld
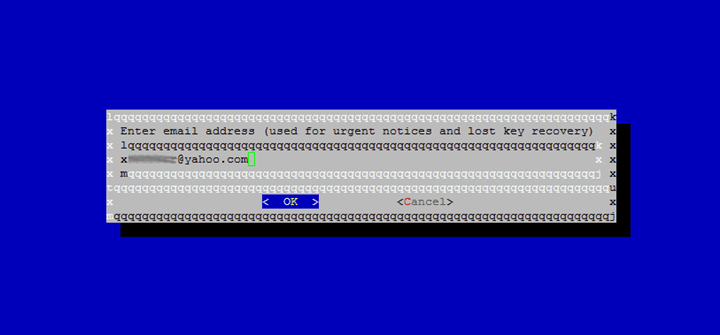
6. Agree the license, enter an email address for recovery and choose whether clients can browse your domain using both HTTP protocols (secure and insecure) or redirect all non-secure requests to HTTPS.

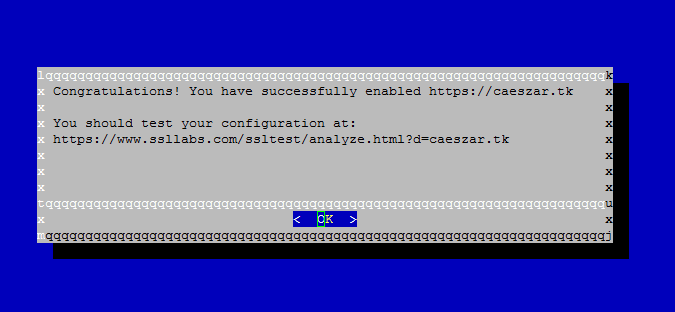
7. After the installation process finishes successfully a congratulation message is displayed on your console informing you about the expiration date and how you can test the configuration as illustrated on the below screenshots.
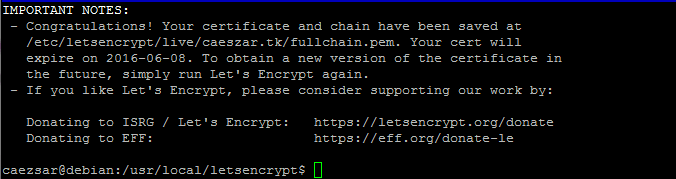
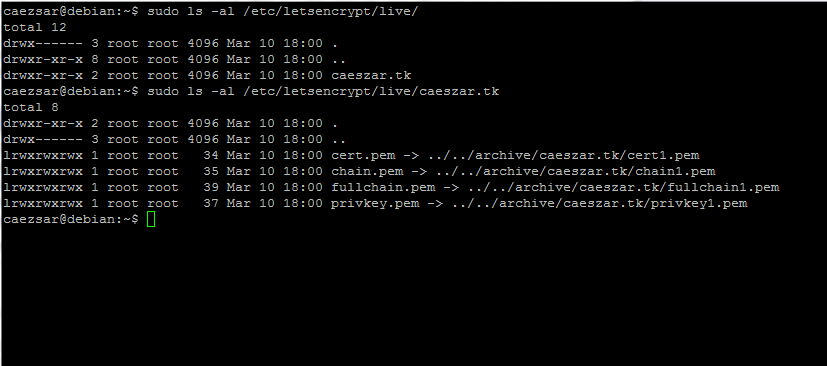
Now you should be able to find your certificate files at /etc/letsencrypt/live directory with a simple directory listing.
$ sudo ls /etc/letsencrypt/live
8. Finally, to verify the status of your SSL Certificate visit the following link. Replace the domain name accordingly.
https://www.ssllabs.com/ssltest/analyze.html?d=your_domain.tld&latest

Also, visitors can now access your domain name using HTTPS protocol without any error appearing in their web browsers.
Step 4: Auto Renew Lets Encrypt Certificates
9. By default, certificates issued by Let’s Encrypt authority are valid for 90 days. In order to renew the certificate before the expiration date you must manually run the client again using the exact flags and parameters as earlier.
$ sudo ./letsencrypt-auto --apache -d your_domain.tld
Or in case of multiple subdomains:
$ sudo ./letsencrypt-auto --apache -d your_domain.tld -d www. your_domain.tld
10. The certificate renewal process can be automated to run in less than 30 days before the expiration date by using Linux schedule cron daemon.
$ sudo crontab -e
Add the following command at the end of the crontab file using one line only:
0 1 1 */2 * cd /usr/local/letsencrypt && ./letsencrypt-auto certonly --apache --renew-by-default --apache -d domain.tld >> /var/log/domain.tld-renew.log 2>&1
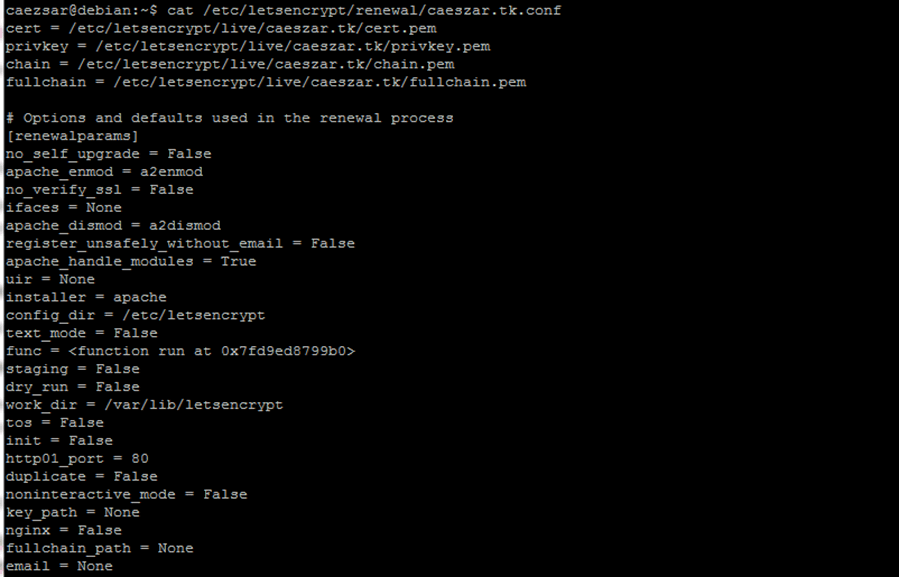
11. Details about your renewal domain configuration file for Let’s Encrypt software can be found in /etc/letsencrypt/renewal/ directory.
$ cat /etc/letsencrypt/renewal/caeszar.tk.conf
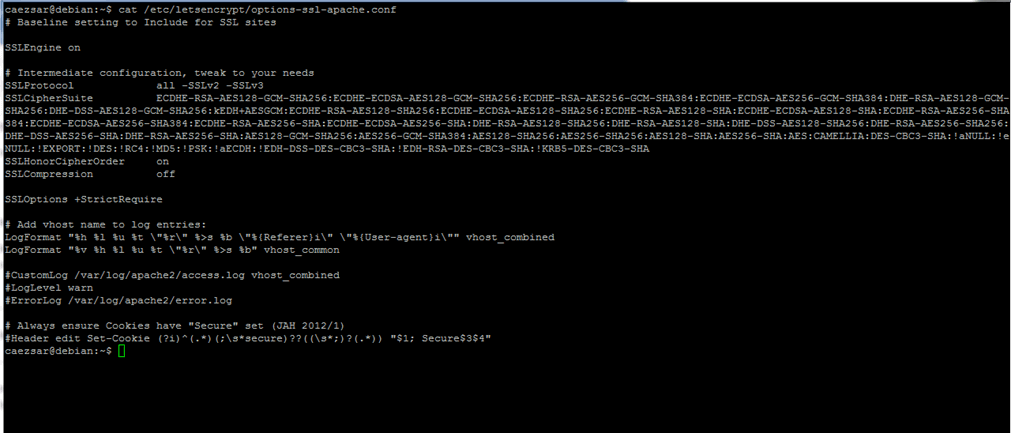
You should also check the file /etc/letsencrypt/options-ssl-apache.conf to view the newly SSL configuration file for Apache webserver.
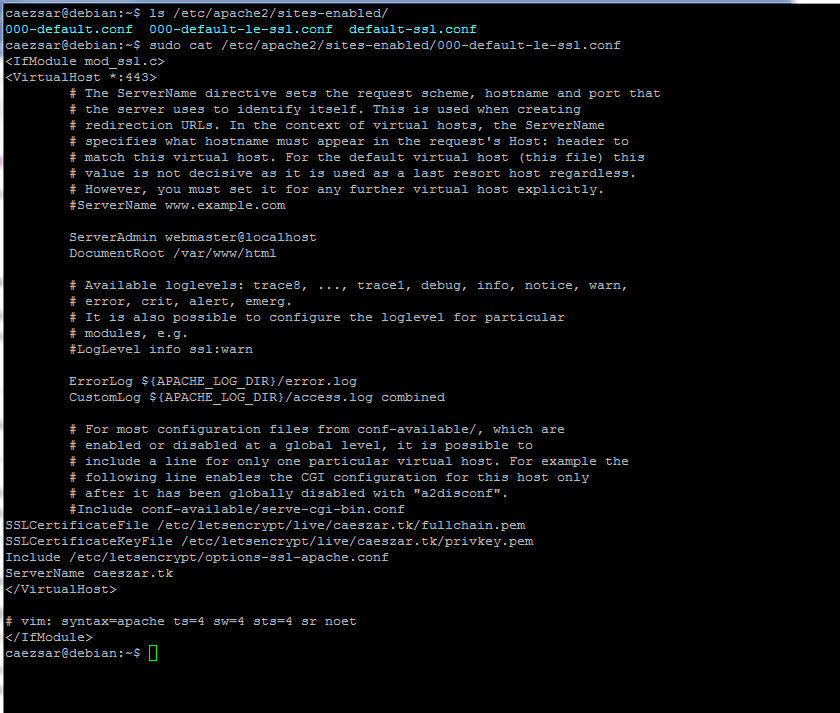
12. Also, Let’s encrypt apache plugin modifies some files in your webserver configuration. In order to check what files had been modified, list the content of /etc/apache2/sites-enabled directory.
# ls /etc/apache2/sites-enabled/
# sudo cat /etc/apache2/sites-enabled/000-default-le-ssl.conf
That’s all for now! On the next series of tutorials will discuss how you can obtain and install a Let’s Encrypt certificate for Nginx webserver on Ubuntu and Debian and on CentOS as well.


After failing when trying to follow this tutorial, I just went to CertBot and got up and running in a couple of clicks.
@Mark,
The certbot instuctions are outdated in this article, we will update the instructions soon…
As of May 2023, when I try this I get “sudo: ./letsencrypt-auto: command not found“. An ls of the letsencrypt directory shows no letsencrypt executable present.
@Mark,
The location has changed, and now the
letsencryptexecutable is present under the letsencrypt-auto-source directory.Thanks so much for the tutorial it helped a lot!
I have a server running on digital ocean single droplet where i am hosting multiple wordpress sites and when i do this for one site it works fine but when i do it for another one the other site gives this message: The certificate is not trusted because it is self-signed.
Everything ran fine, took a while, but got this error at the end
Installation succeeded.
Saving debug log to /var/log/letsencrypt/letsencrypt.log
Plugins selected: Authenticator apache, Installer apache
Obtaining a new certificate
Performing the following challenges:
Client with the currently selected authenticator does not support any combination of challenges that will satisfy the CA.
Client with the currently selected authenticator does not support any combination of challenges that will satisfy the CA.
See this topic: https://community.letsencrypt.org/t/solution-client-with-the-currently-selected-authenticator-does-not-support-any-combination-of-challenges-that-will-satisfy-the-ca/49983/12
if my certificate expire then how can i renew it
Hey, great tutorial works like a charm!
I just got one issue how can I tell CloudFront about the certificate? because when I edit my “Distribution” on Cloudfront and go to edit it to custom SSL it does not let me choose this option but, I see that certificate is there, what I am doing wrong?
Thanks!
@Oliver,
You don’t need to tell about your site’s Let’s Encrypt certificate to CloudFront.. Just use the CloudFront basic settings that’s enough.
I am getting following error, how I can solve this error?
@Homzzang,
Try to execute the command this way..
Thank you very much !!
Thanks to you, I solved this problem.
Hi, just want to let you know that step 4 has 3 dashes instead of 2 in the –apache context, which doesn’t work. Great tutorial otherwise. Thanks!
@Mark,
Yes, there are 3 dashes, instead two, corrected in the writeup and thanks for informing us..
tennis24.ee is a public registered domain name.
Name does not end in a public suffix. The error is self explanatory! It must be a public registred domain name.
Error: urn:acme:error:malformed :: The request message was malformed :: Error creating new authz :: Name does not end in a public suffix