It is every developer’s desire to deploy secure web applications which are safe from threats. On most occasions, this is effortless said than done. The frequency of websites being hacked keeps rising as hackers continue to exploit all attack vectors at their disposal.
WebApp security can be a huge challenge especially with the prevalence of malicious tools such as rootkits, scanners, bots, and other malware. Although getting breached may seem a matter of when if not if, it is prudent to implement some decent security measures to safeguard your web applications.
[ You might also like: 5 Tools to Scan a Linux Server for Malware and Rootkits ]
One of the tools that can provide a decent level of security against attacks is called ModSecurity. This is a free and open-source Web Application Firewall (WAF) that protects your web applications from a vast array of layer 7 attacks such as cross-site scripting (XSS), SQL injection, session hijacking, and many more.
In this guide, we will show you how to install and configure ModSecurity to work with Nginx on Debian-based Linux distributions such as Ubuntu.
Step 1: Install Dependencies
To begin the installation, a number of software dependencies are required for the installation to be successful. But first, update the package lists and refresh the repositories as follows.
$ sudo apt update
Next, install the dependencies as follows.
$ sudo apt install make gcc build-essential autoconf automake libtool libfuzzy-dev ssdeep gettext pkg-config libcurl4-openssl-dev liblua5.3-dev libpcre3 libpcre3-dev libxml2 libxml2-dev libyajl-dev doxygen libcurl4 libgeoip-dev libssl-dev zlib1g-dev libxslt-dev liblmdb-dev libpcre++-dev libgd-dev
Step 2: Install Latest Nginx Version
The next step will be to install the Nginx web browser. To install the latest version, we are going to install it from the ondrej/nginx-mainline PPA w that is currently being maintained by a Debian developer since 2000.
To add the PPA to your local Ubuntu system execute the command:
$ sudo add-apt-repository ppa:ondrej/nginx-mainline -y
Next, update the package lists and install the latest version of Nginx as follows
$ sudo apt update
$ sudo apt install nginx-core nginx-common nginx nginx-full
Typically, only the default repository is enabled. It’s prudent to enable the source code repository so that you can, later on, download the Nginx source code in the next step.
To achieve this, modify the Nginx repository file.
$ sudo vim /etc/apt/sources.list.d/ondrej-ubuntu-nginx-mainline-*.list
Locate and uncomment this line to enable the source code repository:
# deb-src http://ppa.launchpad.net/ondrej/nginx-mainline/ubuntu/ focal main
The file should now appear as shown.

Save the changes and exit.
Then update the package index.
$ sudo apt update
Step 3: Download Nginx Source Package
To compile the ModSecurity dynamic module, we need to download the Nginx source code package. To do this, we will, first, create an Nginx directory in the /usr/local/src/ path to accommodate the Nginx source code package file.
$ sudo mkdir -p /usr/local/src/nginx
Next, assign the directory permissions as shown. Be sure to replace the username with your actual sudo username.
$ sudo chown username:username -R /usr/local/src/
Thereafter, navigate into the Nginx source directory:
$ cd /usr/local/src/nginx
Proceed and download the Nginx source file packages:
$ sudo apt source nginx
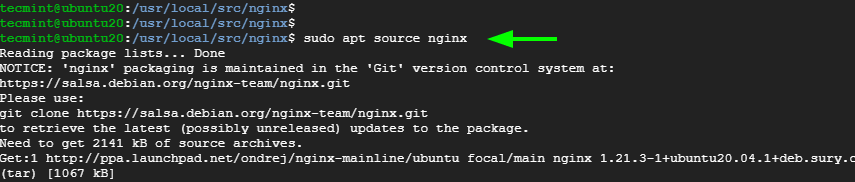
You will most likely get into the following error:
W: Download is performed unsandboxed as root as file 'nginx_1.19.5.orig.tar.gz' couldn't be accessed by user '_apt'. - pkgAcquire::Run (13: Permission denied)
This is nothing to get you worked up. So, simply ignore the error.
You can have a peek at the source file using the ls command.
$ ls -l

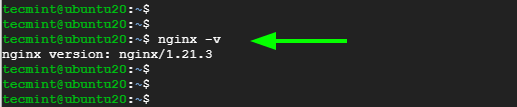
Be sure that the source code version coincides with the version of Nginx installed.
$ nginx -v
Step 4: Install the Libmodsecurity3 Library
Libmodesecurity is a Modsecurity library that handles HTTP filtering for your applications. There are two ways of installing it. You can use the apt package manager as shown
$ sudo apt install libmodsecurity3
The other approach is to install it from a source which is preferable since it provides you with the latest version. To start the installation of Libmodsecurity from the source, clone the git repository as shown:
$ git clone --depth 1 -b v3/master --single-branch https://github.com/SpiderLabs/ModSecurity /usr/local/src/ModSecurity/
Navigate into the cloned directory:
$ cd /usr/local/src/ModSecurity/
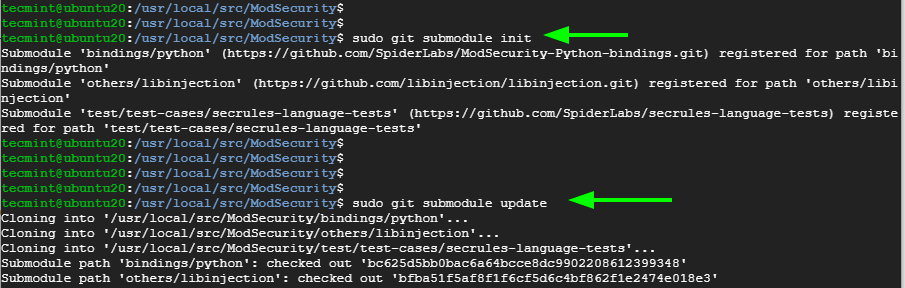
Make a point to install the submodules
$ sudo git submodule init
$ sudo git submodule update
Afterward, build the environment using the commands below.
$ sudo ./build.sh
$ sudo ./configure
Once again, ignore the error displayed below.
fatal: No names found, cannot describe anything.
Then compile the source code and install other utilities using the following make command. This takes around 25 minutes, and some patience is required.
$ sudo make -j4
Once completed, install the libraries.
$ sudo make install
Step 5: Download and Compile ModSecurity v3 Nginx Connector
The next step is to download and compile the ModSecurity Nginx connector. The connector, as the name suggests, links the Libmodsecurity library to the Nginx webserver. To download the Modsecurity connector, Clone it from the GitHub repository as follows.
$ git clone --depth 1 https://github.com/SpiderLabs/ModSecurity-nginx.git /usr/local/src/ModSecurity-nginx/
Navigate into the cloned directory.
$ cd /usr/local/src/nginx/nginx-1.21.3/
Proceed and install build dependencies
$ sudo apt build-dep nginx
$ sudo apt install uuid-dev
Next, compile the ModSecurity Nginx Connector module with the --with-compat flag. The --with-compat option makes the ModSecurity Nginx Connector module binary-compatible with the current Nginx library.
$ sudo ./configure --with-compat --add-dynamic-module=/usr/local/src/ModSecurity-nginx
Once that is done, build the ModSecurity Nginx Connector module using the make command.
$ sudo make modules
The module is saved as objs/ngx_http_modsecurity_module.so. You need to copy this module to the /usr/share/nginx/modules/ directory as follows.
$ sudo cp objs/ngx_http_modsecurity_module.so /usr/share/nginx/modules/
Step 6: Load the ModSecurity Nginx Connector Module
To load the Nginx connector module, First, access the main Nginx configuration file.
$ sudo vim /etc/nginx/nginx.conf
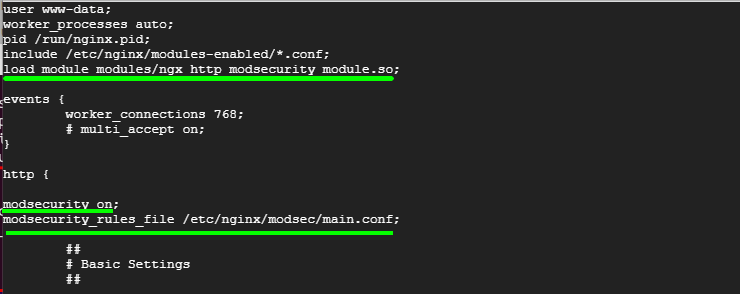
Append the following line just below the first few lines
load_module modules/ngx_http_modsecurity_module.so;
In addition, append the following lines in the http {...} section. This enables ModSecurity for all Nginx virtual hosts.
modsecurity on;
modsecurity_rules_file /etc/nginx/modsec/main.conf;
Save the changes and exit the file.
Next up, create the /etc/nginx/modsec/ directory which will store ModSecurity configuration.
$ sudo mkdir /etc/nginx/modsec/
Next, copy the ModSecurity configuration file as follows.
$ sudo cp /usr/local/src/ModSecurity/modsecurity.conf-recommended /etc/nginx/modsec/modsecurity.conf
Then open the configuration file.
$ sudo vim /etc/nginx/modsec/modsecurity.conf
Locate the line beginning with the SecRuleEngine directive.
SecRuleEngine DetectionOnly
This line instructs ModSecurity to only log HTTP transactions but takes no action in the face of a web app attack. You need to change this so that Modsecurity will not only detect but also block web attacks.
Change the line to the line below
SecRuleEngine On

Save the changes and exit the file.
Next, create the /etc/nginx/modsec/main.conf file.
$ sudo vim /etc/nginx/modsec/main.conf
Append this line to reference the /etc/nginx/modsec/modsecurity.conf configuration file.
Include /etc/nginx/modsec/modsecurity.conf
Save the changes and exit the file.
Additionally, copy the Unicode mapping file.
$ sudo cp /usr/local/src/ModSecurity/unicode.mapping /etc/nginx/modsec/
Then test Nginx configuration.
$ sudo nginx -t

The test should be successful. If not, head back and check if all the changes made are correct.
Then finally, restart Nginx to apply all the changes made.
$ sudo systemctl restart nginx
And verify that Nginx is running as expected.
$ sudo systemctl status nginx
Step 7: Download OWASP Corerule Set
For ModSecurity to protect your web applications, you need to specify rules that are going to detect suspicious activities and block them. To get started, it’s preferable to install existing rule sets that will help you learn the ropes.
The OWASP Core Rule Set (CRS) is a free, open-source, and community-maintained rule set that provides rules to ward off common attack vectors such as SQL injection, Cross-site scripting (XSS).
Download the OWASP Core Rule Set from Github as shown using the wget command.
$ wget https://github.com/coreruleset/coreruleset/archive/v3.3.0.tar.gz
Extract the compressed file.
$ tar xvf v3.3.0.tar.gz
Ensure to move the uncompressed directory to the /etc/nginx/modsec/ path.
$ sudo mv coreruleset-3.3.0/ /etc/nginx/modsec/
Then rename the crs-setup.conf.example file to crs-setup.conf.
$ sudo mv /etc/nginx/modsec/coreruleset-3.3.0/crs-setup.conf.example /etc/nginx/modsec/coreruleset-3.3.0/crs-setup.conf
Again, head back to the ModSecurity configuration file.
$ sudo vim /etc/nginx/modsec/main.conf
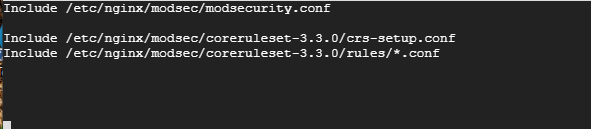
And append the following lines.
Include /etc/nginx/modsec/coreruleset-3.3.0/crs-setup.conf
Include /etc/nginx/modsec/coreruleset-3.3.0/rules/*.conf
The file should now have 3 lines:
Save the file and, once again, restart Nginx.
$ sudo systemctl restart nginx
Step 8: Testing Out ModSecurity
Finally, We are going to carry out a test ModSecurity and confirm it can detect and block suspicious HTTP traffic.
We are going to edit the ModSecurity configuration file and create a blocking rule that will block access to a certain URL when accessed by a web browser.
$ sudo vim /etc/nginx/modsec/modsecurity.conf
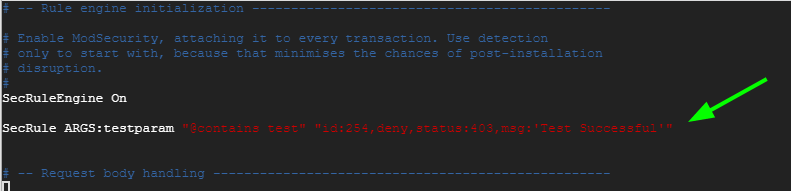
Add this line just below the SecRuleEngine On directive
SecRule ARGS:testparam "@contains test" "id:254,deny,status:403,msg:'Test Successful'"
You can set the ‘id’ and ‘msg’ tags to your preferred values.
Save the changes and restart Nginx.
$ sudo systemctl restart nginx
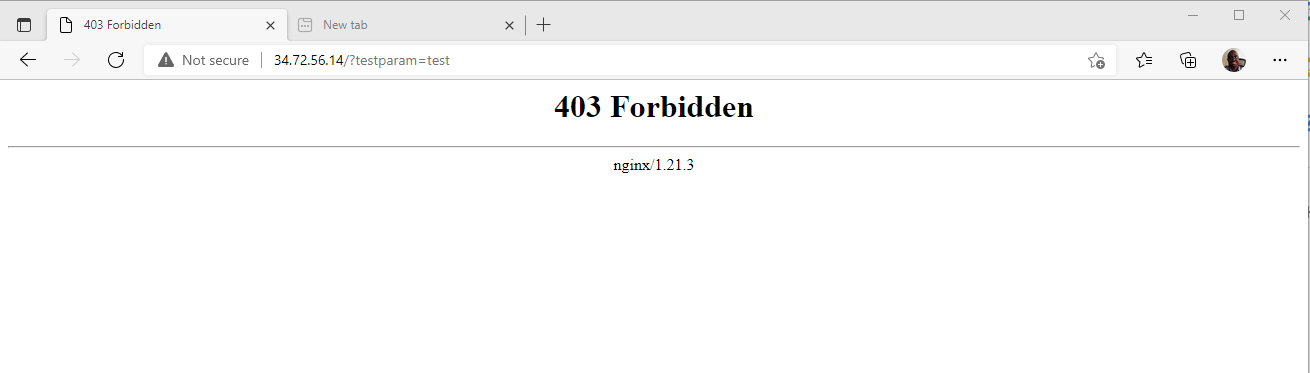
Now launch your browser and visit the URL below with the ?testparam=test suffix
http://server-ip/?testparam=test
You should get a 403 ‘Forbidden’ error. This indicates that you are trying to access a forbidden resource on the webserver.
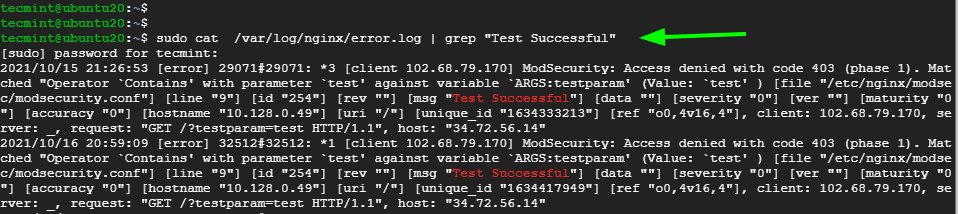
Additionally, you can check the Nginx error logs to confirm that the client was blocked
$ cat /var/log/nginx/error.log | grep "Test Successful"
[ You might also like: How to Set Up ModSecurity with Apache on Debian/Ubuntu ]
That was an overview of how you can set up Modsecurity with Nginx on Debian and Ubuntu. We hope that this has been beneficial.


I have an issue.
nginx -t
nginx: [emerg] dlopen() “/usr/share/nginx/modules/ngx_http_modsecurity_module.so” failed (libfuzzy.so.2: cannot open shared object file: No such file or directory) in /etc/nginx/nginx.conf:1
nginx -v
nginx version: nginx/1.18.0 (Ubuntu)
Did anyone solve this problem?