After my previous tutorials on Zentyal 3.4 running as a PDC, where I have joined only Windows related OS so far, is time to integrate Linux distributions systems to this domain name.
- Install Zentyal as PDC (Primary Domain Controller) and Integrate Windows – Part 1
- Manage Zentyal PDC (Primary Domain Controller) from Windows – Part 2
- Creating Organizational Units and Enableing Group Policy – Part 3
- Setup File Sharing in Zentyal 3.4 PDC – Part 4
Zentyal 3.4 Community Server setup as a Primary Domain Controller acts like a Windows 2003 Server and can easily join all kind of Windows based OS, like Windows XP, 7, 8, 8.1, Server Editions 2003/2008/20012 and can also to a great job on joining Linux Desktop/Server distributions too.
In this setup Ubuntu 13.10 Desktop (or any Ubuntu version) will be integrated into Zentyal PDC with the help of Likewise Open package based on Winbind found on Ubuntu repositories.
Step 1: Integrating Ubuntu in Zentyal PDC
1. On Ubuntu 13.10, open Software & Updates from Dash menu.
2. On Other Software tab check both Canonical Partners.

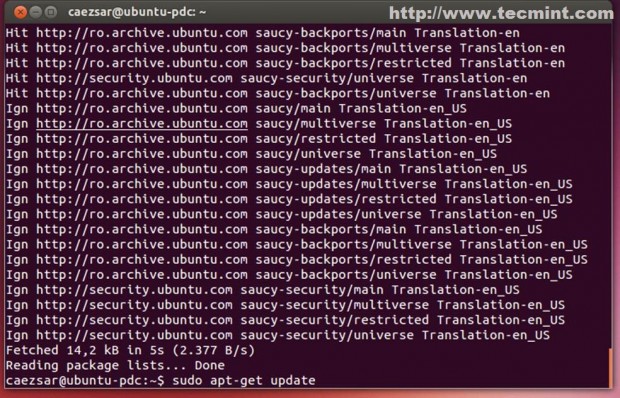
3. Open a Terminal and do a system repository update with “sudo apt-get update” command.
$ sudo apt-get update
4. Then install Likewise Open software packages needed for Ubuntu to join Zentyal 3.4 PDC by running.
$ sudo apt-get install likewise-open-gui

Step 2: Configuring Network Connections
This step is optional, if your system has already Zentyal DNS IP in Network Configuration!.
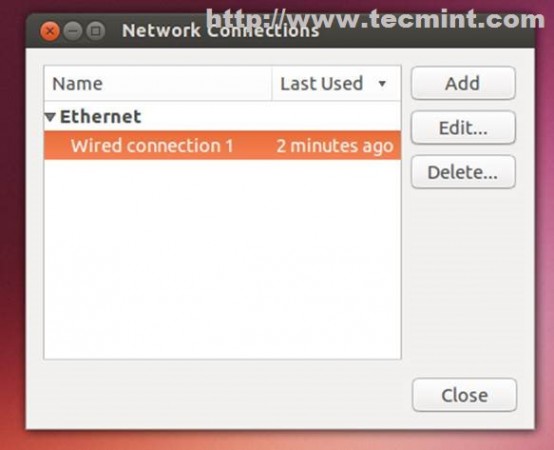
5. Go to Network icon shortcut from upper menu and right click on it and select Edit Connections.
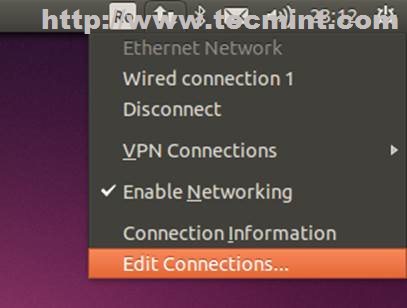
6. Choose your Network Interface that is connected to your Zentyal network and select Edit.
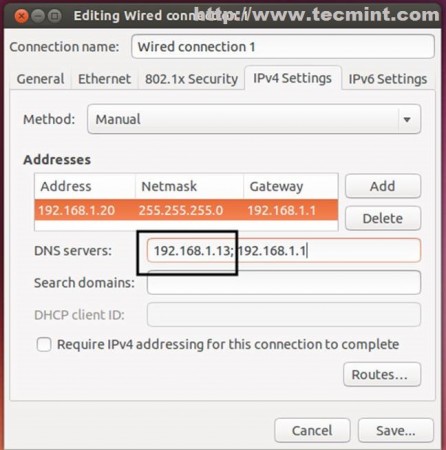
7. Select Manual or Automatic (DHCP) address only ( The important configurations here are your DNS ) and enter all configurations needed hit on Save, close window and verify your configuration. On DNS field enter Zentyal 3.4 IP address.
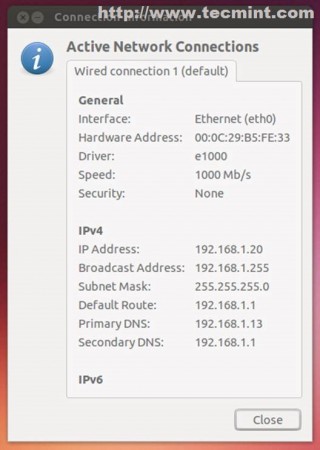
8. To verify that your DNS functionality issue a ping command on domain name.
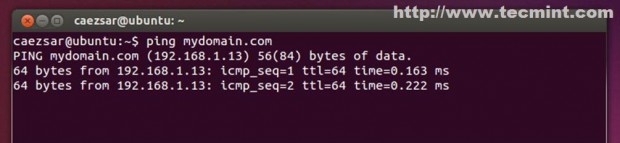
The domain responds from Ubuntu and everything is correctly configured!
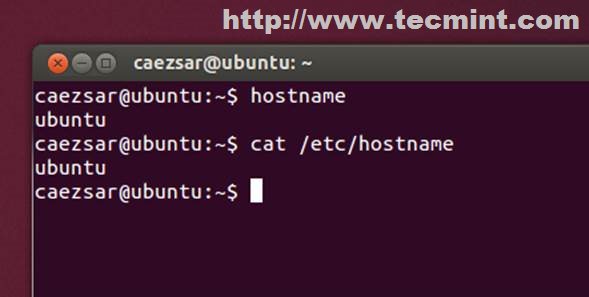
9. As a necessary step verify your Ubuntu hostname ( should respond with your system hostname else edit this file with an file editor like nano ,vi or gedit.
$ hostname
$ cat /etc/hostname
Step 3: Join Ubuntu to Zentyal PDC
10. Now is time to join Ubuntu to Zentyal PDC to be a part of Active Directory. Again open a Terminal and enter the following command and reboot to apply new settings.
$ sudo domainjoin-cli join domain_name domain_administrative_user

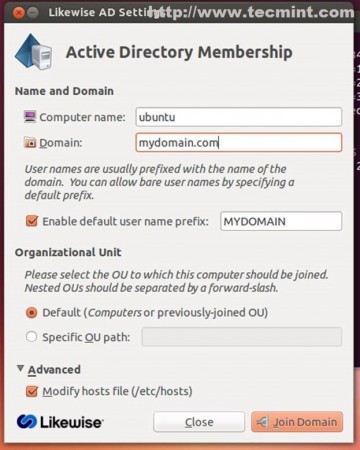
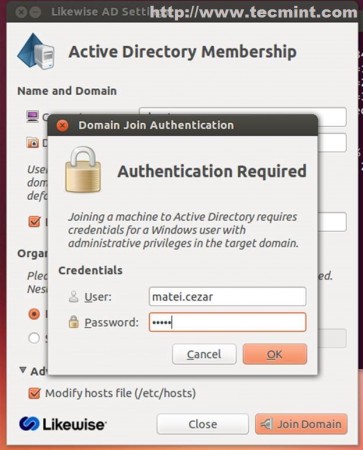
If you prefer doing it from a Graphical User Interface run the following command on the terminal.
$ sudo domainjoin-gui
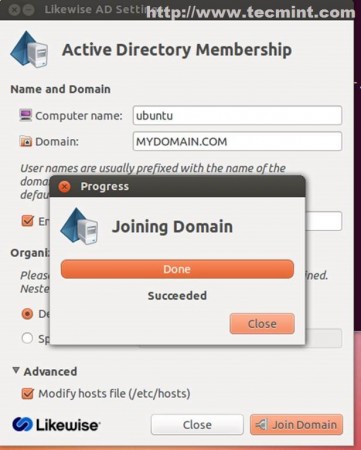
And enter your settings like in the screenshots below.
At the end you will get a success notify from server.
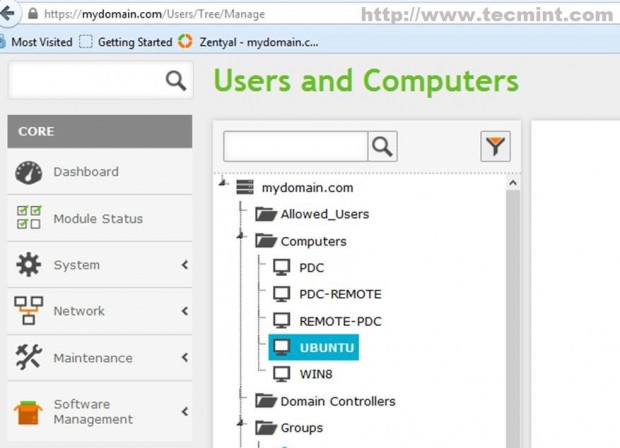
11. To confirm that Ubuntu has been added to Active Directory go to Zentyal Web Administrative Tool ( https://yourdomain_name ), navigate to Users and Computers -> Manage and check if Ubuntu hostname appears in domain forest on Computers.
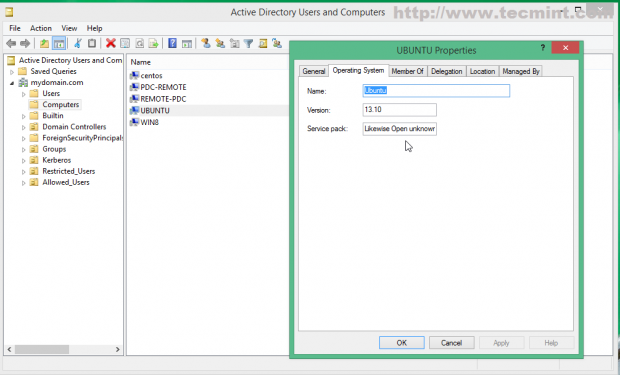
12. As a complementary step you can also verify from a Windows Remote System by running Active Directory Users and Computers.
Step 4: Login to Domain Controller
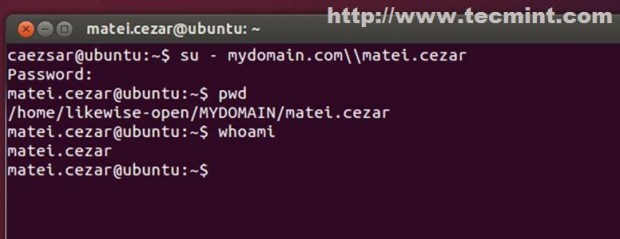
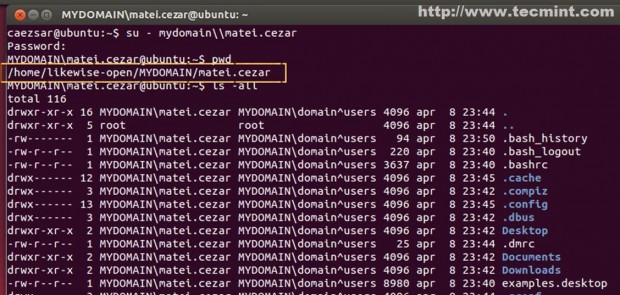
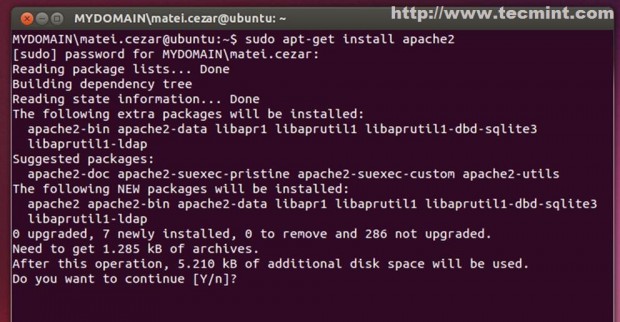
13. To login with a user that belongs to domain use the following structure from Terminal command line.
$ su - domain_name\\domain_user
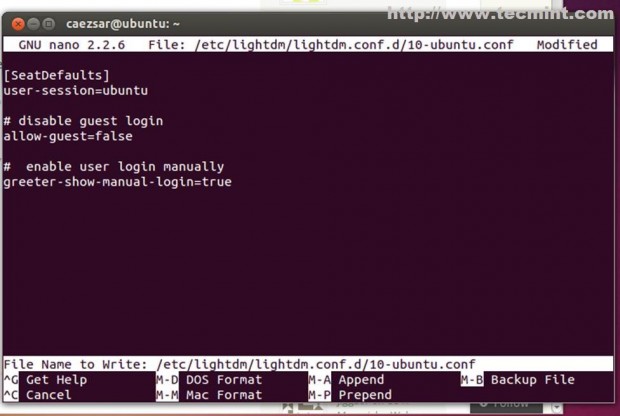
14. To perform a GUI login on Ubuntu 13.04 and Ubuntu 13.10 edit /etc/lightdm/lightdm.conf.d/10-ubuntu.conf file.
$ sudo nano /etc/lightdm/lightdm.conf.d/10-ubuntu.conf

Add the following lines at the bottom of the file.
allow-guest=false
greeter-show-manual-login=true
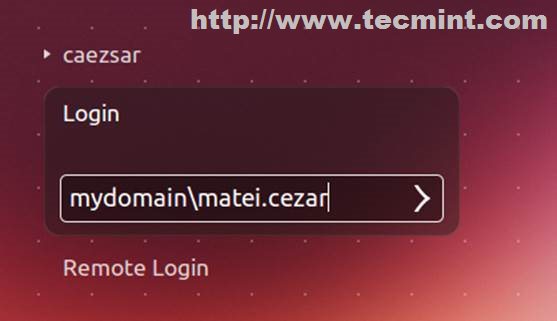
15. Then go on Ubuntu Login screen, select Login using keyboard arrows and enter.
domain_name\domain_user
OR
domain_name.tld\domain_user
OR
domain_user
16. Now you can login on Ubuntu with remote users belonging to Zentyal PDC Active Directory and their default profile will be located on.
/home/likewise-open/DOMAIN_NAME/domain_user
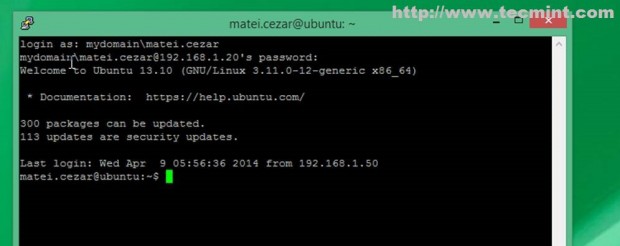
17. To remote login from Putty use this login structure.
domain_name\domain_user
Step 5: Enable Active Directory Administrative Rights
18. By default Ubuntu doesn’t allow remote users from Active Directory to perform administrative tasks on system or to empower the root account with sudo.
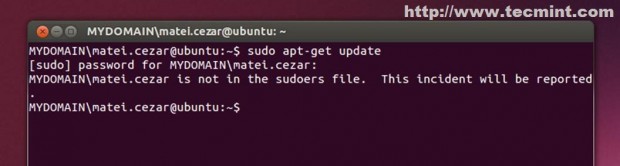
19. To enable Zentyal PDC Active Directory Administrative User with root powers on Ubuntu edit /etc/sudoers file.
$ sudo nano /etc/sudoers
20. Navigate under root privilege line and add your Zentyal Administrative user with the following lines.
DOMAIN_NAME\\domain_administrative_user    ALL=(ALL)  ALL
the_same_domain_administrative_user   ALL=(ALL)  ALL
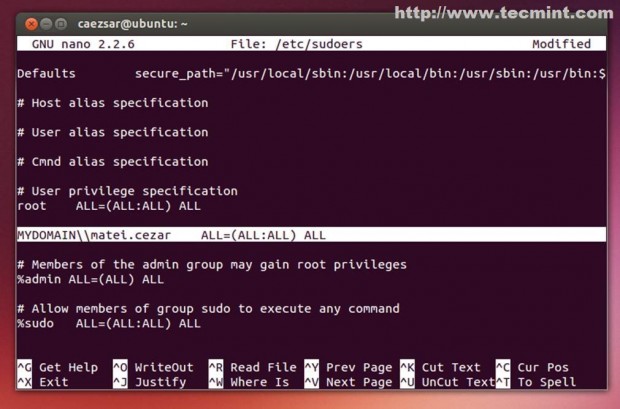
21. As demonstrated now Zentyal 3.4 PDC Administrative User has full root power on Ubuntu system ( edit configuration files , install/remove software packages , manage services and all sorts of administrative tasks).
As a final conclusion Ubuntu can be integrated to Zentyal PDC Active Directory easily with the remark that Windows GPO doesn’t apply on Linux systems!

Hi,
I have done for Ubuntu as well, domain user can login over the Ubuntu machine.
Is there any way to apply GPO on Ubuntu Machine ? ANY WAY???
am not going to use lots of gpo for Ubuntu, I have only need for Desktop Infra, I want to be set static wallpaper of all Ubuntu machine. How it is possible ? I just do lot of afford over google but not getting any affordable solution, it’s a big challenge for me.
It will be really appreciating for help.
Thanks
Pankaj
Hi,
is there any options in zentyal firewall 4.0 that i can authenticat active directory users in zentyal openVPN.
pl. reply
Thank you.
Brilliant tutorial. Very easy to follow. Worked perfectly on my Mint 16 laptop.
One quick suggestion as a replacement for step 20:
instead of entering details of a specific user in sudoers, why not specify the AD Domain Admins group instead by adding this line:
# Allow AD Domain Admins full access to commands
%domain^admins ALL=(ALL:ALL) ALL
Use the following tutorial for Ubuntu 14.04: https://www.tecmint.com/integrate-ubuntu-14-04-to-zentyal-pdc/
Thanks for a nice how-to and let me ask a question about your suggestion “what next”, now in 14.04. I have used Likewise as well and it worked perfect. But with new release of Ubuntu and deleting Likewise from repository is now the question which way to choose. Install manually the old Likewise 6, install manually newer version like Pbis 8, configure manually winbind and pam or something different like Sadms. Nothing of them is so smooth as Likewise installed from repository was. Do you have some experience? Any suggestion?