After my previous two tutorials on installing, basic configurations and remotely accessing Zentyal PDC from a Windows-based node it’s time to apply some degree of security and configurations on your users and computers that are joined onto your domain through creating Organizational Units (OU) and enabling GPO (Group Policy).
Requirements
- Install Zentyal as PDC (Primary Domain Controller) and Integrate Windows System – Part 1
- How to Manage Zentyal PDC (Primary Domain Controller) from Windows System – Part 2
As you might already know GPO is software that controls user accounts, computers, work environments, settings, applications, and other security-related issues from a central point on all Windows desktop and server Operating Systems.
This subject is a very complex one and tons of documentation have been published on the subject but this tutorial covers some basic implementation on how to enable GPO on users and computers joined in a Zentyal PDC Server.
Step 1: Create Organizational Units (OU)
1. Access your Zentyal Web Administration Tools through domain or IP address and go to Users and Computers Module –> Manage.
https://your_domain_name:8443
OR
https://your_zentyal_ip_addess:8443
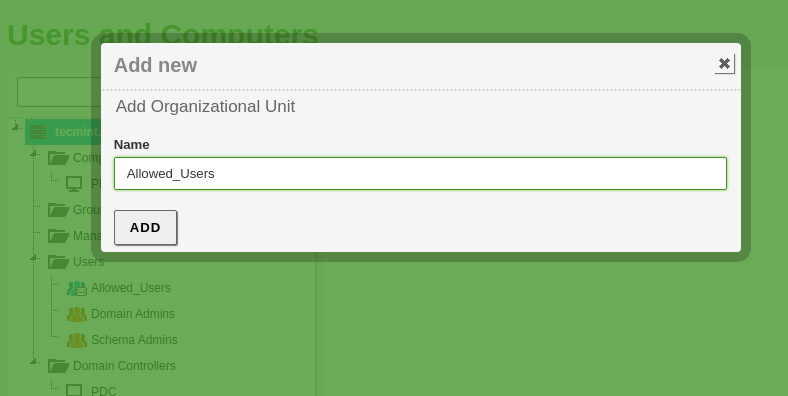
2. Highlight your domain, click on the green “+” button, select Organizational Unit, and on the prompt enter your “Organizational Unit Name” (choose a descriptive name) and then shoot on Add ( OU’s can also be created from Remote Administrative Tools like Active Directory Users and Computer or Group Policy Management).
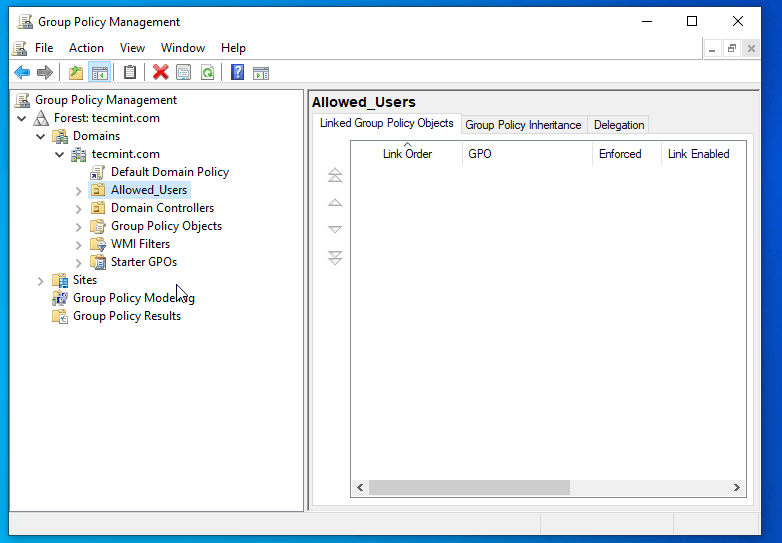
3. Now go to your Windows Remote System and open the Group Policy Management shortcut (as you can see your newly created Organizational Unit appears on your domain).
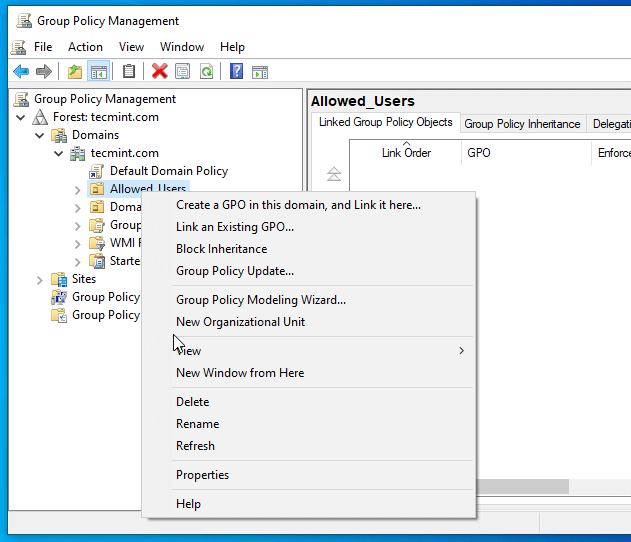
4. Right-click on your Organization Name just created and select Create a GPO in this domain, and Link it here…
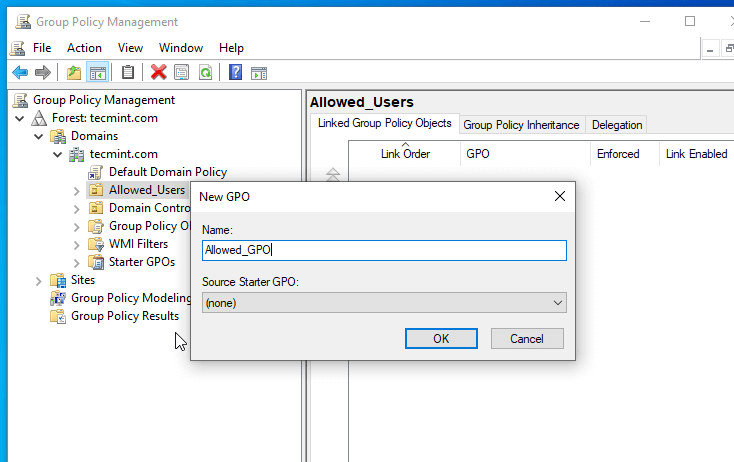
5. On the New GPO prompt enter a descriptive name for this new GPO and then hit OK.
6. This creates your GPO Basic File for this Organizational Unit but has no settings configured yet. To start editing this file right click on this file name and select Edit.
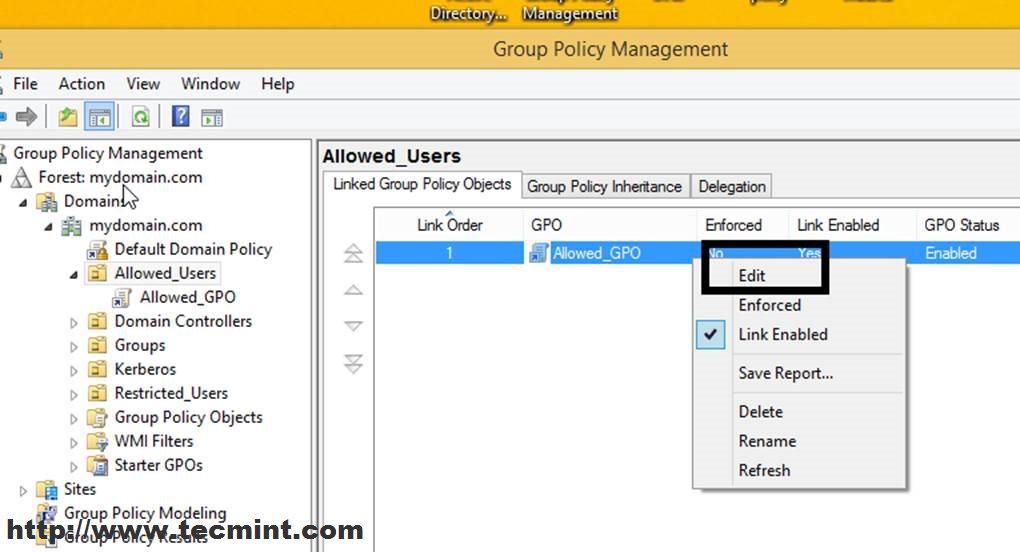
7. This will open Group Policy Management Editor for this file (these settings will apply only to users and computers moved to this OU).

8. Now let’s start to configure some simple settings for this Group Policy File.
Here are some basic settings
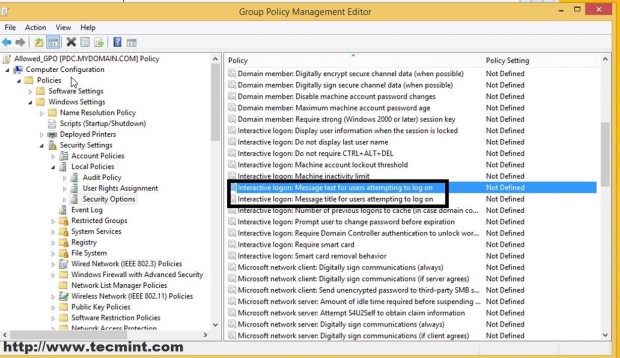
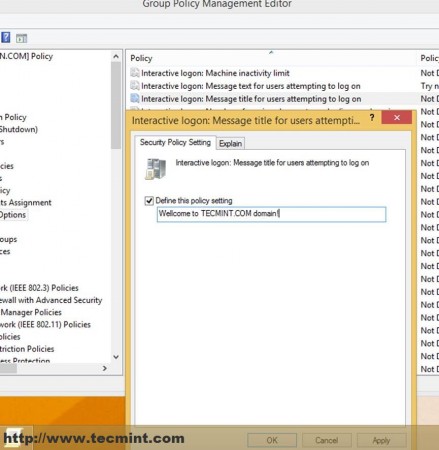
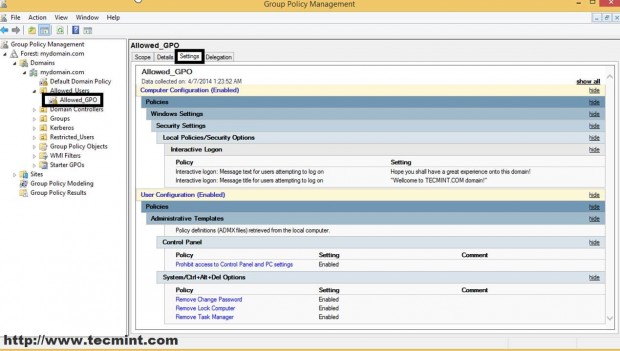
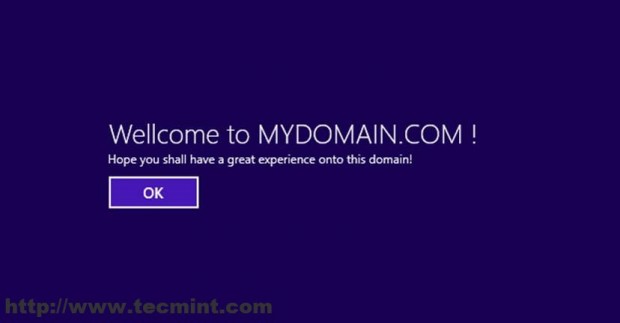
A. Navigate to Computer Configuration –> Windows settings –> Security Settings –> Local Policies –> Security Options –> Interactive Logon –> Message text/title for users attempting to logon, enter some text on Define this policy settings on both settings and hit OK.
WARN: To apply this setting on your entire domain users and computers so far you should select and edit the Default Domain Policy file on the Domain Forest List.
B. Navigate to User Configuration –> Policies –> Administrative Templates –> Control Panel –> prohibit Access to Control Panel and PC Settings, double click and select Enabled.
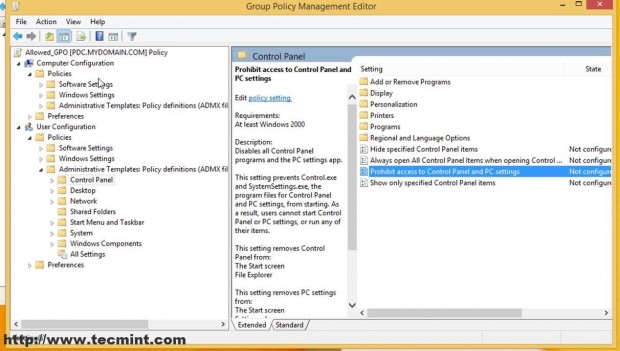
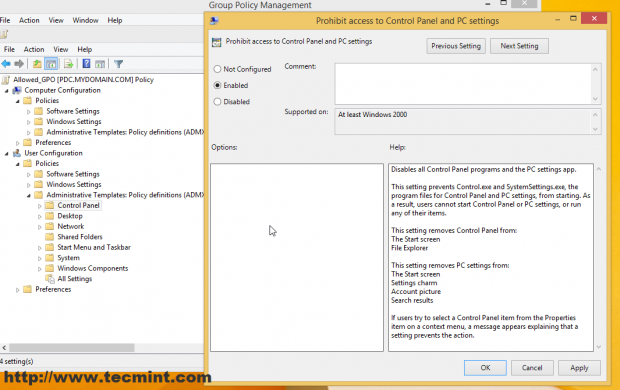
You can do all sorts of security settings related to Users and Computers for this Organizational Unit (only your needs and imagination is the limit ) like the ones in the screenshot below but that’s not the purpose of this tutorial (I have configured this only for demonstrating).
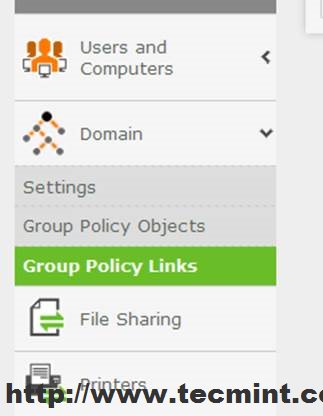
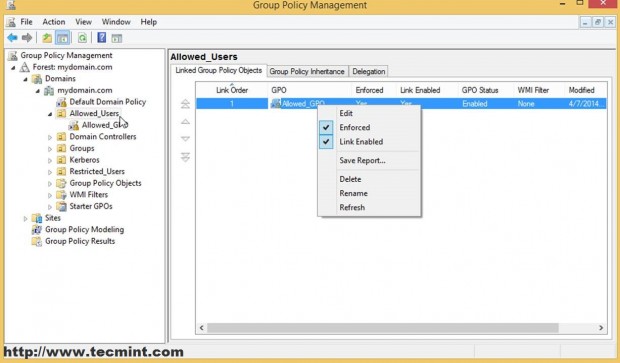
9. After you have done all your security settings and configurations close all windows and go back to Zentyal Web Admin Interface ( https://mydomain.com ), go to Domain Module –> Group Policy Links, highlight your GPO file from your domain Forest, select both Links Enabled and Enforced and hit on Edit button to apply settings for this OU.
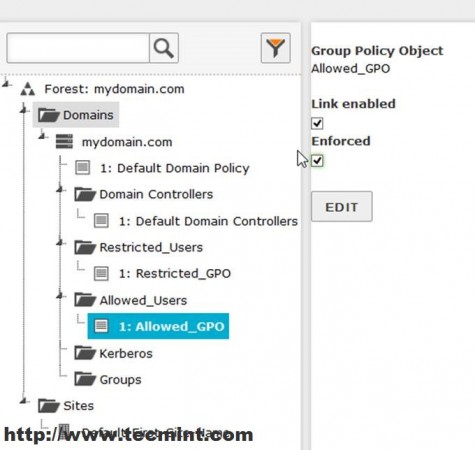
As you can see from Windows Group Policy Management remote tool this policy has been enabled on OU.
You can also see a list of all your OU GPO settings by clicking on the Settings tab.
10. Now for actually being able to see your new settings applied just reboot twice your Windows machines joined in this domain to see the effect.
Step 2: Add Users to Organizational Units (OU)
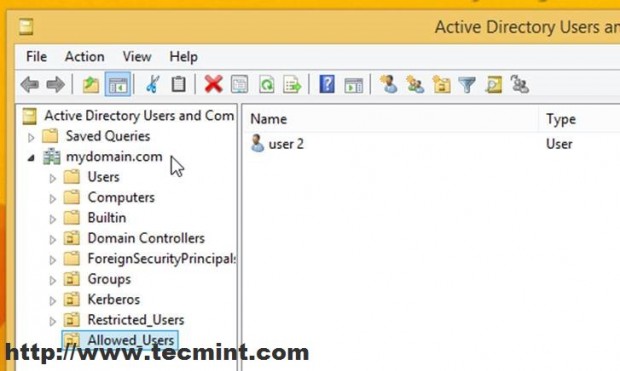
Now, let’s add a user into our new OU to effectively apply these settings. Let’s say that you have some doubts about user2 on your domain and you what him to have restrictions imposed by Allowed_User OU GPO.
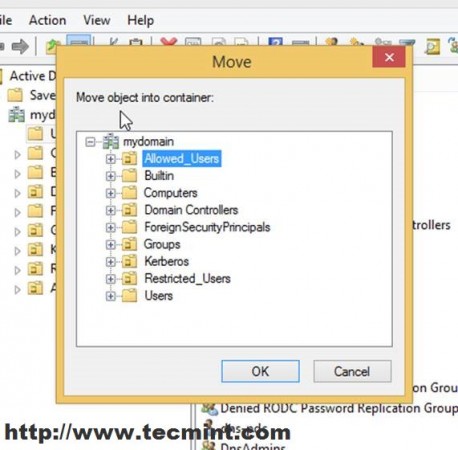
11. On Windows Remote Machine open Active Directory Users and Computers, navigate to Users, select user2, and do a right-click for menu appearance.
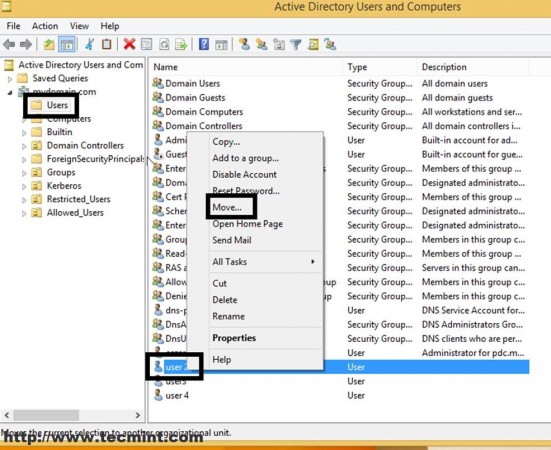
12. On the Move window prompt select Allowed_Users OU and hit OK.
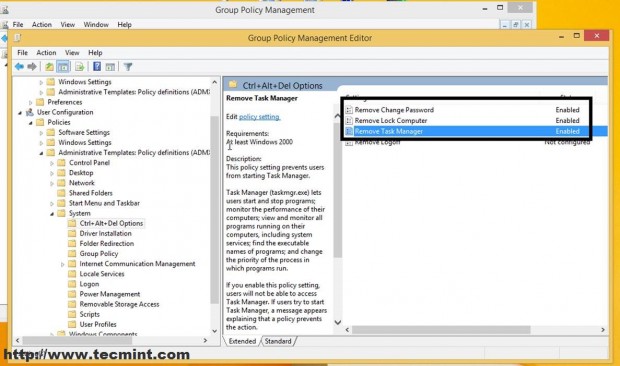
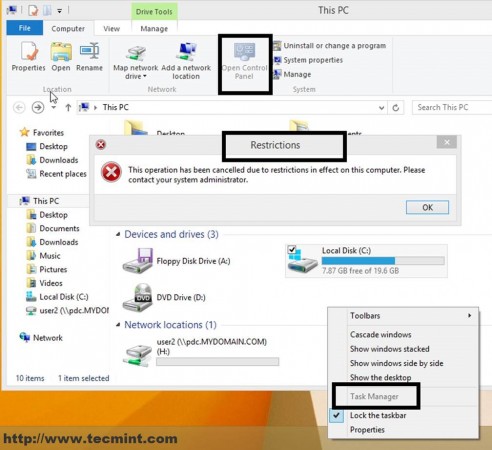
Now all settings on this GPO will apply to this user as soon as he logs back in the next time. As proven this user does not have access to Task Manager, Control Panel or other related computer settings joined into this domain.

All of these settings were made possible under a server running a Linux-based distribution, Zentyal 7.0, with free open-source software, Samba4, and LDAP, that acts almost like a Windows genuine Server and a few remote management tools that are available on any Windows Desktop machine.
When I try to add Forest to Group Policy Management this message appear “No mapping between account names and security IDs was done”
I’m using admin user.
What can I do?
Sir I am creating one OU FOR example IT and I create various user e.g (a,b,c,d,e,f user) and apply policies remove computer icon. but i want to (e user) not applied policies.
So please tell me procedure.
thanks
Hi Matei,
I followed all the instructions you wrote and it works fine, but one thing I found is that in my original setup, all users can access their home directory from any device the logged in within the network. Now they can’t, I think it probably related to LDAP or something from the instructions you gave. Some users cannot login completely as their profile is not exist though I have not deleted any user profile.
What might be the problem..?
Thanks.
The GPO can be edited only by installing RSAT (Group Policy management) on a Windows side machine and remotely connect to Zentyal BDC.
The enabled flag is settable in Window admin Grp Pol. Management, so I did it that way. There do seem to be some functional and menu differences between v. 3.4 and 4.1.
Greetings Matei,
I hit a stone wall at Step 1: #9 on this one. The Domain Module in Zentytal ver. 4.1 only has Settings in the sub-menu with no way to view/edit GPO’s or GPL’s. Nothing about this in the Forum discussions.
Yeah they removed all of the GPO UI functionality in Zentyal 4.1 so you must use RSAT to create, edit, link or even view your GPOs now. Watch out though, there are a couple of windows updates that will prevent you from being able to connect to Zentyal with RSAT as well! There is a bunch of info about that around online.
MAN YOU’RE THE BOSS!!!
Hello ! I got a request of the Group Policy Management in windows 7 fail to add that GPO ( Allowed_GPO ) tells me that I have access to all that are connected to the win with a user from Domain Admins created zentyal where wrong ? or how can I give rights to a user to have full access to the Group Policy Management.
Is your user3 added to the right GPO?
yes, it is, only working Default Domain Policy. Other policys didnt work :S
Hi again, Finally i can access to de GPOs and all this stuff, but my GPOs didn´t work. If i modify “Default Domain Policy” only my user “administrator” have applied this GPO, other domain users no, and allowed_GPO not work for users3…
Can you tell me where is the problem??
thank you!
Hi,
Great tutorials, I’m gonna test all that soon. Go on!!
Hi!
Thank you so much for all your tutorials, there are very useful!
I have some problems with zentyal 3.4 and Group Policy Management. I have my domain (medsan.net), DNS, all right, Samba works, DHCP works, everything is fine.
Then, I have a virtual machine with windows 7 Professional x32. It is on my medsan domain. I enter with a user called “Administrator” (he is in Domain Admins group so i think he is an admin, right?). But, when I try to create a new GPO in the windows 7 Group Policy Management, it says “Access Denied” or when i try to edit Default domain policy.
what is the problem here? :S
Thank you! waiting for an answer. Im doing a school project with zentyal :)
Hi,
I am big fan of your tutorials please keep continue your ingeniously simplified tutorials
@Ivan : You cannot edit LDAP schema on Zentyal from Web admin tool but you shoud try add object fields form a Windows RSAT Active Directory…the LDAP schema can be edited from command line also but the changes are not permanent (they will be rewritten) .
@Shaunx : I don’t understand what you mean? The basic GPO file can be created from Zentyal but for editing GPO setting you must use Group Policy Management from Windows RSAT.The file will then behave in the same way as a genuine GPO file created from AD.
Thanks man,
I know how to edit LDAP schema, just wanted to make sure that this is supported in Zentyal. Didn’t get a chance to test it yet.
Hi Matei, can I make a question??? Can a GPO that’s created by Zentyal work correctly like Window’s AD???
Is it possible to edit the schema in a Zentyal domain and add new fields to objects ?
Nothing to say but Clap Clap, thanks !