One of the challenges developers faced in the past is getting applications to run reliably across multiple computing environments. Oftentimes, applications didn’t run as expected or encountered errors and failed altogether. And that’s where the concept of containers was born.
What are Container Images?
Container images are static files that ship with executable code that runs in an isolated environment. A container image comprises system libraries, dependencies & other platform settings needed by the application to run in diverse environments.
Red Hat Linux provides a set of useful container tools that you can leverage to work directly with Linux containers using requiring docker commands. These include:
- Podman – This is a daemon less container engine for running and managing OCI containers in either root or rootless mode. Podman is similar to Docker and has the same command options except that Docker is a daemon. You can pull, run, and manage container images using podman in much the same way as you would with Docker. Podman comes with lots of advanced features, fully integrates with systems, and offers user Namespace support which includes running containers without the need for a root user.
- Skopeo: This is a command-line tool used for copying container images from one registry to another. You can use Skopeo to copy images to and from a particular host as well as copy images to another container registry or environment. Apart from copying images, you can use it to inspect images from various registries and use signatures to create and verify images.
- Buildah: This is a set of command-line tools used for creating and managing container OCI images using Docker files.
In this article, we will focus on Managing containers using podman and Skopeo.
Searching Container Images from a Remote Registry
The podman search command allows you to search selected remote registries for container images. The default list of registries is defined in the registries.conf file located in the /etc/containers/ directory.
The registries are defined by 3 sections.
- [registries.search] – This section specifies the default registries that podman can search for container images. It searches for the requested image in the registry.access.redhat.com, registry.redhat.io, and docker.io registries.
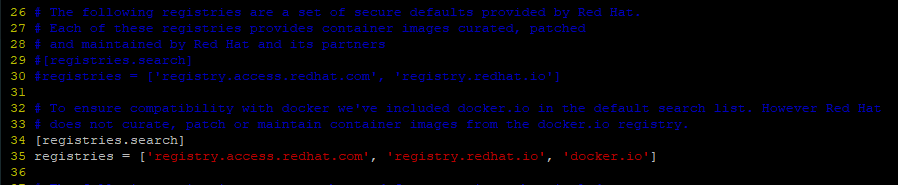
- [registries.insecure]– This section specifies registries that do not implement TLS encryption i.e insecure registries. By default, no entries are specified.

- [registries.block] – This blocks or denies access to the specified registries from your local system. By default, no entries are specified.

As a regular (non-root) user running the podman command, you can define your own registries.conf file on your home directory ($HOME/.config/containers/registries.conf) to override system-wide settings.
Rules When Specifying Registries
As you specify the registries, keep in mind the following:
- Every registry should be enclosed by single quotes.
- Registries can be specified using either a hostname or IP address.
- If multiple registries are specified, then they should be separated by commas.
- If a registry uses a non-standard port – either port TCP ports 443 for secure and 80 for insecure, – the port number should be specified alongside the registry name e.g. registry.example.com:5566.
To search a registry for a container image using the syntax:
# podman search registry/container_image
For example, to search for a Redis image in the registry.redhat.io registry, invoke the command:
# podman search registry.redhat.io/redis

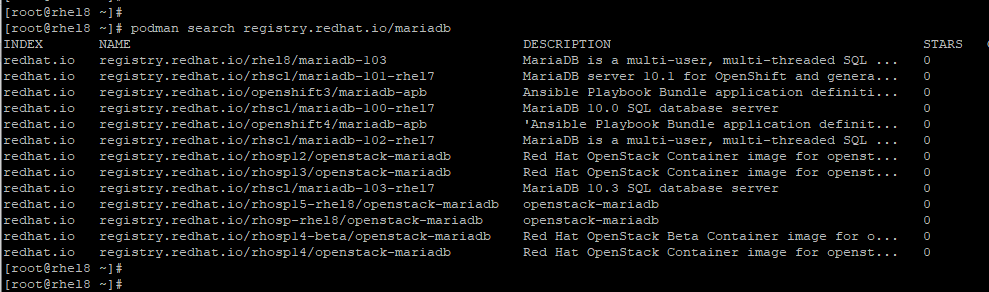
To search for a MariaDB container image run.
# podman search registry.redhat.io/mariadb
To obtain an elaborate description of a container image, use the --no-trunc option before the name of the container image from the results that you get. For instance, we will try to obtain a detailed description of the MariaDB container image as shown:
# podman search --no-trunc registry.redhat.io/rhel8/mariadb-103

Pulling Container Images
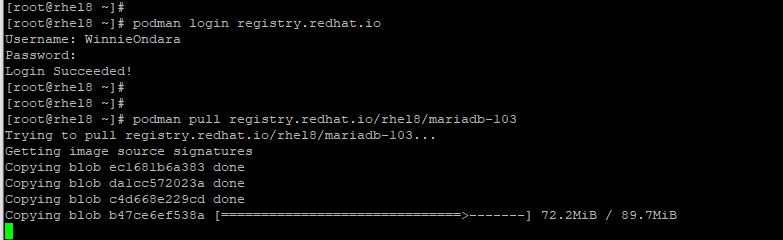
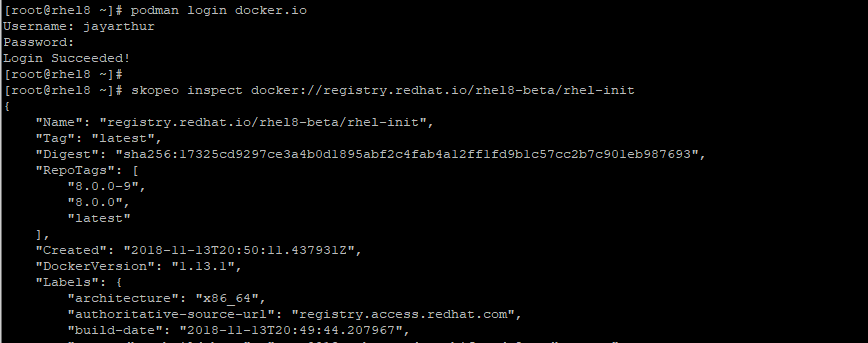
Pulling or retrieving container images from a remote registry requires that you first authenticate before anything else. For example, to retrieve the MariaDB container image, first log in to the Redhat registry:
# podman login
Provide your username and password and hit ‘ENTER‘ on your keyboard. If all goes well, you should get a confirmation message that the login to the registry was successful.
Login Succeeded!
Now, you can pull the image using the syntax shown:
# podman pull <registry>[:<port>]/[<namespace>/]<name>:<tag>
The <registry> refers to the remote host or registry that provides a repository of container images on the TCP <port>. The <namespace> and the <name> collectively specify a container image based on the <namespace> at the registry. Finally, the <tag> option specifies the version of the container image. If none is specified, the default tag – latest – is used.
It’s always recommended to add trusted registries, that is those that provide encryption and don’t allow anonymous users to spawn accounts with random names.
To pull the MariaDB image, run the command:
# podman pull registry.redhat.io/rhel8/mariadb-103
- The
<registry>– registry.redhat.io - The
<namespace>– rhel8 - The
<name>– MariaDB - The
<tag>– 103
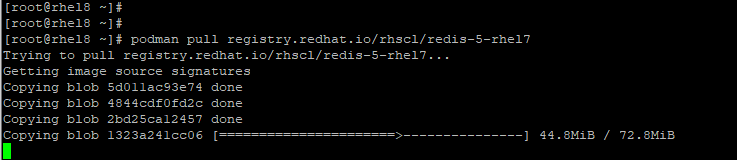
For subsequent container images pull, no further logging in is required since you are already authenticated. To pull a Redis container image, simply run:
# podman pull registry.redhat.io/rhscl/redis-5-rhel7
Listing Container Images
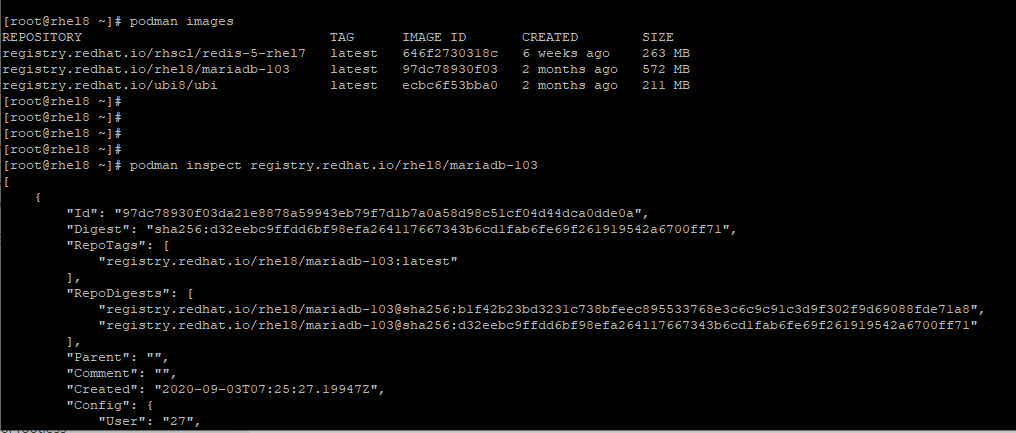
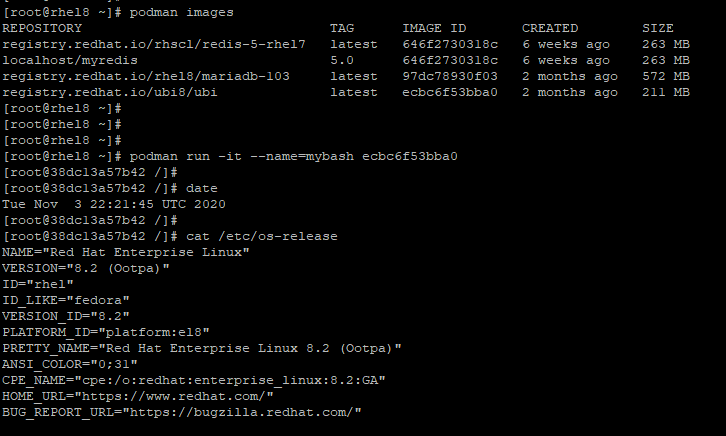
Once you are done pulling the images, you can view the images currently existing on your host by running the podman images command.
# podman images

Inspecting Container Images
Before running a container, it’s always a good idea to probe the image and get to understand what it does. The podman inspect command prints out a sea of metadata about the container such as the OS and Architecture.
To inspect an image, run the podman inspect command followed by the image ID or repository.
# podman inspect IMAGE ID
OR
# podman inspect REPOSITORY
In the example below, we’re inspecting the MariaDB container.
# podman inspect registry.redhat.io/rhel8/mariadb-103
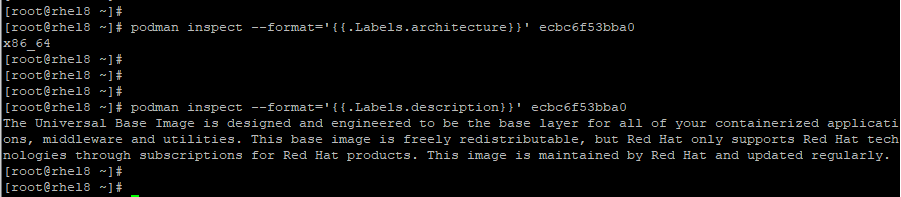
To pull specific metadata for a container pass the --format option followed by the metadata and the container identity ( Image ID or name ).
In the example below, we’re retrieving information about the architecture and description of the RHEL 8 base container which falls under the ‘Labels’ section.
# podman inspect --format=’{{.Labels.architecture}}’ image ID
# podman inspect --format=’{{.Labels.description}}’ image ID
To inspect a remote image from another registry, use the skopeo inspect command. In the example below, we are inspecting an RHEL 8 init image hosted on Docker.
# skopeo inspect docker://registry.redhat.io/rhel8-beta/rhel-init
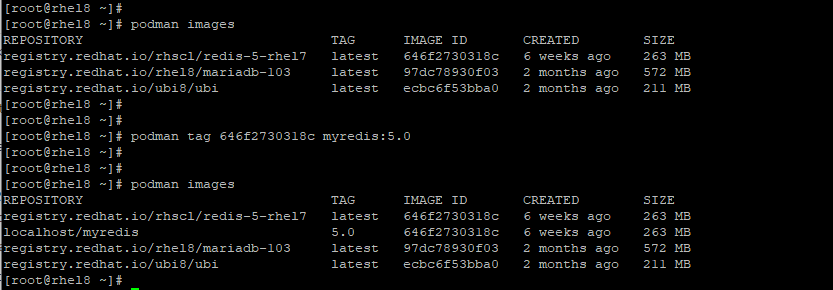
Tagging Container Images
As you might have noted, image names are usually generic in nature. For example, the redis image is labeled:
registry.redhat.io/rhscl/redis-5-rhel7
Tagging images gives them a more intuitive name to better understand what they contain. Using the podman tag command, you can create an image tag which is essentially an alias to an image name that comprises different parts.
These are:
registry/username/NAME:tag
For example, to change the generic name of the Redis image which has an ID of 646f2730318c , we will execute the command:
# podman tag 646f2730318c myredis
To add a tag at the end append a full colon followed by the tag number:
# podman tag 646f2730318c myredis:5.0
Without adding the tag number, it will just be assigned the attribute latest.
Running Container Images
To run a container, use the podman run command. For example:
# podman run image_id
To run a container silently in the background as a daemon service use the -d option as shown.
# podman run -d image_id
For example, to run the redis image with ID 646f2730318c, we will invoke the command:
# podman run -d 646f2730318c

If you are running a container based on an operating system such as RHEL 8 base image, you can gain access to the shell using the -it directive. The -i option creates an interactive session while the -t spawns a terminal session. The --name option sets the container name to mybash while is the ecbc6f53bba0 image id of the base image.
# podman run -it --name=mybash ecbc6f53bba0
Thereafter, you can run any shell commands. In the example below, we are verifying the OS version of the container image.
# cat /etc/os-release
To exit the container, simply invoke the exit command.
# exit
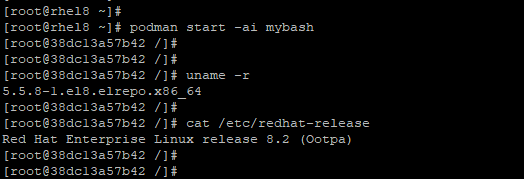
Once the container is exited, it automatically stops. To start the container again, use the podman start command with the -ai flag as shown.
# podman start -ai mybash
Once again, this gives you access to the shell.
Listing Running Container Images
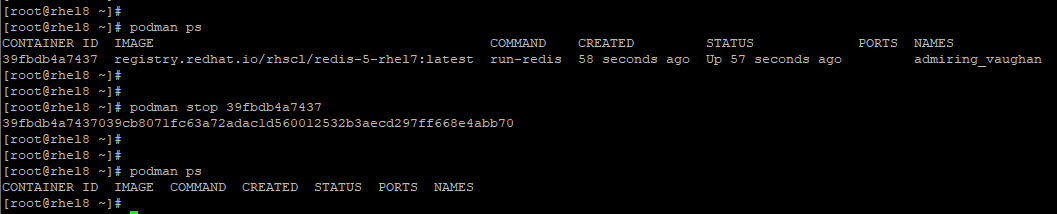
To list currently running containers, use the podman ps command as shown.
# podman ps

To view all containers including those ones that have exited after running, use the command:
# podman ps -a

Configure Container Images to Auto Start Under Systemd Service
In this section, we focus on how a container can be configured to run directly on an RHEL system as a systemd service.
First, get your preferred image. In this case, we have pulled the Redis image from docker hub:
# podman pull docker.io/redis
If you have SELinux running on your system, you need to activate the container_manage_cgroup boolean to run containers with systemd.
# setsebool -p container_manage_cgroup on
Thereafter, run the container image in the background and assign it to your preferred image name. In this example, we have named our image redis_server and mapped the port 6379 from the container to our RHEL 8 host
# podman run -d --name redis_server -p 6379:6379 redis

Next, we are going to create a systemd unit configuration file for redis in the /etc/systemd/system/ directory.
# vim /etc/systemd/system/redis-container.service
Paste the content below to the file.
[Unit]
Description=Redis container

[Service]
Restart=always
ExecStart=/usr/bin/podman start -a redis_server
ExecStop=/usr/bin/podman stop -t 2 redis_server

[Install]
WantedBy=local.target
Save and exit the file.
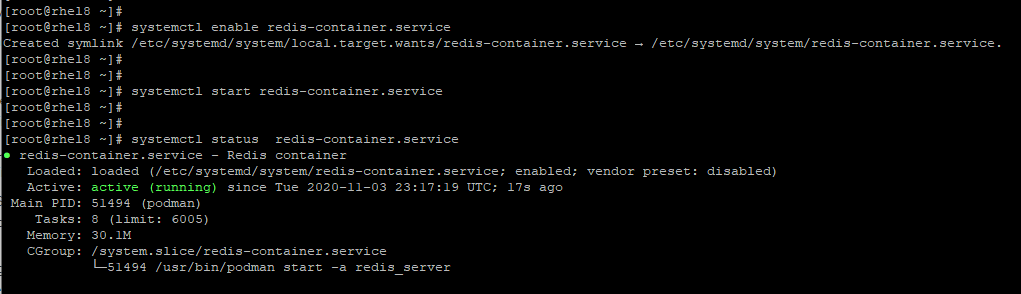
Next, configure the container to start automatically on bootup.
# systemctl enable redis-container.service
Next, start the container and verify its running status.
# systemctl start redis-container.service
# systemctl status redis-container.service
Configure Persistent Storage for Container Images
When running containers, it’s prudent to configure persistent external storage on the host. This provides a backup in case the container crashes or gets removed accidentally.
To persist the data, we are going to map a directory located in the host to a directory inside the container.
$ podman run --privileged -it -v /var/lib/containers/backup_storage:/mnt registry.redhat.io/ubi8/ubi /bin/bash
The --privileged option is passed when SELinux is set to enforcing. The -v option specifies the external volume which is located on the host. The container volume here is the /mnt directory.
Once we have accessed the shell, we are going to create a sample file testing.txt in the /mnt directory as shown.
$ echo "This tests persistent external storage" > /mnt/testing.txt
We will then exit the container and check whether the file exists in the external storage residing on the host
# exit
# cat /var/lib/containers/backup_storage/testing.txt
Output ⇒ This tests persistent external storage.

Stopping and Removing Containers
Once you are done with running your container, you can stop it using the podman stop command followed by the container-id which you can obtain from the podman ps command.
# podman stop container-id
To remove the containers that you no longer need, first, ensure that you stop it and then invoke the podman rm command followed by the container id or name as an option.
# podman rm container-id
To remove multiple containers at a go in one command, specify the container ids separated by a space.
# podman rm container-id-1 container-id-2 container-id-3

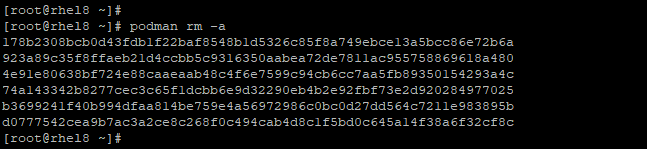
To clear all your containers, run the command:
# podman rm -a
Removing an Image
To remove an image, first, ensure that all containers spawned from the images are stopped and removed as discussed in the previous sub-topic.
Next, proceed and run the podman -rmi command followed by the ID of the image as shown:
# podman -rmi image-id

Conclusion
This wraps up this chapter on managing and working with containers in RHEL 8. We hope this guide provided a decent understanding of containers and how you can interact and manage them on your RHEL system using podman and Skopeo.
In the Removing an Image section you need to remove the – from -RMI, otherwise it fails.
We can also use the podman to generate commands instead of creating the file manually.
Thank you for the awesome explanation.
*a correction – just the setsebool will have
-Pinstead of-p.