Continuing the previous tutorial on how to administer Samba4 from Windows 10 via RSAT, in this part we’ll see how to remotely manage our Samba AD Domain controller DNS server from Microsoft DNS Manager, how to create DNS records, how to create a Reverse Lookup Zone and how to create a domain policy via Group Policy Management tool.
Requirements
- Create an AD Infrastructure with Samba4 on Ubuntu 16.04 – Part 1
- Manage Samba4 AD Infrastructure from Linux Command Line – Part 2
- Manage Samba4 Active Directory Infrastructure from Windows10 via RSAT – Part 3
Step 1: Manage Samba DNS Server
Samba4 AD DC uses an internal DNS resolver module which is created during the initial domain provision (if BIND9 DLZ module is not specifically used).
Samba4 internal DNS module supports the basic features needed for an AD Domain Controller. The domain DNS server can be managed in two ways, directly from command line through samba-tool interface or remotely from a Microsoft workstation which is part of the domain via RSAT DNS Manager.
Here, we’ll cover the second method because it’s more intuitive and not so prone to errors.
1. To administer the DNS service for your domain controller via RSAT, go to your Windows machine, open Control Panel -> System and Security -> Administrative Tools and run DNS Manager utility.
Once the tool opens, it will ask you on what DNS running server you want to connect. Choose The following computer, type your domain name in the field (or IP Address or FQDN can be used as well), check the box that says ‘Connect to the specified computer now’ and hit OK to open your Samba DNS service.

2. In order to add a DNS record (as an example we will add an A record that will point to our LAN gateway), navigate to domain Forward Lookup Zone, right click on the right plane and choose New Host (A or AAA).
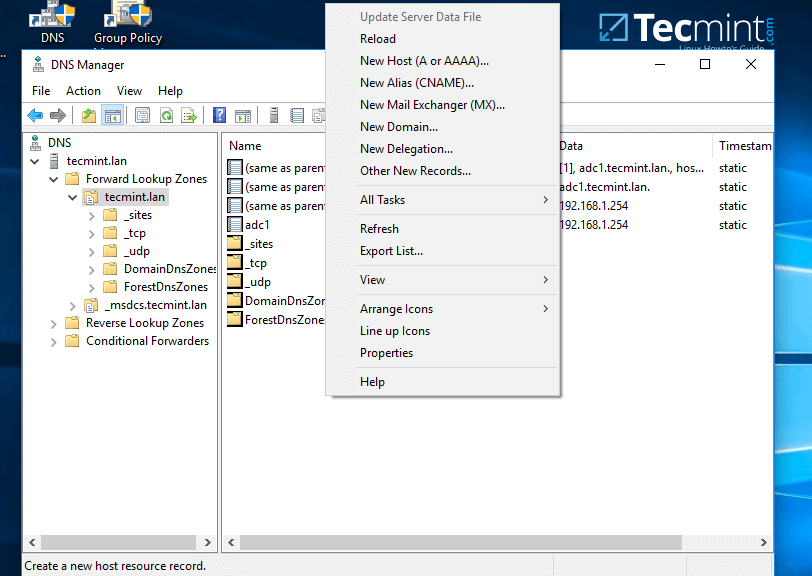
3. On the New host opened window, type the name and the IP Address of your DNS resource. The FQDN will be automatically written for you by DNS utility. When finished, hit the Add Host button and a pop-up window will inform you that your DNS A record has been successfully created.
Make sure you add DNS A records only for those resources in your network configured with static IP Addresses. Don’t add DNS A records for hosts which are configured to acquire network configurations from a DHCP server or their IP Addresses change often.

To update a DNS record just double click on it and write your modifications. To delete the record right click on the record and choose delete from the menu.
In the same way you can add other types of DNS records for your domain, such as CNAME (also known as DNS alias record) MX records (very useful for mail servers) or other type of records (SPF, TXT, SRV etc).
Step 2: Create a Reverse Lookup Zone
By default, Samba4 Ad DC doesn’t automatically add a reverse lookup zone and PTR records for your domain because these types of records are not crucial for a domain controller to function correctly.
Instead, a DNS reverse zone and its PTR records are crucial for the functionality of some important network services, such as an e-mail service because these type of records can be used to verify the identity of clients requesting a service.
Practically, PTR records are just the opposite of standard DNS records. The clients know the IP address of a resource and queries the DNS server to find out their registered DNS name.
4. In order to a create a reverse lookup zone for Samba AD DC, open DNS Manager, right click on Reverse Lookup Zone from the left plane and choose New Zone from the menu.

5. Next, hit Next button and choose Primary zone from Zone Type Wizard.

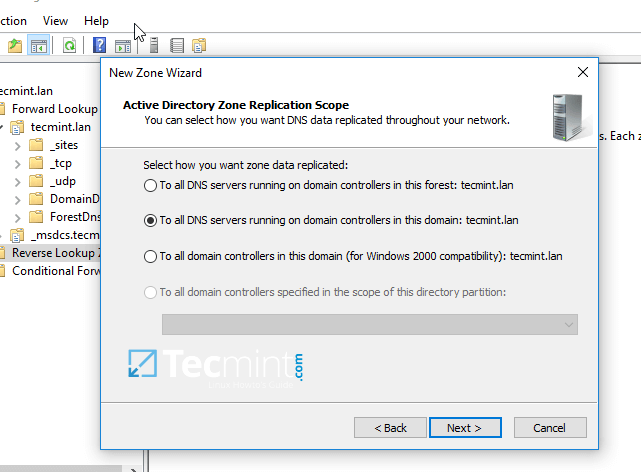
6. Next, choose To all DNS servers running on domain controllers in this domain from the AD Zone Replication Scope, chose IPv4 Reverse Lookup Zone and hit Next to continue.

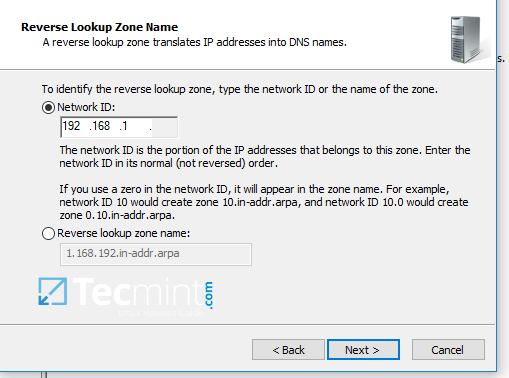
7. Next, type the IP network address for your LAN in Network ID filed and hit Next to continue.
All PTR records added in this zone for your resources will point back only to 192.168.1.0/24 network portion. If you want to create a PTR record for a server that does not reside in this network segment (for example mail server which is located in 10.0.0.0/24 network), then you’ll need to create a new reverse lookup zone for that network segment as well.
8. On the next screen choose to Allow only secure dynamic updates, hit next to continue and, finally hit on finish to complete zone creation.

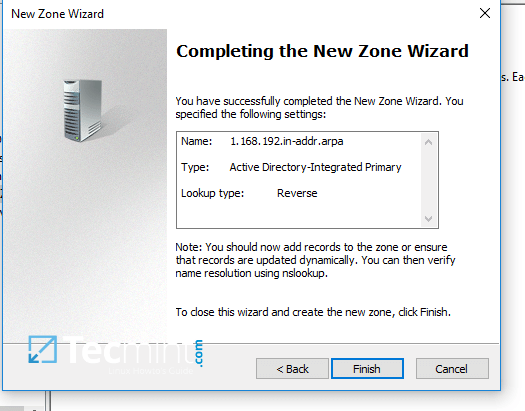
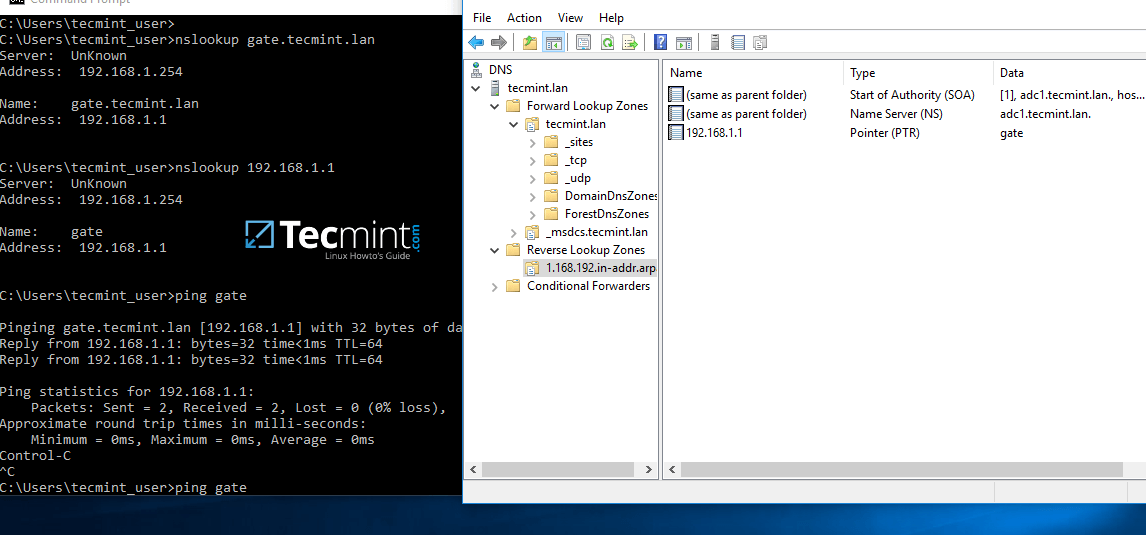
9. At this point you have a valid DNS reverse lookup zone configured for your domain. In order to add a PTR record in this zone, right click on the right plane and choose to create a PTR record for a network resource.
In this case we’ve created a pointer for our gateway. In order to test if the record was properly added and works as expected from client’s point of view, open a Command Prompt and issue a nslookup query against the name of the resource and another query for its IP Address.
Both queries should return the correct answer for your DNS resource.
nslookup gate.tecmint.lan
nslookup 192.168.1.1
ping gate
Step 3: Domain Group Policy Management
10. An important aspect of a domain controller is its ability to control system resources and security from a single central point. This type of task can be easily achieved in a domain controller with the help of Domain Group Policy.
Unfortunately, the only way to edit or manage group policy in a samba domain controller is through RSAT GPM console provided by Microsoft.
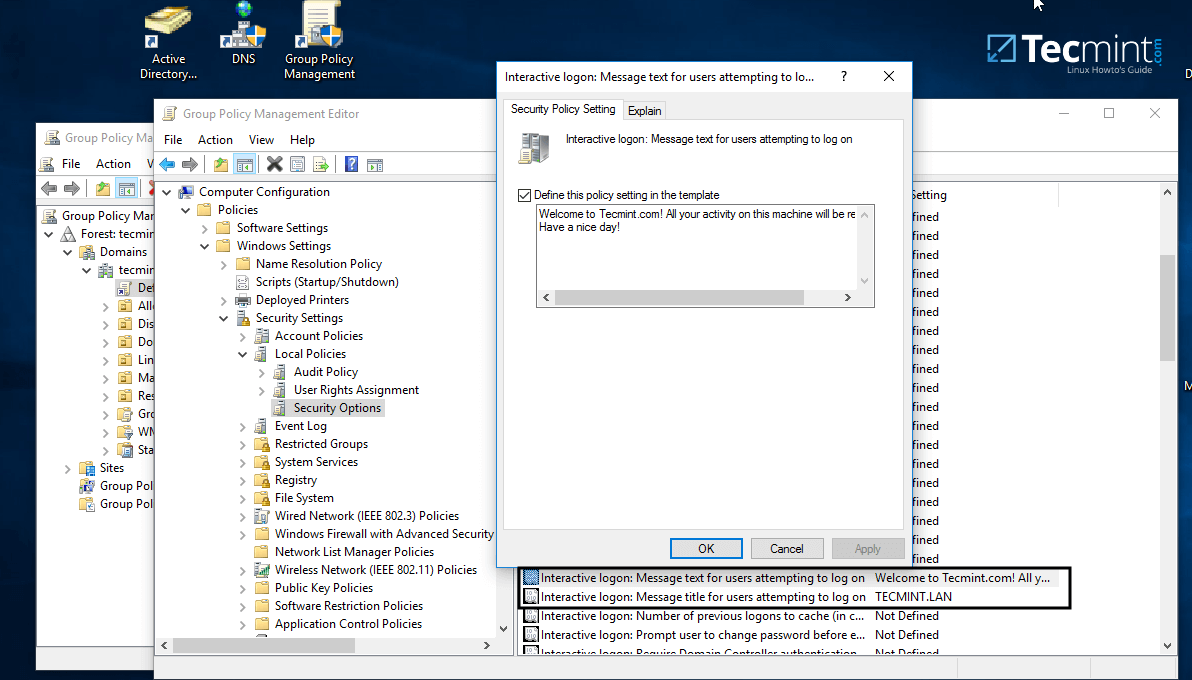
In the below example we’ll see how simple can be to manipulate group policy for our samba domain in order to create an interactive logon banner for our domain users.
In order to access group policy console, go to Control Panel -> System and Security -> Administrative Tools and open Group Policy Management console.
Expand the fields for your domain and right click on Default Domain Policy. Choose Edit from the menu and a new windows should appear.

11. On Group Policy Management Editor window go to Computer Configuration -> Policies -> Windows Settings -> Security settings -> Local Policies -> Security Options and a new options list should appear in the right plane.
In the right plane search and edit with your custom settings following two entries presented on the below screenshot.
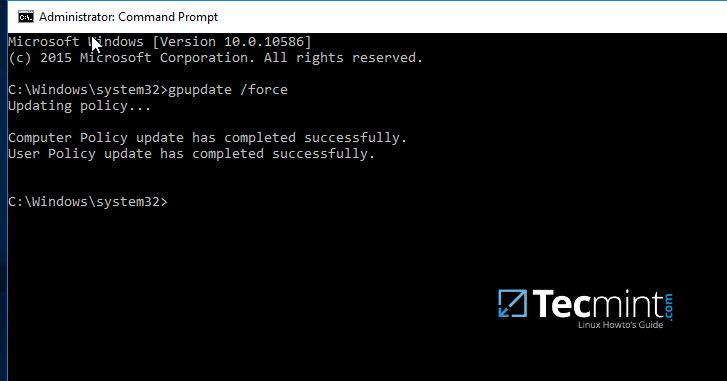
12. After finishing editing the two entries, close all windows, open an elevated Command prompt and force group policy to apply on your machine by issuing the below command:
gpupdate /force
13. Finally, reboot your computer and you’ll see the logon banner in action when you’ll try to perform logon.

That’s all! Group Policy is a very complex and sensitive subject and should be treated with maximum care by system admins. Also, be aware that group policy settings won’t apply in any way to Linux systems integrated into the realm.


Access was denied. Would you like to add it anyway ? When i tried add dns from rsat. How to repair these permission ??
Hi,
We have a problem Ubuntu machine successfully installed the Domain controller in Ubuntu but will looks like came into the terminal like
$.If any commands are typed it will getting a error.issue
#is not in the sudoers file. this incident will be reported “please help meYou must manually add the user to sudoers file or via usermoad -aG command in order to gain root privileges. Also, home directory must me setup in smb.conf file with template homedir directive.
If you run a command like sudo command, and you are not in the sudoers file, then you have the message # is not in the sudoers file. this incident will be reported. This is a normal situation
The $ indicates a different shell. If is possible that you have created a user with the useradd command instead of the adduser command. These two commands are different, since one creates the home directory, and the other does not create it.
Try to run /bin/bash to get the right shell. And recreate the user if needed (use the root login)
Hi,
Is it possible to set a wallpaper for all users (Windows and Linux) from Samba DC?
Samba AD DC domain policy can be applied only for Windows hosts. Domain policies don’t apply in Linux. Yes, you can apply a wallpaper for all Windows users on Windows machines, but not on Linux integrated machines.
Yes, its true. They only can be applied to windows hosts.
I did not had read linux on the question :) (Just skipped that…)
Everything that you do with a normal GPO is possible to do in Samba DC.
In this case, you need to perform the actions
1) Copy the wallpaper to windows dir
2) Change a registry key
REG ADD “HKCU\Control Panel\Desktop” /v Wallpaper /f /t REG_SZ /d “%windir%\wallpaper\wallpaper.bmp”
3) Update user parameters
RUNDLL32.EXE user32.dll,UpdatePerUserSystemParameters
So my advice is to create a user Logoff GPO
Regards,
Nuno Mourinho
I have tested this setup, review all steps several times. All shown here works. It is possible to create a DNS A record, a reverse DNS record manually.
What does not work is automatic DDNS or dynamic dns updates.
If I run ipconfig /registerdns on the computer on AD, it shout automatically create the DNS record. That does not happen.
If I check the event log it gives a security issue that prevents the DNS A record from host computer being created automatically.
Is there any other configuration needed for automatic dns updates?
Kind Regards,
Nuno Mourinho
Hello Nuno,
did you manage to sort this “problem”?
If so how?
Yes Manuel Borges, I have solved the problem.
Put allow dns updates in global, like this this:
This way the automatic updates work. Don’t ask me why….
Fantastic articles!
Eagerly awaiting part 5.