MySQL is one of the most popular database in the world. This database can be installed on the Microsoft Windows platform besides of Linux platform. Why this database is so popular? It may caused by its powerful feature and its free to use. As a database administrator, a database backup is really crucial to maintain the availability of the data. It will minimize the risk if something happens to our database.

Since MySQL is a popular database, there are many software that we can use to backup it. From the console mode to the web based software. Now we will give you a look of MySQLDumper as a tool for backup MySQL Database.
What is MySQLDumper?
MySQLDumper is a another open source web based tool for backing up MySQL databases. It built from PHP and Perl and can be easily dump and restore your MySQL data. It is especially suitable for shared hosting, where we don’t have access to Linux shell.
MySQLDumper Features
There are a lot of MySQLDumper features, but here are some features that may interest you.
- Easy installation; just make sure that you have a working web server and point your browser to MySQLDumper installation file.
- All parameters is shown before the backup is started; so you are sure what you are doing.
- Database-Overview; look at running processes/
- SQL-Browser: Access to your MySQL-Tables, delete tables, edit or insert data.
- Two type of backup method, using PHP or Perl.
- Complete log files.
- Automatic file-deletion of your old backups.
- Create directory protection.
Installation of MySQLDumper in Linux
Installing MySQLDumper is so easy. First we can download MySQLDumper from the following link.
At the time of writing this article, the latest version is 1.24. So, download latest version under your working web server directory (i.e. /var/www or /var/www/html). Once you have it, you can extract MySQLDumper1.24.4.zip.
$ unzip MySQLDumper1.24.4.zip
Then you will find a ‘msd1.24.4‘ folder. This folder contain all MySQLDumper files. The next step, you just need to point your browser to MySQLDumper installation file. The file is ‘msd1.24.4/install.php’. Here are the steps of super easy MySQLDumper.
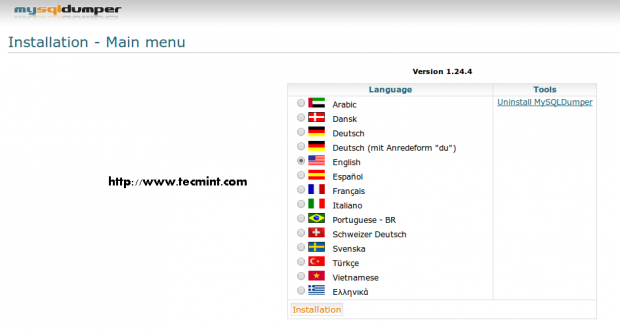
1. We need to choose installation Language.
2. We need to fill some credentials such as hostname, user and MySQL password.
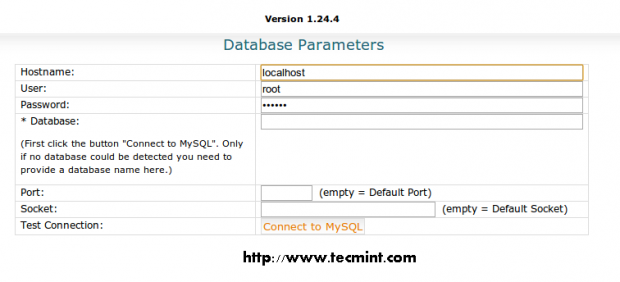
3. We can test the connection to the database by clicking Connect to MySQL button. If it succeed, then we will see a message saying that “Database connection was established”.
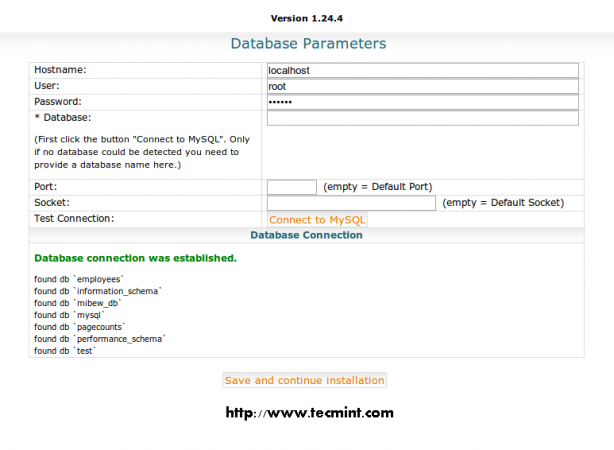
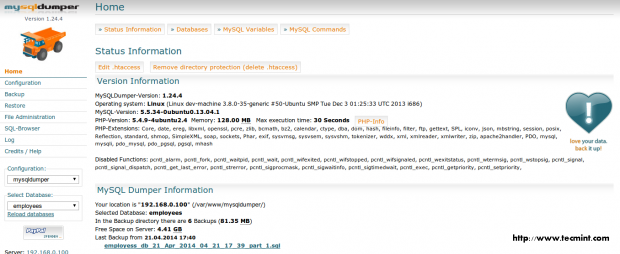
4. Once you got the message, click the ‘Save‘ and continue installation button. You will be taken into the home screen.
How to use MySQLDumper
As we can guess from its name, MySQLDumper main function is to backup your MySQL database. With this application, backup (and restore) MySQL database is very easy. Let’s start to take a look.
Backup Process using PHP
The function menu is located on the panel navigation on the left. First we need to select which database that we want to backup. We can see the option on the left menu.
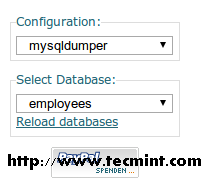
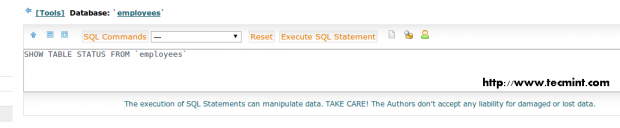
In the screenshot above, we choose to backup a database named ‘employees‘.
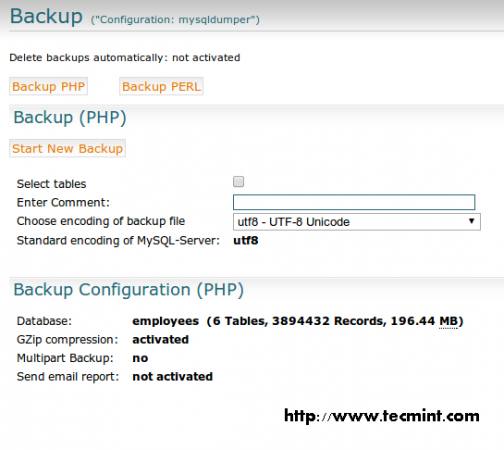
Then we can select ‘Backup‘ menu on the left. Then choose ‘Backup PHP‘ on the top area. We will have a screen like this.
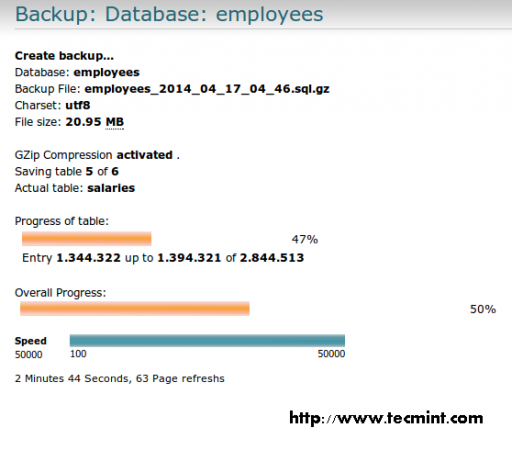
Then click on ‘Start New Backup‘. A progress of backup activity will show to you.
Once backup progress is finish, we can see the notification.

Backup Process using Perl
Another backup method that is supported by MySQLDumper is ‘Backup Perl’. With this method, we will use Perl as the backup engine.
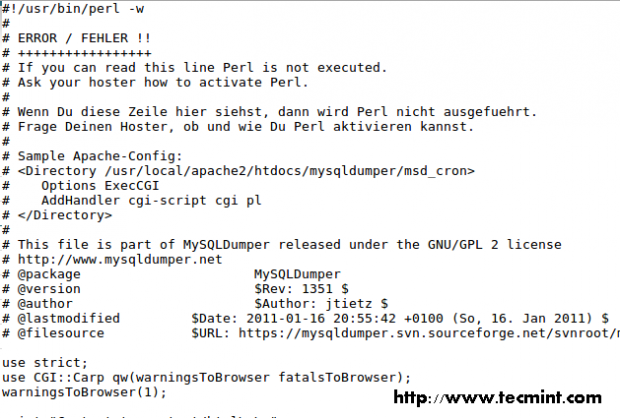
Please notice that your web server must support ‘Perl/CGI‘ script before running this backup method. Otherwise, you will see an error like this when you click on Test Perl button.
Same with PHP backup method, we need to select which database that we want to backup. Then choose Backup menu from the left navigation panel. Then click Backup Perl button.
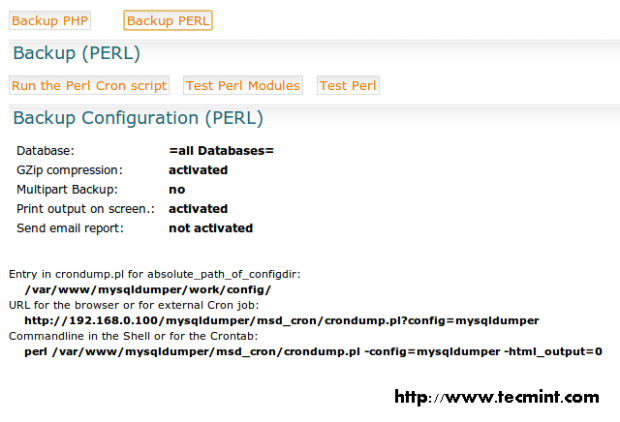
MySQLDumper will show you some active parameters on the bottom area. Then we can click ‘Run the Perl Cron‘ script button. Using this method, we will not see any progress bar appear. The duration of this backup process will be depend on the database which we are going to backup. If no error, then we will see a notification like this.

Restore Process
Restoring a backup is also easy using MySQLDumper. You can click on ‘Restore‘ menu from the navigation panel in the left. Unlike Backup activity, all backups are available at the bottom area of restore page.
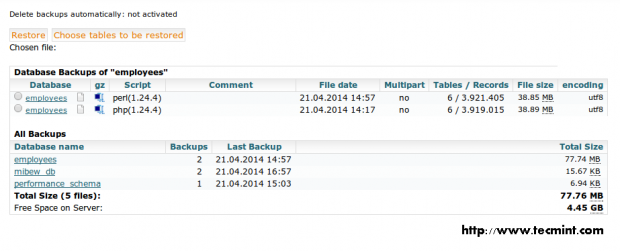
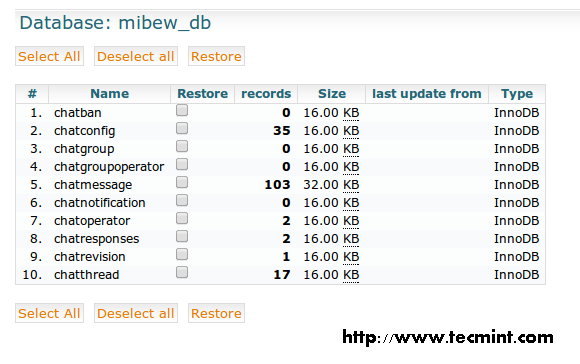
When we need to select a backup, we can choose from there. At the above area is the selected backup which are ready to restore. If you want to do full restore, then click on the ‘Restore‘ button above. While if you want to restore some tables only, click on the ‘Choose tables‘ to be restored above.
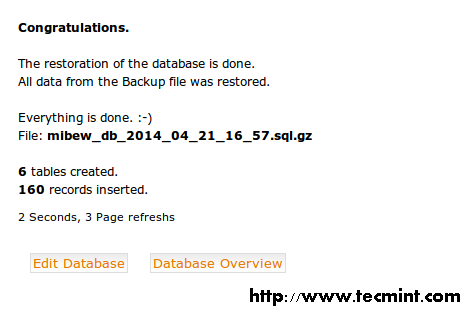
Once it done, click ‘Restore‘. Just wait for a moment to complete the restore progress.
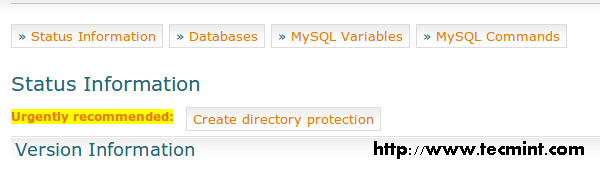
Create a Directory Protection
By default, the home page of MySQLDumper can be accessed by anyone who know its URL. Using Directory Protection, we can create a this home screen protected by password. This Directory Protection utilizes ‘.htaccess‘ function on Apache web server.
To create it, just click Create directory protection button on the home screen.
Then you will ask to provide some credential.
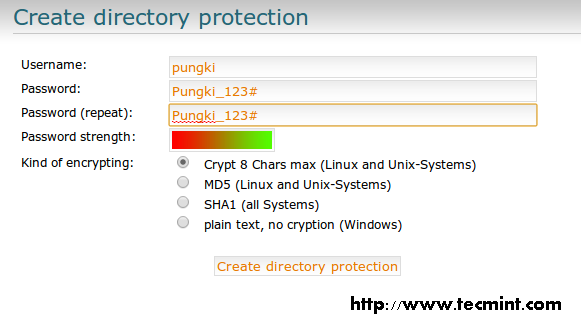
Once you finish with that, click Create directory protection button. After that, you will have a confirmation page about it.

If there is no error, a success message will be displayed.
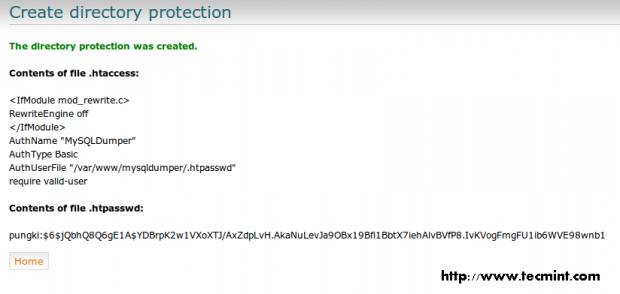
Next time you visit the page, MySQLDumper will ask you a password before you see its home screen.

File Administration
This menu is used to maintain all available backups and restore.
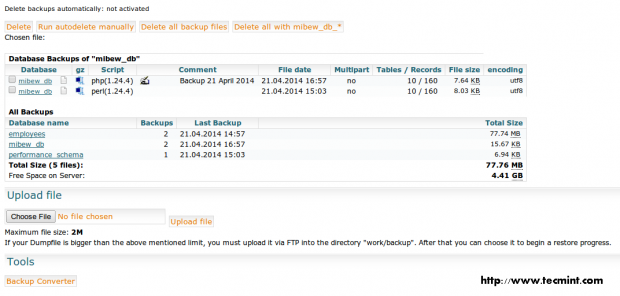
Here are some activity that can be done in this page.
- Delete backup(s) ; use the Delete buttons at the top area.
- Download backup(s) ; click the backup name.
- Select backup(s) ; click the Database name in the All Backups area.
- Upload a big backup(s) to be restored.
- Convert database into MySQLDumper (MSD) format.
Note: When we tried to convert database without using any compression, we found that MySQLDumper create a database with ‘part_1.sql’ name. The size is smaller than the original source.
SQL-Browser
If you want to run specific SQL command, you can do it in this SQL-Browser page. But please you should know what you are doing.
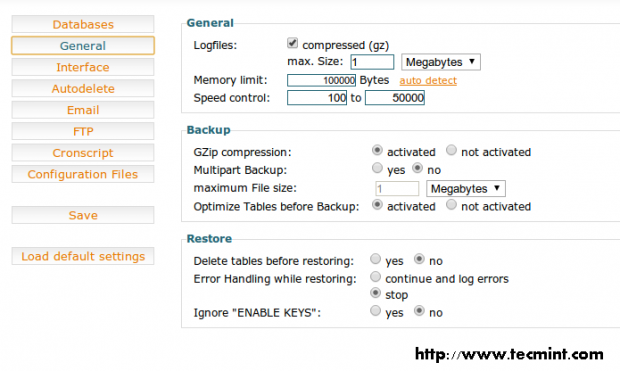
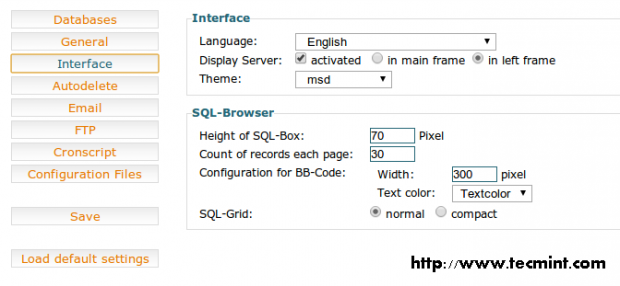
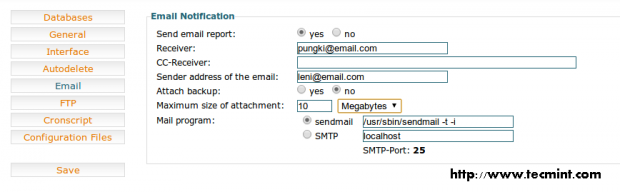
Configuration
All function above can be configured from Configuration menu. Here are some sections that we can configure.
General
Interface
Autodelete

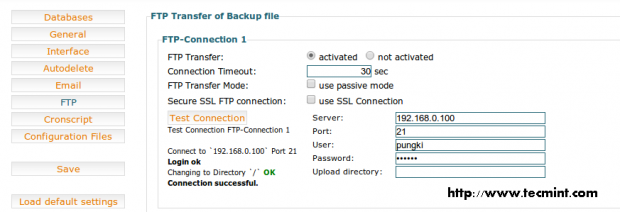
FTP
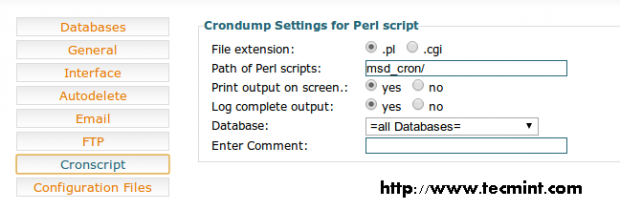
Cronscript
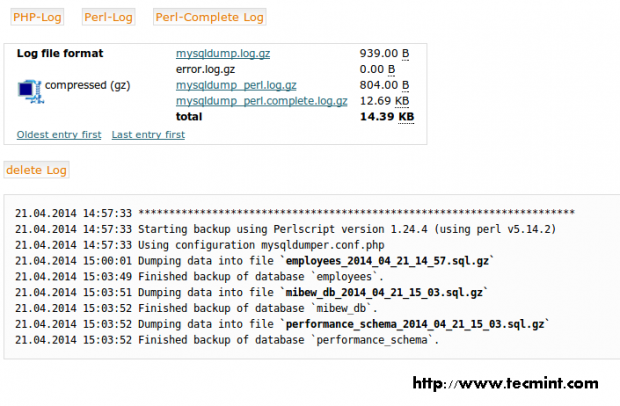
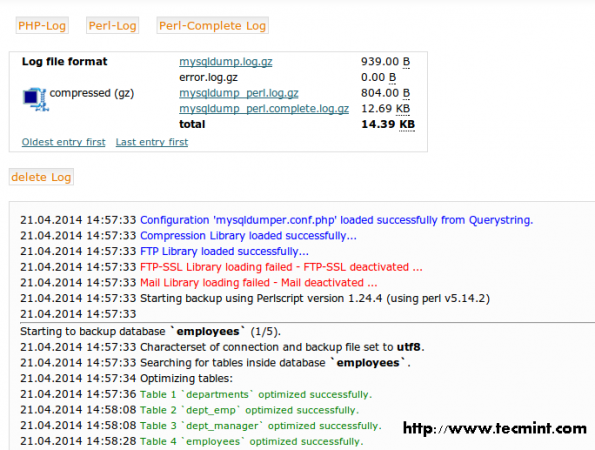
Log Management
MySQLDumper also provide basic logs for us. So we can know when the backup-restore activity occurred. To access log page, just click ‘Log’ menu from the navigation panel on the left.
There are 3 kind of logs. PHP-Log, Perl-Log and Perl-Complete Log.

Conclusion
MySQLDumper may not the best backup tool for MySQL. But with the ease of use of this application, people may start using this application. Unfortunately, I found that MySQLDumper is not equipped with offline documentation. But still, it is a great alternative tool for backup MySQL database.
How can we use this for remote DB backup