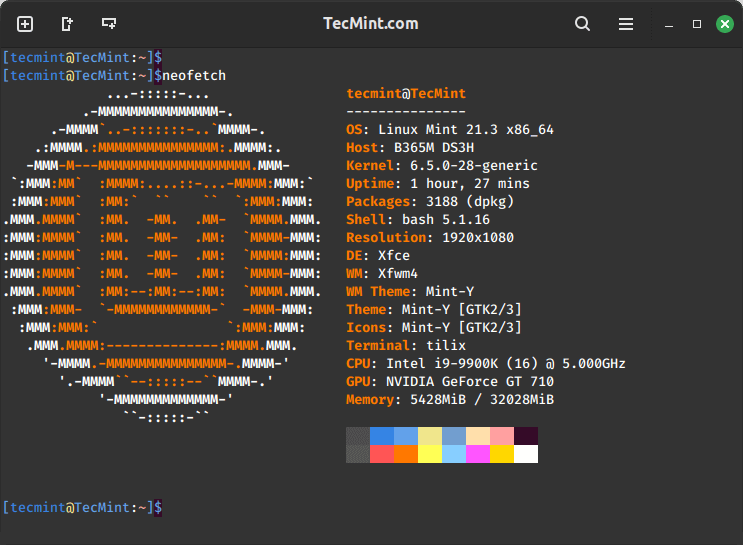
Neofetch, the popular command-line tool for displaying system information in a visually appealing ASCII format, is no longer being actively developed.
The project’s main developer has archived the GitHub repository, indicating that development has ceased.
This news has prompted the Linux community to explore alternative tools that can fill the void left by Neofetch.
While Neofetch development has ceased, the tool will continue to work and display system information on Linux, BSD, macOS, Windows, and other platforms where it is installed.
sudo apt install neofetch         [On Debian, Ubuntu and Mint]
sudo yum install neofetch         [On RHEL/CentOS/Fedora and Rocky/AlmaLinux]
sudo emerge -a sys-apps/neofetch  [On Gentoo Linux]
sudo apk add neofetch             [On Alpine Linux]
sudo pacman -S neofetch           [On Arch Linux]
sudo zypper install neofetch      [On OpenSUSE]
sudo pkg install neofetch         [On FreeBSD]
However, as new hardware and software emerge, the accuracy of the information provided by Neofetch may gradually diminish.
Reasons for Neofetch’s Demise
The decline of Neofetch development can be attributed to several factors. First, the project seemed to stall a few years ago, with bug reports piling up, pull requests being ignored, and the developer becoming less responsive.
Additionally, as new hardware and software continue to be released, Neofetch has struggled to keep up, with some users reporting that it no longer accurately displays information about their systems.
Alternatives to Neofetch
Fortunately, there are several alternatives to Neofetch that users can explore.
1. Fastfetch
Fastfetch is a direct fork of Neofetch and is actively maintained, making it a viable replacement. It offers similar functionality to Neofetch, but with the added benefit of being actively developed and updated.
To install Fastfetch on Ubuntu-based distributions, you need to use the following PPA.
sudo add-apt-repository ppa:zhangsongcui3371/fastfetch
sudo apt update
sudo apt install fastfetch
To install Fastfetch on other Linux systems, use the following appropriate command for your specific Linux distribution.
sudo yum install fastfetch         [On RHEL/CentOS/Fedora and Rocky/AlmaLinux]
sudo emerge -a sys-apps/fastfetch  [On Gentoo Linux]
sudo apk add fastfetch             [On Alpine Linux]
sudo pacman -S fastfetch           [On Arch Linux]
sudo zypper install fastfetch      [On OpenSUSE]
sudo pkg install fastfetch         [On FreeBSD]
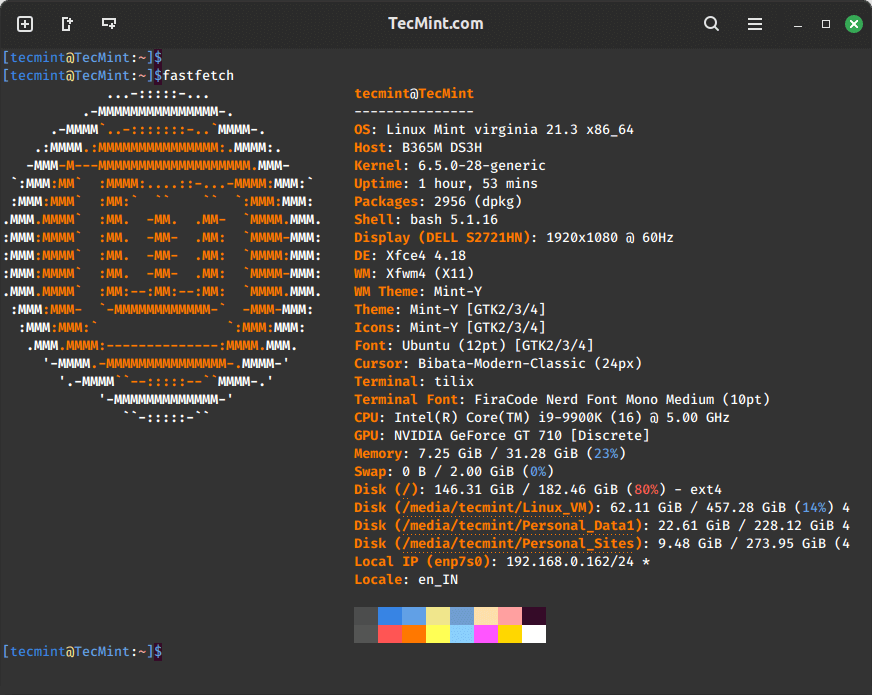
Privacy Note: When using Fastfetch, be mindful that it may display sensitive system information, including your local IP address.
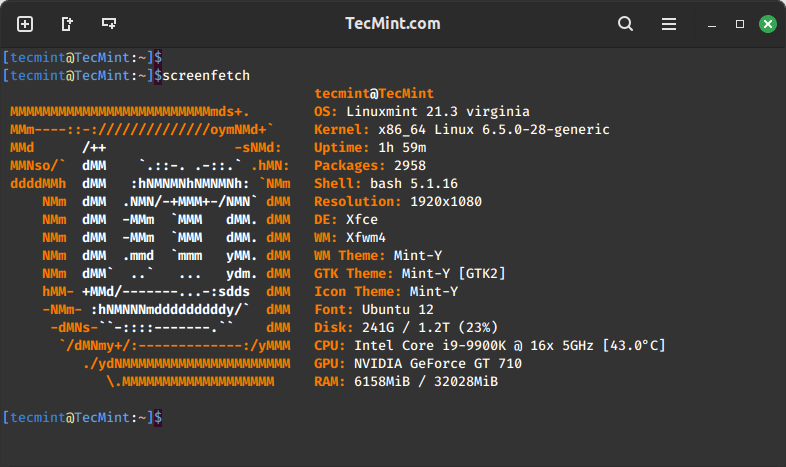
2. screenFetch
screenFetch is another popular alternative that has been around for longer than Neofetch. It provides similar system information display capabilities and is actively maintained.
To install screenFetch on Linux, use the following appropriate command for your specific Linux distribution.
sudo apt install screenfetch         [On Debian, Ubuntu and Mint]
sudo yum install screenfetch         [On RHEL/CentOS/Fedora and Rocky/AlmaLinux]
sudo emerge -a sys-apps/screenfetch  [On Gentoo Linux]
sudo apk add screenfetch             [On Alpine Linux]
sudo pacman -S screenfetch           [On Arch Linux]
sudo zypper install screenfetch      [On OpenSUSE]
sudo pkg install screenfetch         [On FreeBSD]
3. macchina
macchina is a more feature-rich alternative that not only displays system information but also provides additional details, such as information about your Git repositories.
To install macchina, download appropriate prebuilt binaries for your system, set the execute permission and run it as shown.
wget https://github.com/Macchina-CLI/macchina/releases/download/v6.1.8/macchina-linux-x86_64
chmod +x macchina-linux-x86_64
./macchina-linux-x86_64

These alternatives ensure that users can continue to enjoy the visual appeal and functionality of system information display tools on their Linux systems.


Suggested Improvement for the Fastfetch Installation Process…
I have a simple modification to the installation instructions for Fastfetch on Ubuntu-based distributions. My suggestion should also work for other packages, and I believe it may slightly improve the efficiency of the process.
Original Instructions:
To install Fastfetch on Ubuntu-based distributions, you need to use the following PPA:
My Suggested Modification:
To install Fastfetch on Ubuntu-based distributions, use the following command sequence:
I have tested my slightly modified command sequence, and it worked successfully.
Additionally, at How-To Geek, there is an important caution:
Including this warning in the instructions for Fastfetch would be a valuable addition.
@Bret,
Thank you for sharing your suggestion to streamline the Fastfetch installation process! Your modified commands look efficient, and the additional caution about Fastfetch displaying the local IP address is very important for privacy. Including that warning would indeed be a valuable update for users.
Great catch!