Red Hat, Inc. the largest company in Open Source world, released last month one of their major enterprise products – RHEL 7.0 – Red Hat Enterprise Linux, designed for modern datacenters, new cloud platforms and big data.
Among other important improvement like switching to systemd, who now manages daemons, processes and other important system resources even for init services that are now passed through systemd start-up, use of Linux Containers with Docker, cross-realm trust for Microsoft Active Directory, one important aspect represents the XFS as the default filesystem, which can support filesystems up to 16 exabytes and files up to 8 exabytes.
Requirements:
You must have an active Red Hat subscription to download RHEL 7.0 ISO image from Red Hat Customer Portal.
- RHEL 7.0 Binary DVD ISO image
Although RHEL can be installed on a variety of platforms, such as AMD 64, Intel 64, IBM System Z, IBM Power, etc. This tutorial covers the RHEL 7.0 basic minimal installation with on an Intel x86-64 processor architecture using a binary DVD ISO image, an installation best suited for developing a high customizable server platform with no Graphical Interface.
Installation of Red Hat Enterprise Linux 7.0
1. After registering on Red Hat Customer Portal go to Download section and grab the last version of RHEL DVD Binary ISO image, then burn it to a DVD media or create a USB bootable media using Unetbootin LiveUSB Creator.
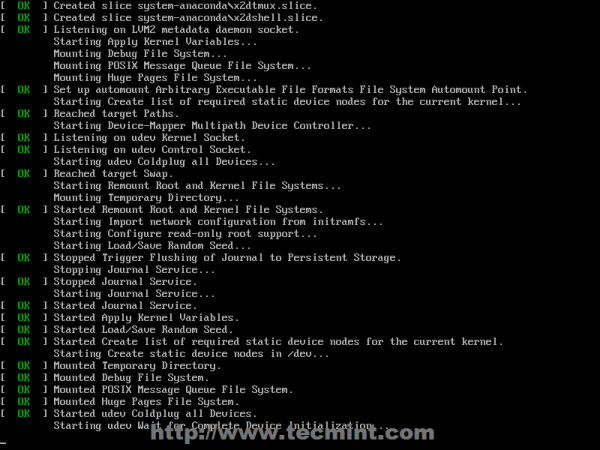
2. Then place the DVD/USB in your appropriate system drive, start your computer, select bootable unit and on the first RHEL prompt select Install Red Hat Enterprise Linux 7.0.

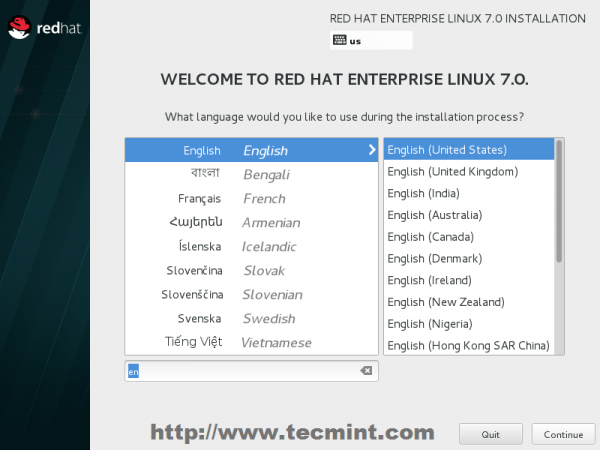
3. After the system loads, select the language for installation process and hit on Continue.
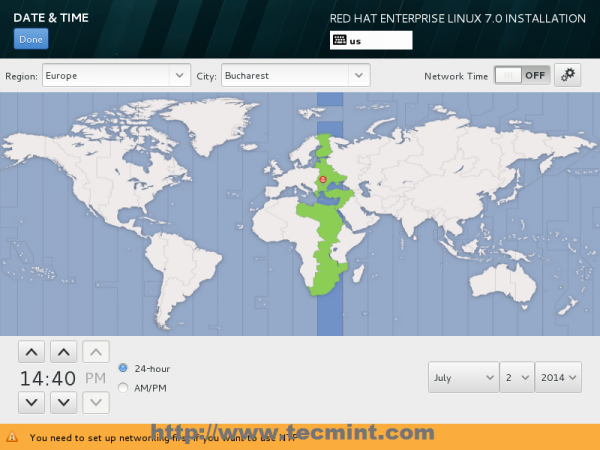
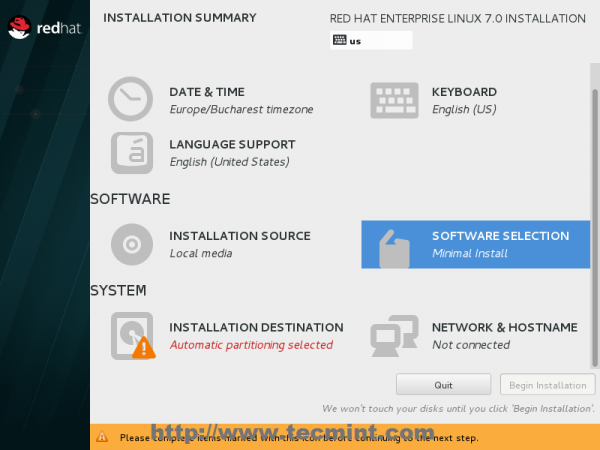
4. When the installer gets on Installation Summary it’s time to customize the installation process. First click on Date & Time, choose your system location from the provided map and hit on Done to apply configuration.
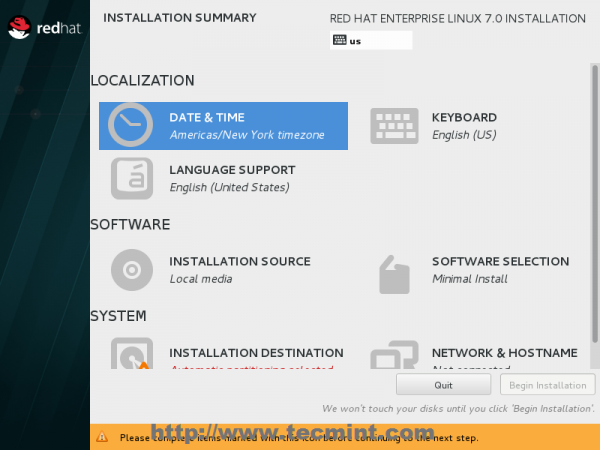
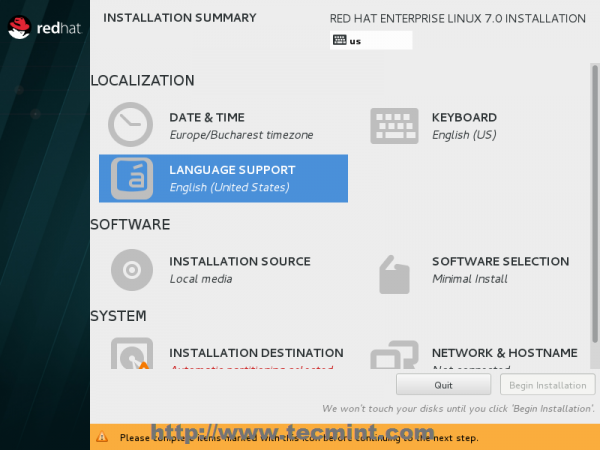
5. The next step is to change Language System Support and Keyboard language. Click on both if you want to change or add other languages to your system but for a server the recommendation is to stick with English language.
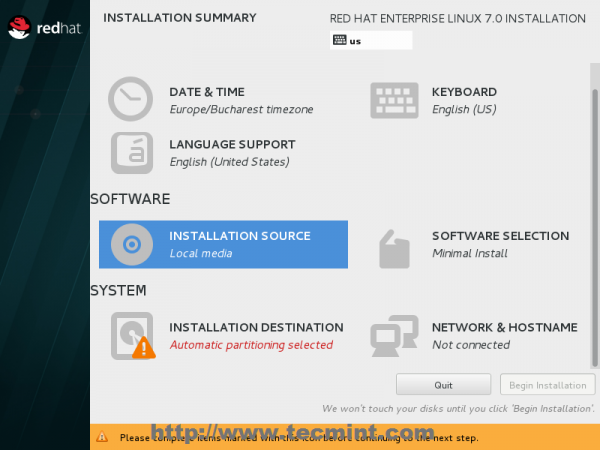
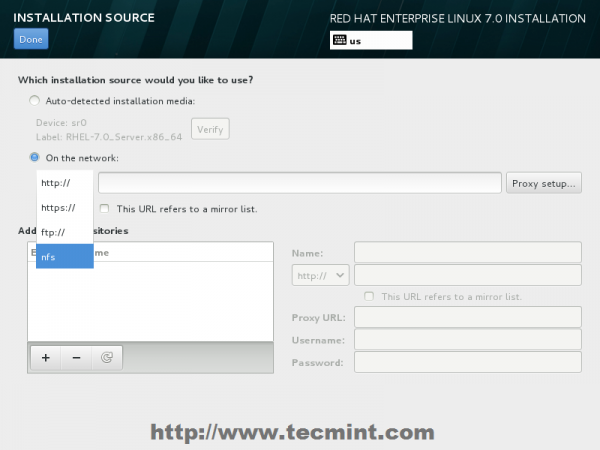
6. If you want to use other sources than the ones provided by the DVD media hit on Installation Source and add your Additional Repositories or specify a network location using HTTP, HTTPS, FTP or NFS protocols then hit on Done to use your new sources. If you can’t provide other sources stick to default one Auto-detected installation media.
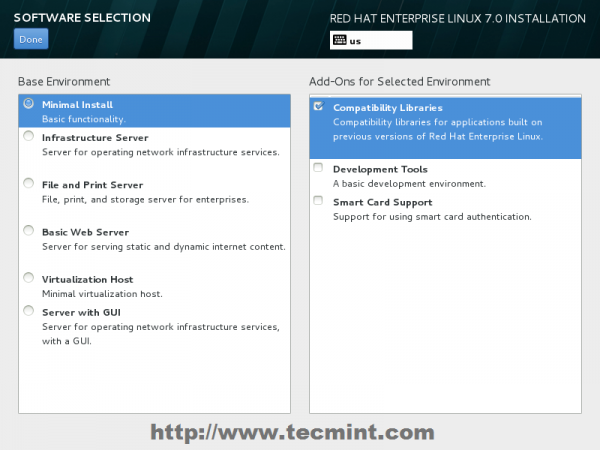
7. The next important step is to select your system software. Click on Software Selection and choose your Base Installation Environment from the down-list. For a highly customizable platform where you can install only the packages that you need after the installation, choose Minimal Install with Compatibility Libraries Add-ons, then hit on Done to apply this changes to installation process.
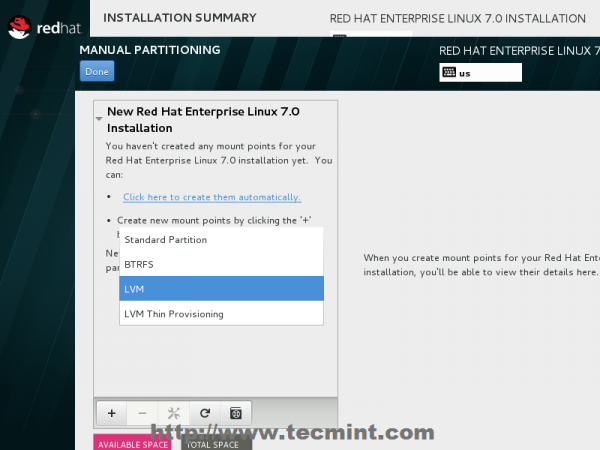
8. The next important step is to configure your system partitions. Click on Installation Destination, select LVM as partition scheme for a
better management over system space, then hit on Click here to create them automatically.

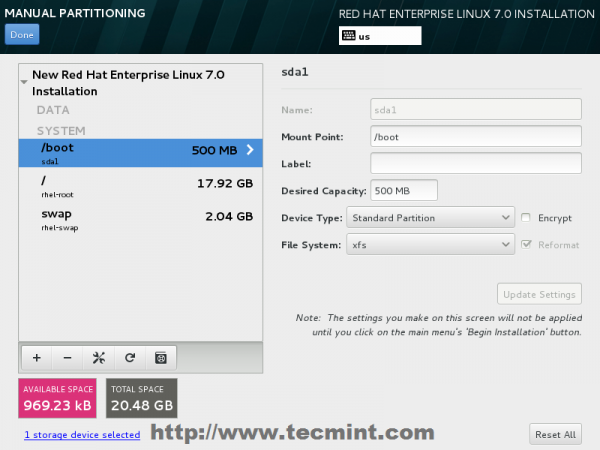
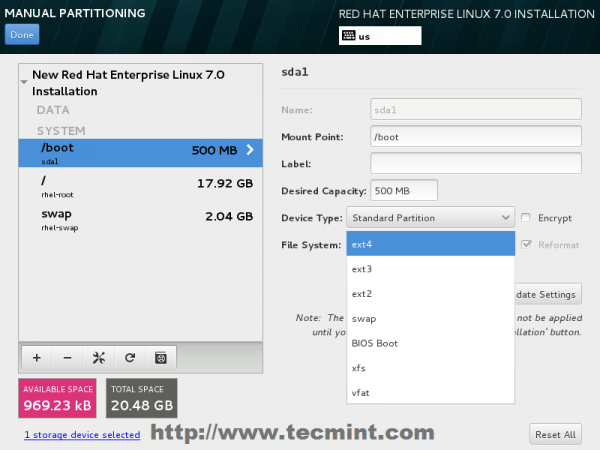
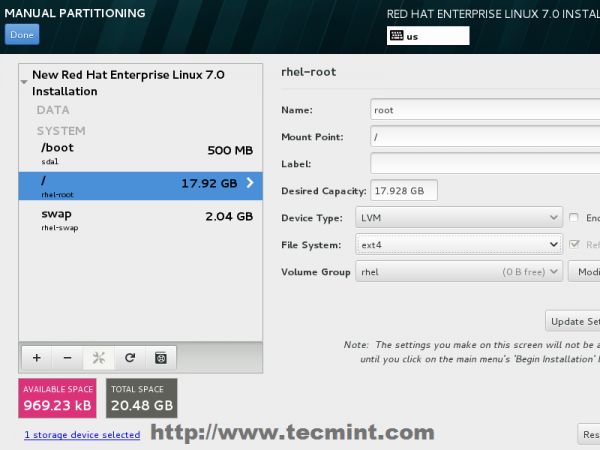
9. After the installer presents you with default system partition scheme you can edit in any way that suits you (delete and recreate partitions and mount points, change partitions space capacity and file system type, etc.). As the base scheme for a server you should use dedicated partitions such as:
- /boot – 500 MB – non-LVM
- /root – min 20 GB – LVM
- /home – LVM
- /var – min 20 GB – LVM
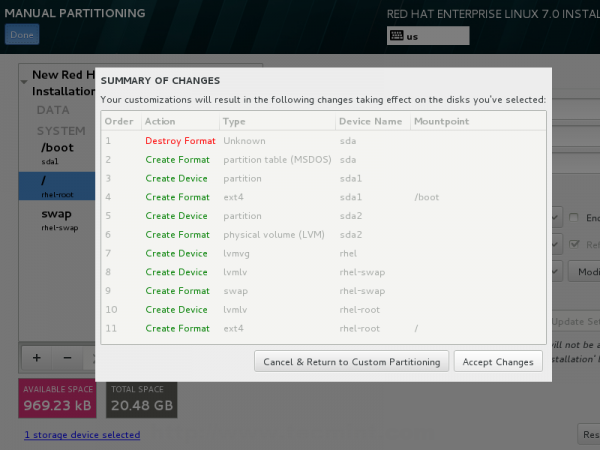
With XFS filesystem, which is the most advanced filesystem in the world. After editing partitions hit on Update Setting button, then click on Done then Accept Changes on Summary of Changes prompt to apply new configurations.
As a note, if your Hard-Disk is larger than 2TB in size the installer automatically will convert partition table to GPT disks and if you want to use GPT table on disks smaller than 2TB, then you should pass the argument inst.gpt to the boot command line in order to change the default behaviour.
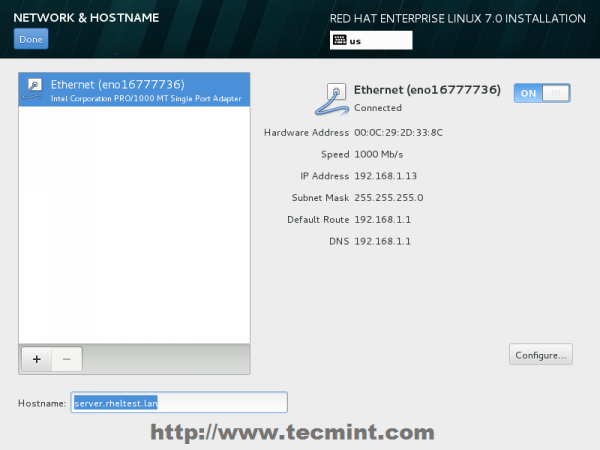
10. The last step before continuing with installation process is setting your Network Connection. Click on Network & Hostname and setup your system hostname. Here you can use your short system hostname or you can append the dot domain (FQDN).
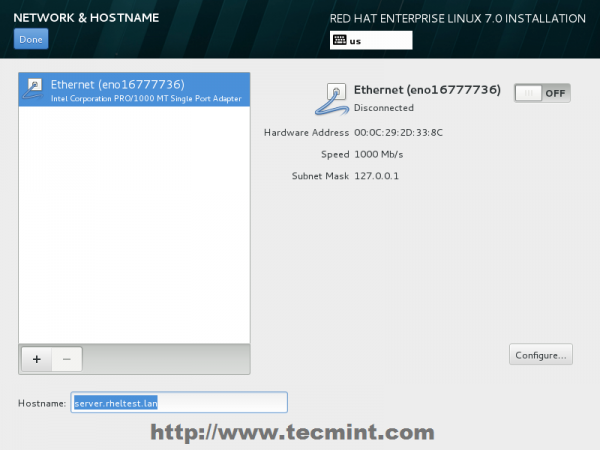
11. After setting up hostname bring up your Network Interface by switching the top Ethernet button to ON. If your network provides automatic Interface configurations through a DHCP server your IPs should be visible on Ethernet Interface Card else go to Configure button and provide your static network settings for your appropriate network connection.
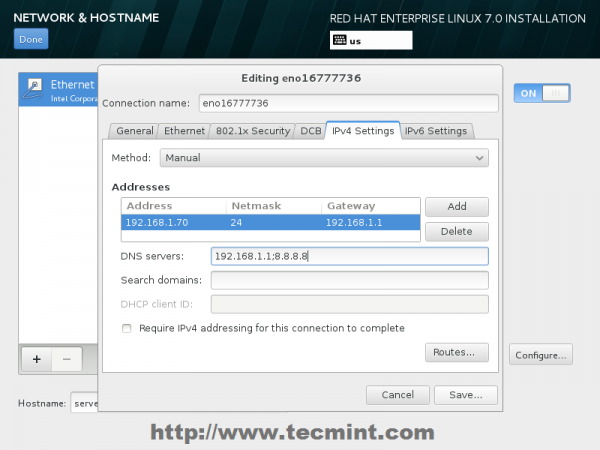
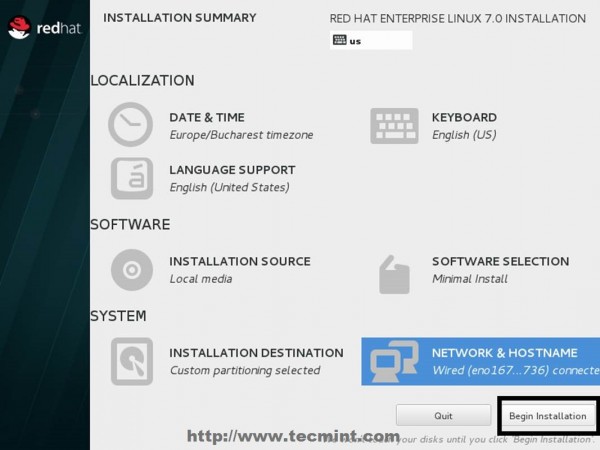
12. After finishing editing Ethernet Interface settings hit on Done which you bring you to default window installer and after you check on your installation settings hit on Begin Installation to proceed further with system installation.
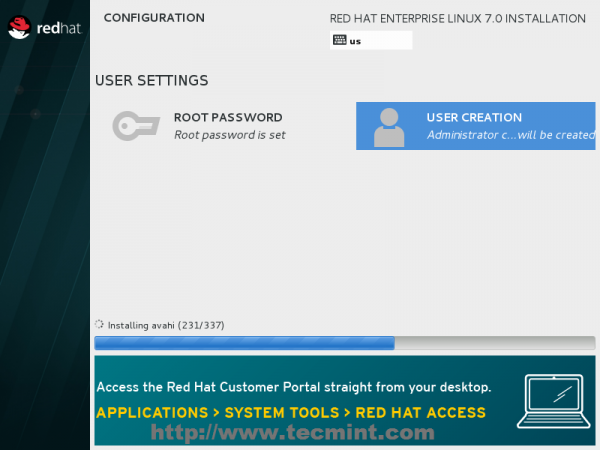
13. As the installation begins writing the system components on your hard-disk, you need to supply your Root Password and create a new User. Click on Root Password and try choose a strong with one at least eight characters in length (alpha-numerical and special characters) and hit in Done when you finish.
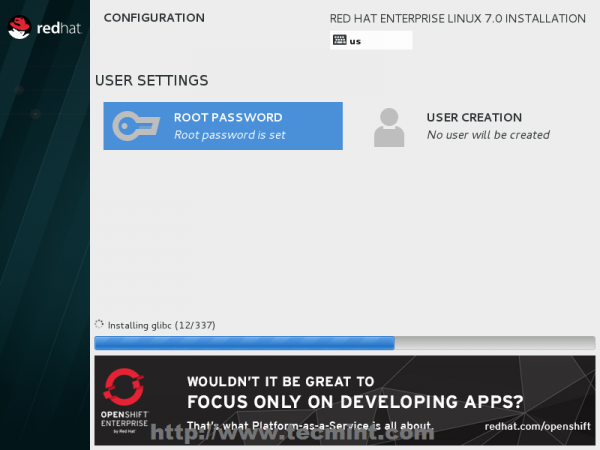

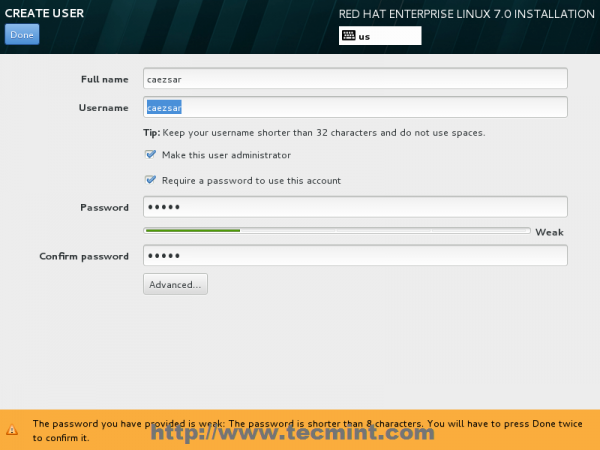
14. Then move to User Creation and provide your credentials for this new user. A good idea is to use this user as a system administrator with root powers through sudo command by checking the box Make this user administrator, then click on Done and wait for the installation process to finish.
15. After the installation finishes the installer will announce that everything completed with success so you should be ready to use your system after reboot.
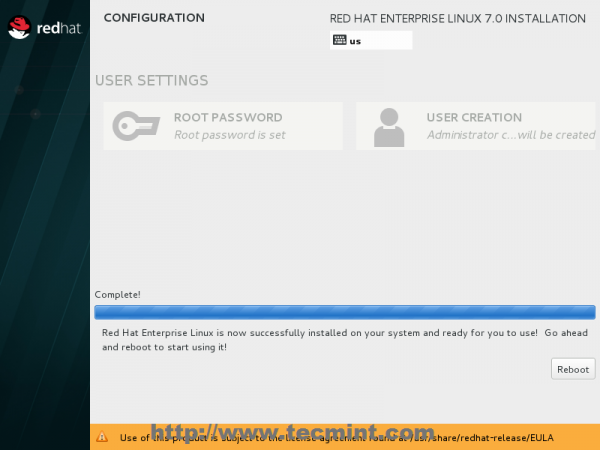
Congratulation! Remove you installation media and reboot your computer and you can now login to your new minimal Red Hat Linux 7.0 environment and perform other system tasks for beginning like register you system to a Red Hat Subscription, activate your system Repositories, update you system and install other useful tools needed to run day to day tasks.
These all tasks can be discussed in my upcoming article. Till then stay tuned to Tecmint for more such howto’s and don’t forget to give your feedback about the installation.


Any option to install redhat7 unattended from custom dvd ? Specially for physical server
Hi, Guys can any one tell me how to install R in red hat 7 ??? i need the raw file file for R.
@Sai,
You mean R programming language? you want to install on RHEL 7?
I am not able to sign up for RHEL, because they insist upon you using your “work” email address to register. This is jot allowed where I currently work. So the “work around” is for me to download a copy of CEntOS 7.x and use these instructions. Pity you would think being an open source company Red Hat would allow you to register with you GMail, but they won’t. No matter CEntOS is basically Red Hat without the Red Hat insignia and logos.
hi everyone ,
today i am trying to download rhel 7 iso last from 2 days . but unfortunately i am getting failure so please tell me or send any link .
@Siddhant,
Firstly, RHEL is not free to download, it needs a subscription to download the RHEL ISO image, if you’ve valid subscription, you can login and download the file from the download section..
You can download the RHEL 7.3 with this link
https://access.redhat.com/downloads/content/69/ver=/rhel—7/7.3/x86_64/product-software
Before this you need to;
Register with your name email id and password
then email from Red Hat will be sent on your Inbox
Confirm the email
On conforming the email this will route you to the page of RHEL installation Binaries Image
Thats it, download and enjoy!
Good Day,
Does anyone know how long does it take to install this version 7.2 of Linux following the aforementioned screen-by-screen? Since I would have this installation done according to the screen shots?
Goo day,
Does anyone know how long does it take for this Linux version7.2 take to install? Mostly looking for the manual labor associated with the screen shots that will guide me to install it?
Thank you very much
I downloaded RHEL from internet. it is a winrar file. How to get iso image out of it
@Kiran,
Extract it, you will get working iso image of RHEL installation..
thank you
Yes, definitely is possible. First install win 10, then RHEL. (i’m guessing this solution is for testing purposes only)
hello, i wanna install RHEL server 7 on my physical system with side by side windows 10……is it possible ? Plz tell me…..if yes then tell me steps, how can i do ?
Hello, under installation destination i get no disk selected (disk doesnt appear at all) . I’m trying to install RHEL7 on Vmware Workstation 10. Please suggest. Thanks in advance
it should be no issue with RHEL installation under VMware. Check the vmware machine settings to verify if you added a disk!
Hi Matei, I figured it out. I changed the disk type from SCSI to SATA and it works. Thanks for the reply.
Sir which vmware version is good for installation rhel 7 because I am using version 9 and it gives me the error in installation disk it shows no disk selected please help me
@Gurdeep,
The version you’re using little old, better go for latest version as shown here Install VMWare Workstation in Linux
This is a very good guide. Question my company server has rhels 7 installed on IBM power 7 machine and its text based mode can I ran it in GUI mode.? Thanks
@Noil,
Yes, you can run it in GUI mode, just install GUI packages as suggested in this following article.
https://www.tecmint.com/install-gui-in-rhel-centos-7/
Yes, you can run GUI on the server but only if there’s a reason to do so. Actually the CLI provides more flexibility than the GUI. If you still want to use a GUI, install Gnome or even a lightware graphical Desktop Environment such as LXDE or XFCE and run a VNC server on the machine in order to connect from a remote VNC client.
I’m guessing that your IBM powered RHEL server it’s a headless machine!
Thx mate for this info. plz share step by step all lessons of RHEL7. thx :)
dear after the complete installation rhel 7.0 when reboot system not login to your new minimal Red Hat Linux 7.0 environment plz help
This is very helpful for installation RHEL 7 for fresher.
very nice
thank you
narayan baghel
Hello Matei,
This is very nice tutorial for RHEL7 installation ,
Can i get some more tutorial for RHEL7 specially for beginners ?
Many Thanks
-Jonus Joseph
@Gopal Raha: No …it’s not RHEL Beta as you think…the article discus RHEL 7.0 Last stable version :
Red Hat Enterprise Linux Server (v. 7.0 x86_64)
Last Modified:
2014-07-02 19:57:57 +0530
You are Discussed about RHEL 7 Beta installation not RHEL 7 Stable versions Please Mention this to this at the Title of this article. Hope you clearly understand this sentence.
it would be so nice, if u make a article about RHEL 7 local / http repository creation