As a system administrator, there are occasions when we need to send emails to users or others directly from the server. Traditionally, we’ve relied on web-based interfaces for this task. But is it really the most convenient option? Absolutely not.
Here in this tutorial, we’ll be using the mutt (a terminal email client) command to send email from the command line interlace.
What is Mutt?
Mutt is a command-line-based email client, which is a highly useful and powerful tool for sending and reading emails from the command line in Unix-based systems.
Mutt also supports POP and IMAP protocols for receiving emails. It opens with a colored interface, making it user-friendly for sending emails from the command line.
Mutt Features
Some other important features of Mutt are as follows:
- It’s very easy to install and configure.
- Allows us to send emails with attachments from the command line.
- It also has the features to add BCC (Blind Carbon Copy) and CC (Carbon Copy) while sending emails.
- It allows message threading.
- It provides us with the facility of mailing lists.
- It also supports many mailbox formats like Maildir, mbox, MH, and MMDF.
- Supports at least 20 languages.
- It also supports DSN (Delivery Status Notification).
How to Install Mutt in Linux
Mutt is often available in the package repositories of most Linux distributions and you can install it using your distribution’s package manager.
sudo apt install mutt         [On Debian, Ubuntu and Mint]
sudo yum install mutt         [On RHEL/CentOS/Fedora and Rocky/AlmaLinux]
sudo emerge -a sys-apps/mutt  [On Gentoo Linux]
sudo apk add mutt             [On Alpine Linux]
sudo pacman -S mutt           [On Arch Linux]
sudo zypper install mutt      [On OpenSUSE]
sudo pkg install mutt         [On FreeBSD]
Mutt Configuration Files
Configuration files of Mutt Email client.
- Main Configuration File – To make changes globally for all users for mutt, you can make changes in its main configuration file ‘/etc/Muttrc‘.
- User Configuration File of Mutt – If you want to set some specific configuration for a particular user for mutt, you can configure those settings in ~/.muttrc or ~/.mutt/muttrc files.
You can customize settings such as your email account credentials, display preferences, and keybindings in this file.
Reading Emails with Mutt
To read emails of the user with whom you are currently logged in, you just need to run “mutt” on the terminal, it will load the current user’s mailbox.
mutt
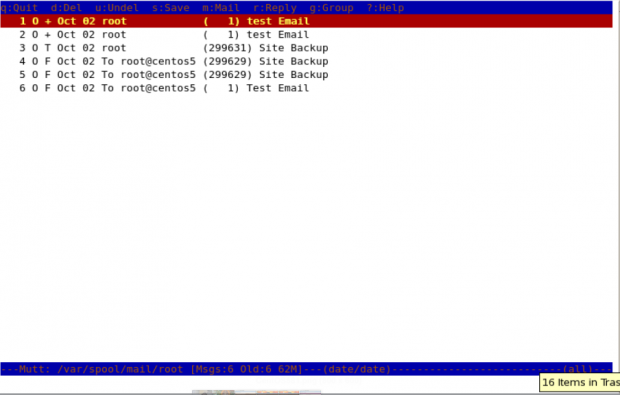
To read the emails of a specific user, you need to specify which mail file to read. For example, if you (as root) want to read the mails of user “John“, you need to specify his mail file with “-f" option with mutt command.
mutt -f /var/spool/mail/john
You may also use “-R” option to open a mailbox in read-only mode.
Sending Emails with mutt Command
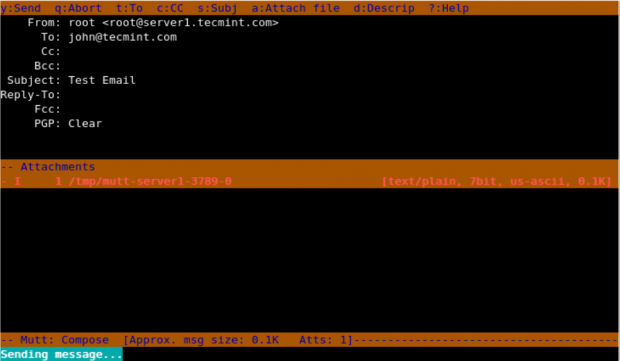
In this example, the following command will send a test email to [email protected]. The “-s” option is used to specify the Subject of the mail.
mutt -s "Test Email" [email protected]
When you enter the above command in the terminal, it opens up an interface and confirms the recipient address and subject of the mail and opens up the interface, here you can make changes to the recipient’s mail address.
- Change the recipient’s email address by pressing t.
- Change Cc address with c.
- Attach files as attachments with a.
- Quit from the interface with q.
- Send that email by pressing y.
Note: When you press “y” it shows the status below that mutt is sending mail.
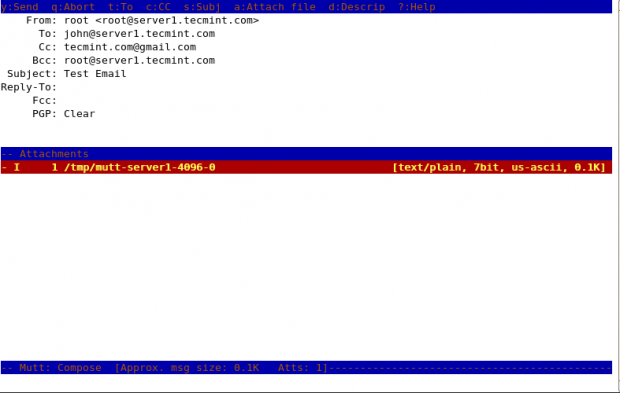
Adding Carbon Copy(Cc) and Blind Carbon copy(Bcc) with Mutt
We can add Cc and Bcc with mutt command to our email with “-c” and “-b” option.
mutt -s "Subject" -c "[email protected]" -b "[email protected]" [email protected] < message.txt
mutt -s “Test Email” -c [email protected]  -b [email protected] [email protected] > message.txt
Here in this example, root is sending an email to [email protected] and putting [email protected] as the Cc address and [email protected] as Bcc.
Sending Emails with Attachments Using Mutt
We can send emails from the command line with attachments by using “-a” option with mutt command.
mutt -s "Site Backup" -a /backups/backup.tar -c [email protected] [email protected]
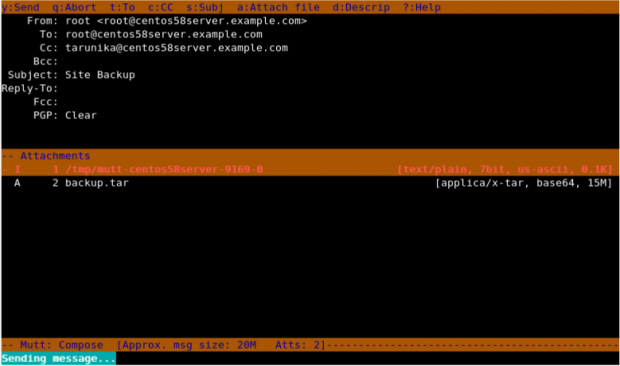
Here in the above snapshot, you can see that it shows an attachment attached with the mail.
Usage of muttrc File
If we want to change the sender’s name and email, then we need to create a file in that particular user’s home directory.
cat .muttrc
Add the following lines to it. Save and close it.
set from = "[email protected]"
set realname = "Realname of the user"
To print the help menu of “mutt”, we need to specify “-h” option with it.
mutt -h
Conclusion
Mutt offers a lightweight and efficient way to send and manage emails directly from the terminal. Its text-based interface, customizable configuration, and support for multiple protocols make it a valuable tool for users who prefer working in a command-line environment.

Please help me with the attachment type supported in the mutt package.
viz. binary files, printable ASCII characters, or both. I am facing an issue with Base64, however with uuencode not facing any difficulty.
I have a constraint for not applying the BASE 64 package in my AIX machine.
@Anoop,
Mutt supports various attachment types, including binary files and printable ASCII characters. However, the encoding method you choose can impact compatibility and ease of use.
Here are a couple of suggestions:
1. The
-aflat is used to attach files to an email, but if you are facing issues with Base64, you might consider explicitly specifying the encoding using the-eflag.2. Since you mentioned that uuencode is working without difficulty, you can consider using it as an alternative encoding method for your attachments. Adjust your Mutt command accordingly:
Can this work with two factor authentication enabled in google mail?
No, the mutt email client will not work with two-factor authentication.
Can we use this with Zimbra?
with gmail default settings under accounts (apps with account access/allow less secure apps – OFF), how can i send mail to gmail.
@Jai,
You don’t need to On/Off default settings of Gmail, just have correct DNS MX record in place for your domain to send mails out using mutt command.
1) Hi team i read in the notes above that in command line or code where i am calling mutt for sending mail, if i need to change my sender id i need to update the .muttrc file at ~/.muttrc, can you confirm if my understanding is correct and it is the only option available ? If that is the only option can you share the tag name which needs to be used to update the sender id.
2) Do we have any option which we can use to have a different replyto option ? i read option ‘
t‘ is available to change the recipient address, can you help to confirm on this.@Mikhil,
Yes ~/.muttrc only file, where you can specify user related configuration and about replyto option, I never used it, but you should give a try and see..
Hi,
I am new to Linux, trying to learn how to Linux command line. I just got to play with “mutt” mail utility but somehow when I wanted to delete an email (after “mutt” mail displayed a list of mails) I could not delete it (Google says: “tag” before removing) I can not “tag” the one that I wanted to remove. Can anyone help ?
Thank you very much
Hi,
When you enter the above command in the terminal, it opens up with an interface and confirms the recipient address and subject of the mail and opens up the interface, here you can make changes to recipient mail address.
But i don’t want this interface to come up. Actually i am try to write a script to send email for every 2 hours automatically but mutt is not usable for my requirement as manual inputs are required for each time.
Please help to share the option .
Thanks,
Venu.M
First of all, this site has been very helpful to me. Thank you.
Issue:
I have a script file that reads:
At the receiving end, the email address ([email protected]) works great whether you click on it in the header or if you use REPLY.
Where it fails is if you send it to an invalid address. It does not let you know it failed.
Is there another something I should set? A SENDER setting?
If I send it to [email protected] I get no notification that the email could not be delivered. I do if I send it from my personal address, so I know that there isn’t really a [email protected].
My client needs to know if their invoices and statements are not being received.
Any help would be greatly appreciated.
I should probably mention that [email protected] is an alias that sends an email to two different employees. It seems to work fine if you send it from a single name. Is an alias email just not going too work?
Is it possible to send mail with attachment in command line?
Now when I, for example, put in “mutt -s “Test Email” [email protected]“ after that see mutt interface where I have to confirm many things. I don’t want it.
I need an application which send me an email with an attachment from a command line without any confirmation. Only one command, enter and nothing more
@Marcin,
Here are few ways to send email attachment from Linux commandline as explained here: 4 Ways to Send Email Attachment from Linux CLI
mutt [email protected] -s “Email with attachment” -a attachment_file_name < /dev/null
This will send the email and return to the command line. No questions asked.
how can i unable mutt in my unix
Hi ,
What is PGP:clear ?,it is showing none to me.
I want to send the report of more than 400k records in CSV as an attachment but ‘mutt’ is not working, could you please help me in this.
@Prince,
May I know what error you getting while sending attachment through mutt? try this command:
hi admin i have an issue, the cat .mttrc not works
it is
.muttrcdear…Hi Linux Guru
How do you add exchange with MUTT/ALPINE, that will be nice
@Tsepo,
Never tried Alpine yet, but seems I must give a try and write a detailed article alpine tool..
How do I send a text message where mutt does not add any additional information ? I can use SMS gateways just fine, the problem is that when I use a Linux command of the form: echo “text” | mutt [email protected], the text that comes through is of the form, text. I need it to only be “text”.
how to add more than one recipients in cc?
On the mutt terminal press ‘c’ key to add CC recipient..
hI,
When I sent a mail from my Linux box, with
mutt \
-e ‘my_hdr Content-Type: text/html’ \
-s “${NOW} Controle File-Set SnapShots and Replications (${SUBJ})” \
-a “/rbm/scr/rbm_check_snap_repl_legenda.html” ${TO_ADDR}
I get the attachment as inline in my outlook 365 mail. The legenda file I mean.
–liOOAslEiF7prFVr Content-Type: text/plain; charset=us-ascii Content-Disposition: inline
V7000 File-System
rbndtcv7k lnx_nfs_appldev_002 512G 15G 3% 498G
–liOOAslEiF7prFVr Content-Type: text/html; charset=us-ascii Content-Disposition: attachment; filename=”rbm_check_snap_repl_legenda.html”
Legenda: icTwa
ect
–liOOAslEiF7prFVr–
What do I have to do, to get an real attachment in outlook 365
Gr,Tom
how to send mail mutt to gmail i did not getting any errors and any mail ,how to reslove the this issue
Have you checked in spam folder of gmail?
Hi Ravi
Why emails from mutt going in spam folder, How can stop this?
@Pradeep,
You need to set correct MX and SPF record for your domain to stop emails delivery into spam.
Thanks Ravi, Still I have doubts on this, I’m sending emails from local host using mutt, So any possible solution to get rid of spam folder mails.
@Pradeep,
The way to deliver mails straight into Inbox, by setting correct SPF, MX and DKIM records for domain..
Can mutt be used to send mail to more than one person in bcc and cc?
If yes , is the delimiter? It was not working for me.
i tested this on Ubuntu 12.04 LTS server. It works perfectly. Thanks a lot for the great article,keep it up!
Great ! i was thinking something like this to test my mail server… thanks
this all things are nice, thanks for all
i am new for centos 6.4,6.5 server but i allways follow your website for my work. thank you all of you.
Informative document