In this article, you will learn how to share a wired (Ethernet) internet connection via a wireless hotspot and also how to share a wireless internet connection via a wired connection on a Linux desktop.
This article requires you to have at least two computers: a Linux desktop/laptop with a wireless card and an Ethernet port, then another computer (which may not necessarily be running Linux) with either a wireless card and/or an Ethernet port.
Sharing Wired(Ethernet) Internet Connection Via Wi-Fi Hotspot
First, connect your computer to a source of internet using an Ethernet cable as shown in the following screenshot.
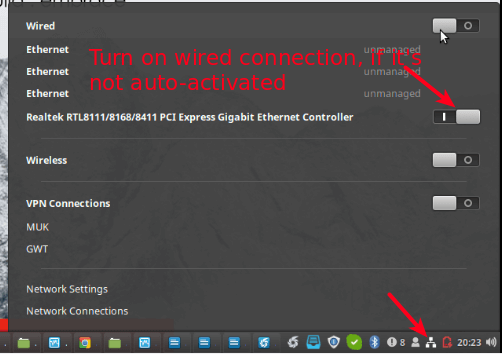
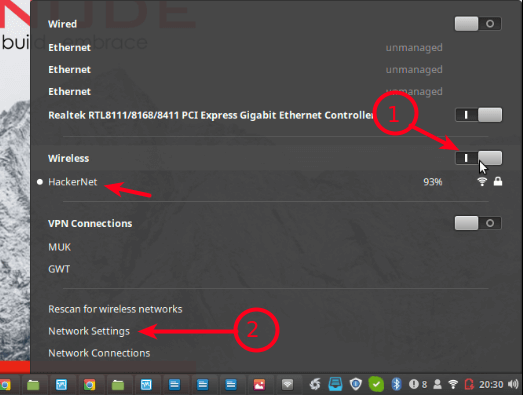
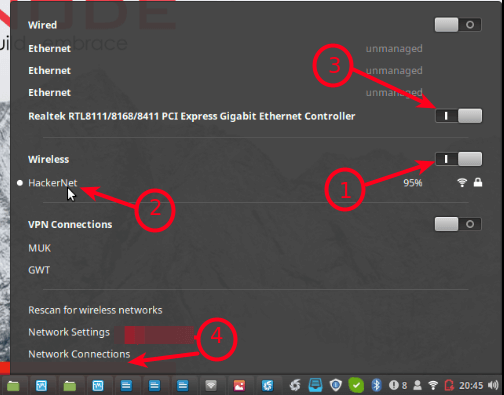
Next, enable Wireless connections, then go to Network Settings as highlighted in the following screenshot.
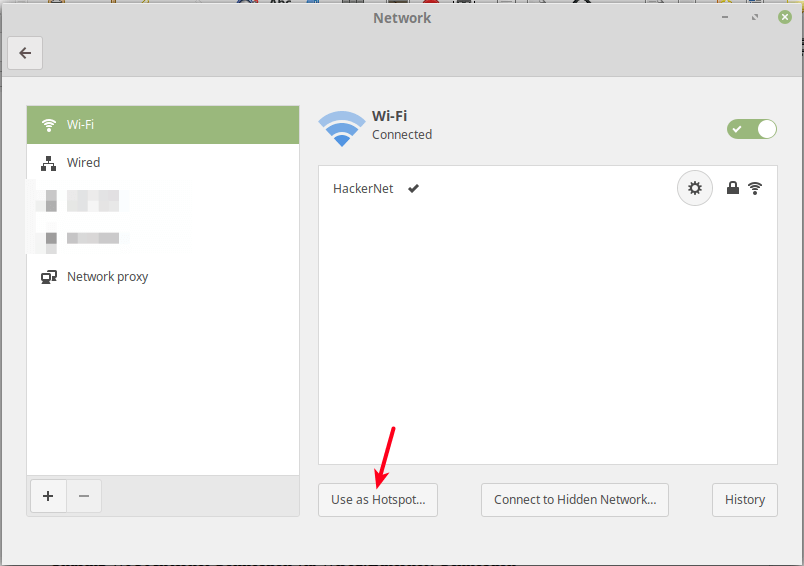
Then click Use as Hotspot as shown in the following screenshot.
Next, from the pop-up window, click Turn On to activate the wireless hotspot.
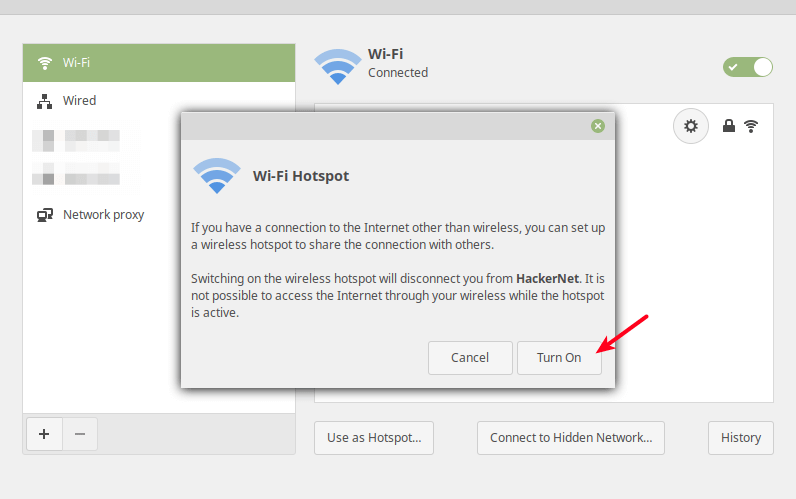
Now a wireless hotspot should be created with a name defaulting to the hostname e.g tecmint.
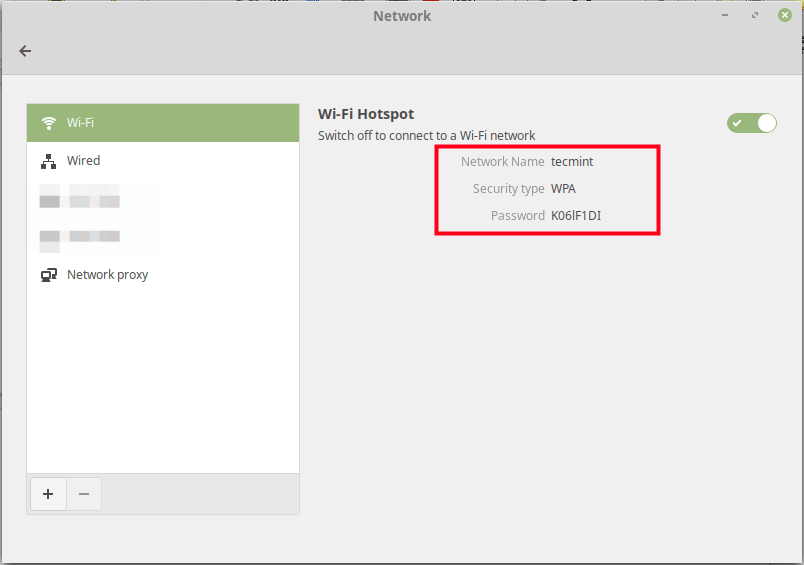
Now you can connect another computer or device via the hot-spot to the internet.
Sharing Wi-Fi Internet Connection via Wired(Ethernet) Connection
Start by connecting your computer to a wireless connection with access to the internet e.g HackerNet in the test environment. Then connect an Ethernet cable to it and go to Network Connections.
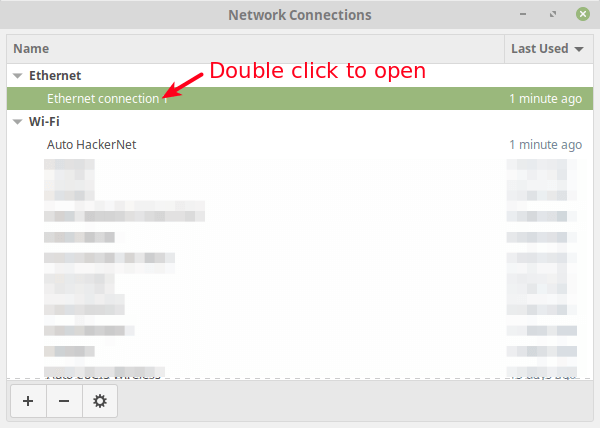
From the pop-up window, select the Wired/Ethernet connection, then go to its settings as described in the following screenshot.
Under the connection settings, go to IPv4 Settings.
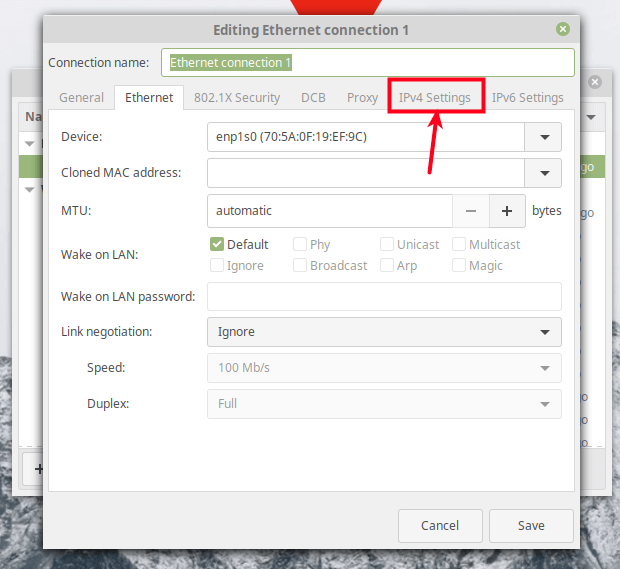
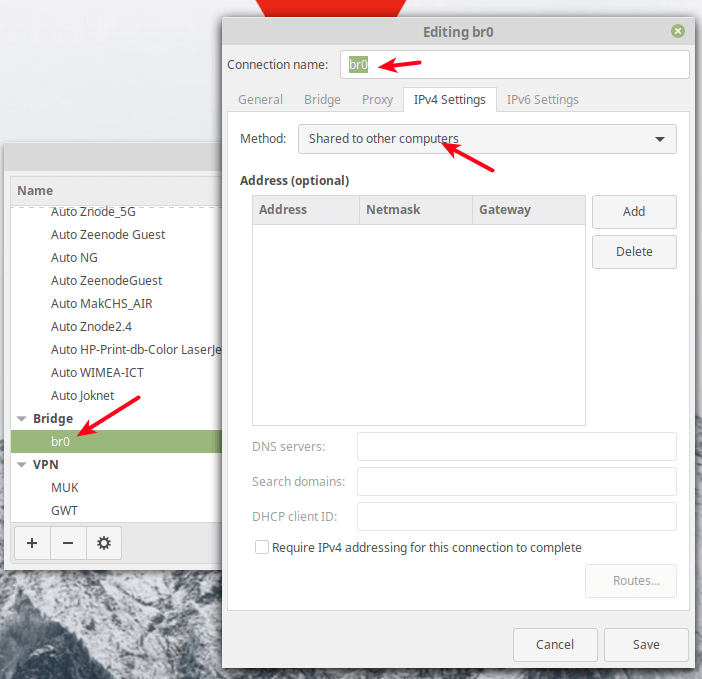
Under the IPv4 settings, set the Method to Shared to other computers as shown in the following screenshot. Optionally, you can add the IP address to define the network to use. Then click Save.

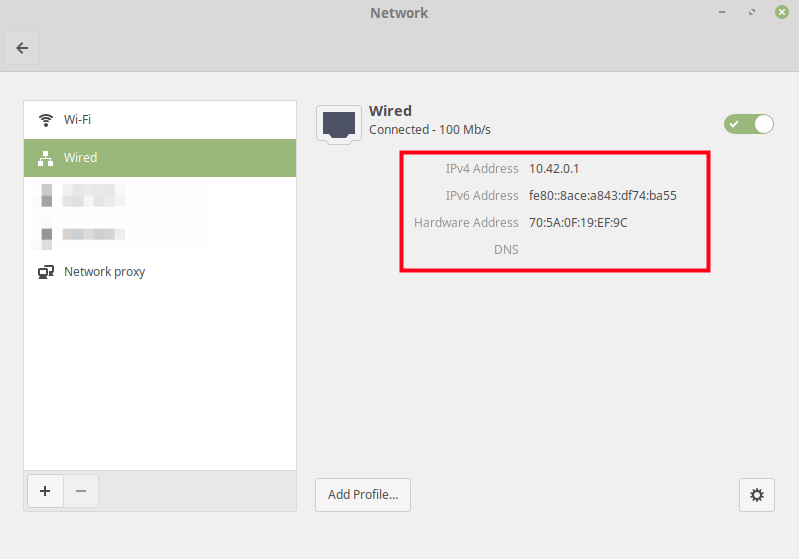
Next, turn the wired connection off then on, to activate it once more. Then open it under Network Connections, it should now be configured for sharing (by having a default IP address of 10.42.0.1) as shown in this screenshot.
Note: You can also share a bridged interface the same way as the wired interface as shown in the following screenshot.
Go ahead and connect another computer to the other end of the Ethernet cable or an access point to serve many computers/devices. For any inquiries, reach us via the feedback form below.


This creates a subnet at 10.42.0.1 and uses dhcp. I need to share without dhcp and use the same network as that connected to the internet, using the dhcp from the upstream router.
Any thoughts?
You’re going to want to set up a bridge. The process will be similar to this when using the GUI.
https://askubuntu.com/questions/359856/share-wireless-internet-connection-through-ethernet
@Shawn,
Thank you for the guidance! Setting up a bridge using the GUI sounds like a straightforward process, and your input is much appreciated
I always wondered what the Share with others computer option in Networks…
Thanks for sharing…
Doesn’t work in Fedora Linux.
@anony
Oh really, let’s check out why. Thanks for the useful feedback.
Worked for ubuntu 20.04 LTS. Many thanks!
Is it possible to create a local hosted network over wifi with Linux? I do not require internet. Want a mobile emby server.
If I want to use a custom DNS for the device that is receiving the shared network, what do i do?
@Alex,
Add the custom DNS to /etc/resolv.conf file..
I followed your instructions to the letter even though they were extremely dated and the screenshots bearded no resemblance to my mint. Predictably… Nothing worked at all. Do I need to configure my Router in any way? I knew your instructions would fail. I’ll further bet that you will ignore my post.
I reinstalled Xubuntu, and now it works in Peppermint and MX KDE also.
Thank you.
Exactly what I was looking for! Thanks, you made my day :)