Netplan is a utility for easily configuring networking on a Linux system, typically used in Ubuntu. It allows users to configure network interfaces through a simple YAML file.
One common use case is creating a network bridge, which is useful for connecting two or more network interfaces to share a network segment, which is particularly useful in virtualized environments.
In this article, we will discuss how to bridge two interfaces using Netplan, explaining both DHCP and static IP configurations.
Why Bridging Interfaces is Useful
Bridging network interfaces can be highly beneficial in various scenarios:
- When running virtual machines (VMs), you often need the VMs to communicate with the external network. A bridge allows VMs to appear as if they are physically connected to the same network as the host machine.
- It allows multiple network interfaces to share a single IP subnet, facilitating easier management and communication within the network.
- In complex network setups, bridges can simplify configurations and reduce the need for additional routing.
Prerequisites
- An Ubuntu system with Netplan installed (usually comes by default with newer Ubuntu versions).
- At least two network interfaces that you want to bridge.
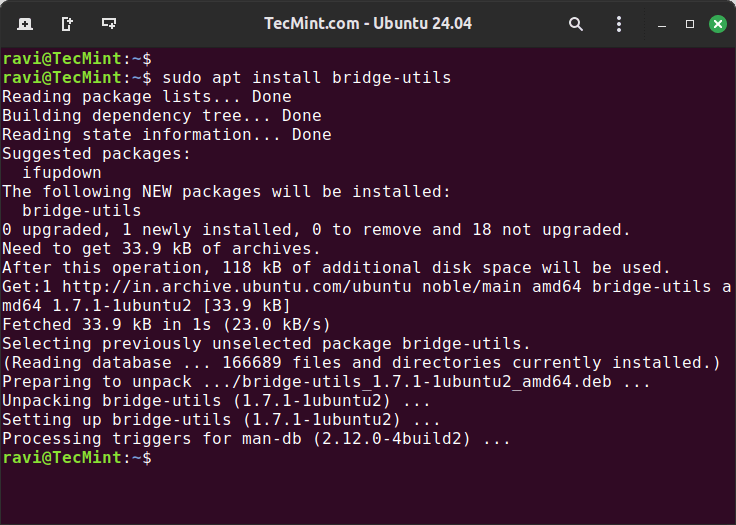
Installing bridge-utils in Ubuntu
To bridge network interfaces, you need to install a bridge-utils package which is used to configure and manage network bridges in Linux-based systems.
sudo apt install bridge-utils
Creating a Network Bridge Using DHCP
To configure a network bridge between two or more network interfaces, you need to list your network interface using the following ip command.
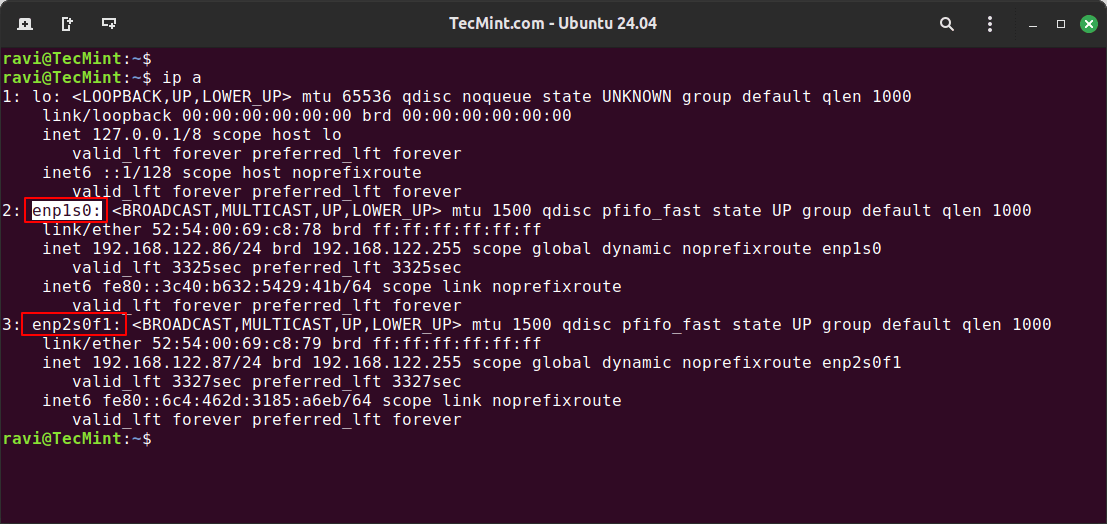
Once you know the name of your network interfaces, open the Netplan configuration file called ‘01-netcfg.yaml‘ or similar which is typically located in ‘/etc/netplan‘ directory.
sudo nano /etc/netplan/01-netcfg.yaml
Add the following configuration to create a bridge named br0 that bridges two interfaces (enp3s0 and enp4s0) using DHCP.
network:
  version: 2
  renderer: networkd
  ethernets:
    enp3s0:
      dhcp4: no
    enp4s0:
      dhcp4: no
    enp2s0f1:  # Define the interface 'enp2s0f1'
      dhcp4: no
  bridges:
    br0:
      interfaces: [enp3s0, enp2s0f1]  # Correct the interface name
      dhcp4: yes
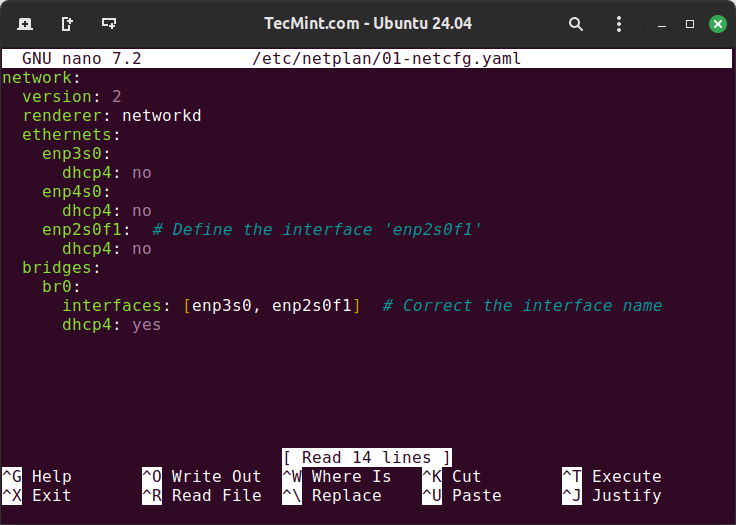
Save the file and apply the Netplan configuration.
sudo netplan apply
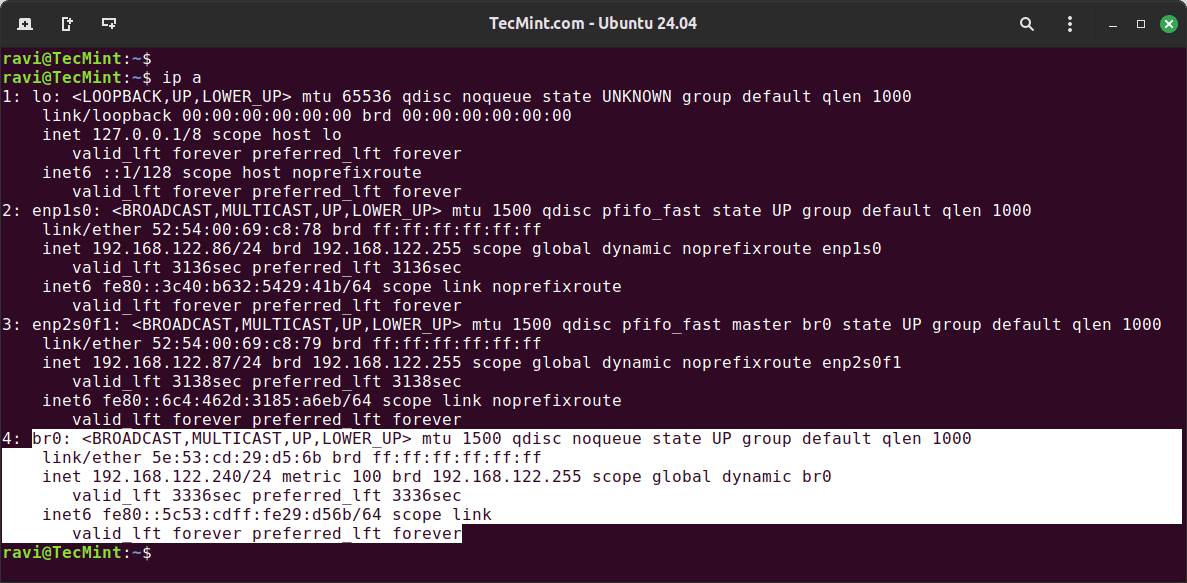
This command will apply the new network configuration and bring up the bridge interface br0 with DHCP.
Let’s confirm that our configurations have been updated successfully.
ip a
Creating a Network Bridge Using Static IP
Similar to the DHCP configuration, you can also configure static IP addresses on the bridge in the same configuration file.
sudo nano /etc/netplan/01-netcfg.yaml
Modify the configuration to assign a static IP to the bridge ‘br0‘.
network:
  version: 2
  renderer: networkd
  ethernets:
    enp1s0:
      dhcp4: no
    enp2s0f1:
      dhcp4: no
  bridges:
    br0:
      dhcp4: no
      addresses: [192.168.122.100/24]
      routes:
        - to: 0.0.0.0/0
          via: 192.168.122.1  # Adjust according to your network configuration
      nameservers:
        addresses: [8.8.8.8, 8.8.4.4]  # DNS servers
      interfaces: [enp1s0, enp2s0f1]
Save the file and apply the Netplan configuration:
sudo netplan apply
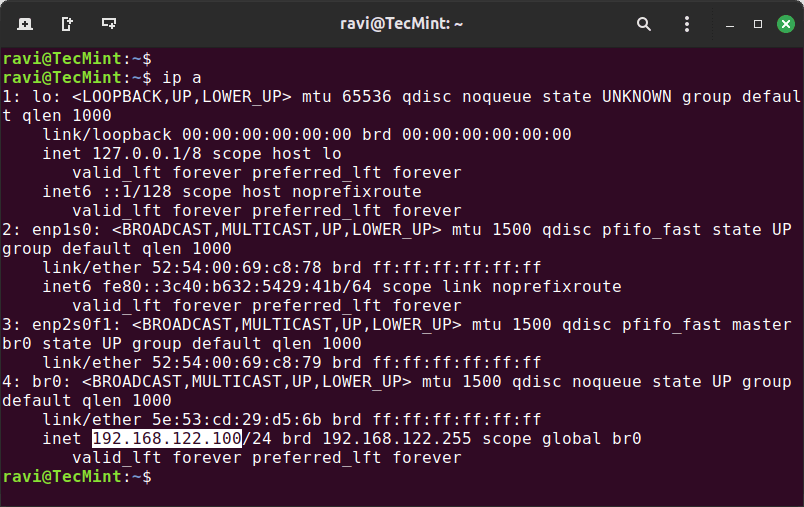
This will bring up the bridge interface ‘br0‘ with the specified static IP configuration.
ip a
Conclusion
Using Netplan to bridge two network interfaces is a straightforward process that significantly simplifies network management in various scenarios, such as virtualization and complex network setups.
By following the steps outlined above, you can configure a bridge using either DHCP or static IP addresses, depending on your network requirements. Netplan’s simple YAML configuration files make it easy to manage and apply these settings, ensuring that your network setup is both flexible and reliable.